Last Updated: December 15 2025
Overview
If you use certain reports regularly, use scheduled reports to automatically receive emailed reports at specified intervals.
Reports are emailed in PDF format.
Not all reports in Simpro Premium are available for scheduling.
 Required setup
In order to view content or perform actions referred to in this article you need to have the appropriate permissions enabled in your security group. Go to System![]() > Setup > Security Groups and access your security group to update your permissions. The relevant security group tab and specific permissions for this article can be found here:
> Setup > Security Groups and access your security group to update your permissions. The relevant security group tab and specific permissions for this article can be found here:
 Schedule a report
To create a new report schedule:
- Go to Reports
 > Schedule Reports.
 - Find the report you wish to create a schedule for by hovering over the report groups on the left. Click the report.
- The status column displays if the report is active, or if there was an error sending the report. If there was an error sending the report, click the refresh icon to run the report overnight.
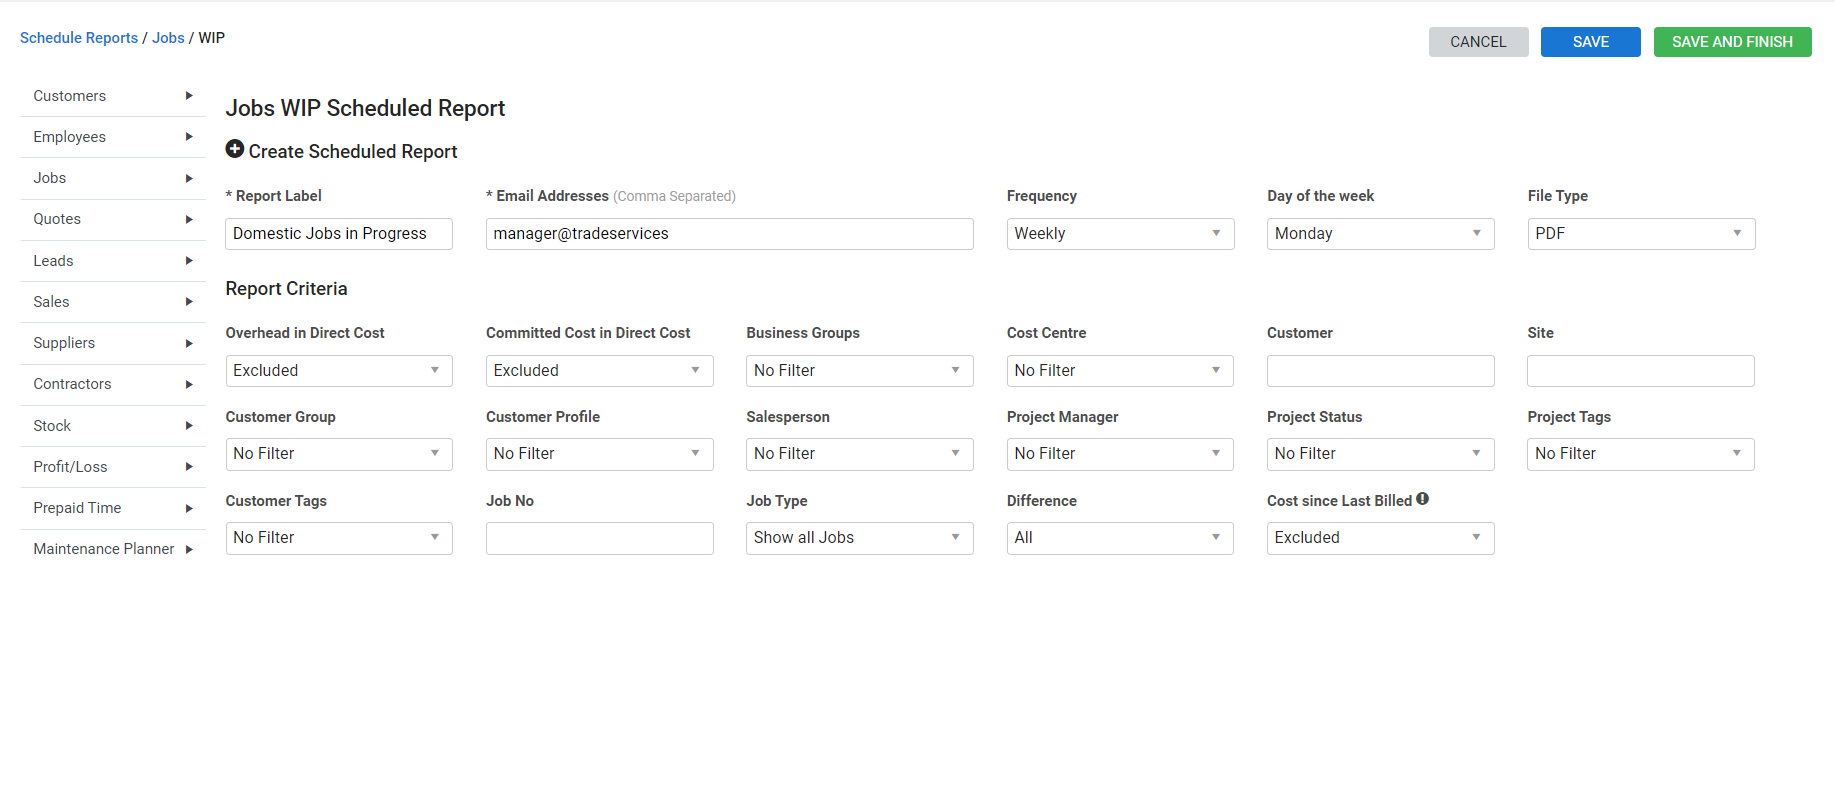
- Enter a Report Label.
- Enter the Email Addresses for the recipients of the report. Use commas to separate multiple email addresses.
- Select the Frequency.
- If Weekly or Fortnightly is selected, select the Day of the Week.
- If Monthly is selected, select the Day of the Month.
- Select the File Type.
- Filter the report by selecting from the drop-downs under Report Criteria. The options available are different for each report.
- Click Save and Finish.
The report is sent to all recipients at the specified intervals, filtered according to the report criteria.
If you use an on-site server, scheduled reports are not available.
 Edit a scheduled report
After a report is scheduled, you can change the report label, email recipients and report criteria. If you want to receive the report at a different frequency, create a new scheduled report and delete the old one.
To edit a scheduled report:
- Go to Reports
 > Schedule Reports.
 - Under Scheduled Reports, click the report.
- Make changes as required.
- Click Save and Finish.
