Last Updated: December 12 2025
Why use the customer portal?
Our customer portal is run through our job management software Simpro Premium. It lets you easily and securely view your quotes, jobs, invoices and account statement; view and edit your details; and view and edit your site and contact details.
If you are unable to find any of the pages mentioned below, this means that you have not been enabled to view them.
 Set up username and password
You will receive an email from Simpro Premium with instructions to set up your login details for the Customer Portal.
- Access the Login Details email.
- Click the link included in the body of the email.
- Confirm or enter a Username. By default the username is set to your email address.
- Enter a Password.
- The password must contain at least one number, one uppercase letter, one special character and one lowercase letter.
- Confirm your Password.
Once you have set up your account, you can log in to the online customer portal and view your invoices, statements and quotes.
 Log in to the portal
To log in, you need your login details, including a URL, username and password. If you did not receive an email to set up your login details, contact your Simpro Premium administrator.
To log into the customer portal:
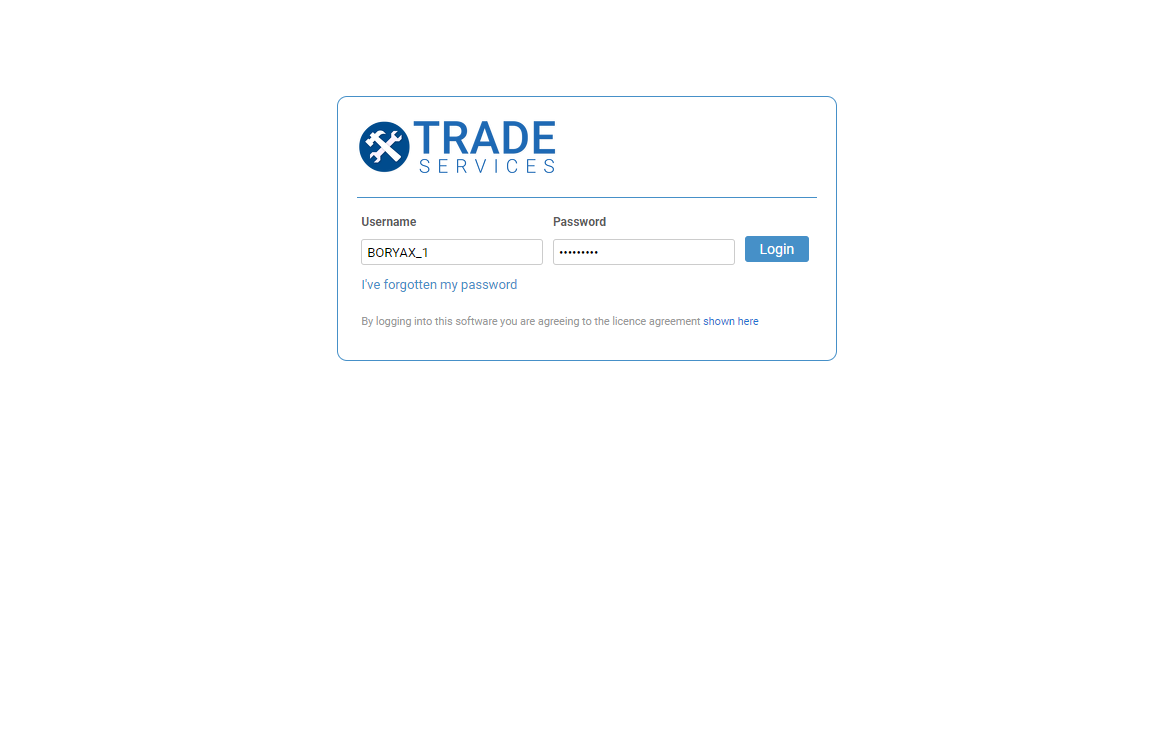
- Click the customer portal URL from the email. A page similar to the screenshot above loads.
- Enter your login details.
- If you did not receive an email to set up your login details, contact your Simpro Premium administrator.
- Click I've forgotten my password to reset your password.
- Click Login.
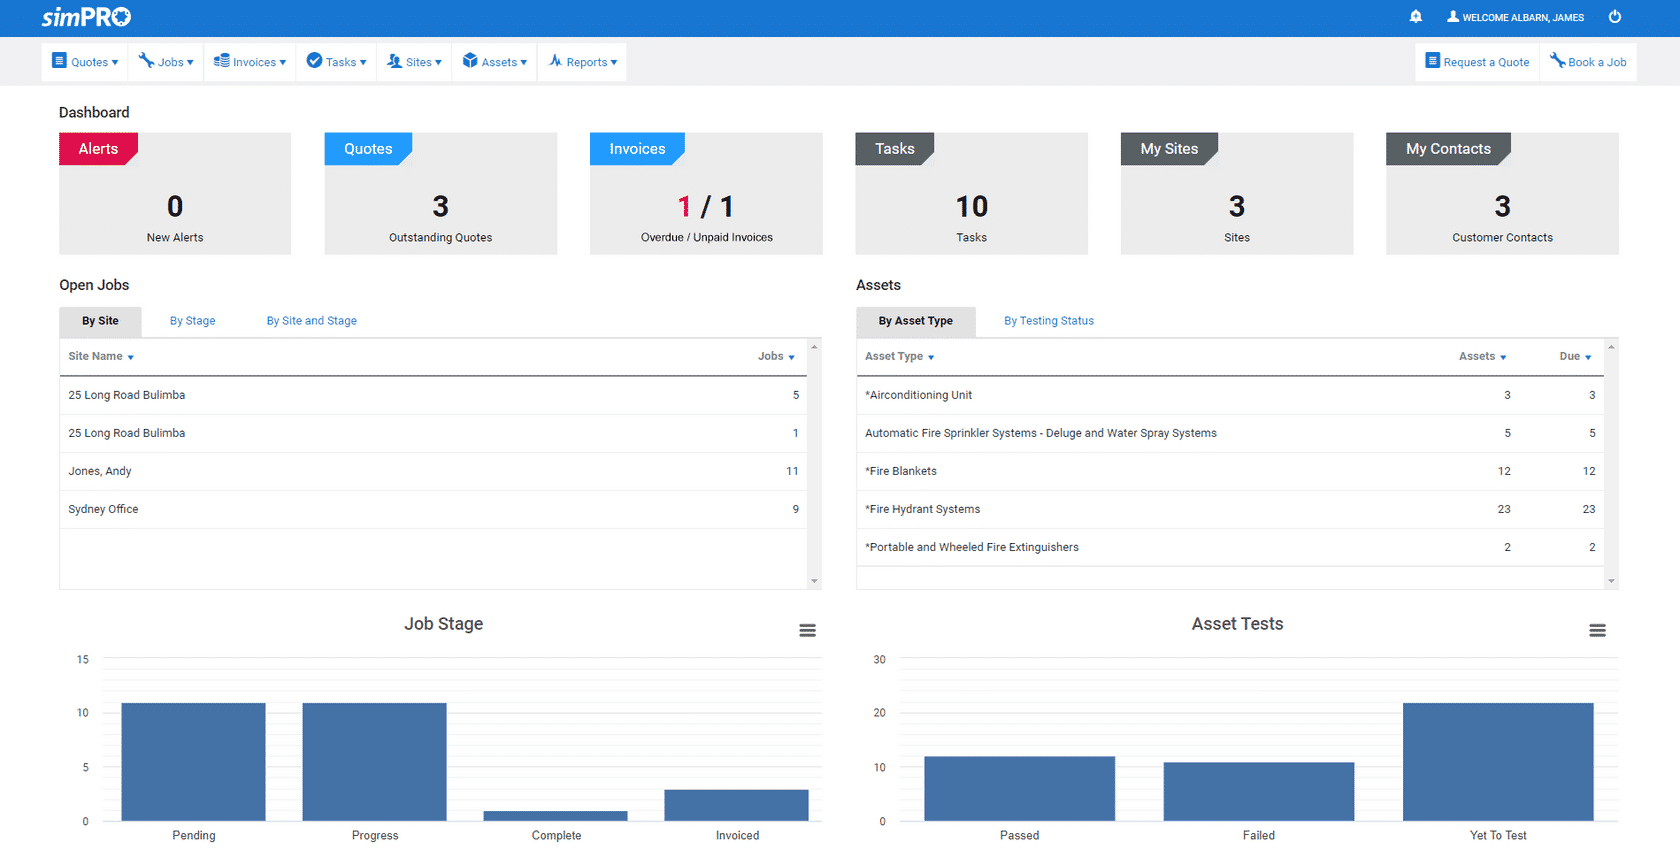
After you have logged in, you are taken to the main screen of the portal, the dashboard. Your name appears in the top right corner, next to the logout icon. The main menu options display across the top of the screen.
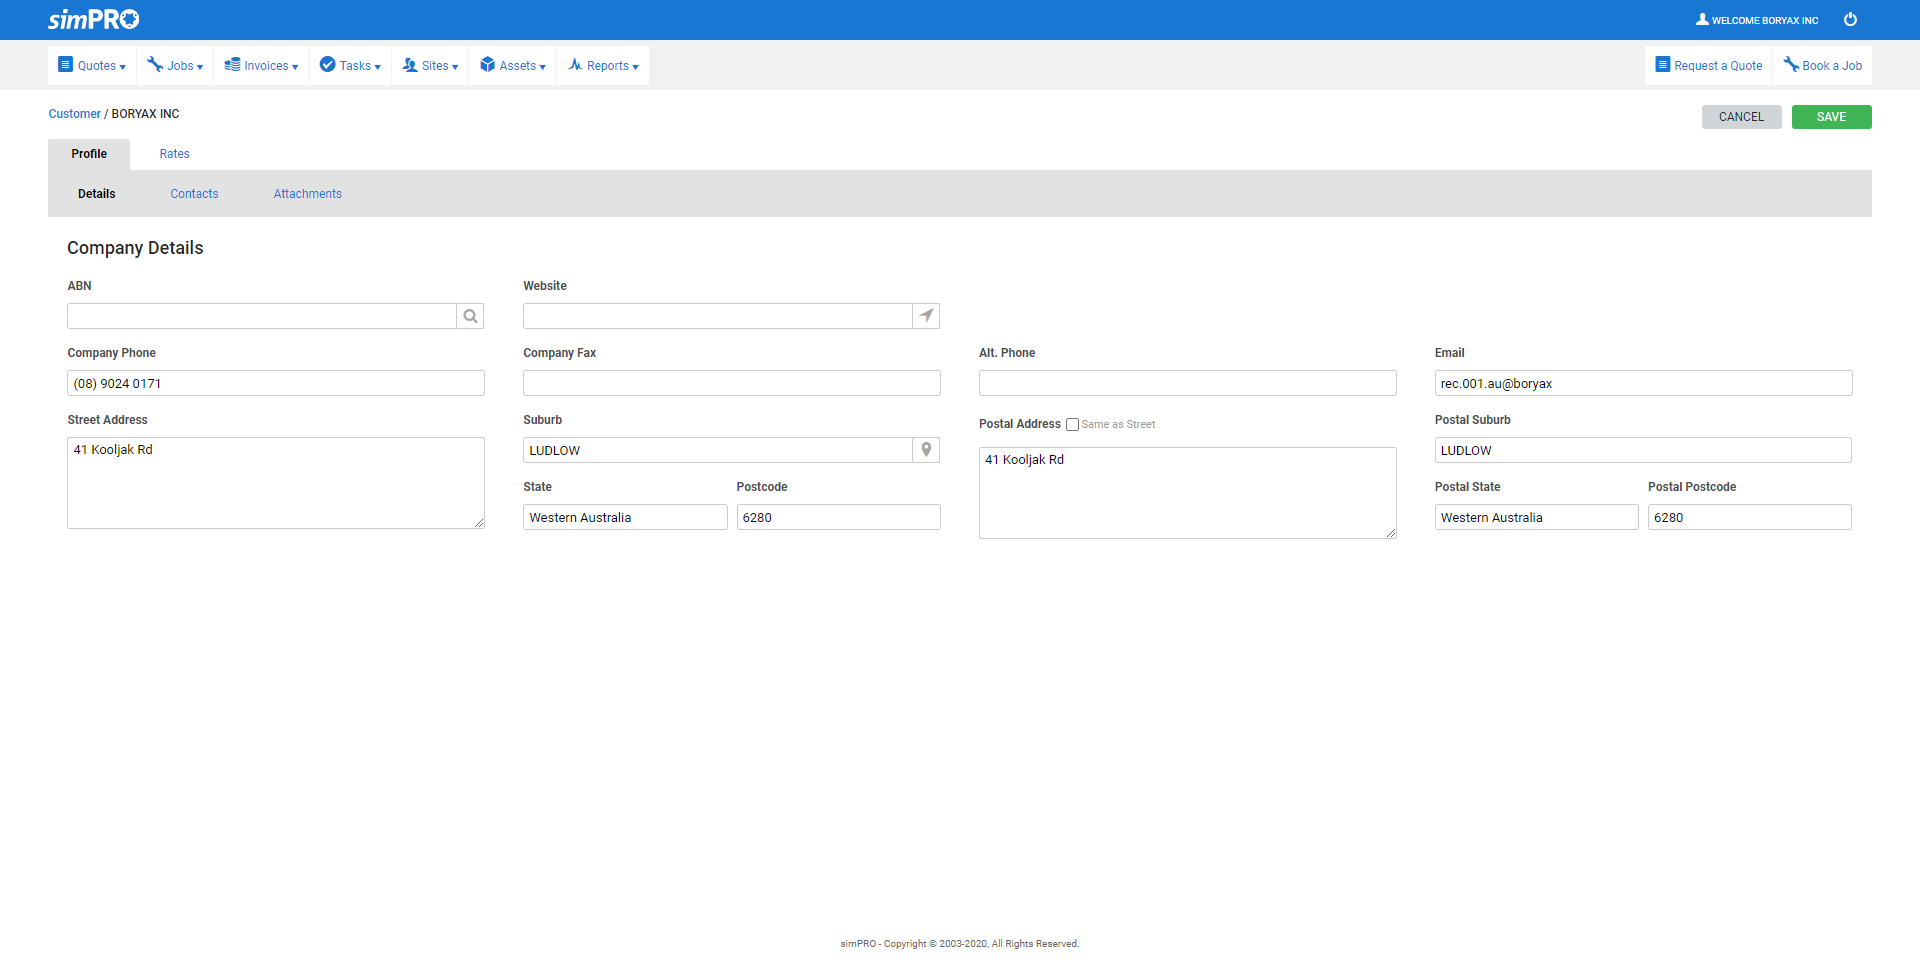
You can view and edit your preferences, including your details, contacts, and any relevant attachments.
 Manage preferences
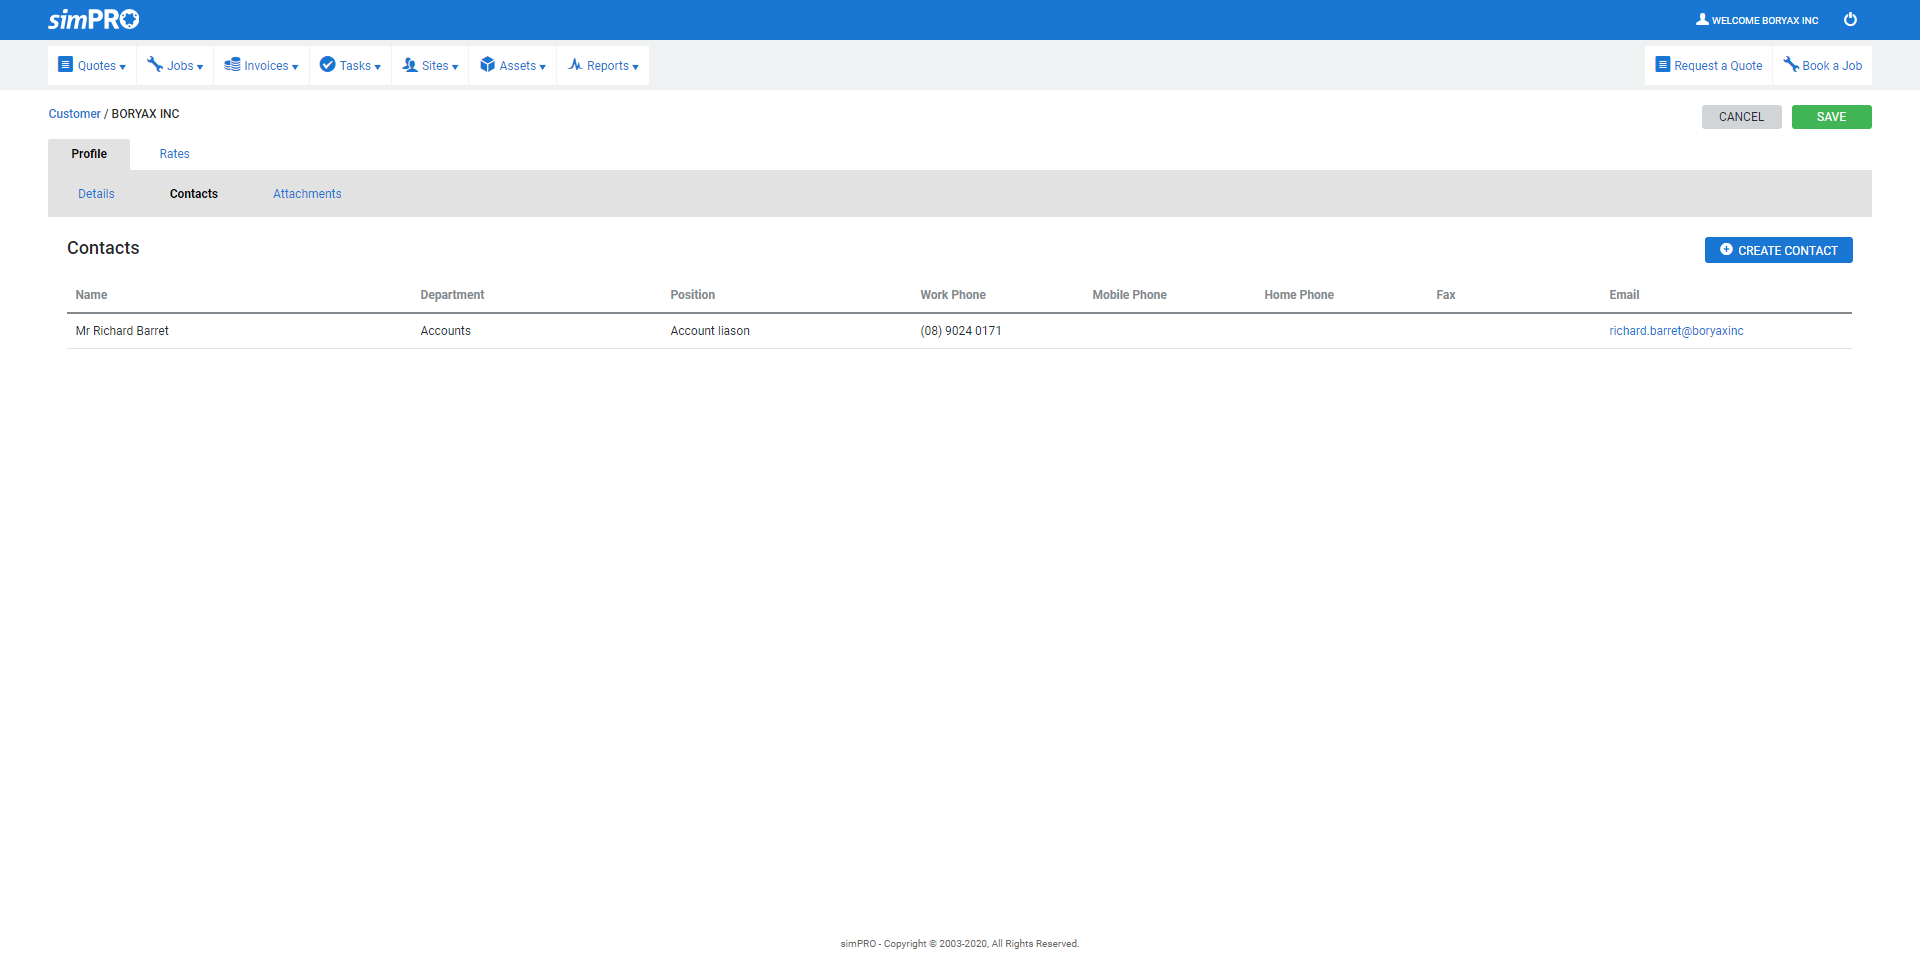
 View and edit contacts
Note that you can only access Profile if you are the primary user that has been provided access to the Customer Portal.
To view and edit your existing contacts:
- Hover over your name in the top right corner.
- Click Preferences.
- Under Profile, click the Contacts sub-tab.
- Click the name of the contact.
- Make changes as required.
- To send a password reset email to a contact with login access, click Options next to the username and click Reset Password.
- Click Update.
- Click Save.
To create a new contact:
- Hover over your name in the top right corner.
- Click Preferences.
- Under Profile, click the Contacts sub-tab.
- Click Create Contact.
- Enter a First Name and other required details.
- Select whether you want this person to be the contact for a Quote, Job, Invoice or Statement & Overdue Letter, and whether they are the Primary Contact.
- Under Login Active, select Yes to give this contact their own customer portal login details.
- To provide login privileges to any contact, the email address is mandatory.
- Under Site Access, to manually assign sites, select Select Assigned Sites.
- To assign all sites to this contact, including any sites created in the future, select Assign All.
- Click Save.
- This sends a setup email automatically to the contact's email address allowing them to create their username and password.
Contacts created in the portal are sent through to Simpro Premium.
Managing contact's password from the customer portal
- Hover over the customer's name in the top right corner and click Preferences.
- Click Contacts and click the required existing contact.
- Under Credentials, click Options > Reset Password. The customer contact is then sent instructions for resetting their password.
Note that customers can view their contacts' usernames but cannot edit them.
 Create login details for another employee
Note that you can only access Profile if you are the primary user that has been provided access to the Customer Portal.
You can create additional login details for your customer portal when editing or creating a contact.
To create login details for another employee:
- Hover over your name in the top right corner and click Preferences.
- Under Profile, click the Contacts sub-tab.
- Open the contact you wish to create login details for, or create a new contact.
- Under Login Active, select Yes.
- If you are providing a login, the email address is mandatory.
- Click Send Setup Email.
- Under Page Access, select the pages you wish the employee to have access to through the portal.
- Under Site Access, click an available site to move it to the Assigned Sites field.
- The employee is able to access quotes, jobs, invoices and assets for Assigned Sites only.
- Click Create or Update below the contact.
- Click Save.
- Click Save and Finish.
The employee can then log in to the customer portal, using the original URL you received along with their login details. You can repeat this process for as many employees as necessary.
 View attachments
Note that you can only access Profile if you are the primary user that has been provided access to the Customer Portal.
You can view any relevant attachments, such as contracts.
To view attachments:
- Hover over your name in the top right corner.
- Click Preferences.
- Under Profile, click the Attachments sub-tab.
- Click an attachment to open it. To find a specific attachment, enter the attachment name in the search bar and click Search.
 View quotes
View the status and details of your quotes through the portal.
To view quotes:
- Hover over Quotes at the top of the page.
- Click Outstanding or Actioned, depending on the quotes you wish to view.
- View quote details as required. To find a specific quote, enter a quote number in the search bar and click Search.
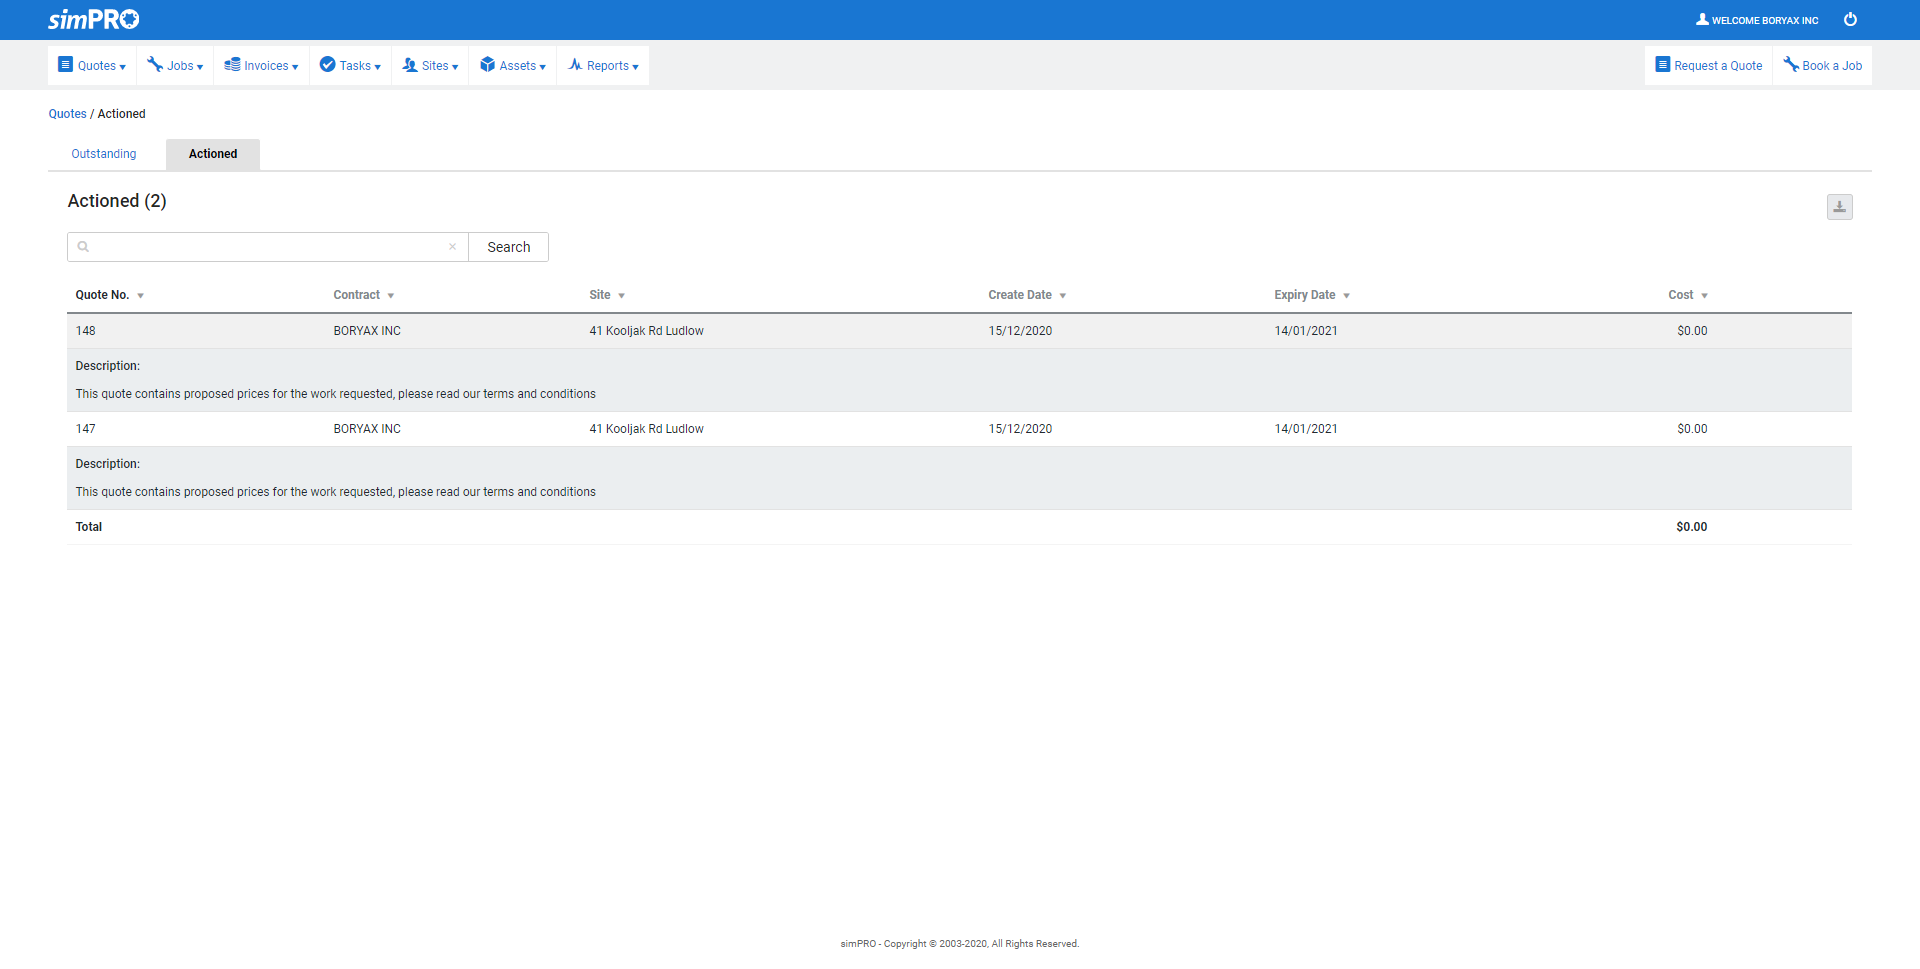
To switch between Outstanding and Actioned quotes, click the appropriate sub-tab. Quotes that have been set to the Approved Stage in Simpro Premium display in the Outstanding page in the Customer Portal. Once a job has been converted to a job, the quote moves to the Actioned page in the Customer Portal.
To print a quote, click Options > Print Quote.
To view or upload attachments, click Options > Attachments.
To download a spreadsheet of quote details, click the ![]() icon in the top right corner, then click CSV.
icon in the top right corner, then click CSV.
In Simpro Premium, under System ![]() > Setup > System Setup > Defaults > Customer Portal > Enabled Pages the Modify Table View option for Jobs / Quotes determines the information displayed in quotes / jobs tables in the Customer Portal.
> Setup > System Setup > Defaults > Customer Portal > Enabled Pages the Modify Table View option for Jobs / Quotes determines the information displayed in quotes / jobs tables in the Customer Portal.
Click on a quote to view the Job Details including Site Visits.
Click Attachments to view and upload Public attachments that are visible to the employees working on the quote in Simpro Premium and contacts accessing the quote in the customer portal.
Click Notes to view and add notes that are visible to the employees working on the quote in Simpro Premium and contacts accessing the quote in the customer portal.
 View jobs
View the status and details of your jobs through the portal.
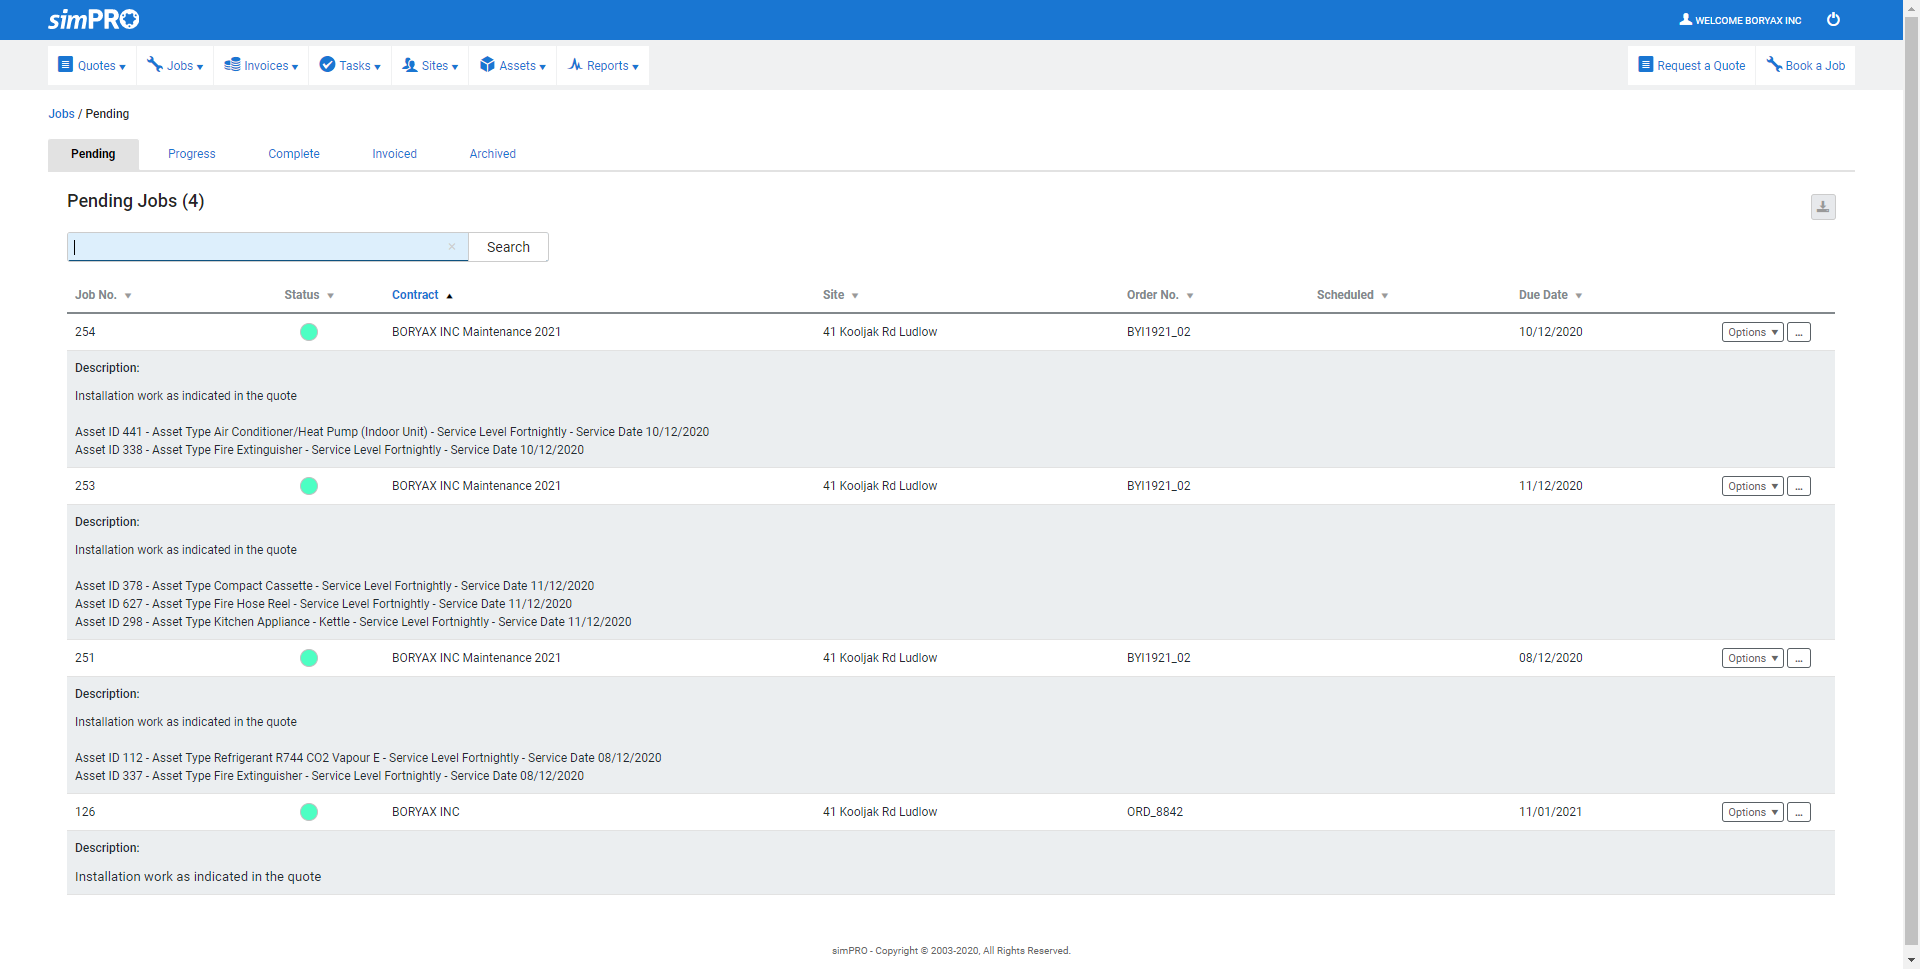
To view jobs:
- Hover over Jobs at the top of the page.
- Click the stage you need to view, such as Pending or Complete.
- Click on the job to view job details as required. To find a specific job, enter a job number in the search bar and click Search.
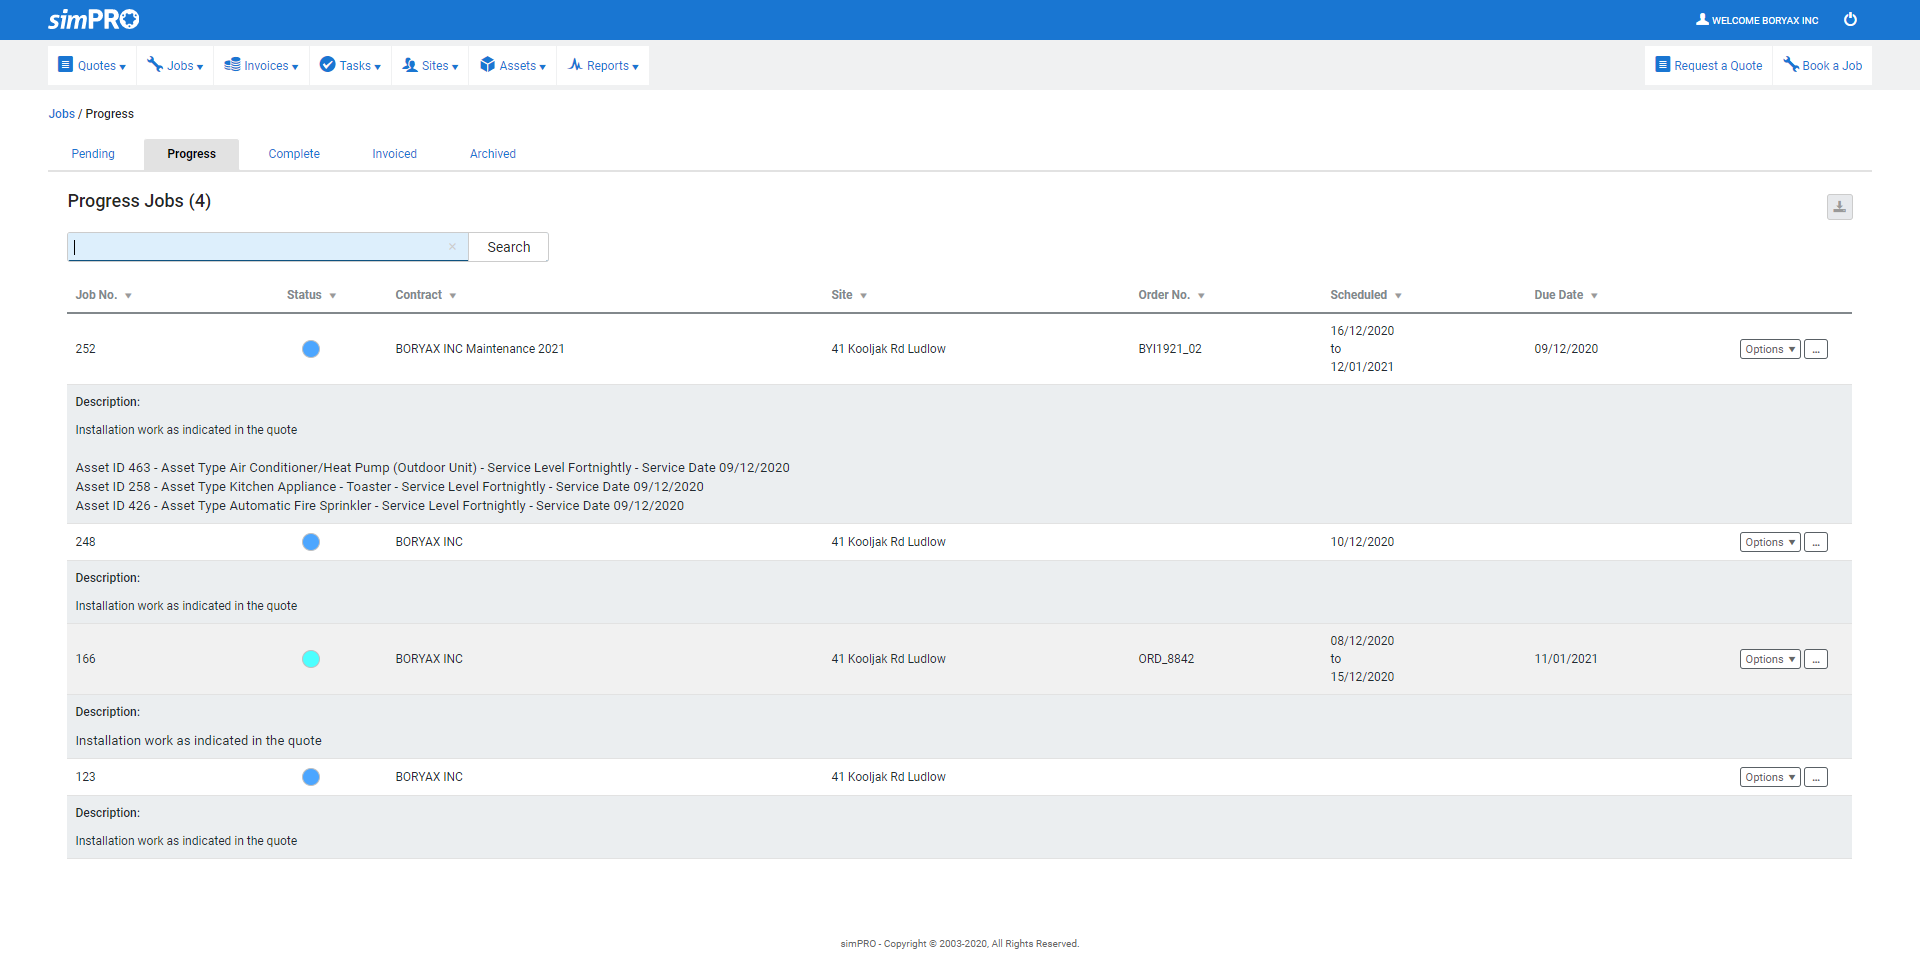
To switch between Pending, Progress, Complete, Invoiced and Archive jobs, click the appropriate sub-tab.
To print a job, click Options > Print Job.
To view or upload attachments, click Options > Attachments.
To view associated invoices, click the ... button to the right of Options for details.
To download a spreadsheet of job details, click the ![]() icon in the top right corner, then click CSV.
icon in the top right corner, then click CSV.
In Simpro Premium, under System ![]() > Setup > System Setup > Defaults > Customer Portal > Enabled Pages the Modify Table View option for Jobs / Quotes determines what is displayed in quotes / jobs tables in the Customer Portal.
> Setup > System Setup > Defaults > Customer Portal > Enabled Pages the Modify Table View option for Jobs / Quotes determines what is displayed in quotes / jobs tables in the Customer Portal.
Click on a job to view the Job Details including Site Visits.
Click Attachments to view and upload Public attachments that are visible to the employees working on the job in Simpro Premium and contacts accessing the quote in the customer portal.
Click Notes to view and add notes that are visible to the employees working on the job in Simpro Premium and contacts accessing the quote in the customer portal.
 View and pay invoices
View invoices through the portal and pay them using a credit card.
 View invoices
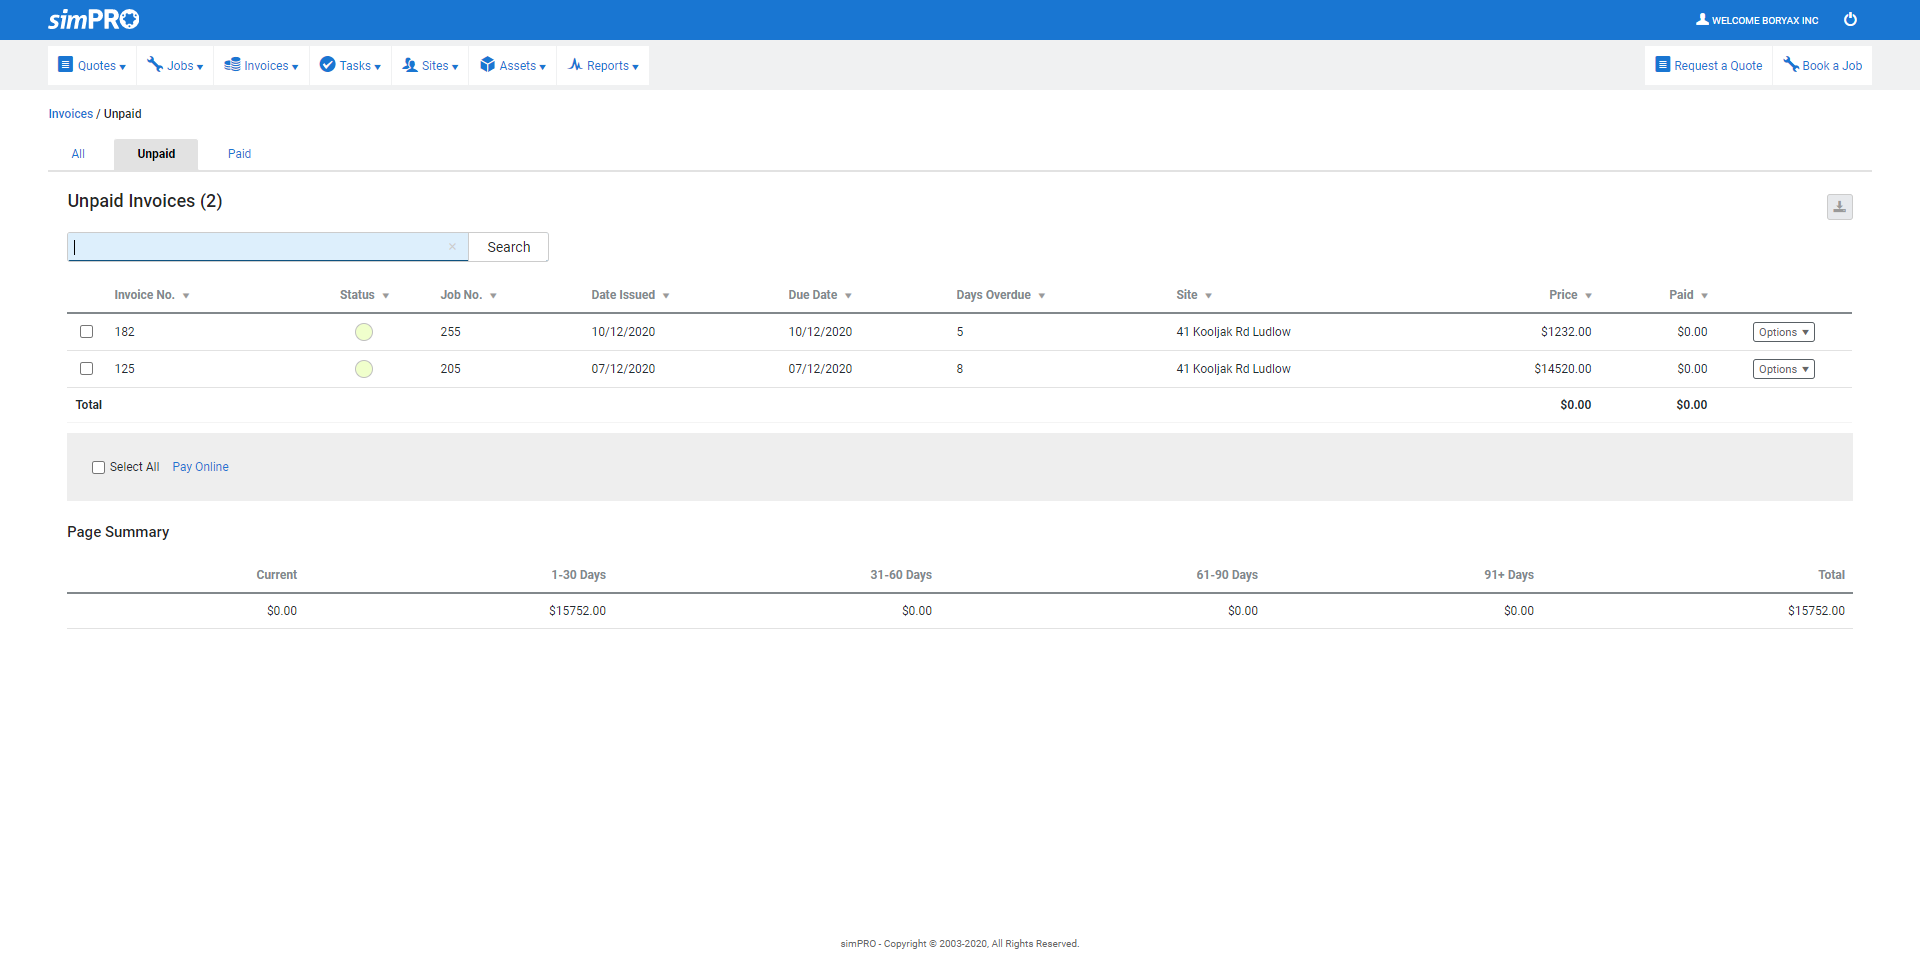
To view invoices:
- Hover over Invoices at the top of the page.
- Click Unpaid or Paid, depending on the invoices you wish to view.
- View invoice details as required. To find a specific invoice, enter an invoice or job number in the search bar and click Search.
To switch between All, Unpaid and Paid invoices, click the appropriate sub-tab.
To print an invoice, click Options > Print Invoice.
To download a spreadsheet of invoice details, click the ![]() icon in the top right corner, then click CSV.
icon in the top right corner, then click CSV.
The Page Summary displays a summary of balance outstanding.
 Pay invoices
To pay invoices:
- Hover over Invoices at the top of the page.
- Click Unpaid.
- Locate the invoice in the list.
- Click Options > Pay Online, or select multiple invoices and click Pay Online at the bottom of the screen.
- In the Payments pop-up window, enter your credit card details, including Name on Card, Expiry, Card Number and CVV.
- Select Store these payment details for future use to save these details in the customer portal instead of entering them manually every time.
- Select Save payment details on file for business to use on your behalf for future payments to allow the business to process these payment details on your behalf. Only some Simpro Premium users will be able to access your payment details.
- Click Pay.
- Click Continue to confirm the payment.
- If the payment is successful, a confirmation appears, along with a receipt number you may wish to record. Click Close.
Alternatively, you can also pay invoices through the Statements page.
To pay invoices through the Statements page:
- Hover over Invoices at the top of the page.
- Click Statement.
- Under Invoices, select the invoice or click Select All.
- Click Pay Online.
- In the Payments pop-up window, enter your credit card details, including Name on Card, Expiry, Card Number and CVV.
- Click Pay.
- Click Continue to confirm the payment.
- If the payment is successful, a confirmation appears, along with a receipt number you may wish to record. Click Close.
 Manage automatic payments in the customer portal
You can give your customers access to the customer portal so they can make online payments. The Manage Payments option is automatically made available to all customer portal users who have set up an automatic payment.
The option to set up automatic payments is only available to the primary contact of the invoice.
Learn more about setting up and using customer portal in How to Set Up the Customer Portal and Customer Portal: Guide for Customers.
To make automatic payments in the customer portal:
- Log into the customer portal with your login credentials.
- Click MANAGE PAYMENTS.
- View the list of Automatic Payments that have been set up:
- Recurring invoice number and name
- Site
- Total including tax
- Frequency
- Last Payment Date
- Next Invoice Due Date
- Click Change Card Details to update the saved payment method.
- You can use only one card at a time, so changing the card details apply to all payments.
- Click Options > Cancel Auto-pay for any invoice to stop automatically sending payments.
If a customer has multiple contacts, only the customer contact who is selected as the Primary Contact for invoice can set up automatic payments. To select a Primary Contact, go to People > Customers and open a customer. Go to the Contacts tab and open a contact. Under Contact For select Invoice and select Primary Contact. Learn more in How to Create Contacts.
 View account statement
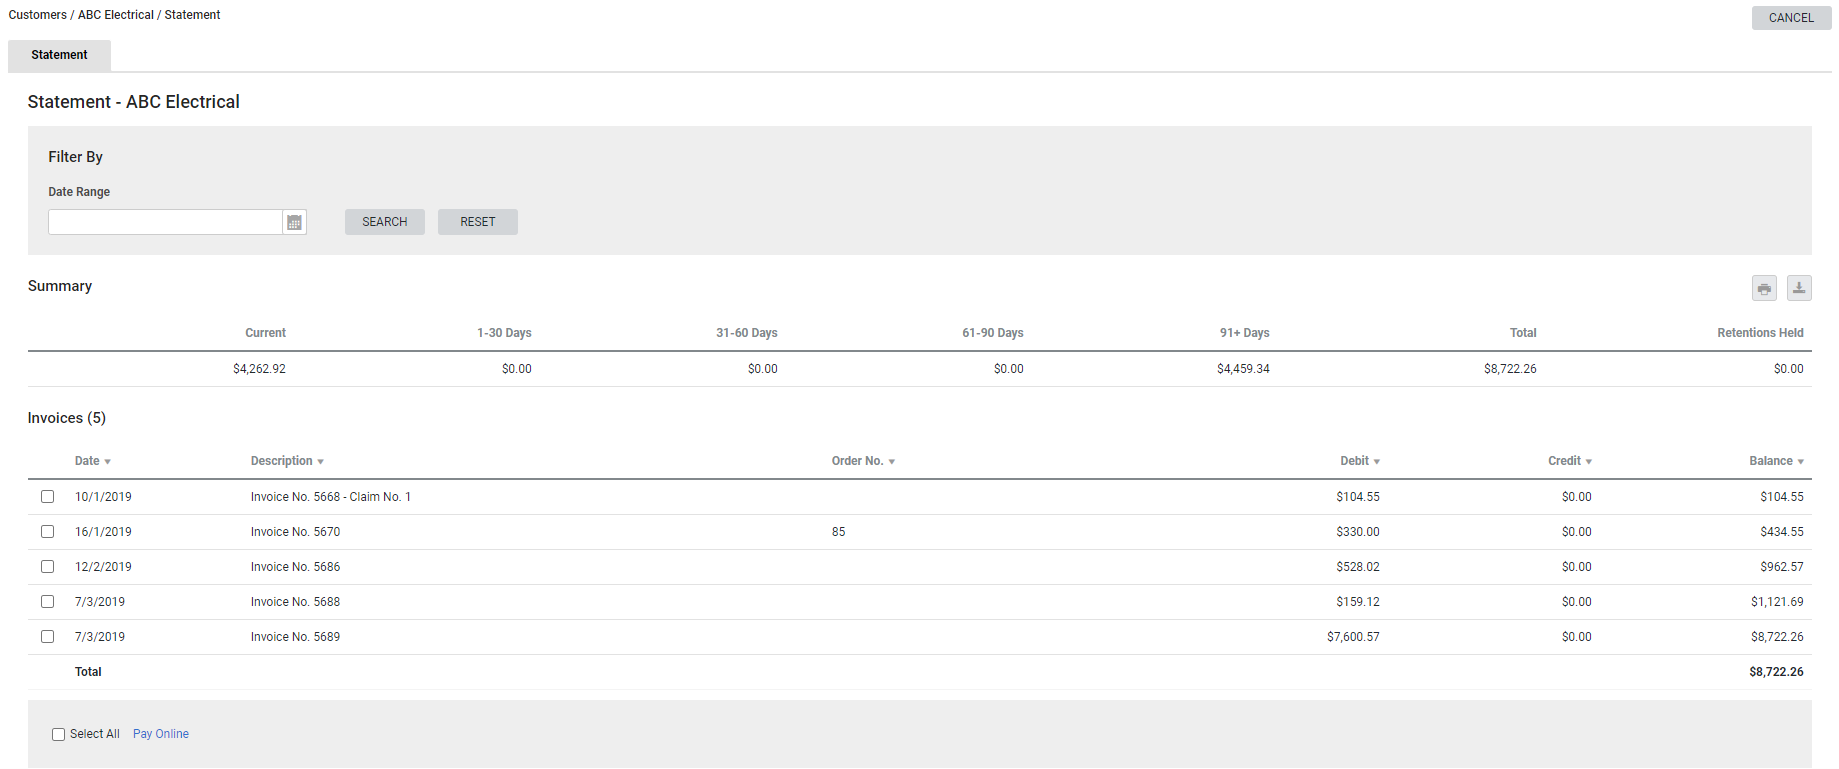
To view your account statement:
- Hover over Invoices at the top of the page.
- Click Statement.
- View statement details as required.
To narrow results to a specific timeframe, use the Date Range date picker and click Search.
To print your statement, click Print Statement at the bottom of the page.
To download a spreadsheet of statement details, click the ![]() icon in the top right corner, then click CSV.
icon in the top right corner, then click CSV.
 View, edit, and create sites
You can view and edit the details of your sites, and create new sites.
 View and edit sites
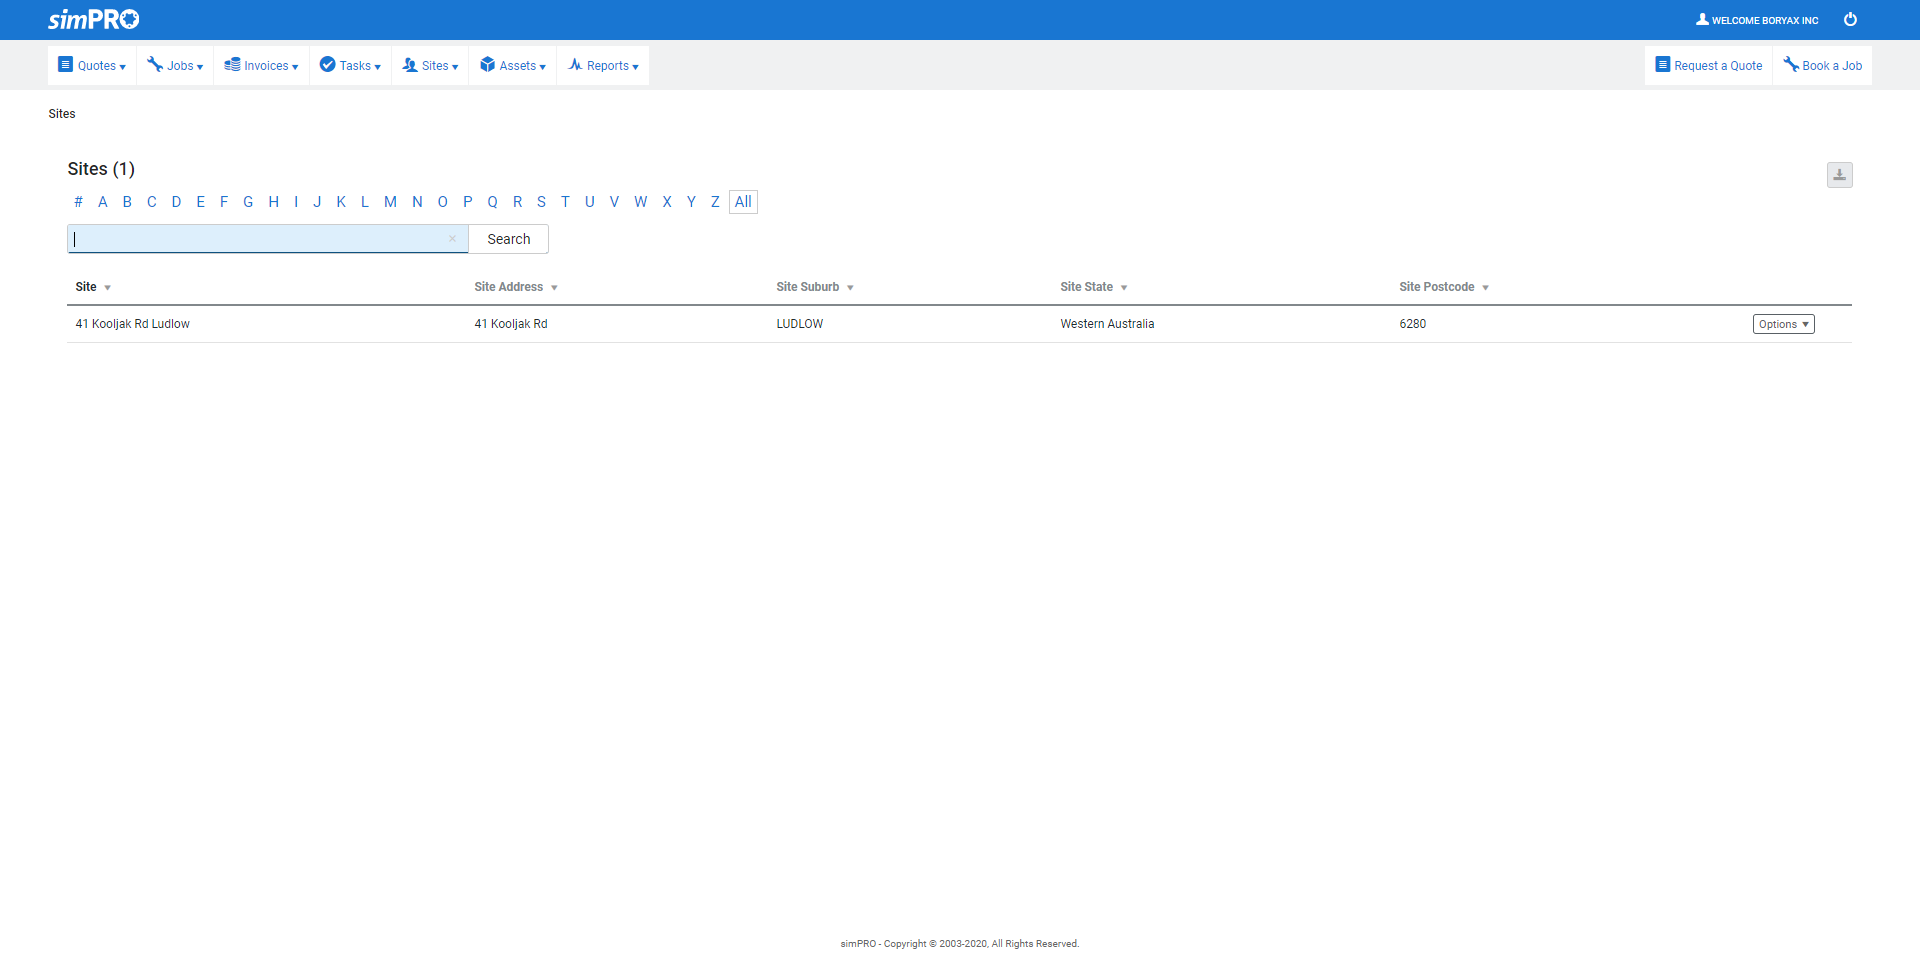
To view and edit sites:
- Hover over Sites at the top of the page.
- Click Sites.
- Click the site. To find a specific site, enter a site name in the search bar and click Search.
- Edit the Site Details as required and click Save.
- View and edit contacts and view attachments as required through the Contacts and Attachments tabs.
- Click Save and Finish.
To download a spreadsheet of site details, click the ![]() icon in the top right corner, then click CSV.
icon in the top right corner, then click CSV.
 Create a new site
New sites created in the portal are sent to Simpro Premium. To create a new site:
- Hover over Sites at the top of the page.
- Click Create New Site.
- Enter New Site Details as required and click Save.
- If you wish to add site contacts, click the Contacts tab and click Create Contact. When you have finished creating the contact, click Save.
- Click Save and Finish.
 View tasks
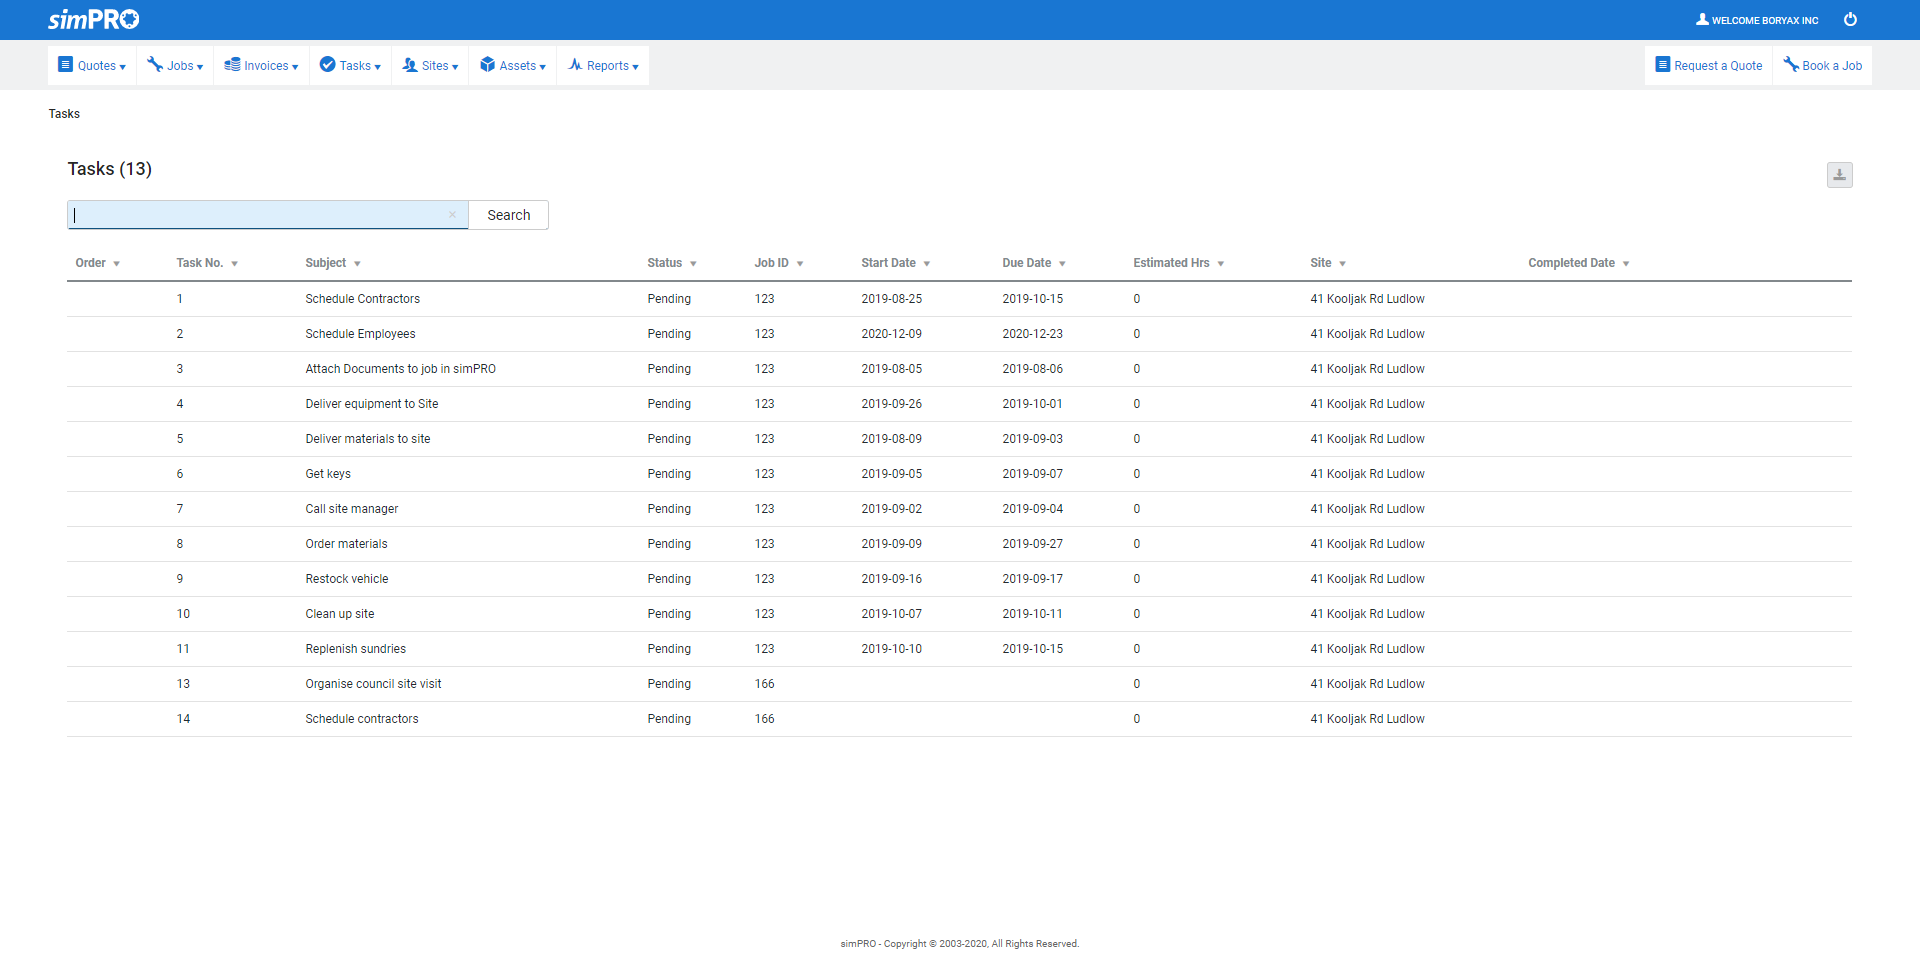
You can use the customer portal to view the details and status of tasks created as part of the work we are doing with you.
To view tasks:
- Go to Tasks
 at the top of the page.
 - Click View Tasks.
- View task details as required.
To download a spreadsheet of task details, click the ![]() icon in the top right corner, then click CSV.
icon in the top right corner, then click CSV.
 Request quotes and check quote status
You can easily request a quote through your customer portal, sending information directly to our system for us to review and action. You can then check the quote's status whenever you wish.
 Request a quote
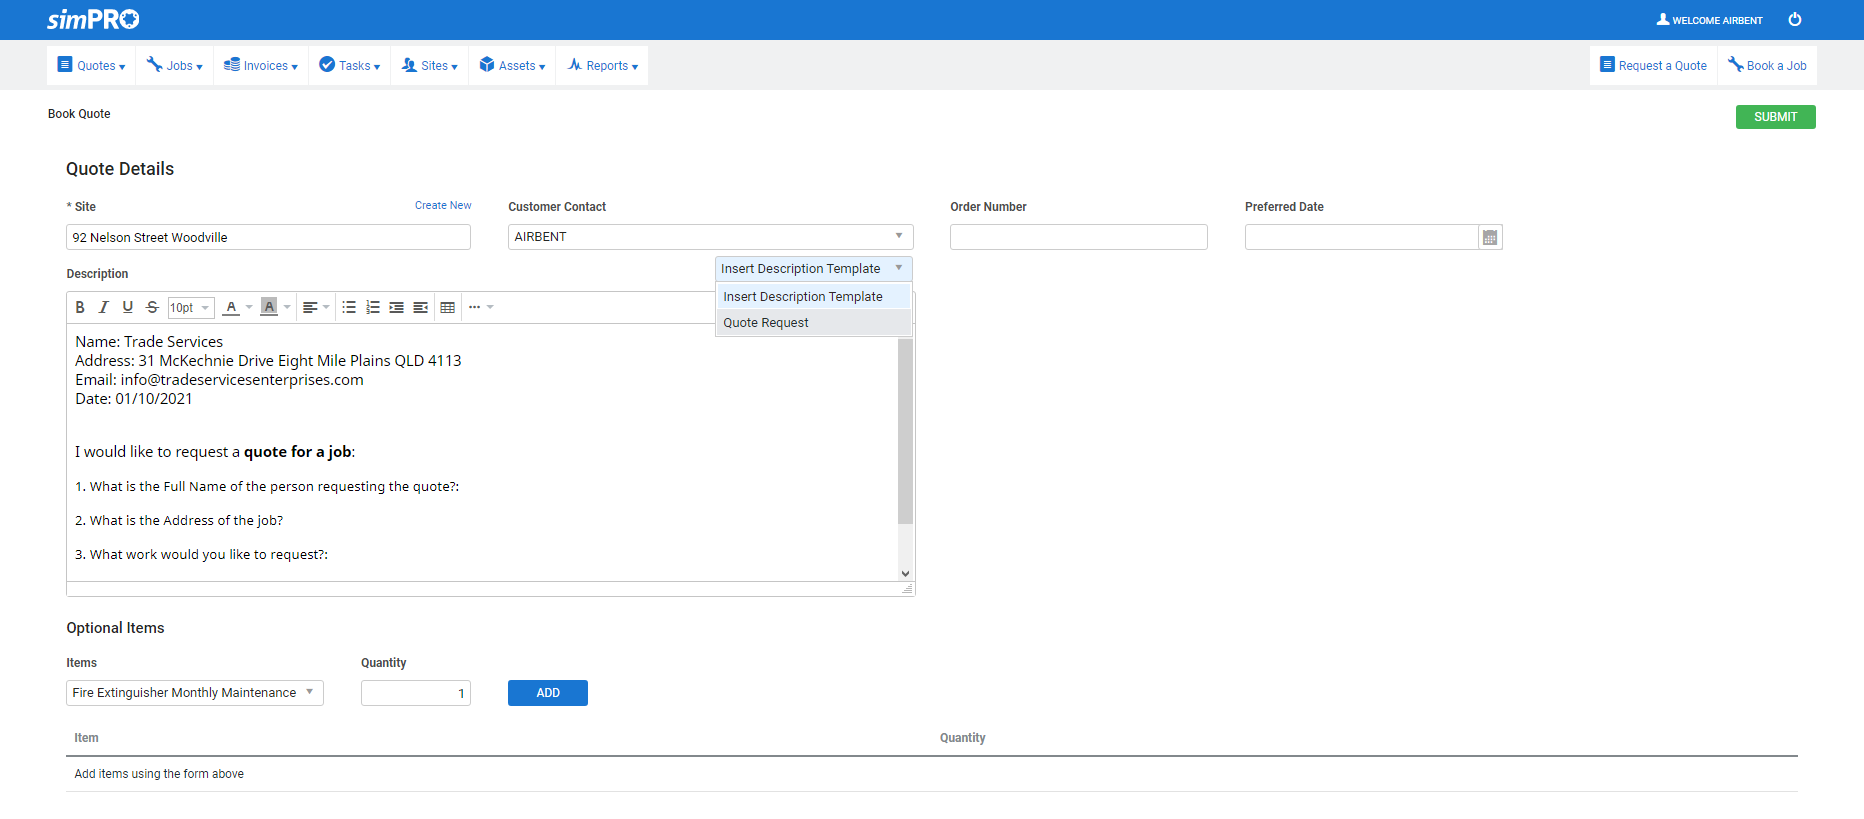
To request a quote through the customer portal:
- Click Request a Quote at the top right corner of the screen.
- Select a Site for the quote, or click Create New to create a new site, then return to this screen.
- Select a Customer Contact.
- If required, enter an Order Number and select a Preferred Date using the date picker.
- In the Description field, enter as much detail as you can about the work you would like us to provide a quote for.
- You can also select a pre-written script from Insert Script.
- If the Assets section appears below the Description, click the search bar to view and search assets requiring maintenance, and click Add.
- You can search the asset using the asset ID, location, name, and other details specific to that asset.
- If the Optional Items field appears at the bottom of the screen, select an item from the Items drop-down list, adjust the Quantity and click Add as required.
- This item depends on your reason for booking the quote, for example, a six month service of an asset or an inspection and maintenance of a fire extinguisher, and has an associated cost.
- Alternatively, you can leave this area blank.
- Under Attachments, drag and drop attachments or click to upload attachments, such as a photo of the work you have quoted, as required.
- When finished, click Submit.
Your quote appears in our system for review.
 Check quote status
After you have requested a quote, go to Quotes > Outstanding to view it. Once we have reviewed and actioned the quote, it appears under Quotes > Actioned instead, with the estimated Cost included.
Once a quote has been approved, you can add attachments if required by clicking Options > Attachments.
In Simpro Premium, go to System ![]() > Setup > System Setup > Defaults > Customer Portal. Under Enabled Pages use the Modify Table View option for Jobs / Quotes to customise the information displayed in quotes / jobs tables in the Customer Portal.
> Setup > System Setup > Defaults > Customer Portal. Under Enabled Pages use the Modify Table View option for Jobs / Quotes to customise the information displayed in quotes / jobs tables in the Customer Portal.
 Book a job and check job status
You can easily book a job through your customer portal, sending information directly to our system for us to review and schedule. You can then check the job's status whenever you wish.
 Book a job
To book a job through the customer portal:
- Click Book a Job at the top right corner of the screen.
- Select a Site for the job, or click Create New to create a new site, then return to this screen.
- Select a Customer Contact.
- If required, enter an Order Number and select a Preferred Date using the date picker.
- In the Description field, enter as much detail as you can about the job.
- You can also select a pre-written script from Insert Script.
- If the Assets section appears below the Description, click into the search bar to view and search assets requiring maintenance, and click Add.
- You can search the asset using the asset ID, location, name, and other details specific to that asset.
- If the Optional Items field appears at the bottom of the screen, select an item from the Items drop-down list, adjust Quantity and click Add as required.
- This item depends on your reason for booking the quote, for example, a six month service of an asset or an inspection and maintenance of a fire extinguisher, and has an associated cost.
- Under Attachments, drag and drop attachments or click to upload attachments, such as a photo of the job site, as required.
- When finished, click Submit.
Your job appears in our system for review and scheduling.
Add attachments to an existing job by clicking Options > Attachments on the job.
 Check job status
After you have booked a job, go to Jobs ![]() > Pending to view it. Once we have scheduled the job, it appears under Jobs
> Pending to view it. Once we have scheduled the job, it appears under Jobs ![]() > Progress Jobs instead, and is displayed the Scheduled date. If you hover over its Status, you see it has changed from 'Job : New Service' to 'Job : In Progress'. After the job is complete it appears under Jobs
> Progress Jobs instead, and is displayed the Scheduled date. If you hover over its Status, you see it has changed from 'Job : New Service' to 'Job : In Progress'. After the job is complete it appears under Jobs ![]() > Complete. After it has been invoiced it appears under Jobs
> Complete. After it has been invoiced it appears under Jobs ![]() > Invoiced, and after the invoice is paid it is listed under Jobs
> Invoiced, and after the invoice is paid it is listed under Jobs ![]() > Archive.
> Archive.
In Simpro Premium, go to System ![]() > Setup > System Setup > Defaults > Customer Portal. Under Enabled Pages use the Modify Table View option for Jobs / Quotes to customise the information displayed in quotes / jobs tables in the Customer Portal.
> Setup > System Setup > Defaults > Customer Portal. Under Enabled Pages use the Modify Table View option for Jobs / Quotes to customise the information displayed in quotes / jobs tables in the Customer Portal.
 View assets
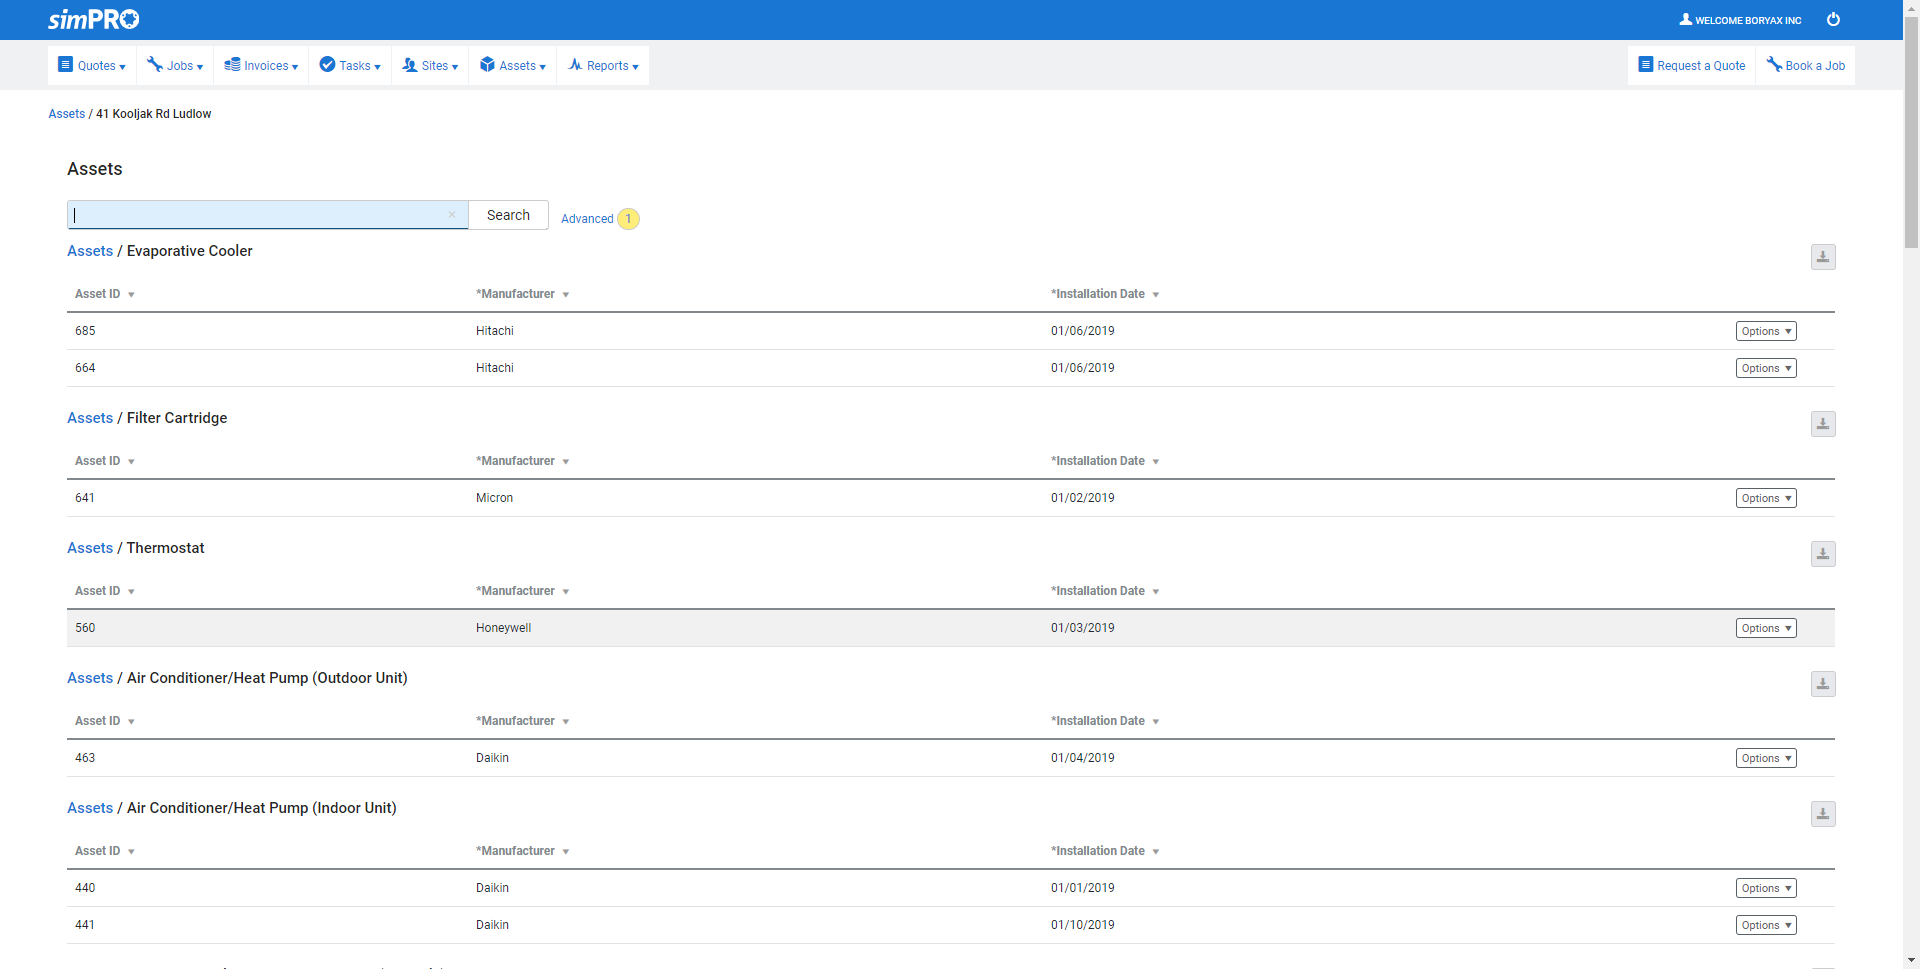
View detailed information about your assets, including service and transfer history, and request a quote or book a job directly from an asset requiring maintenance to automatically assign it to the quote / job.
Assets are grouped by site and asset type.
To view assets and their service and transfer history:
- Hover over Assets at the top of the page.
- Click View Assets.
- Click the Site you wish to view assets for.
- Assets are grouped by type. Scroll to find the asset, or enter an asset number into the search bar and click Search.
- Click the asset. It opens in a pop-up window.
- View the Service History details as required.
- Click the Transfer History tab to view transfer information as required.
- When you have finished, close the window by clicking the X in the top right corner.
To download a list of asset details, click the ![]() icon in the top right and click CSV.
icon in the top right and click CSV.
To request a quote or book a job directly from an asset:
- Hover over Assets at the top of the page.
- Click View Assets.
- Click the Site you wish to view assets for.
- Assets are grouped by type. Scroll to find the asset, or enter an asset number into the search bar and click Search.
- Click Options > Request a Quote / Book a Job on the asset.
- Request a quote or Book a job as normal.
 View reports
Find out more detailed information about your assets by viewing reports. Reports include the Programmed Preventative Maintenance Report, the Defect Report, and the Test History Report.
To view reports:
- Hover over Reports at the top of the page.
- Click the report you wish to view.
- Filter results by selecting options from the drop-down lists.
- Click Search.
- View report results as required.
To download report details, click the ![]() icon in the top right corner of the report.
icon in the top right corner of the report.
Programmed Preventative Maintenance Report
This report displays an overview of service results per service level and asset types.
- Select a Year.
- Search and select a Site.
- Click Search.
Use the key above the report results to find which assets have failed, passed, or are yet to be tested.
The report divides the results based on weeks and each week runs from Monday to Sunday. Note the following to understand the report:
- Past results include all results tested prior to the current week. Future results include all results from the start of the current week. The current week is indicated by a red line.
- The Contract Expiry Date filter applies whether or not a contract is selected. If a contract is not selected, all assets are displayed and only those associated with contracts are displayed based on the filter option selected.
- Week 1 is the first complete week of January starting from Monday and ending on Sunday.
- Week 53 starts on the final Monday of December and includes the first days of the following year up to Sunday.
Click a cell with results to view:
- The start and end date of the week
- The asset type
- If the cell is for a future result, it displays the number of assets to be tested.
- If the cell is for a past result, it displays the number of assets not tested, failed and passed and the associated job number.
Past records
Past records show the quantity of assets that were tested that week. This is based on the date on the job card in which the assets were tested.
- If all asset tests due in that week have passed, the value shows the number of assets passed and the cell is green.
- If not all assets were tested but there were no failures, the number of assets not tested is displayed, and the cell is yellow.
- If there was at least one recorded failure, the number of failures is displayed and the cell is coloured red.
- If there was at least one recorded failure, but there were also some untested assets, the cell is red with a yellow bubble that displays the quantity of untested assets.
Future records
Future weeks show the number of assets due to be tested. This is based on the Service date, or if the asset is already added to a job, the due date on the job.
All future records are displayed blue.
Weeks that have a relatively higher number of assets due to be tested are displayed in a darker blue.
Current Defects Report
This report displays all assets that have failed a test and have not yet been rectified.
- Search and select a Site.
- Select a specific Asset Type to include in the report, or select All types.
- Click Search.
The Date Checked column is the date when the technician failed the asset.
Test History Report
- Search and select a Site, as required.
- Select a Date range and click Search to view all sites’ test history in that date range.
- Note that it is mandatory to select either a Site or a Date range to generate the report.
- Select a specific Asset Type to include in the report, or select All types.
- Select a Date range to include assets tested in that range.
- Select to filter by Status.
- Click Search.
