Last Updated: December 08 2025
Overview
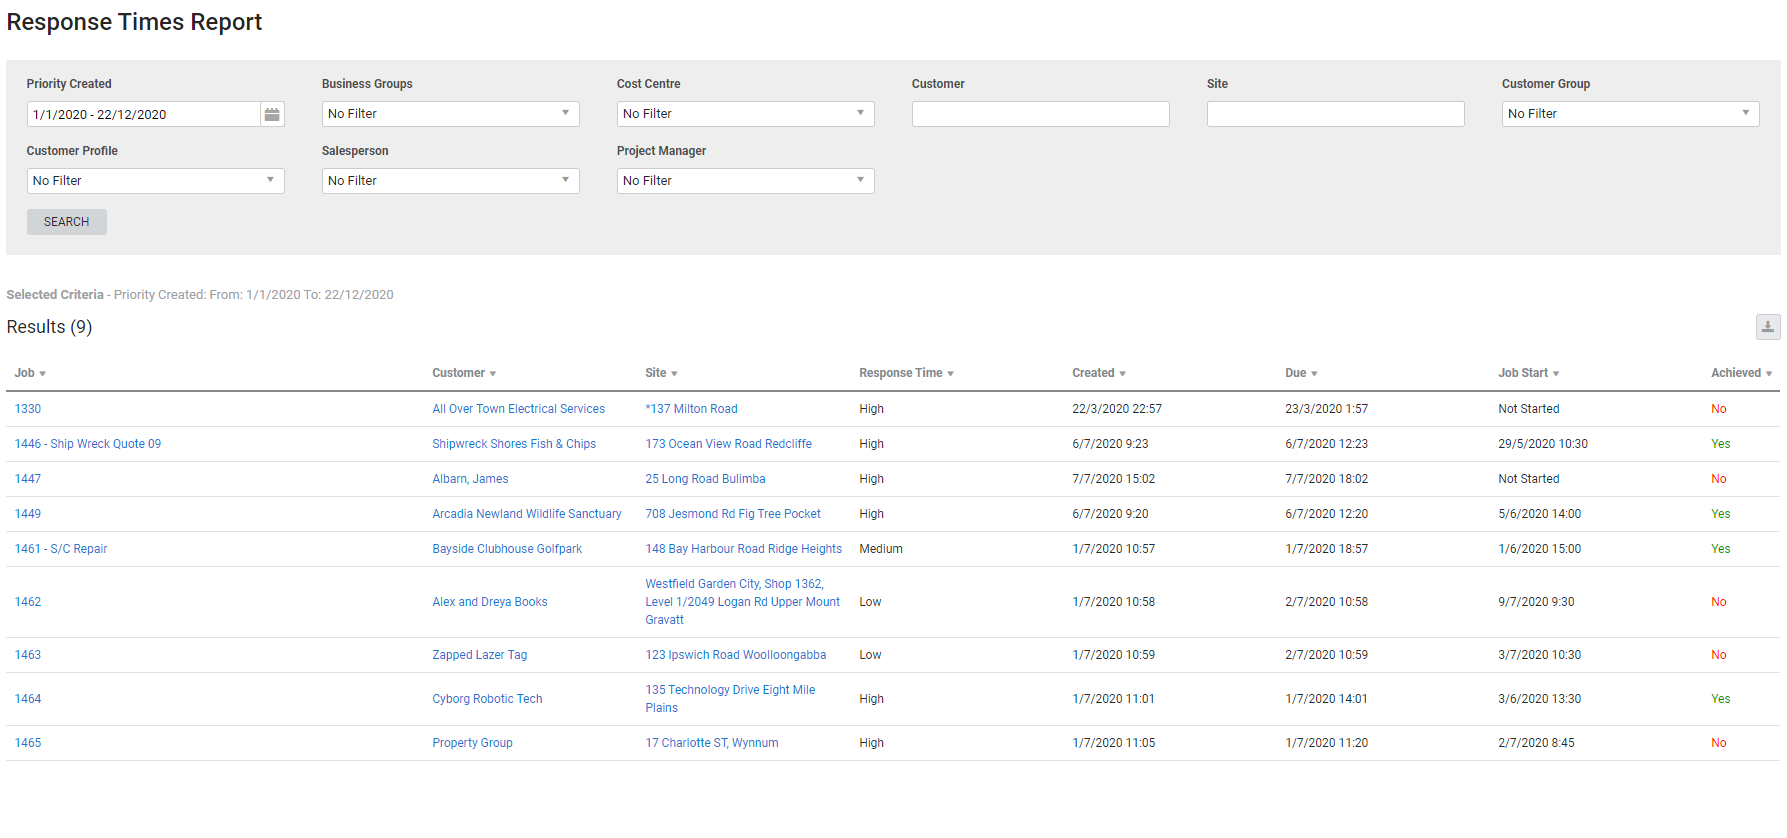
This report displays jobs with assigned response times and their created and due times, which is useful for project managers to monitor.
To create response times, go to System ![]() > Setup > System Setup > Response Times, assign and adjust these times in your customer's card file, then select the response time when creating a job. Learn more in How to Use Response Times.
> Setup > System Setup > Response Times, assign and adjust these times in your customer's card file, then select the response time when creating a job. Learn more in How to Use Response Times.
Learn about other Job reports in Job Reports.
 Required setup
In order to view content or perform actions referred to in this article you need to have the appropriate permissions enabled in your security group. Go to System![]() > Setup > Security Groups and access your security group to update your permissions. The relevant security group tab and specific permissions for this article can be found here:
> Setup > Security Groups and access your security group to update your permissions. The relevant security group tab and specific permissions for this article can be found here:
 Run the Response Times report
To run the report:
- Go to Reports
 > View Reports.
 - Click Jobs
 > Response Times.
 - Under Priority Created, select the date range.
- The report displays all jobs created with response times within this date range.
- Filter the report further by selecting from the Business Groups, Cost Centre, Customer, Site, Customer Group, Customer Profile, Salesperson and Project Manager drop-down lists.
- Click Search.
The report then displays the following information:
| Job | Click the job number and job name to open the job. |
| Customer | Click to open the customer card file. |
| Site | Click to open the site card file. |
| Response Time | The response time selected when the job was created. |
| Created | The date and time when response time is added to the job. |
| Due | The date and time required to meet the response time. |
| Job Start | The date and time of the first schedule created for the job. |
| Achieved |
If the Job Start time is before the Due time, this column displays Yes. If the Job Start time is after the Due time, or the job is not yet started, this column displays No. |
 Download the report as a CSV file
You can download the information in the report as a spreadsheet in CSV format, viewable in Microsoft Excel and other spreadsheet software.
To download the report:
- Generate the report as required.
- Click the
 icon in the top right, then click CSV.
 - View, print or save the CSV, as required.
