Last Updated: December 15 2025
Overview
In Simpro Premium, a response time is the time taken between creating a job and the time of the earliest schedule on that job.
To use response times, they must first be assigned to a customer, then selected when creating a job. If required, you can also provide response time reports to your customers.
When a job has a response time selected, there are two ways that the response time needs to be met:
- The earliest schedule created for the job is within the response time
- If you use Simpro Mobile and the scheduled technician has tapped Start Work in Simpro Mobile within the response time, and then synced.
If neither of these conditions are achieved, then the response time is not met. Additionally, if the job is scheduled within the response time, but the technician taps Start Work after the response time, this moves the schedule block and since neither condition is achieved and the response time is not met.
For example:
- A customer calls for an urgent job at 9:00am
- The response time is two hours.
If the earliest schedule starts before 11:00am and the technician taps Start Work before 11:00am and then syncs, the response time has been met. However, if the technician does not arrive at the site and tap Start Work until 11:30, this moves the schedule block forwards to 11:30, the response time has not been met, regardless of the initial scheduled time in Simpro Premium.
You can use the Response Times Report to view what response times are completed.
If a response time is not met, an alert is sent to all employees who can access the relevant job. This includes employees who have security group access to view and edit all jobs. It also includes sales people and project managers who have security group access to view and edit jobs that they are assigned to.
 Required setup
In order to view content or perform actions referred to in this article you need to have the appropriate permissions enabled in your security group. Go to System![]() > Setup > Security Groups and access your security group to update your permissions. The relevant security group tab and specific permissions for this article can be found here:
> Setup > Security Groups and access your security group to update your permissions. The relevant security group tab and specific permissions for this article can be found here:
 Create a response time
To create a response time:
- Go to System
 > Setup > System Setup > Response Times.
 - Go to the All tab and click Create Response Time.
- Enter a Name.
- Enter the Days, Hours or Minutes.
- Use the Include Weekends toggle to set your job response times to include or exclude weekends depending on your operating hours.
- In the Settings tab, toggle on Make 'Response Time' Mandatory on for Service Jobs and Project Jobs, as required.
- Note that these options are toggled off by default for all builds and must be manually enabled.
- Click Create.
You can select Response Time and Response Due as columns when modifying the table view for Pending and Progress jobs.
 Edit a response time
To edit a response time:
- Go to System
 > Setup > System Setup > Response Times.
 - Click the response time you need to edit.
- Make changes as required.
- Click Save.
 Delete a response time
To delete a response time:
- Go to System
 > Setup > System Setup > Response Times.
 - On the response time you wish to delete, click the
 icon.
icon. - Click OK.
 Assign a response time to a customer
To assign a response time to a customer:
- Go to People
 > Customers.
 - Click the customer you wish to assign to.
- Under the Profile tab, click Response Times.
- Select a response time from the drop-down list, then click Add.
- If this is the response time that is most often used for this customer, click the tick to make this the default response time. This response time is automatically added to all jobs created for this customer.
- To remove the default, select the Remove Default? check box and click Save.
- Click Save and Finish.
Use the ![]() icon to remove a response time from a customer.
icon to remove a response time from a customer.
Once you have assigned a response time to a customer, you can customise it for that customer as needed.
Learn more in How to Create Customers.
 Select a response time for a job
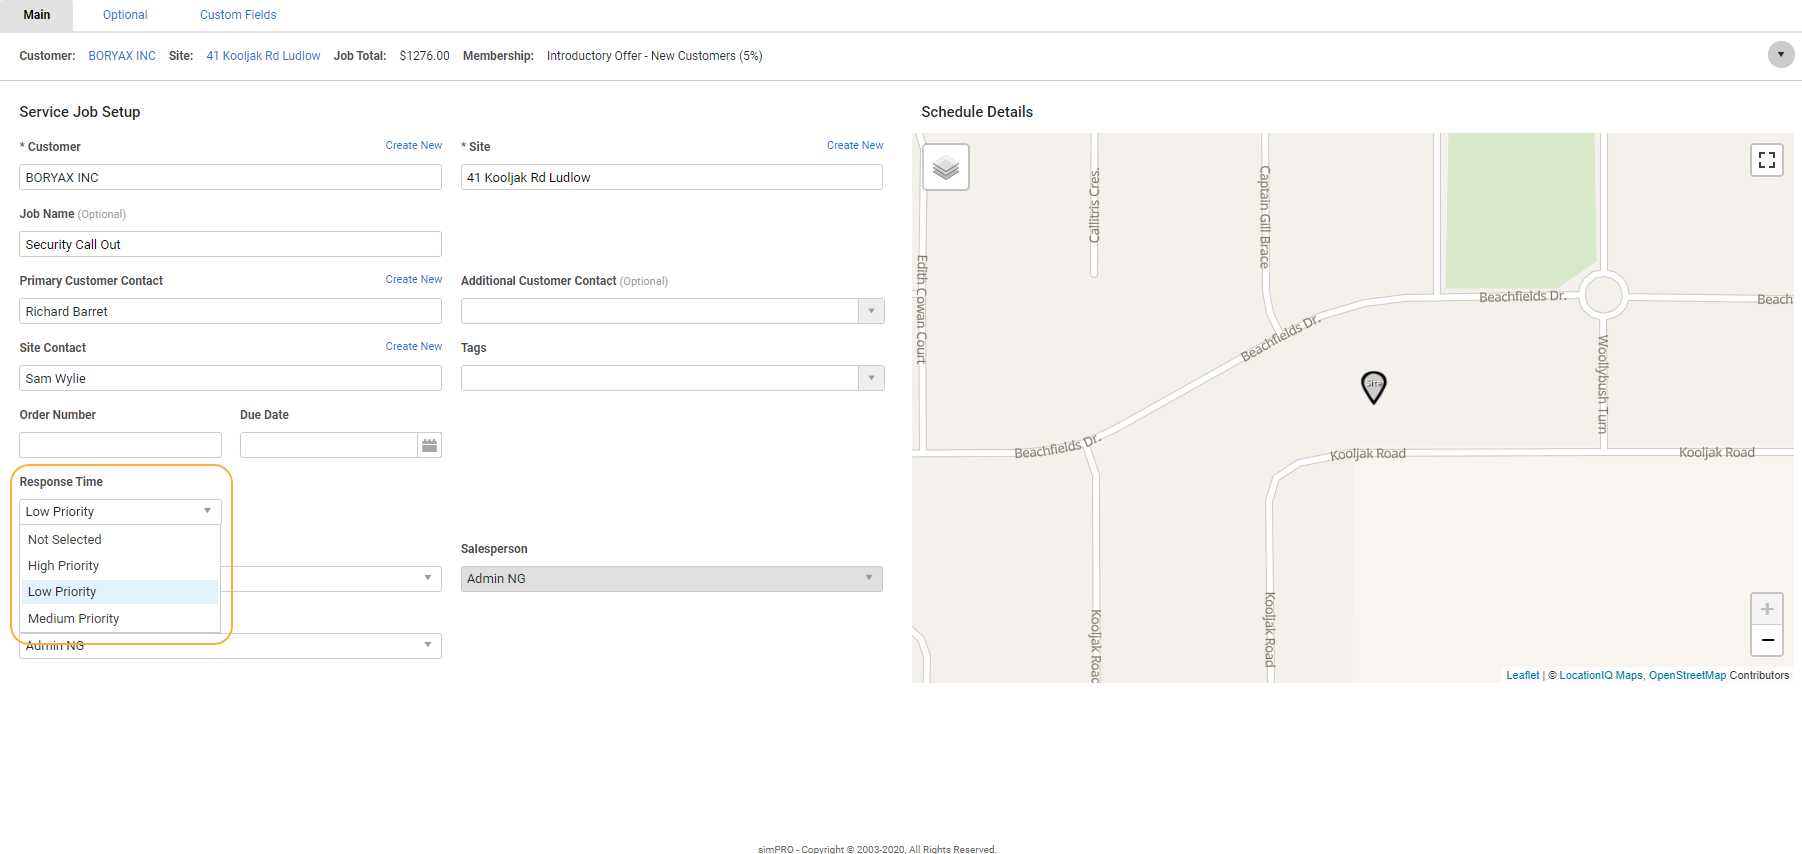
When you create a job for a customer who has response times, select the response time you want to use for this job.
To select a response time in a job:
- Create a job or edit an existing job.
- After you have selected a customer in the Main tab, select a Response Time from the drop-down list.
- Adjust the rest of the job as needed, then click Finish, or Next to continue adding job details.
Learn more in How to Create a Service Job.
 Priority response jobs on Service dashboard
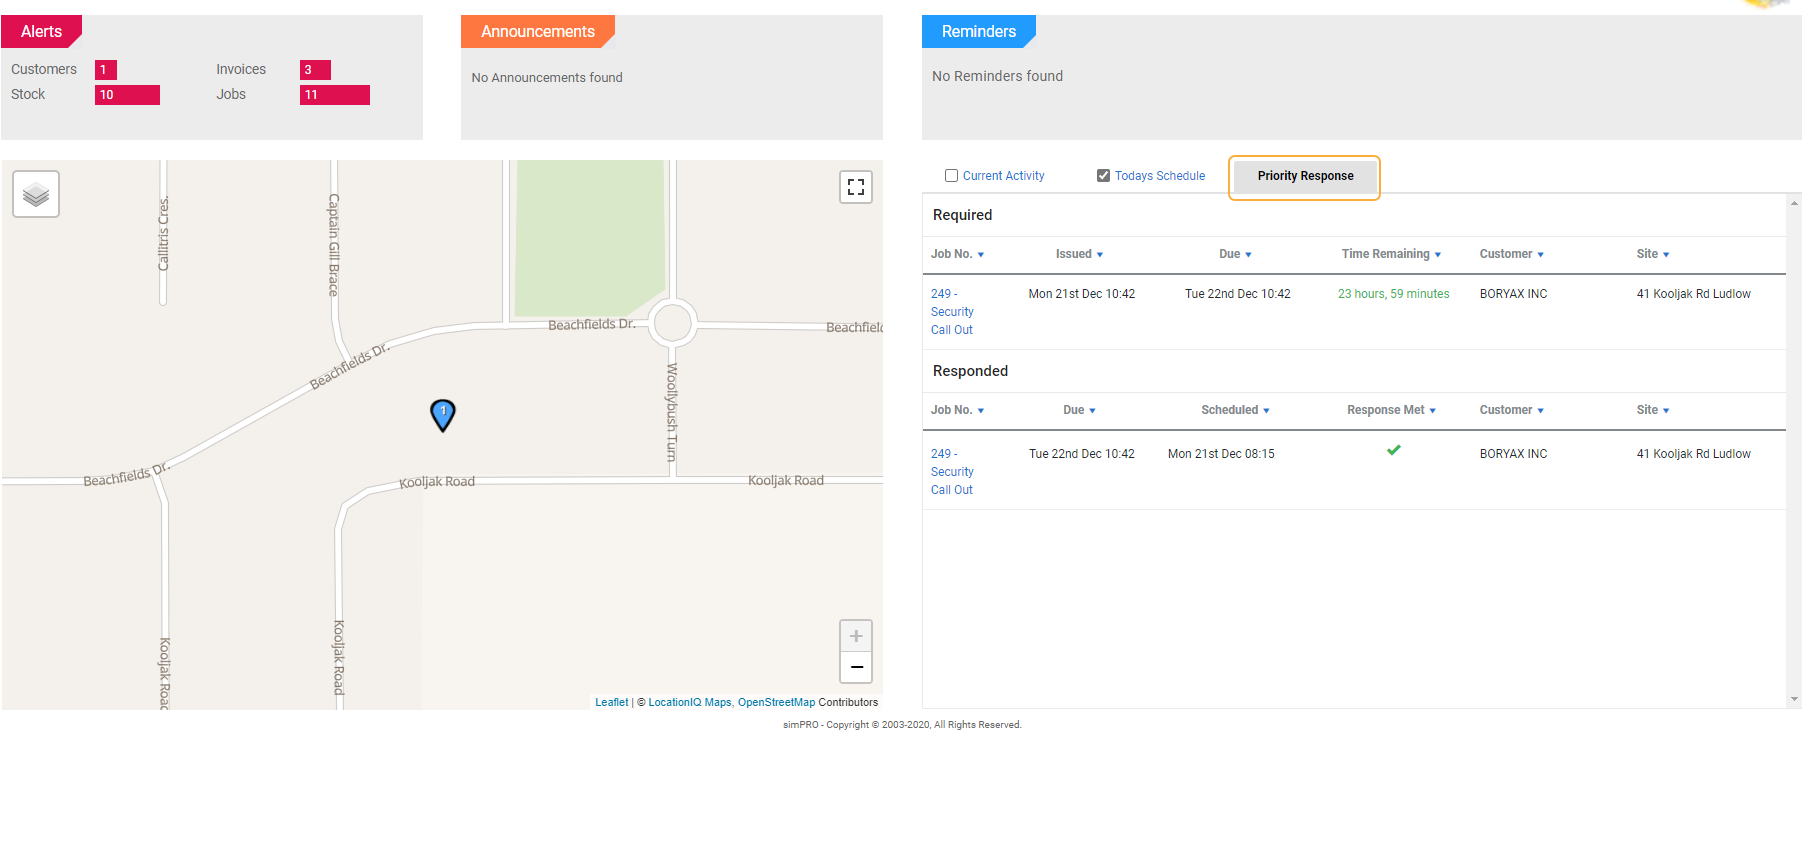
Jobs that are assigned response times appear in the Priority Response tab on the Service dashboard. For more information on dashboards, see How to Use the Simpro Premium Dashboard.
When you log in to Simpro Premium, click the drop-down arrow next to the Welcome banner to select the Service dashboard and click the Priority Responses tab. The information is classified into the following sections:
- Response Required: Lists the job number, date and time when the job was issued and is due, the Time Remaining until the due date, and the customer and site name. The Time Remaining is shown in green if the due date is not yet passed, alternatively it is shown in red.
- Response Scheduled: Lists the job number, date and time when the job was scheduled, whether the response was met, and the customer and site name.
The jobs in the Complete, Invoiced and Archived stages are not displayed on the Priority Responses tab. Also, the Priority Response tab does not appear on the Service dashboard if there are no jobs with response times pending or in progress.


