Last Updated: January 07 2026
Overview
Simpro Premium's integration with Sage Intacct allows you to export transactions and customer data from Simpro Premium to Sage through the accounting link.
 Required setup
In order to view content or perform actions referred to in this article you need to have the appropriate permissions enabled in your security group. Go to System![]() > Setup > Security Groups and access your security group to update your permissions. The relevant security group tab and specific permissions for this article can be found here:
> Setup > Security Groups and access your security group to update your permissions. The relevant security group tab and specific permissions for this article can be found here:
Before performing the steps detailed below, ensure that this part of your build is set up correctly. The relevant steps to set up the features and workflows detailed in this article can be found here:
Enable the Sage accounting link
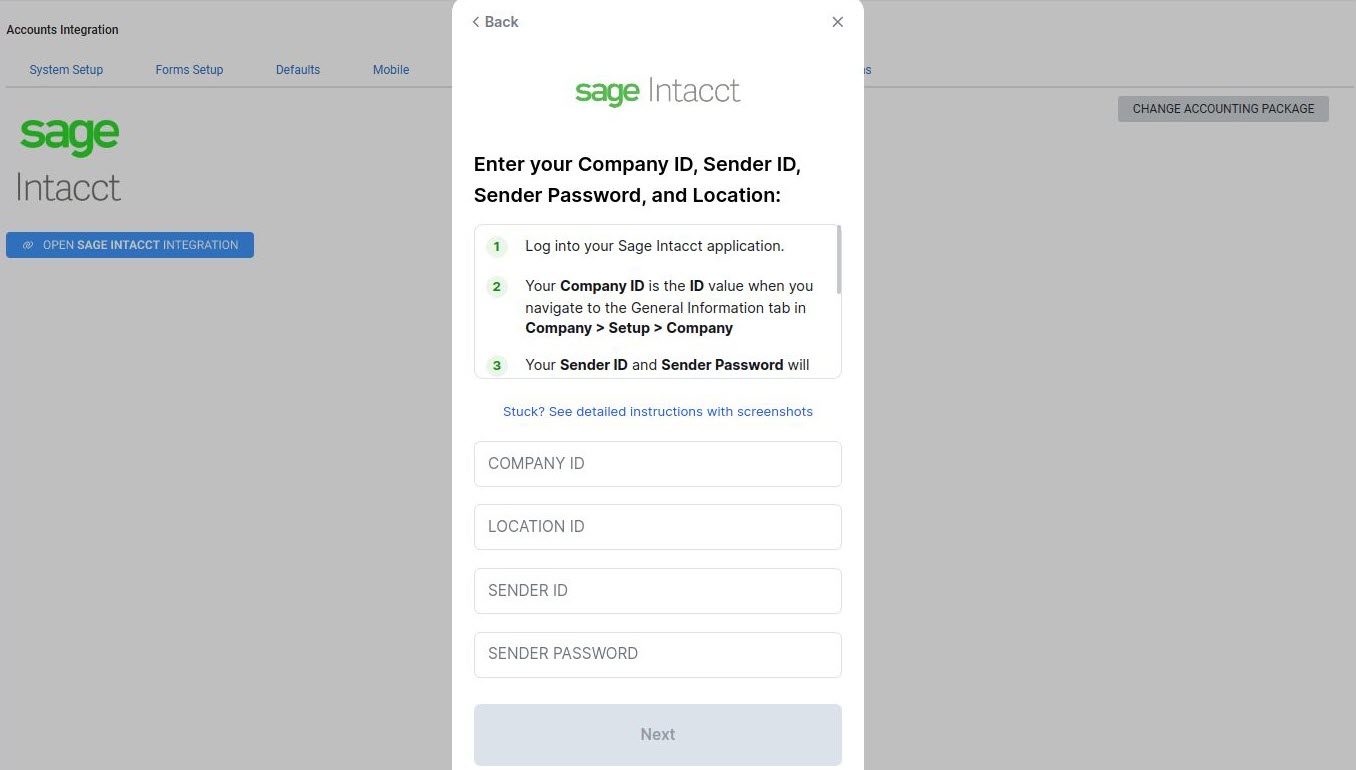
To enable the Sage Intacct accounting link, you need to have Admin privileges for your Sage Intacct licence and the following information from your account:
- Company ID
- Location ID
- Sender ID
- Sender Password.
In Simpro Premium, make sure you have the Accounting Link permission in your security group and a valid Sage Intacct Licence.
View export summary
In the Summary tab, you can view the number of customers, customer payments, vendors and vendor invoices that are ready to export.
To quickly export all entries that are ready, click Export all.
To quickly export a specific type of data, click Export in the relevant row.
For more details on the transactions ready to export, go to the Transfer tab.
Export transactions
The Transaction tab shows a more detailed view of the transactions awaiting an export. The Transaction tab displays information, such as customer details, Date Issued and the corresponding Amount.
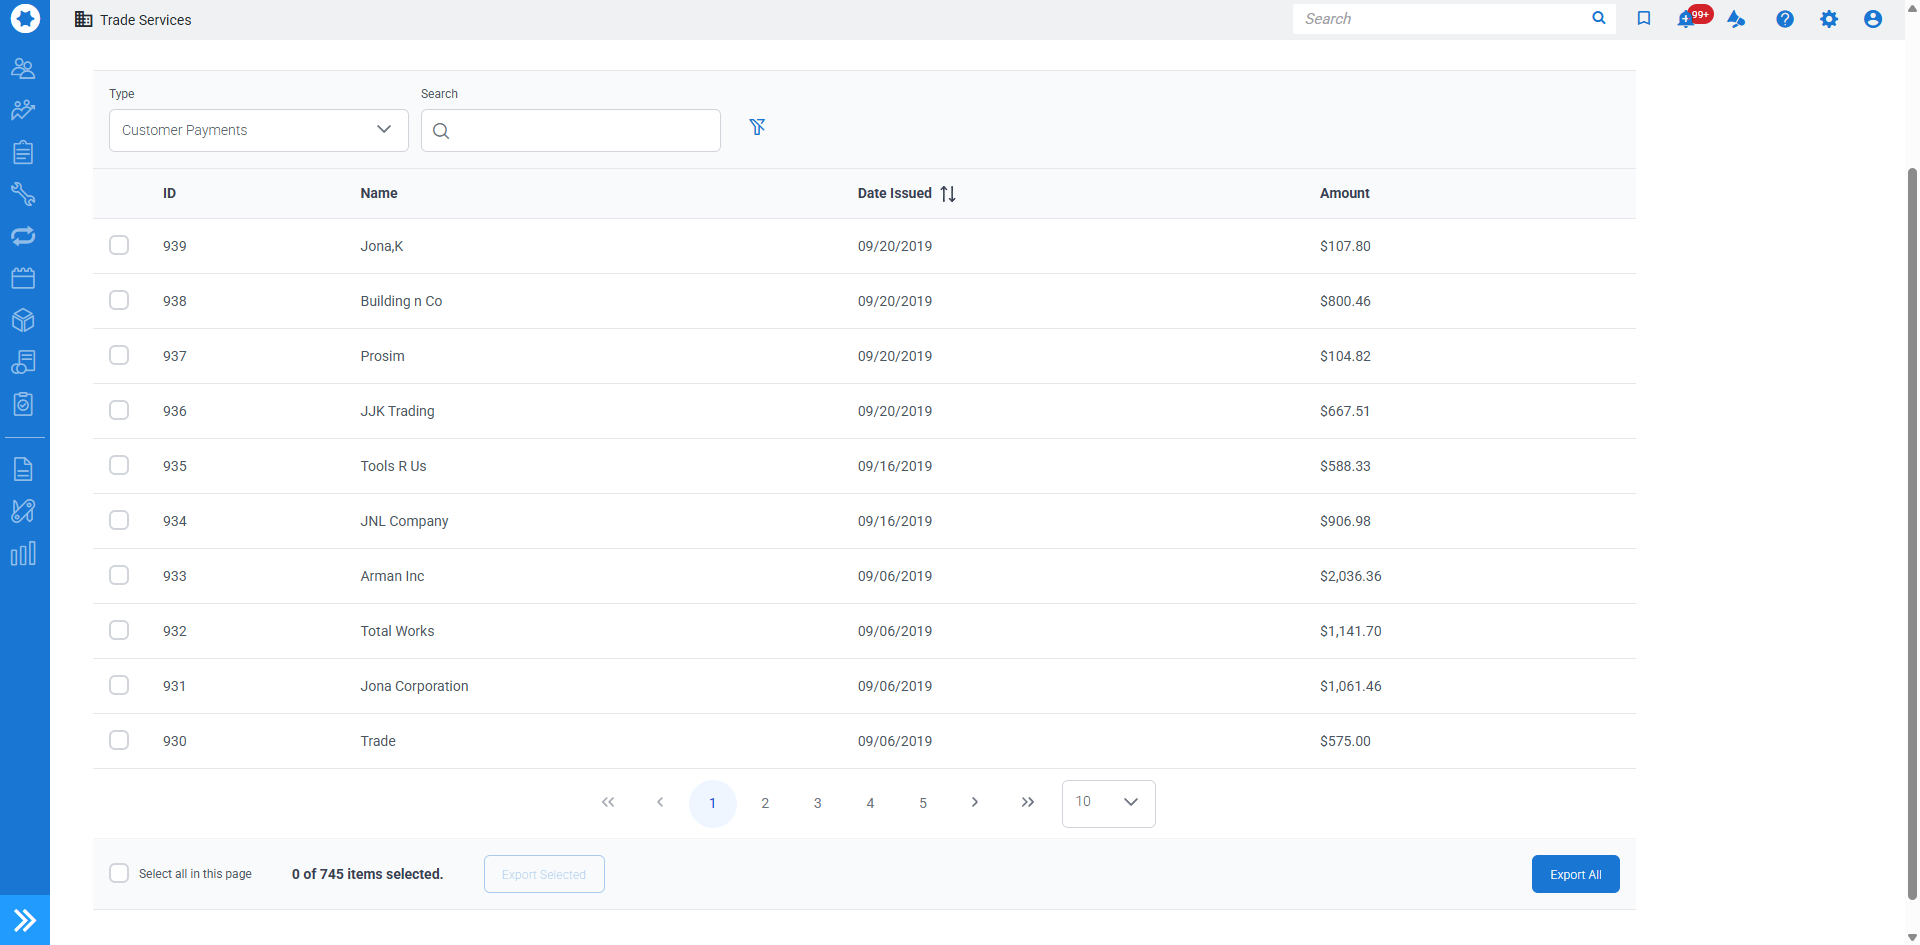
To process a transfer:
- Select the Type of transaction. For example, Customers, Customer Payments, Vendors, or Vendor invoices. You can also use the search bar to find transactions.
- Select the check boxes for each transaction.
- Click Export Selected and click Export to confirm.
Similarly, you can select Export All to export the full list of items.
Once a record is exported, they disappear from the Summary and Transaction tabs. Successfully exported records will be displayed on the History tab while unsuccessful exports are located in the Error tab.
Retry errors
If a transfer has failed the corresponding entry is listed in the Errors tab awaiting action. The Error column displays a reason why the transaction failed. You will need to address this error before retrying the transfer.
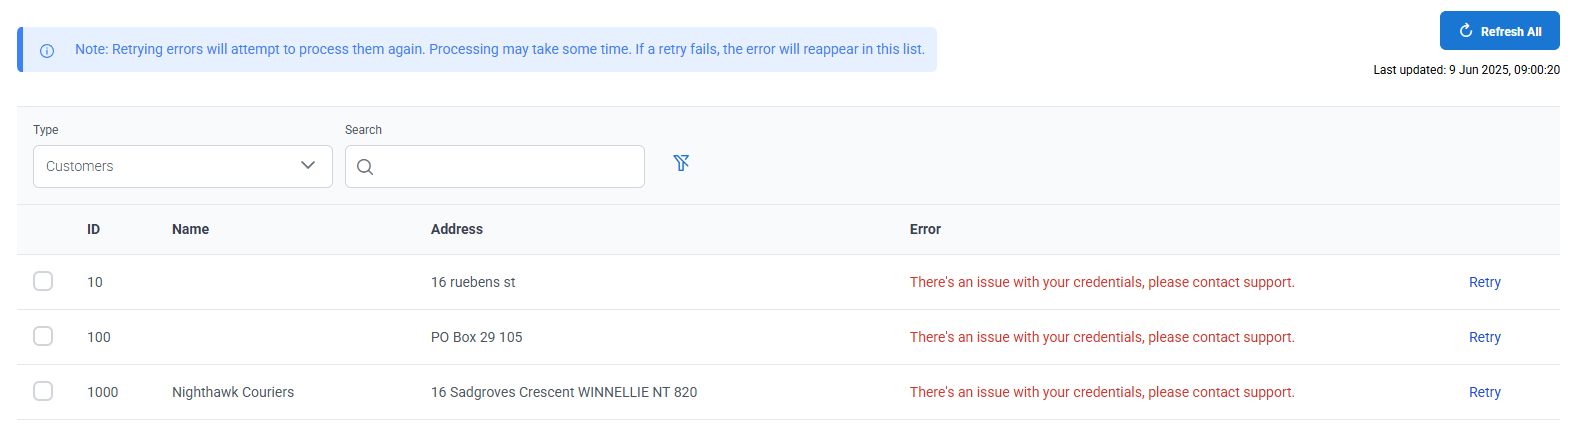
To retry a transfer:
- Review the error note of the transfer, and update accordingly.
- Select the required transfer records.
- Click Retry Selected or Retry All Error for all errors.
View history
Go to the History tab to view previously exported data, including customer details and vendor and contractor information.
To search for transactions, enter a Transaction Name/Number, select a Type, Log Date Range and click Search.
Change linked company
If you need to change the Sage Intacct company you are linked to, go to the Settings tab and click Change Linked Company. You will then need to reconnect to Sage Intacct using different company details.