Last Updated: March 06 2025
How to Create a Workflow
Overview
Workflows allows you to collaborate with multiple users on a single submission. A common use of this functionality is to pass a submission to another user for approval before it is submitted. The transaction is called a "handoff," and you can have as many handoffs as you need within a single form.
 Create a workflow
Each form has its own unique workflow. Some forms might require multiple handoffs to complete the workflow, or they may not need a workflow if only one mobile user can complete the form. By default workflows are switched off for new forms. The person dispatching a form can also complete fields before it is dispatched. Learn more in How to Dispatch Forms.
To create a workflow:
- Click Forms >
 and under Workflow click Settings.
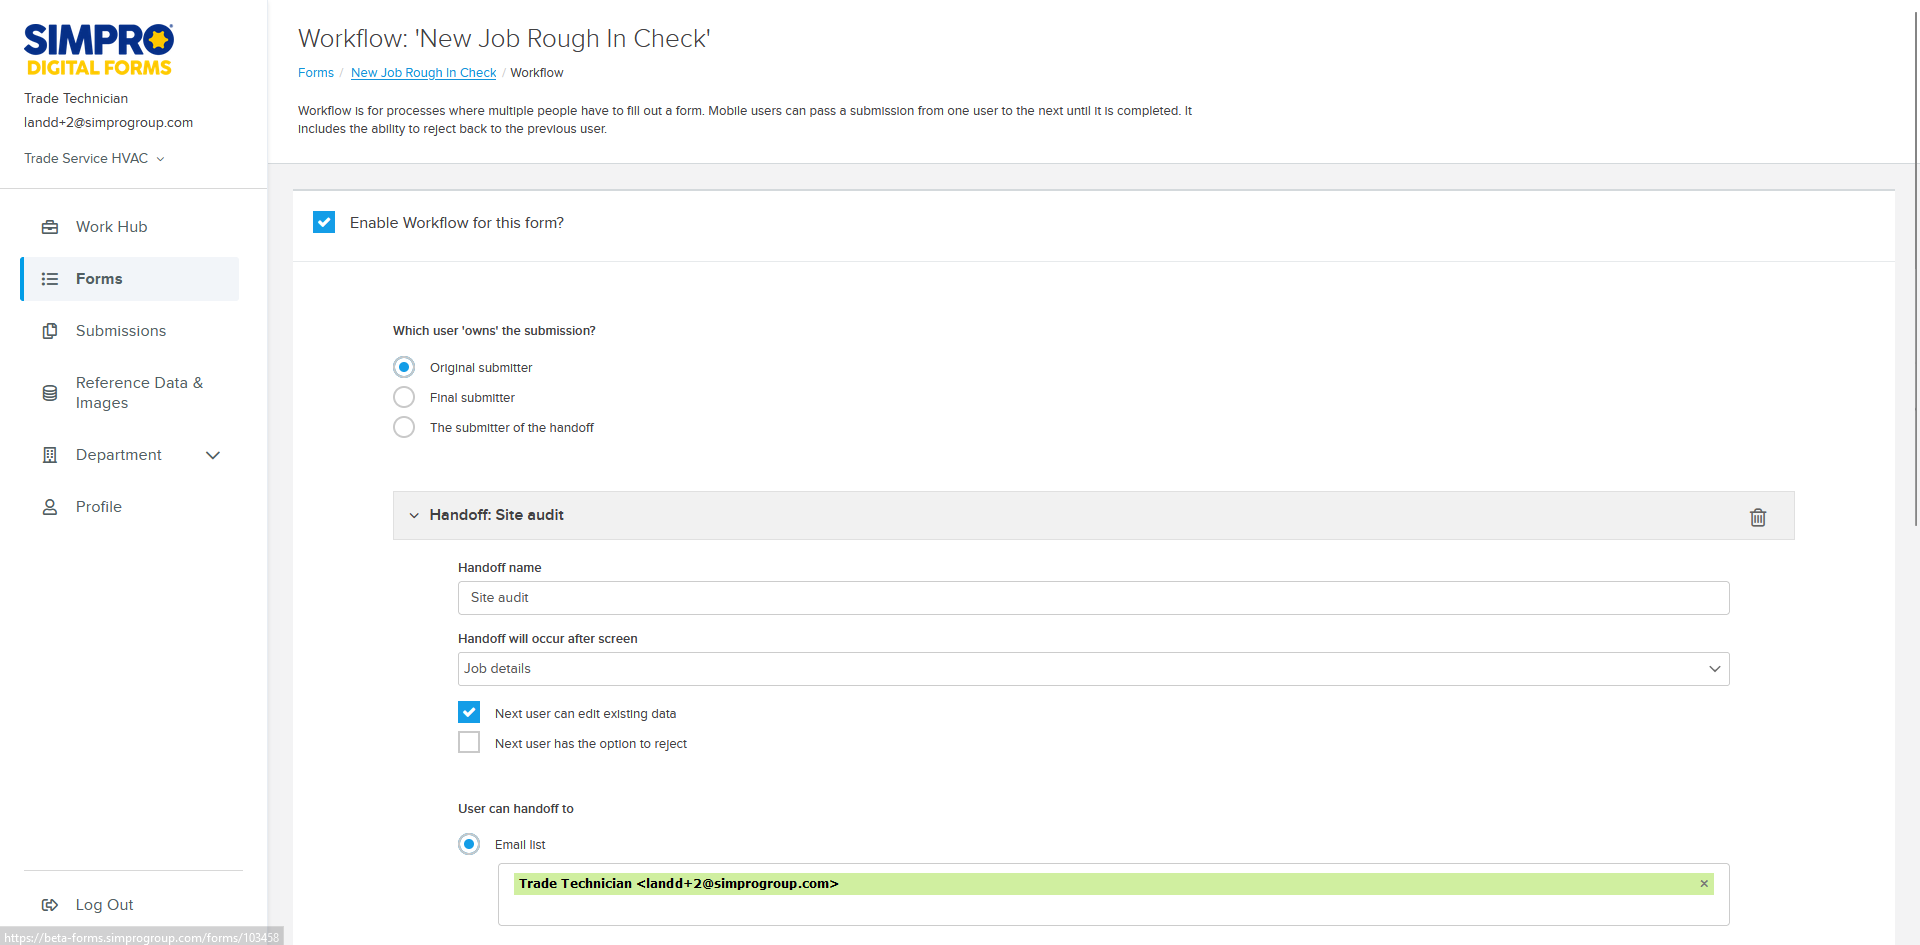
 - Select Enable Workflow for this form?
- Select Which user ‘owns’ the submission? This determines which user appears in the submission as the submitter.
- Original submitter - This is the user that completes the first handoff in the Workflow.
- Final submitter - This is the user that completes the final handoff in the Workflow causing the Workflow to go to a completed status.
- The submitter of the handoff - This is the user that completes a specific handoff.
- Enter a Handoff name. This is the description for this step in the workflow. It's used for the status that is displayed on the Workflow page. It can be seen when this step is complete but the whole Workflow hasn't been completed.
- Under Handoff will occur after screen, choose the screen that signals the handoff. After filling out the chosen screen, the user will be shown the handoff screen to send it to the next person. This can be any screen in the form except the very last screen. Pages are the equivalent of Screens for Basic Forms.
- Select whether the Next user can edit existing data. This allows the next user to be able to edit the screens already filled out by the initial user. If this isn’t selected the data already filled out will be read-only if the next user begins at the start of the form. This setting is redundant if the next user begins where the handoff occurs.
- Select whether the Next user has the option to reject. This gives the user receiving the handoff the ability to reject a submission. They can also write a note along with it to return to the sender. Any data filled out in the form by the user rejecting the submission will be deleted from the submission. This setting is only useful if the next user begins at the beginning of the form.
- Select who the User can handoff to.
- Email list search for and select users that this form can be handed off to. The users must be assigned to this form.
- Email field can either be a Text or Drop Down field that appears on the form screens before that handoff that holds user emails. The mobile user will enter or select the email of the user they want to hand off to from this field. To use this option the form must contain a handoff field. Learn more in Add a handoff field.
- Select where the Next user begins at. Choose whether the user receiving the handoff will start at the beginning of the form or at the screen where the handoff occurs. Pages are the equivalent of Screens for Basic Forms.
- Click Add Handoff to add more handoffs as required. Complete all handoff settings for each handoff.
- Click Save to finish creating the workflow.
 Add a handoff field
You can add a handoff field to a form to allow mobile users to enter or select the email address for the user that the form needs to be handed off to. If you have used the Email List option this is not required.
To add a handoff field:
- Go to Forms and click
 to edit on the relevant form.
 - Click and drag either a Text or Drop Down field into the a screen that appears before the handoff. You may want to make this the final field that appears on the screen before the handoff. Pages are the equivalent of Screens for Basic Forms.
- Name the field to indicate that it is used to designate who the form will be handed off to.
- For example, name the field 'Handoff form to'.
- If the handoff field is a Text field the mobile user will need to manually type the email address of the person they are handing the form off to. If the handoff field is a Drop Down, click ADD CHOICES and either START FROM SCRATCH to manually enter the email addresses that can be selected from or use Reference Data to reference a list of available employee emails.
- Note that the email addresses must be users who have been assigned to the form.
- Click DONE and click SAVE. The handoff field will now be available when you create a workflow.
