Last Updated: December 08 2025
Overview
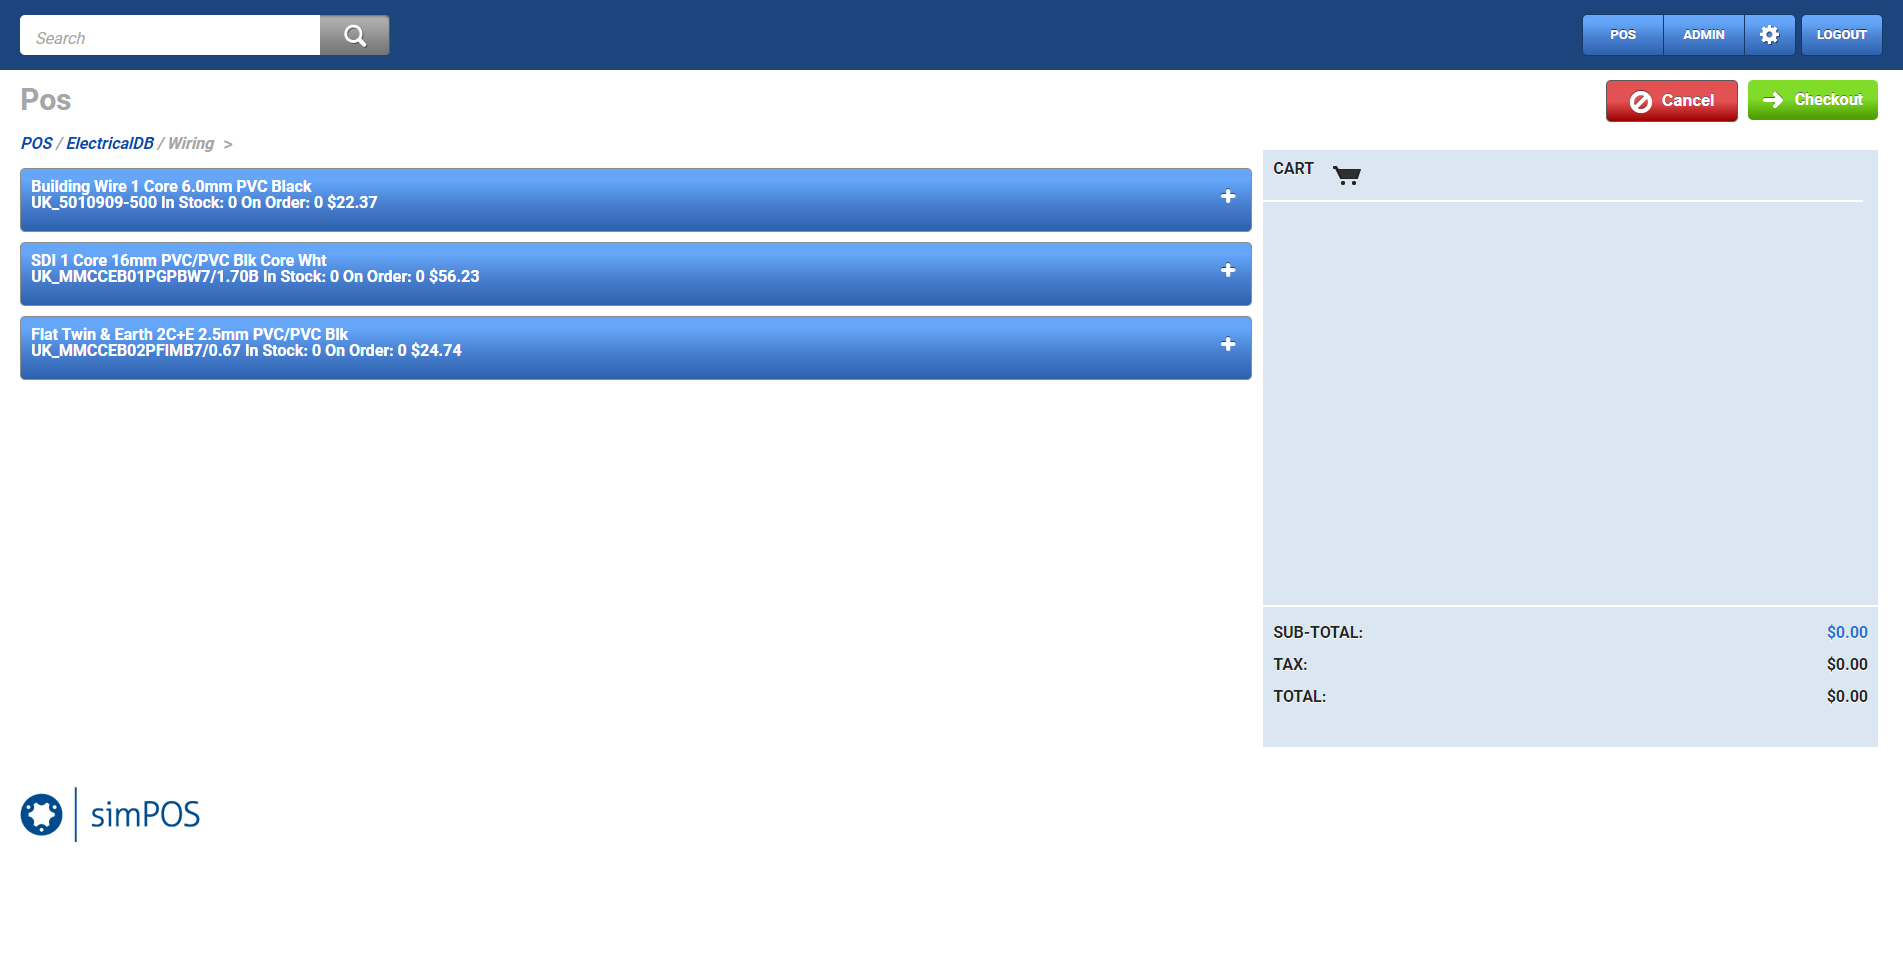
simPOS is a point of sale system that processes jobs, allocates stock and creates everything in the background to comply with standard Simpro Premium workflows. It allows the user on the front end to simply scan or choose what they are selling and then process the transaction.
While simPOS is browser-based and can run on any computer screen, it has been optimised for touch screen.
 Enable simPOS in Simpro Premium
After you have purchased the simPOS add-on, it is enabled in Simpro Premium. You can then allow employees to access simPOS by enabling the licence.
To enable simPOS licences:
- Go to People
 > Employees.
 - Click the employee to open their card file.
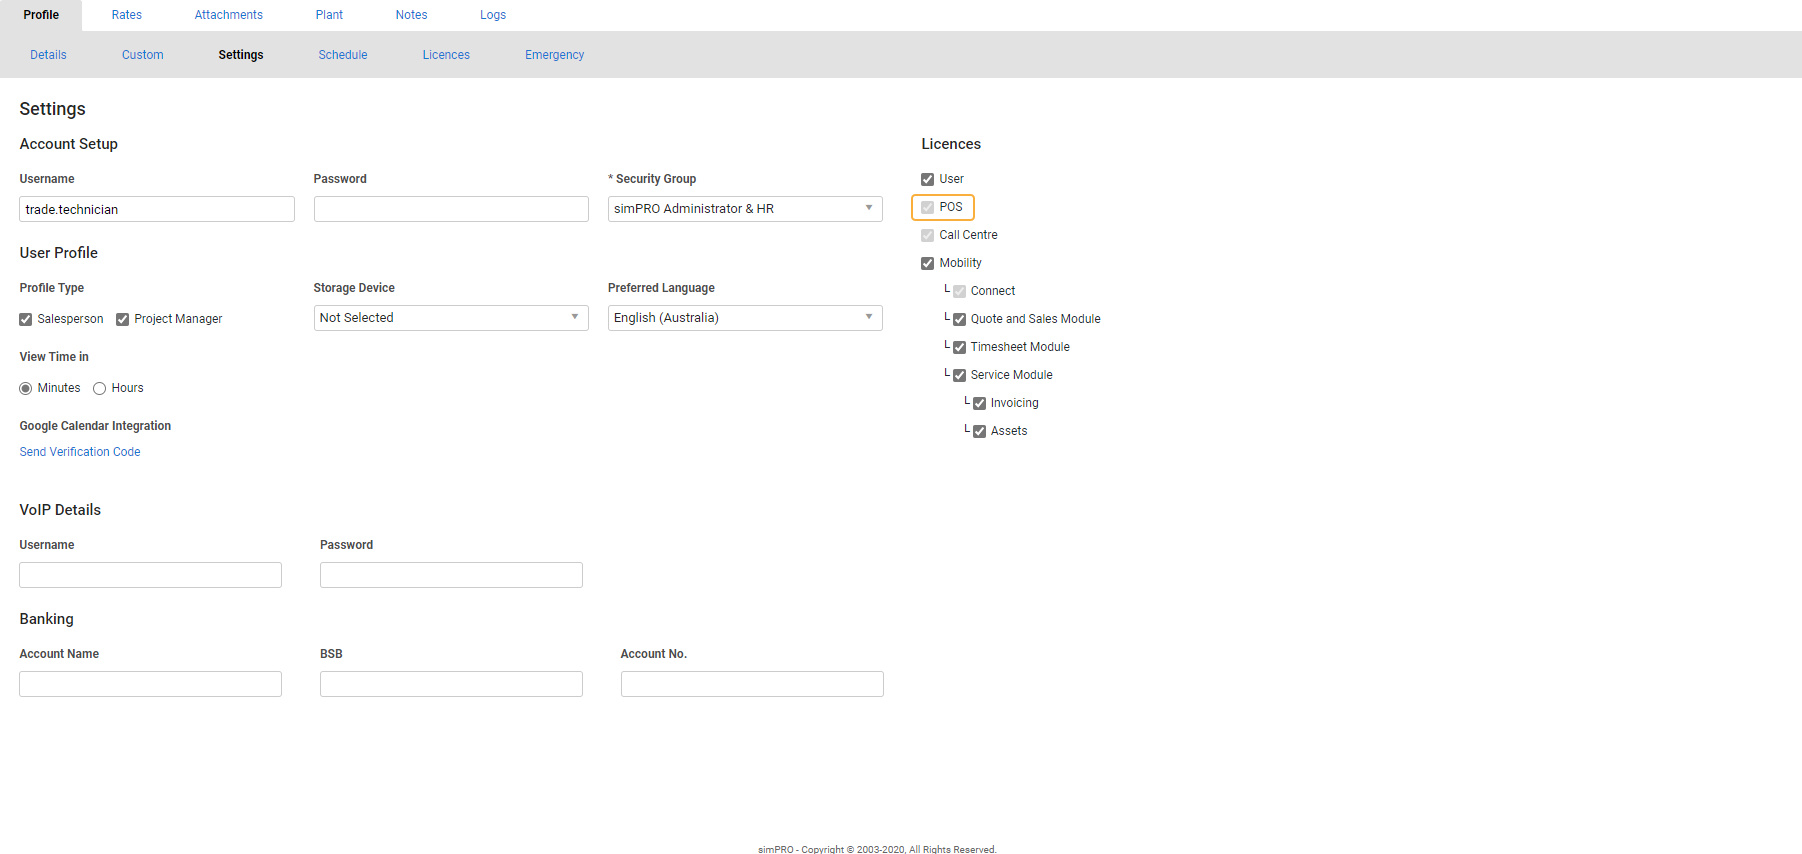
- Go to Profile > Settings.
- Ensure that the employee has a valid Username and Password.
- Under Licences, select either User to give the employee access to both Simpro Premium and simPOS. Or, select POS if the employee is only using simPOS.
- Click Finish.
A Simpro Premium user licence is not required to enable access to simPOS. Learn more in How to Use Licences.
 Log in to simPOS
To log in to simPOS:
- Make sure you are logged out of Simpro Premium.
- Enter your Simpro Premium URL in your browser's address bar and replace /staff with /pos. For example, if your regular Simpro Premium URL is 'trade.company@simprosuite.com/staff', your simPOS URL is 'trade.company@simprosuite.com/pos'.
- Enter your Simpro Premium Username and Password. This is the same username and password you use for logging in to Simpro Premium.
 Set up simPOS
The first time you log in, you are prompted to set up your company settings.
- Click Company Settings.
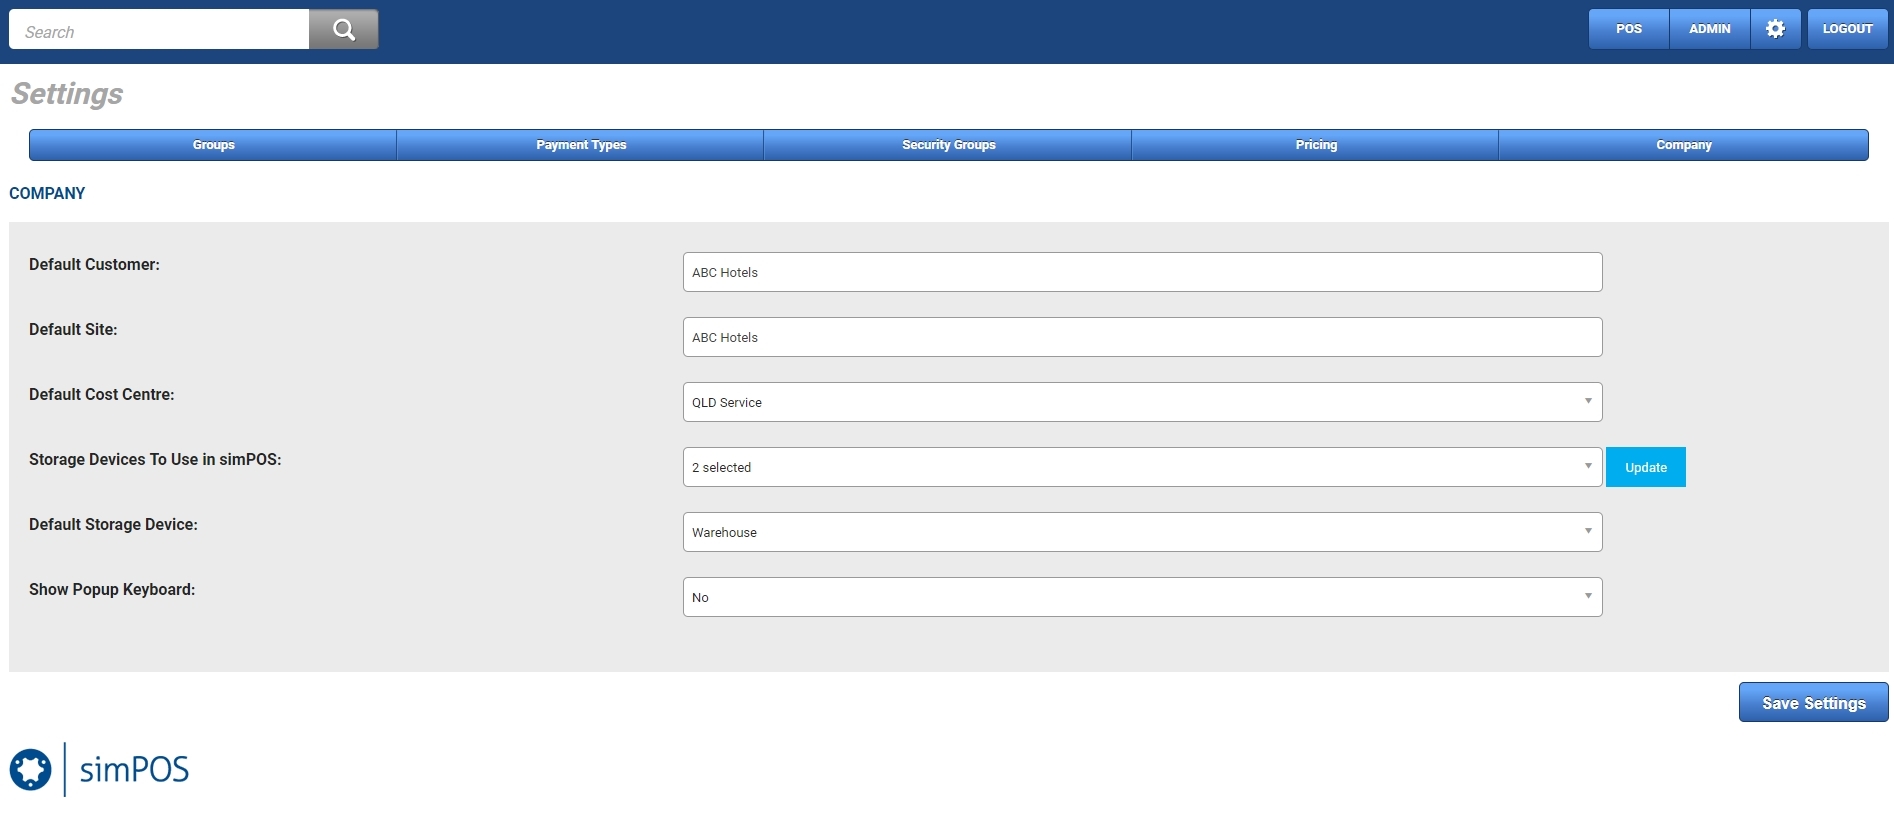
- Search and select a Default Customer. This customer is automatically selected when you create a transaction in simPOS, and can be changed for individual transactions.
- Note that any special pricing, such as discounts / fees and memberships set up on the customer card in Simpro Premium, apply to the transaction created in simPOS.
- Click Next.
- Select a Default Site. This site is automatically selected when you create a transaction in simPOS, and can be changed for individual transactions.
- Click Next.
- Select a Default Cost Centre. This cost centre is automatically selected when you create a transaction in simPOS, and can be changed for individual transactions.
- Click Next.
- Select any storage devices that you want to use for simPOS. Only stock stored in these storage devices can be purchased through simPOS.
- Click Update > Next.
You then have the option to start using simPOS or choose which area of simPOS to set up next.
To return to your company settings and adjust them, go to Settings > Company.
 Set up item groups
You need to set up which catalogue groups and subgroups in Simpro Premium you are using in simPOS.
To set up item groups:
- Click Item Groups.
- Click the drop-down list and select the check boxes for each group you want to enable in simPOS.
- Click Add.
- To add subgroups, click the name of a group, then select subgroups from the drop-down list in the same way. Within each group you can add three levels of subgroups.
- Click Add.
- To return to the list of groups, click Groups in the breadcrumb.
- To remove a group or subgroup, select the check boxes and click Remove.
- To save, click Save Settings.
Continue setting up by clicking the next setup area in the tabs across the top of the page.
 Set up payment types
You need to set up which payment methods use in simPOS.
To set up payment types:
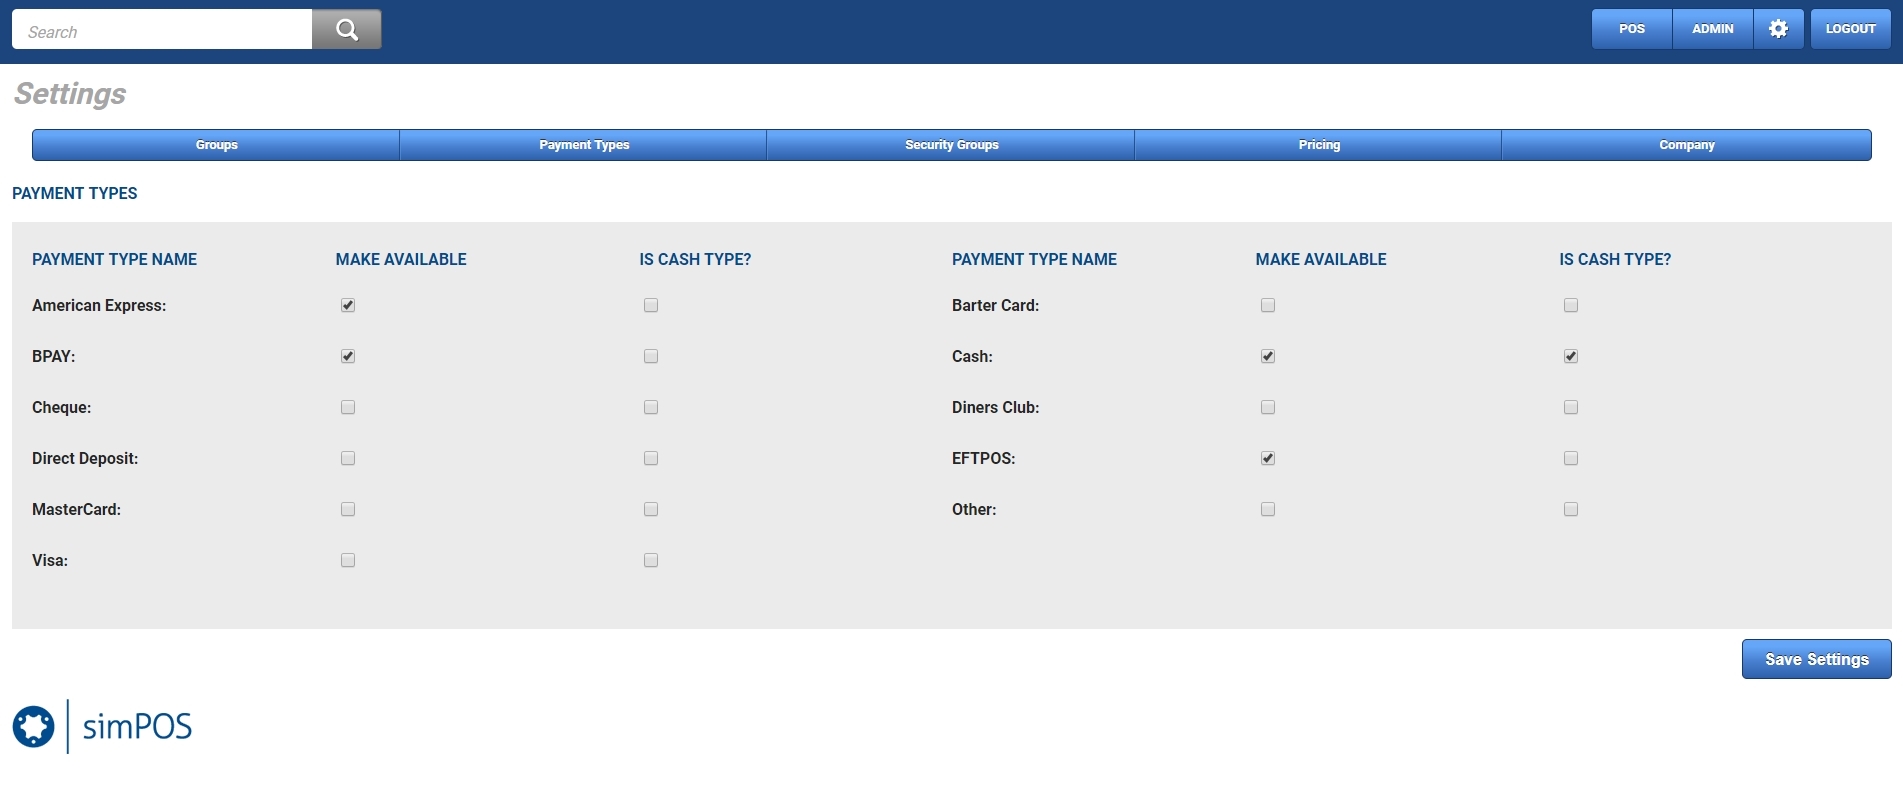
- Click Payment Types.
- If you are going to use a payment type, select the check box under Make Available.
- If a payment type is cash, select the check box under Is Cash Type?
- To save, click Save Settings.
Continue setting up by clicking the next setup area in the tabs across the top of the page.
 Set up security groups
You may have different employees who have different levels of access. Control how your employees can use simPOS with security groups.
To adjust employee access:
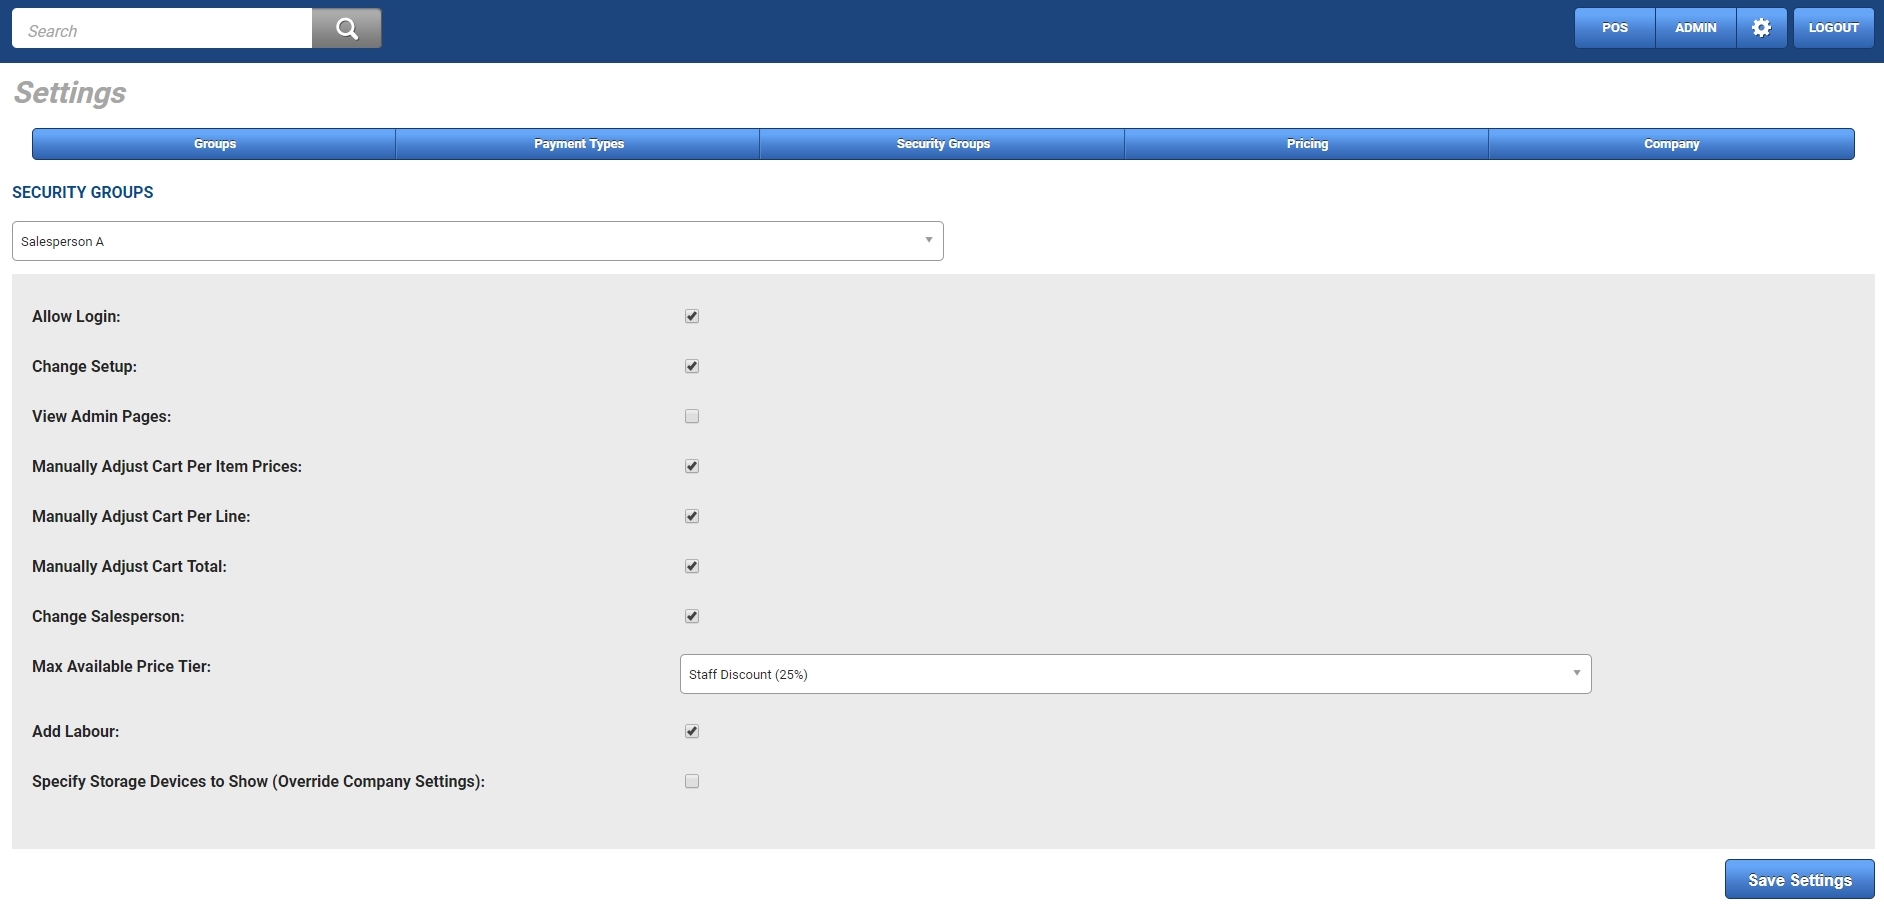
- Click Security Groups.
- Select the employee to adjust their access.
- To allow this employee to log in to simPOS, select Allow Login.
- To allow this employee to make changes to simPOS settings, select Change Setup.
- To allow this employee to access admin pages, select View Admin Pages.
- To allow this employee to adjust individual item prices in the cart, select Manually Adjust Cart Per Item Prices.
- To allow this employee to adjust item prices by line in the cart, select Manually Adjust Cart Per Line.
- To allow this employee to adjust the total price in the cart, select Manually Adjust Cart Total.
- To allow this employee to change the salesperson on a transaction, select Change Salesperson.
- To allow this employee to apply discounts to transactions, select a Max Available Price Tier. This option is only visible if you have created discount tiers.
- To allow this employee to add labour to a transaction, select Add Labour.
- To allow this employee to add stock not in the default storage to the cart, select Specify Storage Devices to Show.
- To save, click Save Settings.
Continue setting up by clicking the next setup area in the tabs across the top of the page.
 Set up pricing
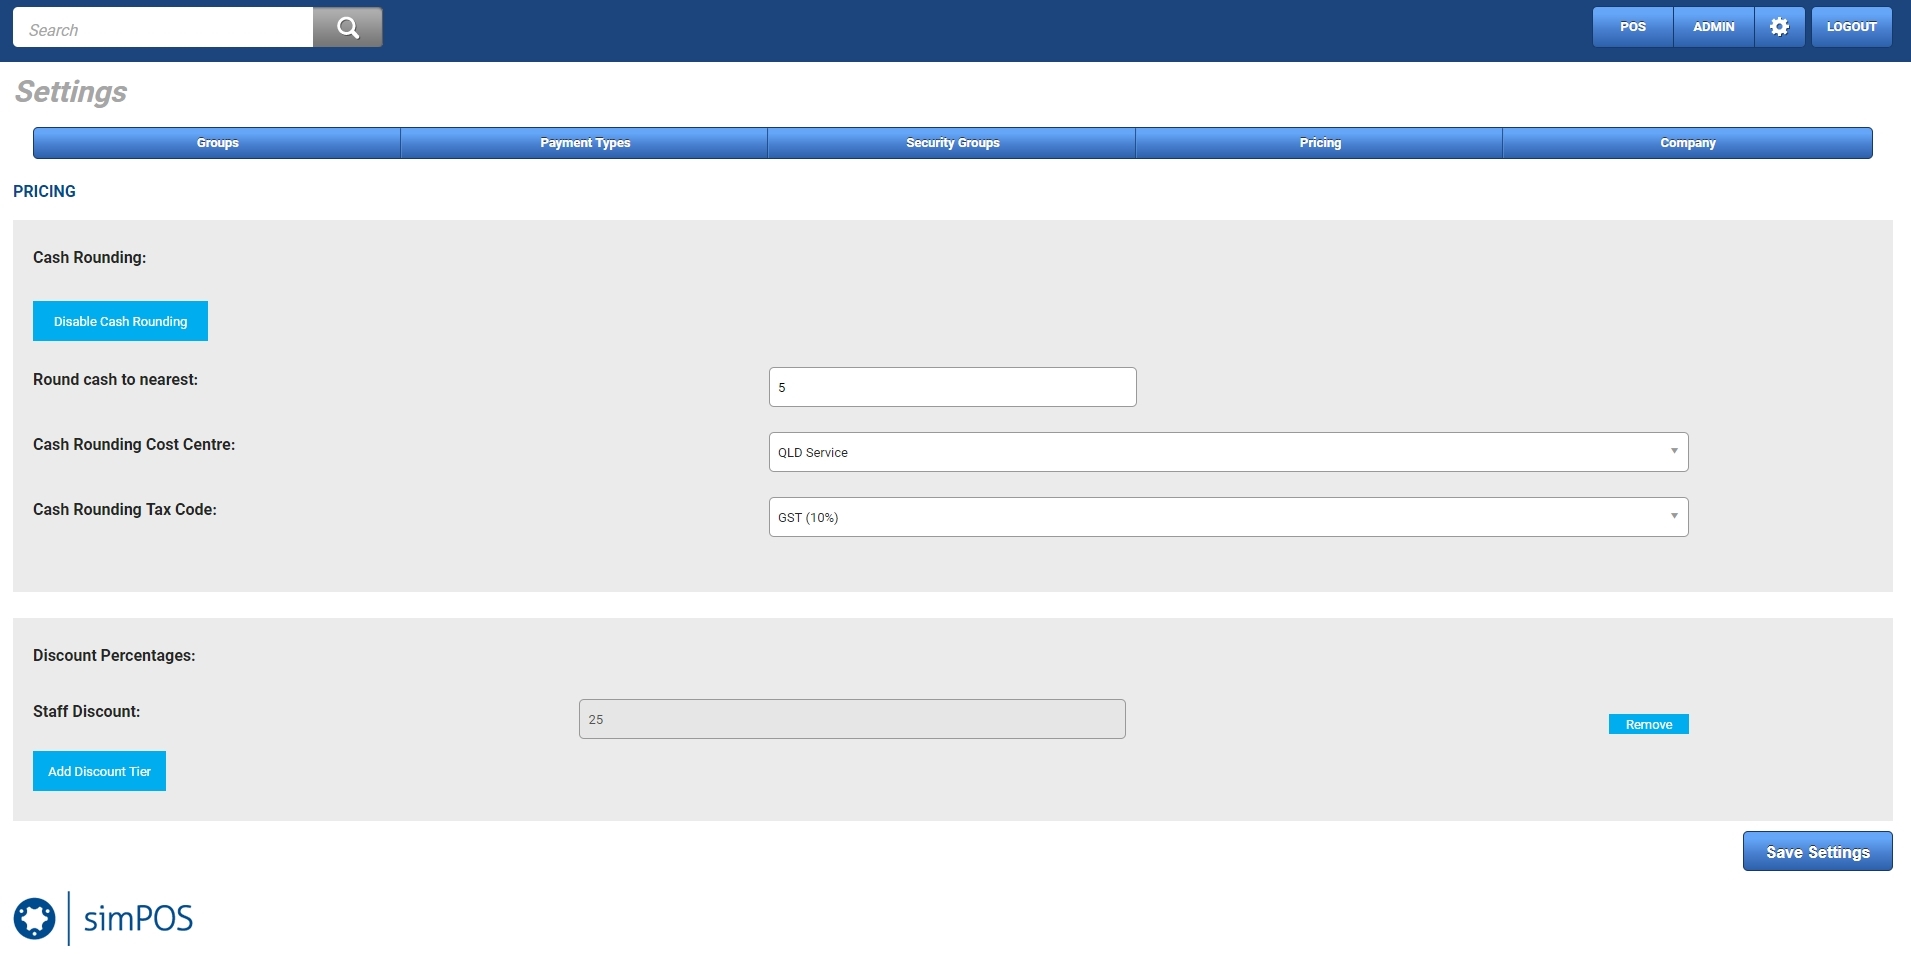
You can set up different discounts for loyalty programs or other special offers, and enable cash rounding.
To set up pricing:
- Click Pricing.
- By default, cash rounding is enabled:
- Adjust the nearest value that cash payments are rounded to.
- Select a Cash Rounding Cost Centre.
- Select a Cash Rounding Tax Code.
- To create a discount tier, click Add Discount Tier.
- Enter the discount name.
- Enter the discount percentage.
- Click Save.
- To save, click Save Settings.
 Additional company settings
After setting up your initial company settings, more settings are available.
- Go to Settings > Company.
- Select a Default Storage Device.
- Select if you want to show an on-screen keyboard. This is useful if you use simPOS on a touchscreen, but not necessary if you are using a computer.
- Adjust other settings as necessary.
- Click Save Settings.
