Last Updated: December 12 2025
Overview
Access the contractor portal to view and update jobs and quotes created in Simpro Premium. You only see work orders and invoices for your contractor company.
US only: If you use Simpro Premium in the United States, the term 'work order' is used instead of 'job card'.
 Required setup
Before performing the steps detailed below, ensure that this part of your build is set up correctly. The relevant steps to set up the features and workflows detailed in this article can be found here:
 Log in to the contractor portal
To log in, you need your login details, including a URL, or web address, username, and password as provided by your Simpro Premium user.
To log in to the contractor portal:
- Enter the URL in your web browser.
- Enter your Simpro Premium Username and Password.
- Click Login.
You are then taken to the Pending Jobs page in the portal.
You can access the main menu options across the top of the screen and your company and name appears in the top right corner next to the logout icon.
 Create a new staff member
You can add staff members so that they can be scheduled and receive work orders. Once you have submitted a staff member, a Simpro Premium user needs to set up their username and password before they can log into the portal.
To create a new staff member:
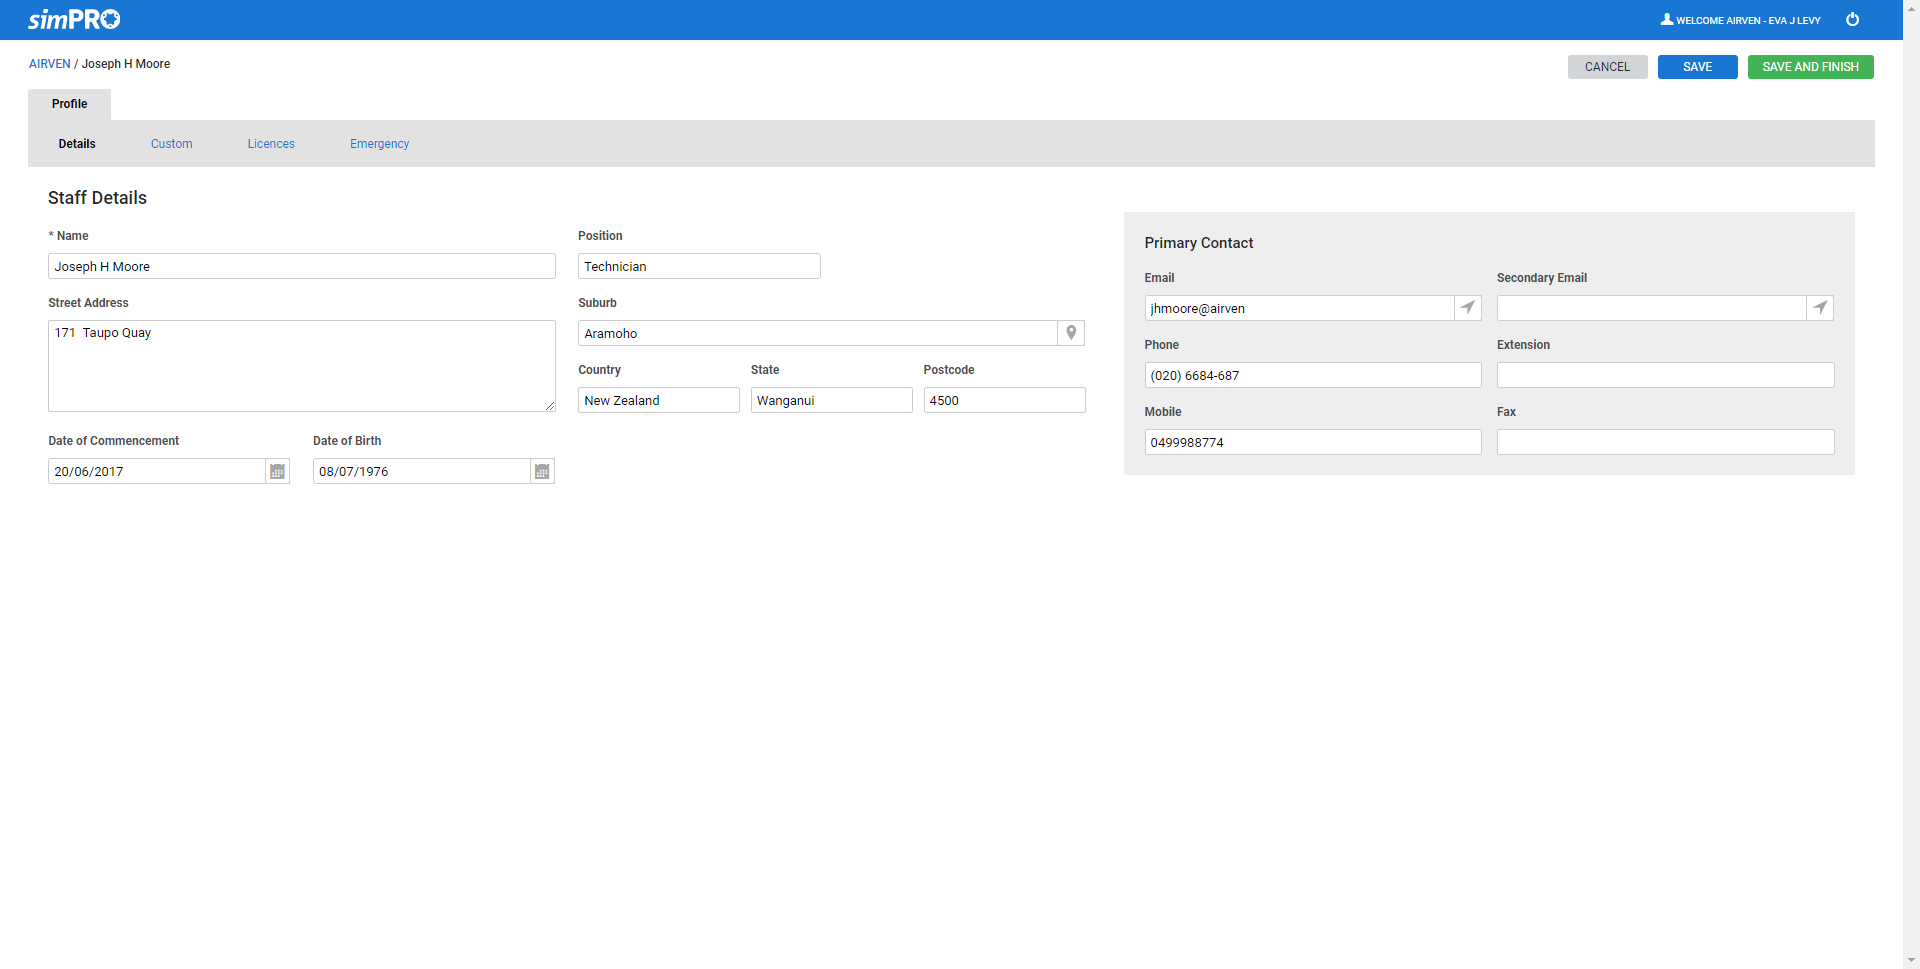
- Go to Staff, then click Create New.
- Enter the Name, Position, and Street Address of the staff member.
- Select the Date of Commencement and Date of Birth if required.
- Enter Primary Contact details.
- Go to Custom to enter additional information about the individual according to custom fields.
- The Custom tab only appears if custom fields have been set up by the Simpro Premium user.
- Go to Licences to enter any relevant licences that the individual holds.
- Enter the Licence Name, Licence Reference, Licence Expiry Date, Description / Notes and Attachments, then click Save. You can then select the Licence Name when editing or creating other staff members.
- When a staff member's Licence Expiry Date is approaching, the Simpro Premium user receives an alert.
- Go to Emergency to enter emergency contact details for the staff member.
- Click Save and Finish.
- Click View Staff.
- Alternatively, click Add New to continue creating staff members.
 Schedule staff
Navigating in the Schedule tab
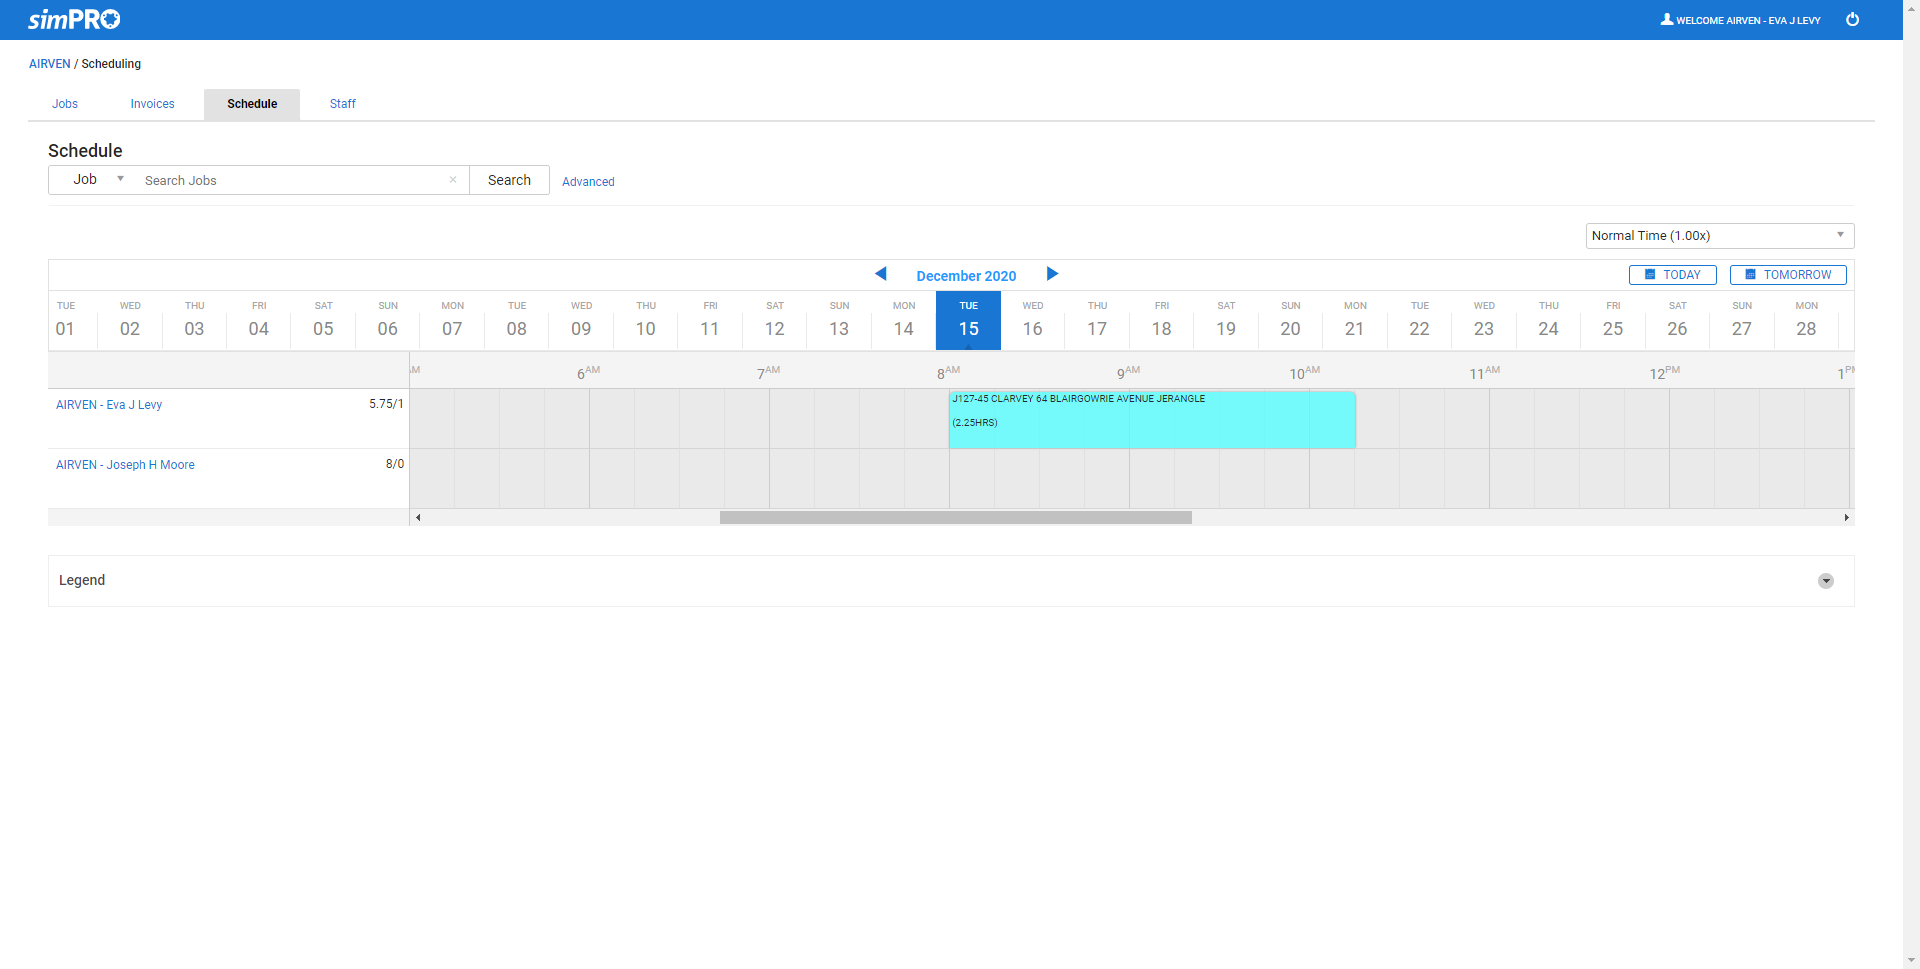
The current / selected day appears at the centre of the schedule view so you can easily view where in the week the new month starts and create schedules accordingly.
To navigate, you can click and drag the calendar forward or backward, as required. When you select a new date to view schedules, the selected day is aligned to appear at the centre of the schedule view.
Click Today to return to the current date in the schedule view and click Tomorrow to view the next day's schedule.
Click the month name to view the date picker. Note that it only displays the month for the selected date and does not span across two months. For example, if you click November 2020 / December 2020 displayed in the image above, the date picker shows the Dec 2020 calendar as the selected date is Dec 1.
The scrolling schedule day view is not currently supported on touch-screen devices.
To schedule staff to jobs:
- Go to Schedule.
- Next to the search bar, select Quote / Job.
- Search and select the quote / job.
- If required, under the Job No. select the applicable cost centre, and select the schedule rate.
- Click the month above the schedule to select the date from the date picker.
- Alternatively, click and drag the calendar or click the blue arrows to adjust the month, then click the date.
- Click to add a schedule block to the time against the contractor name.
- Click to drag the schedule block to another time, or hover over the block, then drag the white arrows to extend or shorten it.
Consult the Legend below the schedule to determine job status by colour.
Once a schedule block has been placed, right-click it to view the following options:
| Cut Schedule |
Cut this schedule block so that it can be pasted to another staff member. Click and drag on the schedule to paste the block. Cutting and pasting or moving a schedule block from one staff member to another. Removes the original work order and creates a new work order. |
| Copy Schedule |
Make a copy of this schedule that can be pasted to another staff member. Pasting a schedule to another staff member creates a new work order. |
| Remove Block |
Remove this schedule block. Removing a schedule block also removes the work order. |
| Remove Schedule |
Remove all blocks for this schedule on the given day. Removing all schedule blocks also removes the work orders. |
| Jobcard | View or Print the job card for this schedule. |
 Mark a job as complete
Once the work for a job has been completed, you can mark the job as complete.
To mark a pending job as complete, go to Jobs ![]() > Pending, then click Options > Mark as Complete on the applicable job. The job now appears under Jobs
> Pending, then click Options > Mark as Complete on the applicable job. The job now appears under Jobs ![]() > Complete.
> Complete.
Use the Advanced search to filter jobs by status. Contractors assigned to multiple companies can select statuses from each assigned company which may result in duplicate statuses. You can select any status to filter all results from all companies.
Contractor work orders that are marked as Complete in the Contractor Portal appear in the Approved tab in Simpro Premium. Work orders available on this tab can be actioned by clicking Options next to the work order.
Learn more in How to Manage Contractor Work Orders.
 Update the job card
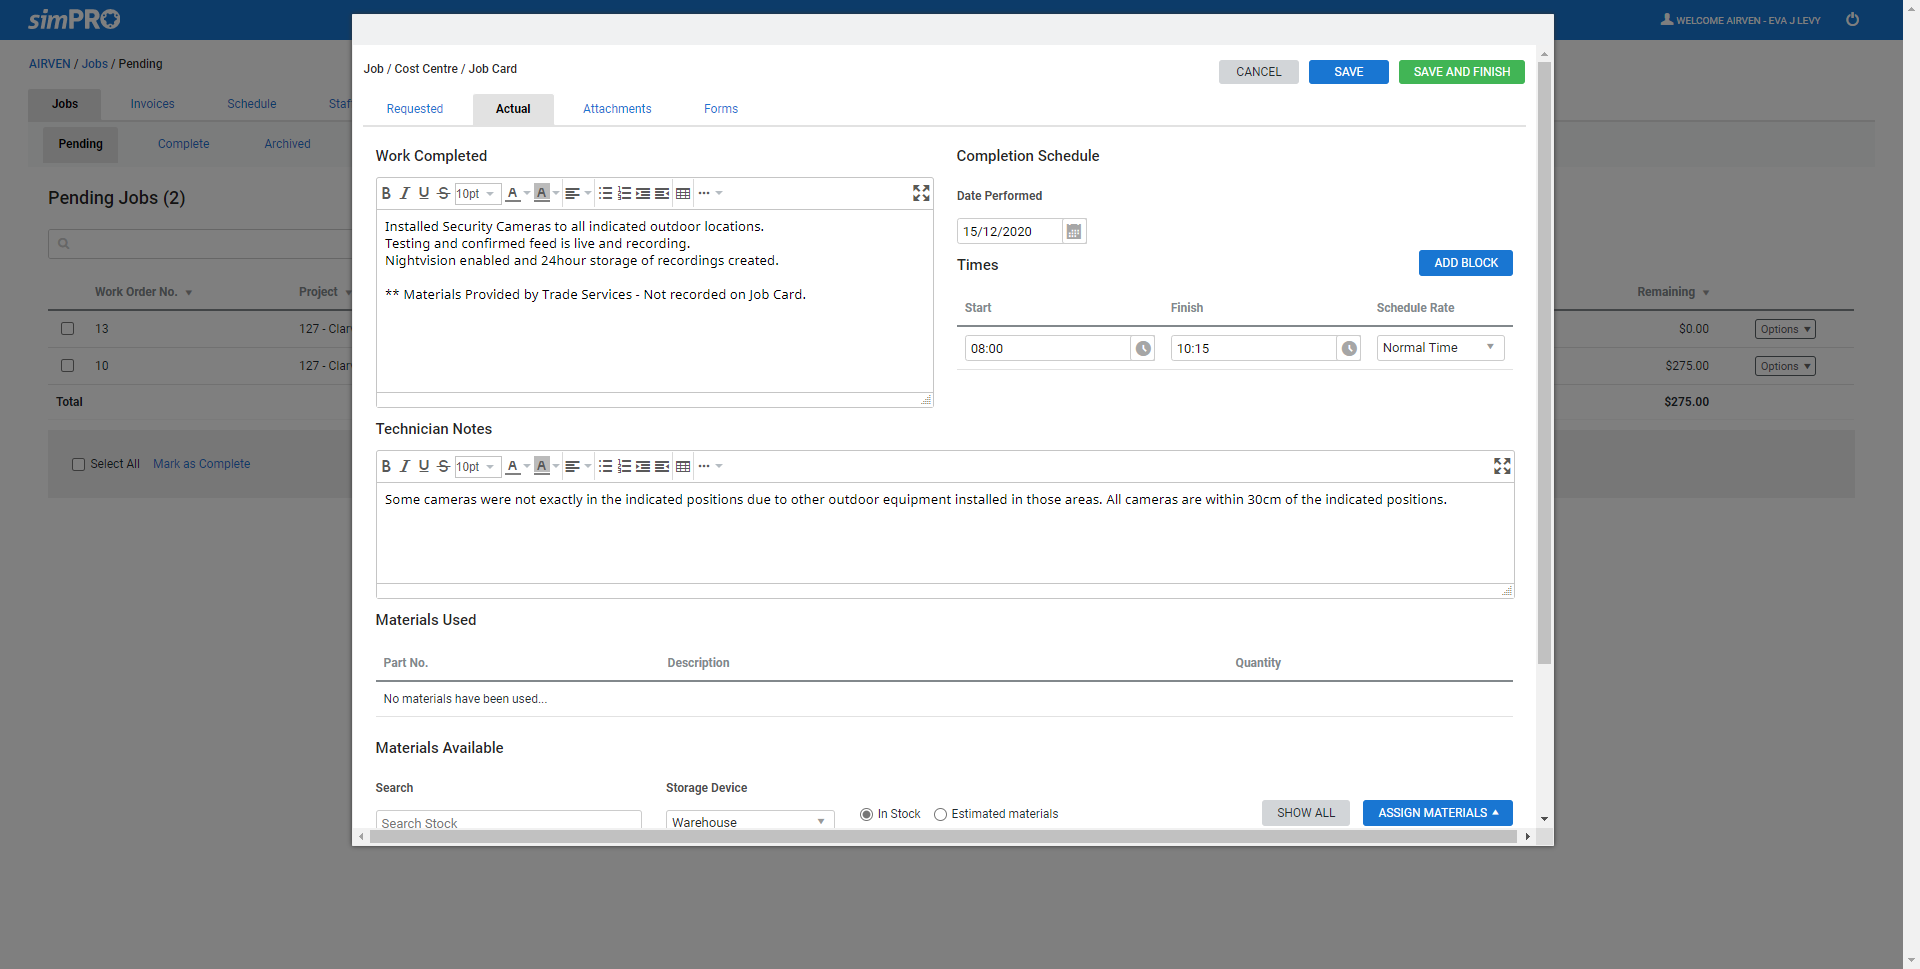
After you have completed the job, you can record the actual work completed in the job card.
To update a job card:
- Locate the job in Jobs
 > Pending / Complete.
 - Click Options > View Job Card on the job.
- Click the Actual tab.
- Enter the Work Completed.
- Select the Date Performed.
- Click Add Block to add schedule blocks if applicable, then select a Start and Finish time and the Schedule Rate.
- Enter Material Notes.
- Under Materials Available, select a Storage Device, then search and select the materials you wish to assign.
- Enter the Quantity, click Assign Materials.
- Click the Attachments tab to upload any relevant attachments.
- Click Save and Finish.
 Approve and reject RCTIs
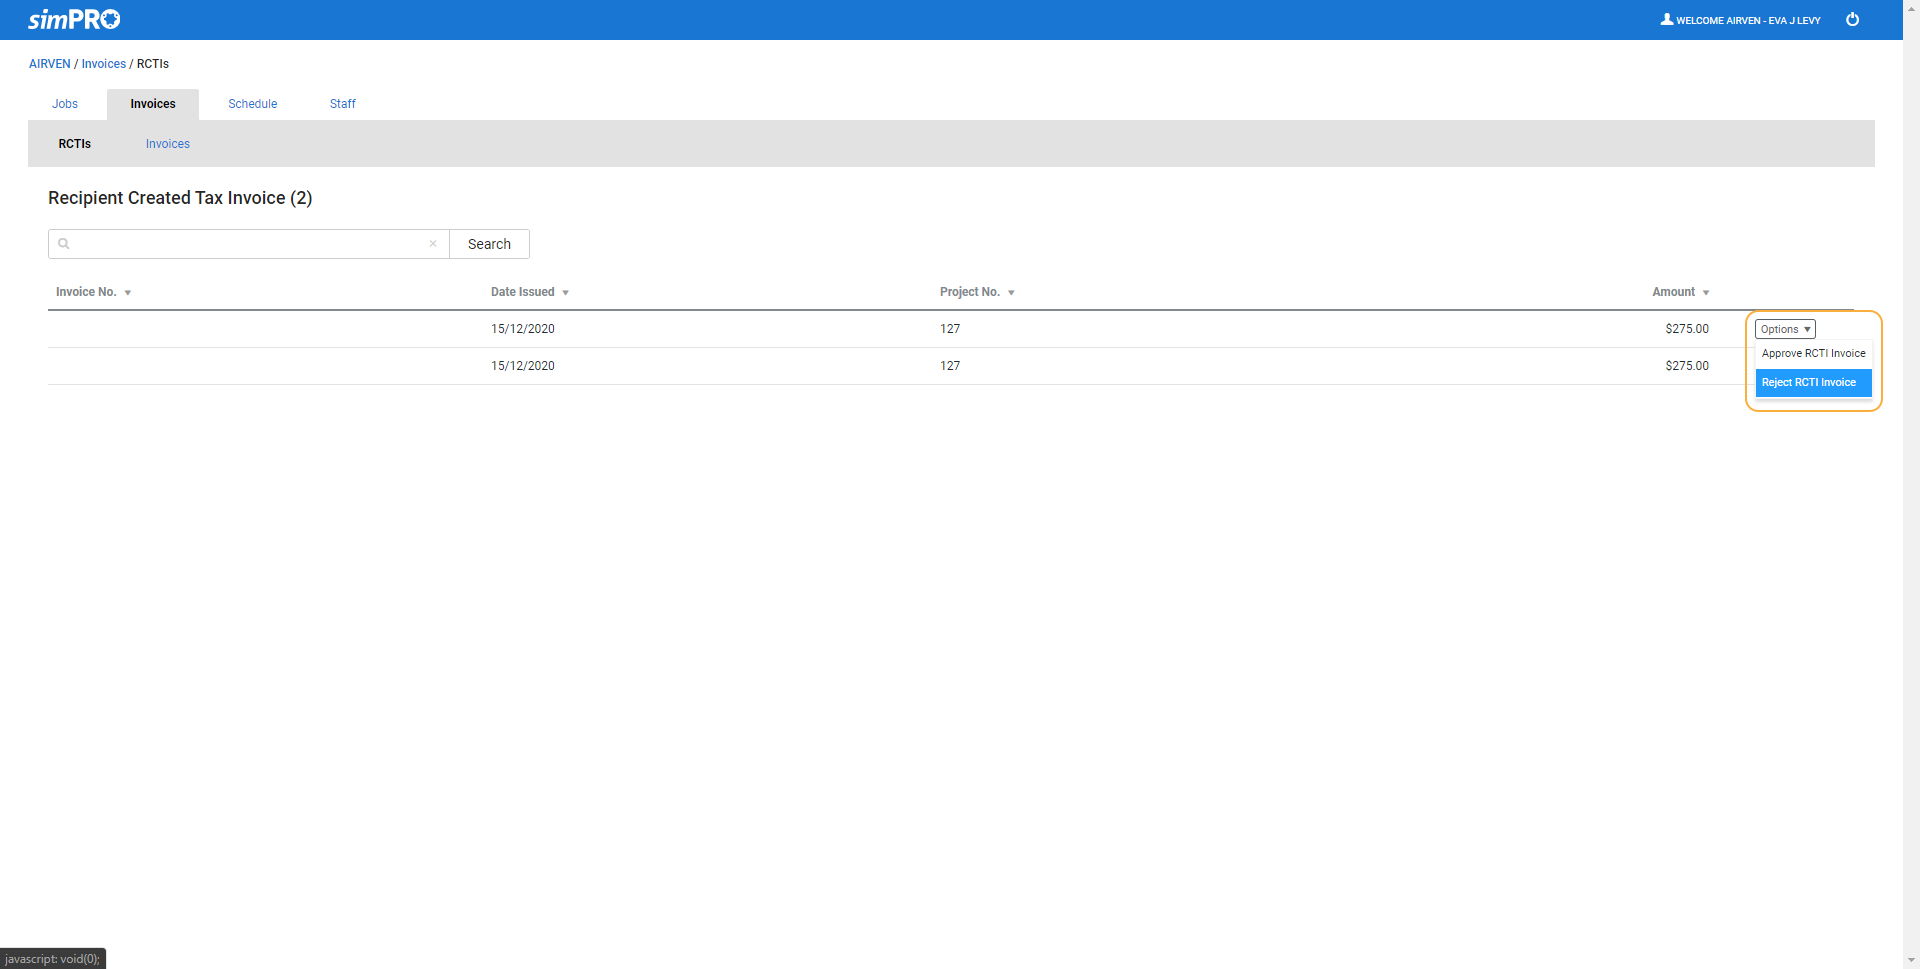
View and approve or reject recipient-created tax invoices, or RCTIs, in the contractor portal as created by the Simpro Premium user.
To approve or reject RCTIs:
- Go to Invoices
 > RCTIs.
 - Review the Amount column for the RCTI.
- Click Options > Approve RCTI Invoice / Reject RCTI Invoice as required.
- If you have rejected the RCTI, enter a Reject Reason, then click Reject.
When the RCTI is approved or rejected, it is removed from the Recipient Created Tax Invoice list.
 View attachments in the contractor portal
- Go to Jobs
 > Pending / Complete / Archive.
 - Click Options.
- Click View Job Card.
- Click Attachments.
- If there are viewable attachments, click the required attachment. The selected attachment opens in a new tab.
