Last Updated: December 12 2025
Overview
Custom fields can be used to store additional information such as a customer's alternate email, or alternate contact person. After they are created, custom fields can be found under the Custom tab in each record.
You can use Simpro Premium's API to lock certain custom fields, which makes them view-only to the Simpro Premium users. Users can’t make changes to the data in the locked fields but the fields can still be updated via the API, ensuring that the information stored in Simpro Premium is always accurate and reliable.
You can create the following types of fields:
| Text | Enter a small amount of text. |
| Date | Select a date from a date picker. |
| List | Choose from a drop-down list of options. |
| Numeric | Enter numerical values only. |
| Hyperlink | Enter a valid URL. |
 Required setup
In order to view content or perform actions referred to in this article you need to have the appropriate permissions enabled in your security group. Go to System![]() > Setup > Security Groups and access your security group to update your permissions. The relevant security group tab and specific permissions for this article can be found here:
> Setup > Security Groups and access your security group to update your permissions. The relevant security group tab and specific permissions for this article can be found here:
 Create a custom field
To create custom fields:
- Go to System
 > Setup > System Setup > Custom Fields.
 - Click the record that the custom field applies to, such as Customers.
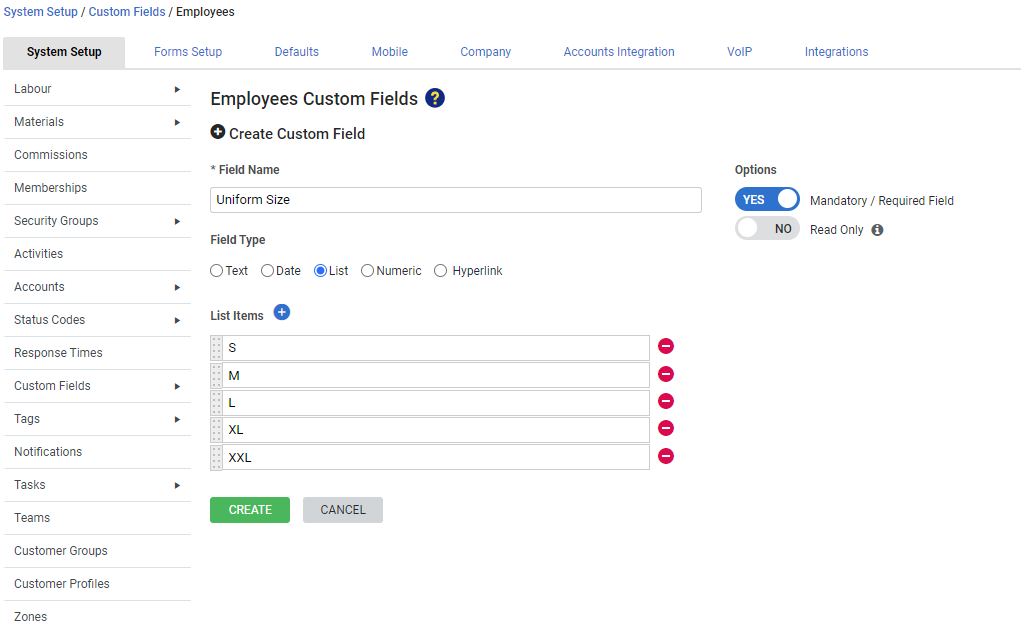
- Click Create Custom Field.
- Enter a Field Name.
- Select the Field Type.
- Select Hyperlink if you need to record any specific URL as a custom field. You can navigate to the link in a new tab using the
 button beside the field.
- Select Hyperlink if you need to record any specific URL as a custom field. You can navigate to the link in a new tab using the
- Under Options:
- Toggle on Mandatory / Required Field to make it a compulsory field.
- Toggle on Read Only to lock the custom field.
- For the List Field Type, click the
 icon to add more options to the list. Click the
  icon to remove options from the list.
 - Click Create.
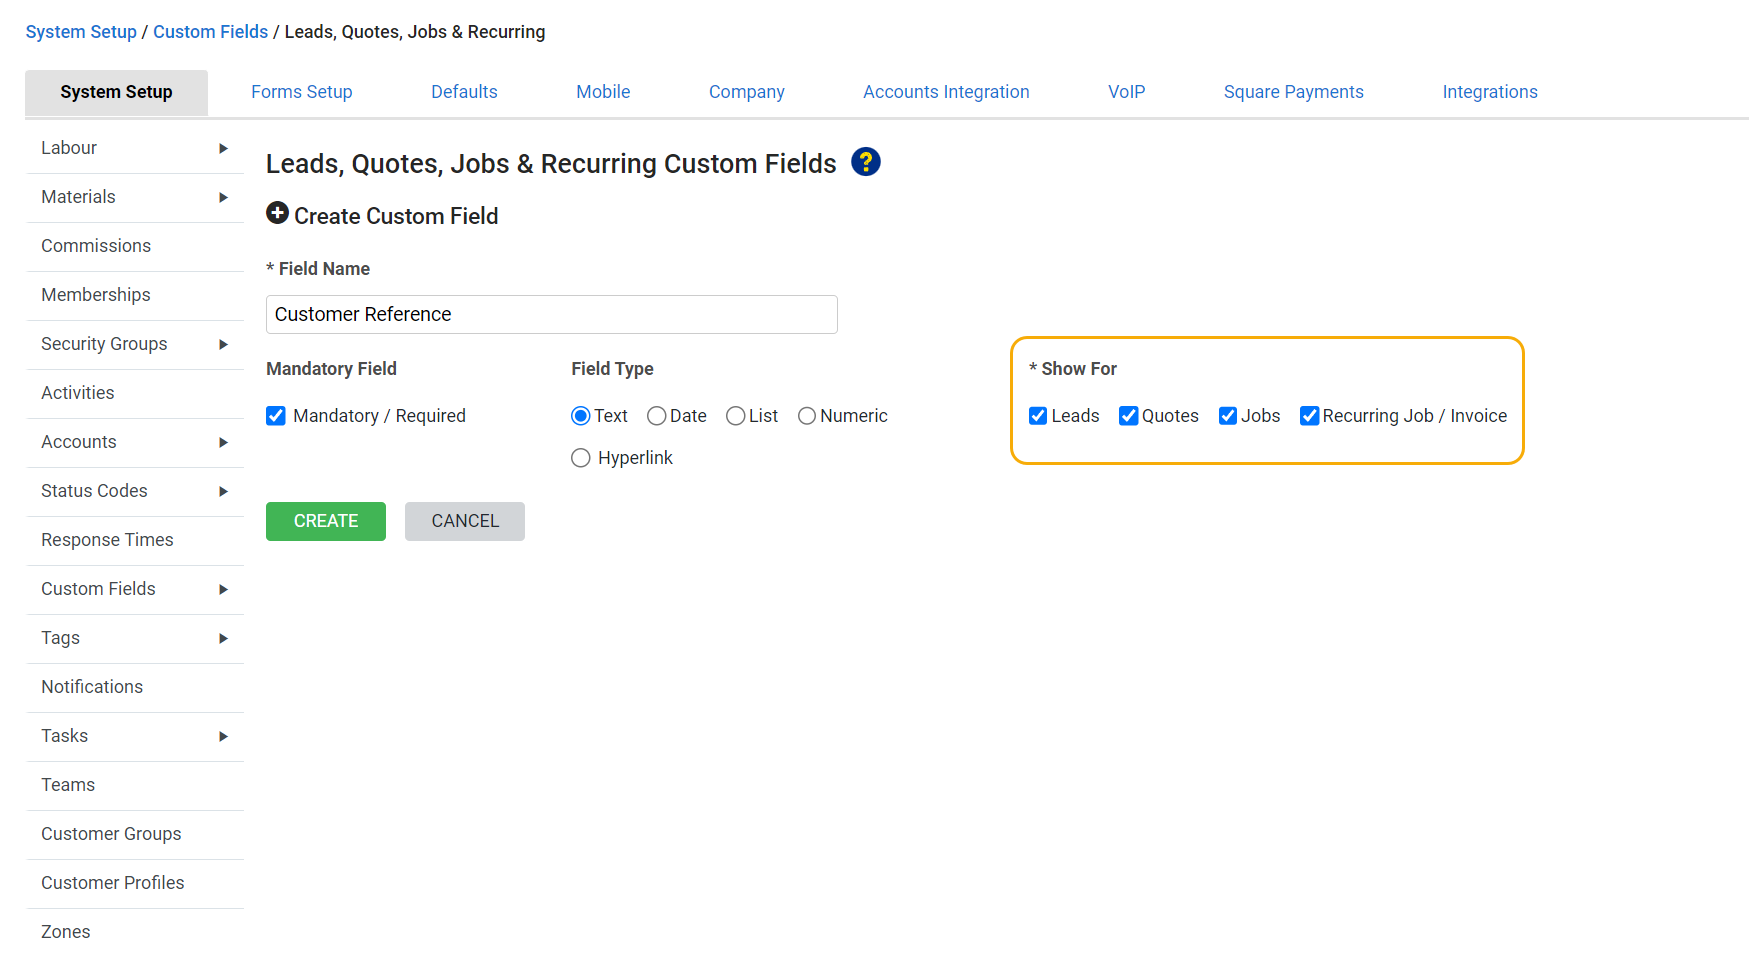
An additional Show For check box appears when creating custom fields for quotes, jobs, recurring jobs / invoices, and leads.
 Add custom fields to table view
You can add custom fields to the table view so you do not have to open each record. Modifying the table view changes the table view for all users, not just the logged-in user.
To add a custom field to the table view:
- When viewing a table, click Modify Table View next to the search bar.
- Select the check boxes for the custom fields.
- Click Save and Finish.
You can select and view custom fields for the related section only. For example, a custom field created under Customers is only available when creating or editing customers.
After you have added custom fields to the table view, you can sort the table by these fields by clicking the heading of the custom field column.
Learn more in Modify the data table view.
Tips
- Use drag handles in Modify Table View to reorder fields and options.
- You can have up to 15 columns displayed in table view.
- If you include custom fields as column headers, you need to click All before the data can be reordered. Learn more in Reorder data.
Modify Table View can be limited to certain security groups. Only users with access to it can add or make changes to the table view.

