Last Updated: December 15 2025
Overview
Most of your data in Simpro Premium is organised in tables. For example, when you go to People ![]() > Customers, or to Materials
> Customers, or to Materials ![]() > Catalogue, the blue and white list of items is a data table.
> Catalogue, the blue and white list of items is a data table.
Almost all Simpro Premium data tables share the same features. You can also use search options to filter and locate table items. Learn more in How to Search Simpro Premium Data.
You can limit the number of rows per page in a data table to improve load times. Learn more in How to Set Up System Defaults.
 Required setup
In order to view content or perform actions referred to in this article you need to have the appropriate permissions enabled in your security group. Go to System![]() > Setup > Security Groups and access your security group to update your permissions. The relevant security group tab and specific permissions for this article can be found here:
> Setup > Security Groups and access your security group to update your permissions. The relevant security group tab and specific permissions for this article can be found here:
 Scroll up and down a data table
In addition to your browser scrolling options, you can also use the Simpro Premium scrolling options on the right side of the screen to quickly move up and down.
Clicking the down arrow scrolls to the bottom of the page.
Clicking the middle up arrow scrolls up to just under the main menu and global search bar.
Clicking the top up arrow scrolls up to the very top of the page.
 Modify the data table view
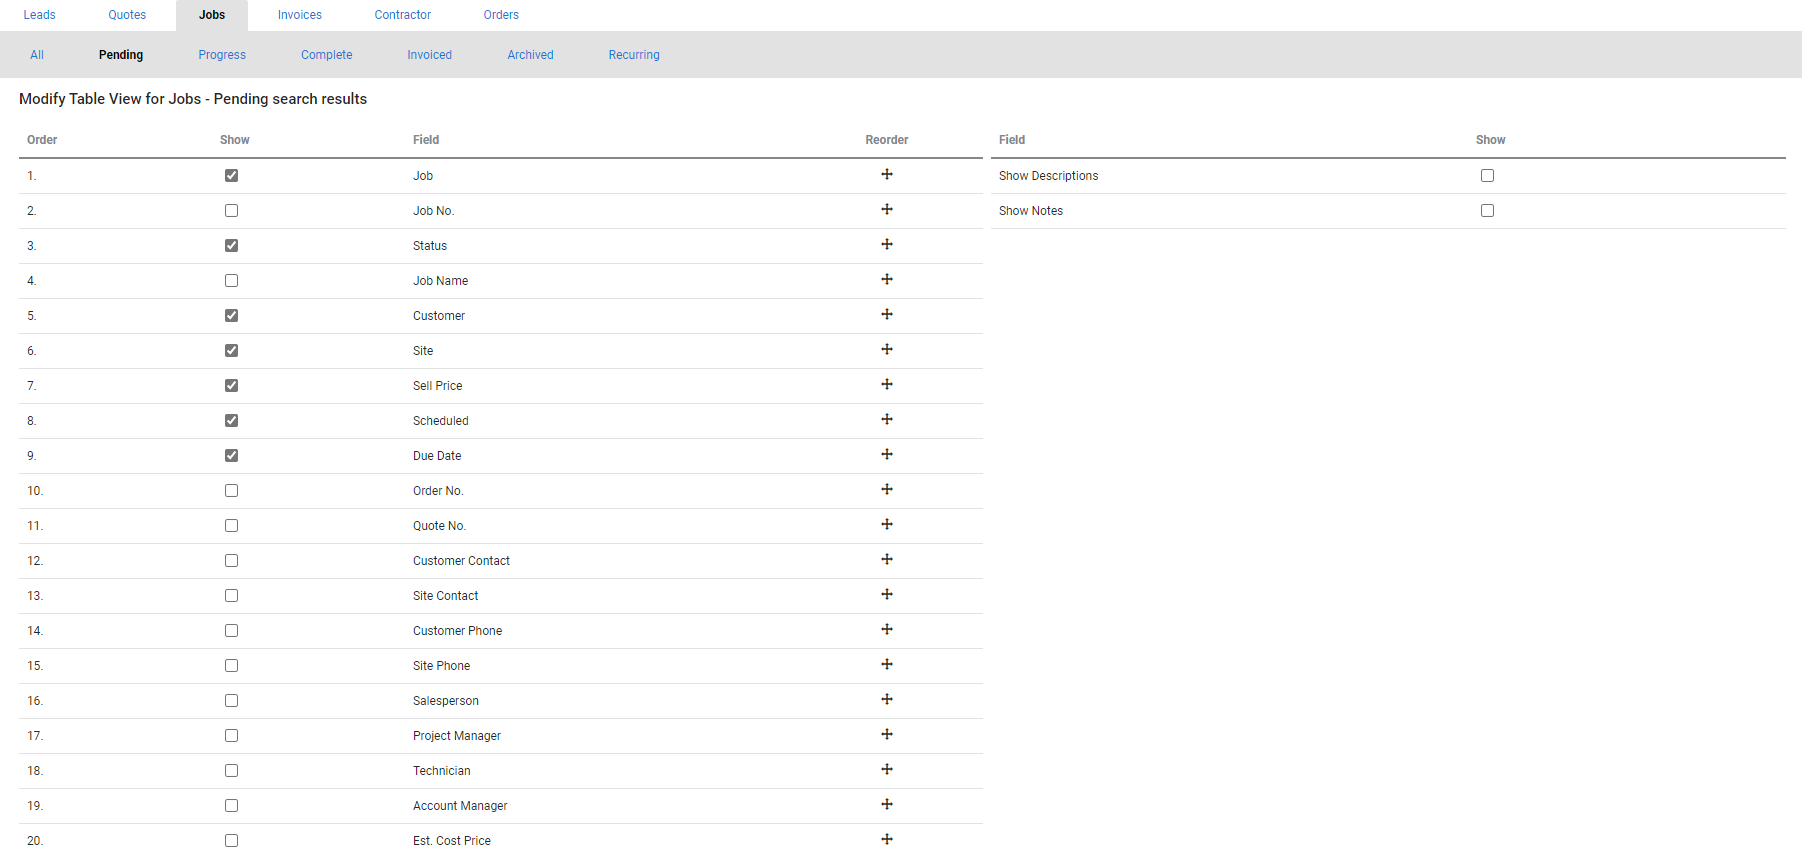
Click Modify Table View to adjust which information fields appear in a data table and the order they appear in.
To reorder the columns in a data table, click and drag the ![]() icon. Then select the Show check box for the fields you want to include in the table, and clear the check box for fields you want to exclude.
icon. Then select the Show check box for the fields you want to include in the table, and clear the check box for fields you want to exclude.
If you select to Show a field and then reorder it, the Show check box clears, so be sure to reorder fields first and then select or clear their check boxes.
Click Save and Finish to save your changes and view the updated data table.
You can only select up to 15 columns to display. Using Modify Table View changes the table view for all users. It is recommended that you use security groups to restrict modifying table view to only certain employees. Learn more in How to Set Up Security Groups.
 Create a new group, subgroup, or data entry
At the top right of most data tables, such as for People, Materials, and Tasks, you can create a new related data entry to include in the list by clicking the Create button. Some tables, such as Pre-Builds and Catalogues, also have an option to organise table items by creating groups and subgroups.
 Access individual table item options
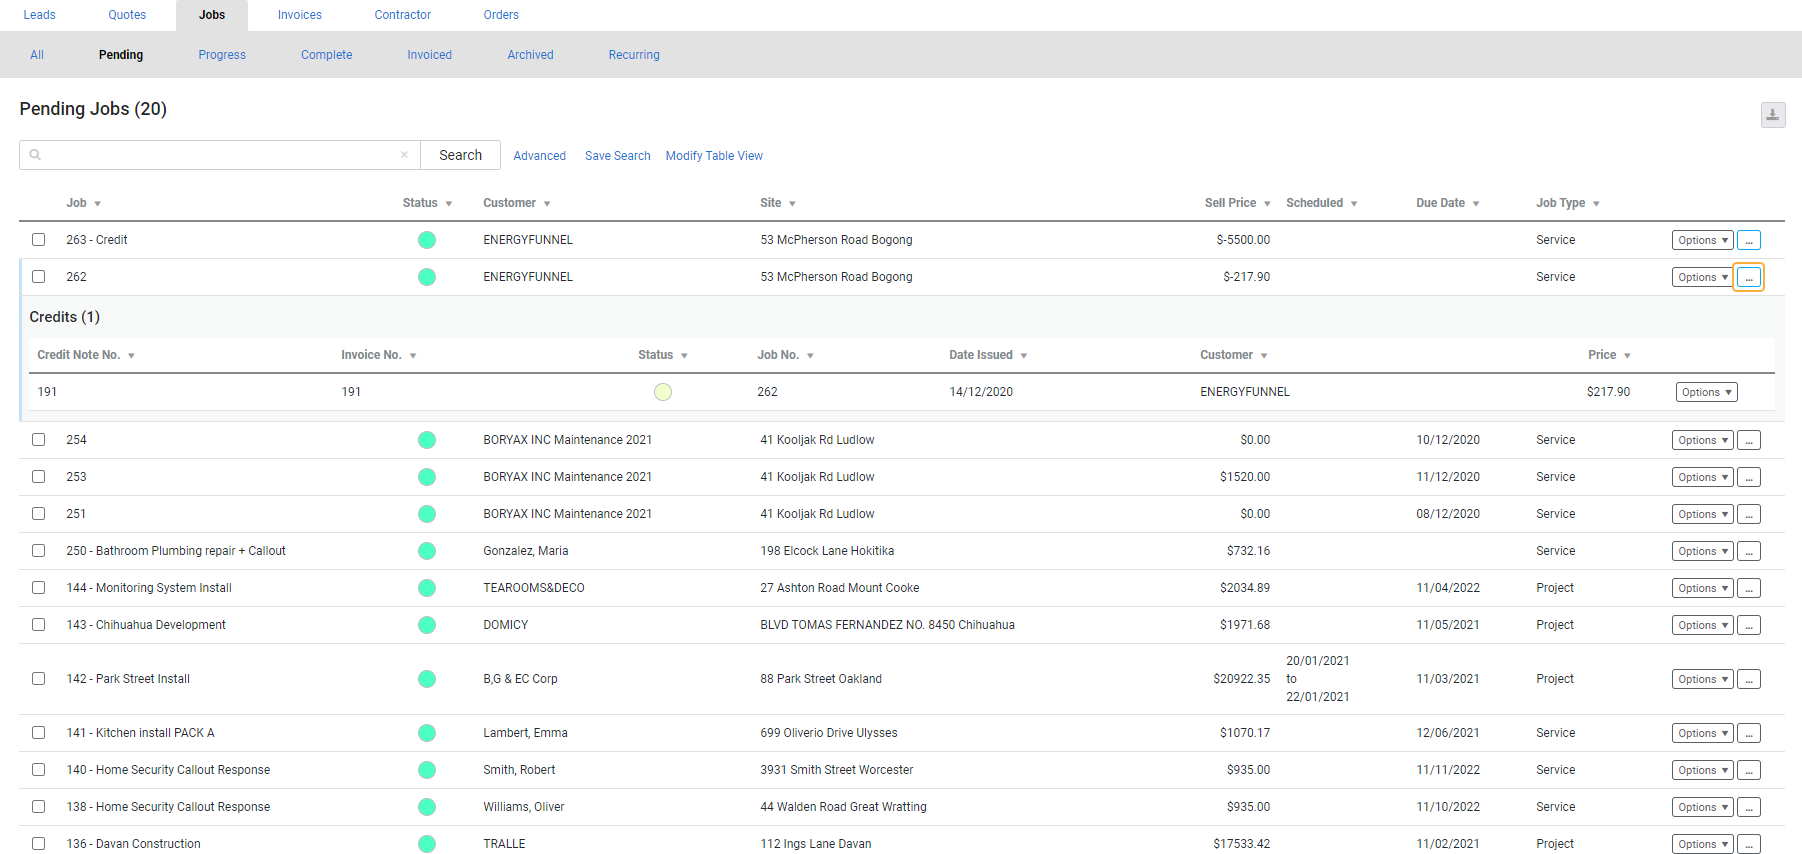
Click Options on an item in a data table to view the available actions. You can also right-click on the item to view the options list.
When viewing data tables for leads, quotes, jobs, invoices, contractor work orders or purchase orders, click '...' next to Options to view related data entries. For example, a job that has been invoiced has the invoice listed underneath it.
 Apply footer options to multiple data entries
Use the footer options below a data table to apply settings or perform actions for multiple data entries at once, for example, when you wish to archive entries in bulk.
Select the check boxes for the data entries, then click the action in the footer options. These actions vary for different data tables and are usually similar to the actions available in Options.
If you are changing settings for multiple data entries at once, you can also select from the drop-down lists in the footer options, then click Update.
You can also Select All to apply footer options to all data entries on the current page.
 Reorder data
You can reorder data in a table according to one of its column headers in alphabetical or reverse alphabetical order, or if the column includes numbers, in ascending or descending order. To do this, click the grey triangle in the applicable column header.
In some data tables, such as the Catalogue, Pre-Builds, Take Off Templates, and Tasks, you can change the order in which individual data entries and groups and subgroups appear. To reorder an entry, click and drag the grey bar on the left to the position.
If you have included custom fields as column headers, you need to click All in the page numbers below the data table before you can view and click the grey triangle in the custom field column header. Learn more in Modify the data table view.
 Export a data table as a CSV
You can export a data table as a CSV file by clicking the ![]() icon in the top right of the table, then clicking CSV.
icon in the top right of the table, then clicking CSV.
A CSV file downloads containing all information included in your current view of the table, that is, only the columns, rows, and included data displayed on the page.

