Last Updated: December 08 2025
Overview
Set up the layout of the overdue letter forms that you send to customers with outstanding accounts, as well as the email template that automatically appears every time you email them.
You can also customise the text to appear in the overdue letter, as well as that of the final notice.
Learn about tracking customers with outstanding invoices in Aged Receivables Report.
 Required setup
In order to view content or perform actions referred to in this article you need to have the appropriate permissions enabled in your security group. Go to System![]() > Setup > Security Groups and access your security group to update your permissions. The relevant security group tab and specific permissions for this article can be found here:
> Setup > Security Groups and access your security group to update your permissions. The relevant security group tab and specific permissions for this article can be found here:
 Set up display options for overdue letters
To set up how your overdue letter forms appears when you print or email them, go to System ![]() > Setup > Forms Setup > Overdue Letters > Display Options and adjust the following options as required.
> Setup > Forms Setup > Overdue Letters > Display Options and adjust the following options as required.
Be sure to Test how your settings apply as you go.
| General |
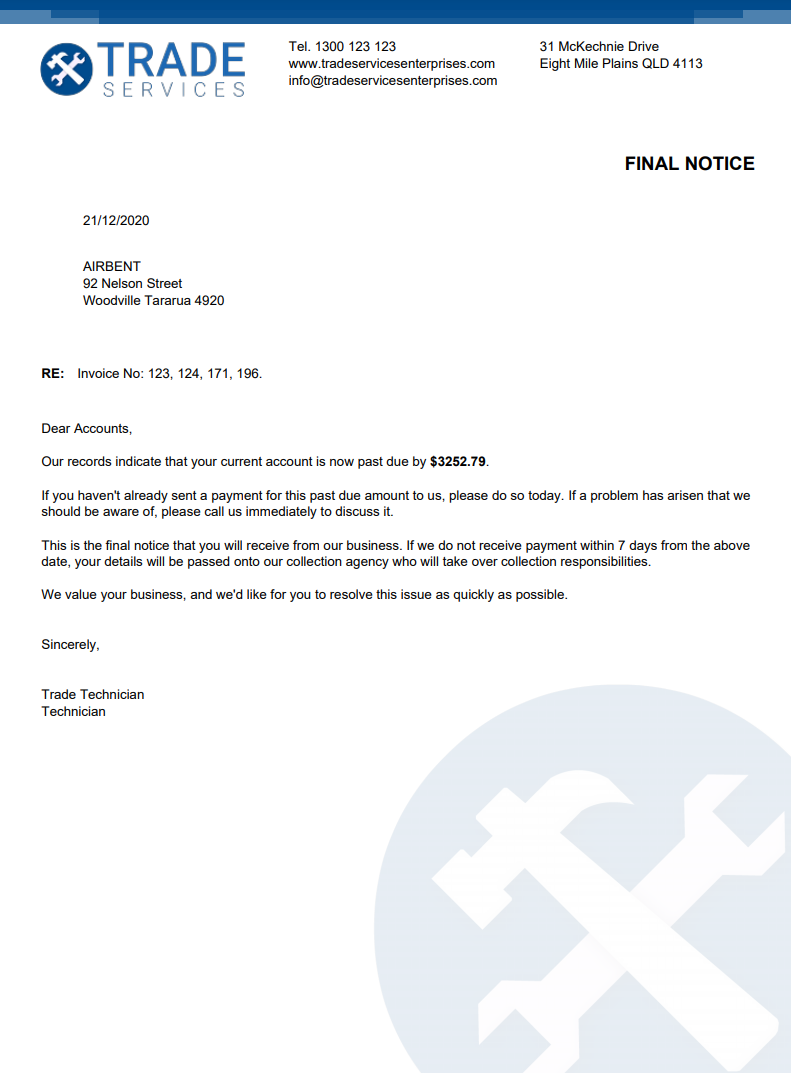
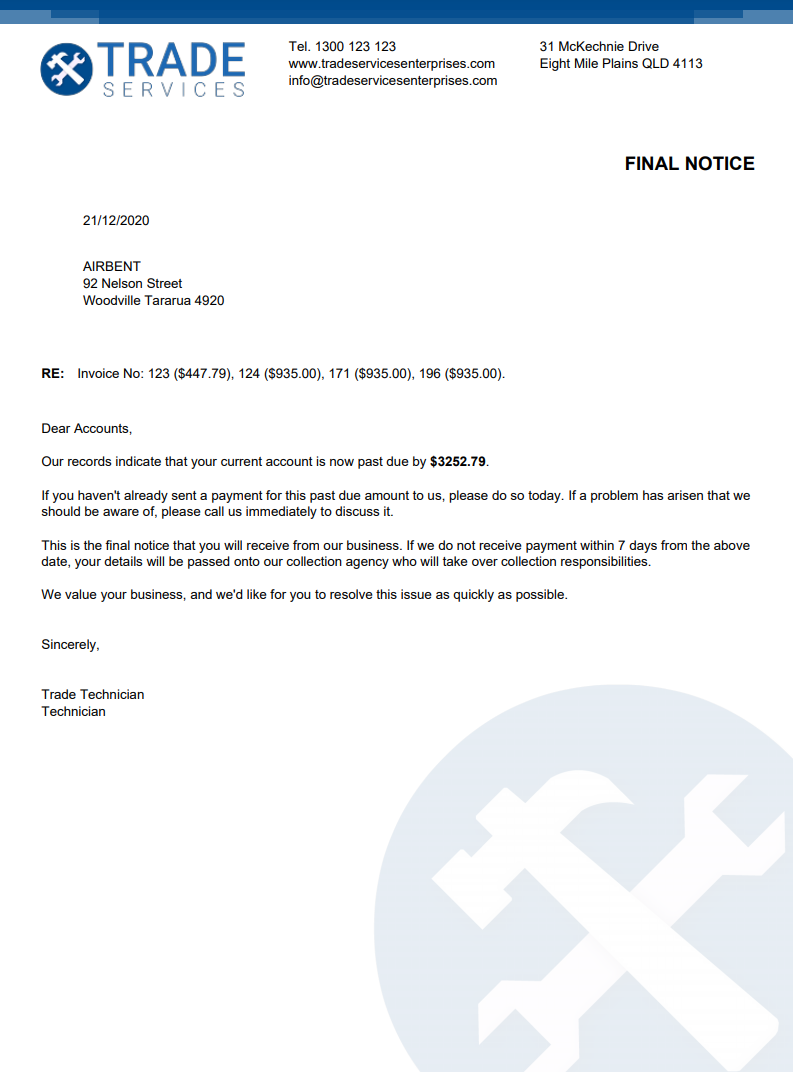
Under RE: Overdue Invoice Numbers, select On to display overdue invoice numbers at the top of overdue letters. Select With Invoice Amounts to display overdue invoice numbers along with the outstanding amount at the top of overdue letters. Select Off to hide the invoice number. |
| Form Title |
Enter the title you wish to have appear at the top of the form. You may wish to use the default titles, 'OVERDUE NOTICE' and 'FINAL NOTICE'. |
| Terms and Conditions (PDF) |
Click Browse / Choose File to upload a PDF of terms and conditions to attach to the end of the form. Please note compressed PDFs do not upload. You can then select to append the PDF to the form automatically when Printing and / or Emailing the form. Select Attaching to append the PDF to the form automatically when you click Attach in the Forms tab when printing or emailing the form. |
When you have finished adjusting settings, click Save.
 Adjust the overdue letter and final notice text
Simpro Premium displays the following default text in overdue letter forms:
Additionally, the following default text is displayed in final notice overdue letter forms:
The overdue amount in bold updates automatically based on the customer's overdue balance, and the name of the Simpro Premium user generating the overdue letter appears below the text.
To enter new text to appear in an overdue letter / final notice form:
- Go to System
 > Setup > Forms Setup > Overdue Letters > Overdue Letter / Overdue Letter - Final.
 - Under Customise Message, select On.
- Enter the text in the Messages text box to appear every time you generate an overdue letter.
- Adjust text using the formatting options (for example, bold, italics, or underline) at the top of the text box.
- To insert information from Simpro Premium into the overdue letter text so that it is automatically retrieved from the system when you generate the letter, click where you wish to include the information in the Messages text box, then click the field of information in the Insert Field list.
- For example, to automatically insert a customer's overdue balance into an overdue letter, click the Overdue Amount field.
- When you have finished adjusting the overdue letter text, click Save.
Be sure to Test how your settings apply as you go.
 Test how your settings apply
To test how your overdue letter form settings apply to a real form as you update them:
- Go to Reports
 > View Reports > Most Common Reports > Aged Receivables.
 - Under Show Aging Groups, select any check boxes except Not Yet Due.
- Click Search to generate the report.
- Select the check box in the Select column of the customer/s you wish to send an overdue letter to.
- At the bottom of the page, select Overdue Letter / Overdue Letter - Final under Print Options.
- Click Print to open the letter/s in a new tab.
- In your Simpro Premium tab, go to System
 > Setup > Forms Setup > Overdue Letters.
 - When you update your settings and save a change, return to the new tab displaying the overdue letter form and refresh the page to view how the updated settings have changed the layout.
 Set up the email template for overdue letter forms
To set up the email template to appear when you email an invoice to a customer:
- Go to System
 > Setup > Forms Setup > Overdue Letters > Email.
 - Under Use Default Settings:
- Clear the check box to Customise overdue letter email settings.
- Select the check box to use settings defined in System
 > Setup > Forms Setup > General > Email Setup, including Request Read Receipt, Send CC of Email to Current User, From Name, From Address and CC to (email addresses separated by commas). Learn more in Email Setup sub-tab.
- Under Email Template, adjust the default email Subject and Body to appear every time you send the form:
- Adjust text in the email Body using the formatting options, for example, bold, italics, or underline, at the top of the text box.
- Use the [projectType] field in Subject, so that if the Show as Estimate option is selected, the email subject updates to Estimate. Also, any reference to Quote in the form template is replaced with Estimate.
- To insert information from Simpro Premium into the email template so that it is automatically retrieved from the system when you email the form, click to include the information in the Subject or Body, then click the field of information in the Insert Field list.
- For example, rather than typing out your company email, click to insert the Company Email field to automatically retrieve the email address from System
 > Setup > Company.
- For example, rather than typing out your company email, click to insert the Company Email field to automatically retrieve the email address from System
- When you have finished adjusting the email template and settings, click Save.
Note that some details, such as site fields and work order number are specific to work orders and shall not populate in the body of email sent from the Work Order invoice.
If you have entered text in System![]() > Setup > Forms Setup > Email Set up > Email Template > Body, it is automatically added to the body text in this email template when you email a form.
> Setup > Forms Setup > Email Set up > Email Template > Body, it is automatically added to the body text in this email template when you email a form.
 Customise overdue letter email settings
When you clear the Use Default Settings check box, you can customise your overdue letter email settings with the following options:
| Request Read Receipt | Select On to automatically request that the email recipient confirm their receipt of your email. |
| Send CC of Email to Current User |
Select On to CC the logged-in Simpro Premium user sending the email. This sends the email to the primary email address entered in the user’s employee card file. The secondary email address is not used. |
| From Name |
Enter the sender name to appear to the recipient of the email when sent from any Simpro Premium user. If left blank, the email uses the logged-in Simpro Premium user’s name as it appears in their employee card file. |
| From Address |
Enter the sender’s email address to display to the recipient of the email when sent from any Simpro Premium user. The email address used in this field is that which the recipient can reply to. If left blank, the email sends from the logged-in Simpro Premium user’s primary email address located in their employee card file. |
| CC to (email addresses separated by commas) |
Enter the email addresses, separated by commas, that you wish to receive all forms of this type emailed from Simpro Premium. This is the default CC. You can also select additional CC in a job in the Forms tab. |
When you have finished adjusting settings, click Save.
 Walk Me Through
Need additional help?
Try Walk Me Through, our step-by-step guidance tool, to set up overdue letter forms.
In Simpro Premium, go to Help ![]() > Walk Me Through and search Overdue Letters Forms Setup.
> Walk Me Through and search Overdue Letters Forms Setup.
Learn more in How to Use Walk Me Through in Simpro Premium.


