Last Updated: December 08 2025
Overview
In Simpro Premium you have the flexibility to set specific payment terms for each of your customers.
 Required setup
In order to view content or perform actions referred to in this article you need to have the appropriate permissions enabled in your security group. Go to System![]() > Setup > Security Groups and access your security group to update your permissions. The relevant security group tab and specific permissions for this article can be found here:
> Setup > Security Groups and access your security group to update your permissions. The relevant security group tab and specific permissions for this article can be found here:
 Create payment terms
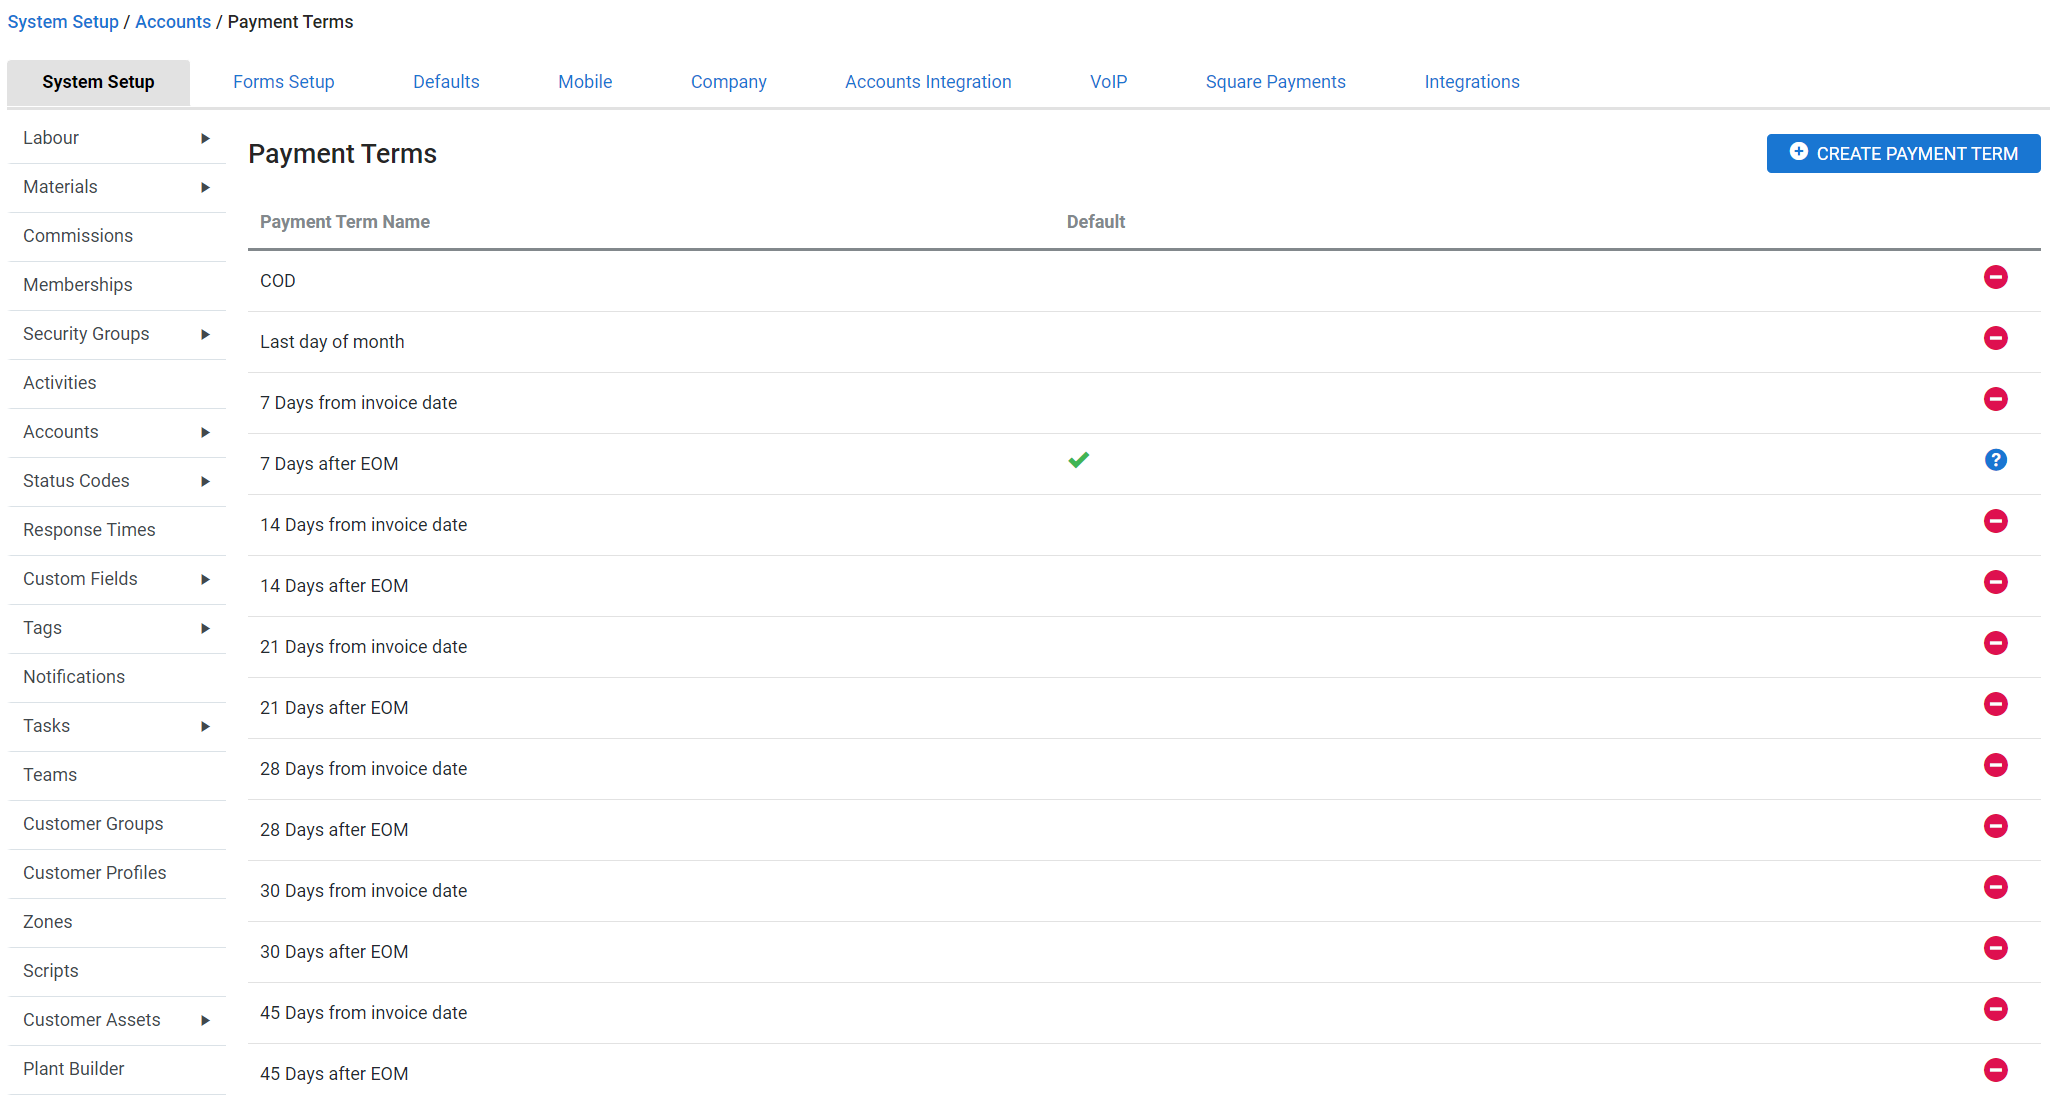
Go to System ![]() > Setup > Accounts > Payment Terms to view a list of all the existing payment terms created in Simpro Premium.
> Setup > Accounts > Payment Terms to view a list of all the existing payment terms created in Simpro Premium.
You can create new payment terms based on specific requirements for each customer. This allows you to access a wider selection of more specific payment terms tailored for your different business needs.
To create a payment term:
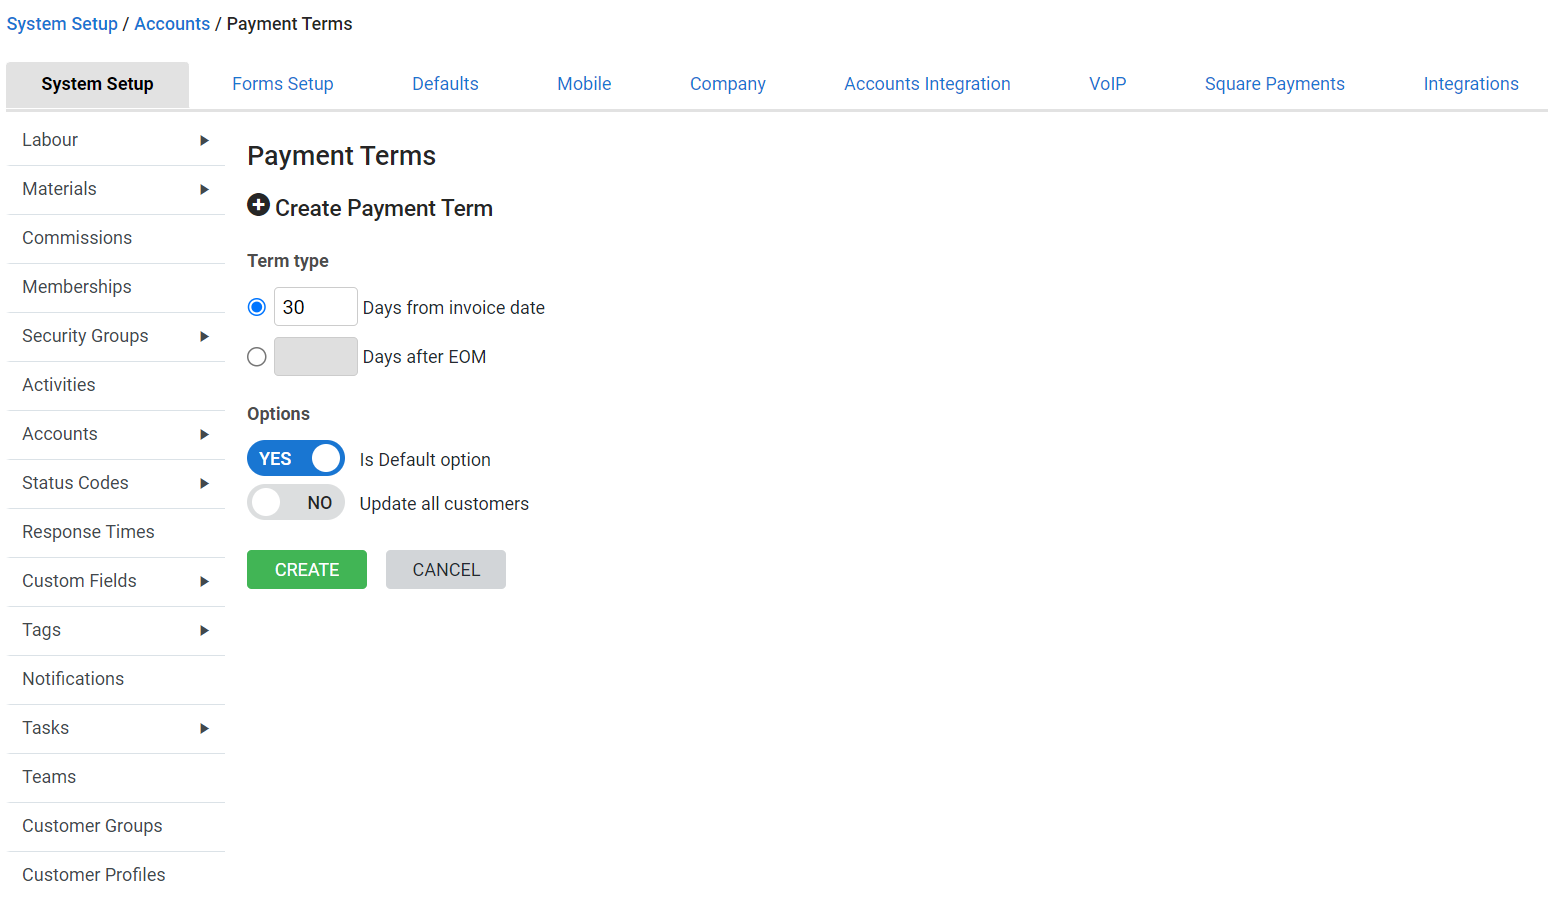
- Click Create Payment Term.
- Under Term type, select one of the following options:
- Select and enter the Days from invoice date or Days after EOM
- Select COD
- Select Last day of month
- Select whether to set the payment term as the Default option.
- Terms selected as default display a green tick in the Default column in the Payment Terms list.
- Select whether to Update all customers.
- Click Create.
Payment terms that are assigned or being used by a customer / supplier / contractor / invoice cannot be edited or archived.
Setting a payment term as the default for customers and updating customers with payment terms does not change the terms currently applied to existing invoices.
 Archive payment terms
In the Payment Terms list, click the delete icon besides the required Payment Term Name to archive the corresponding payment term.
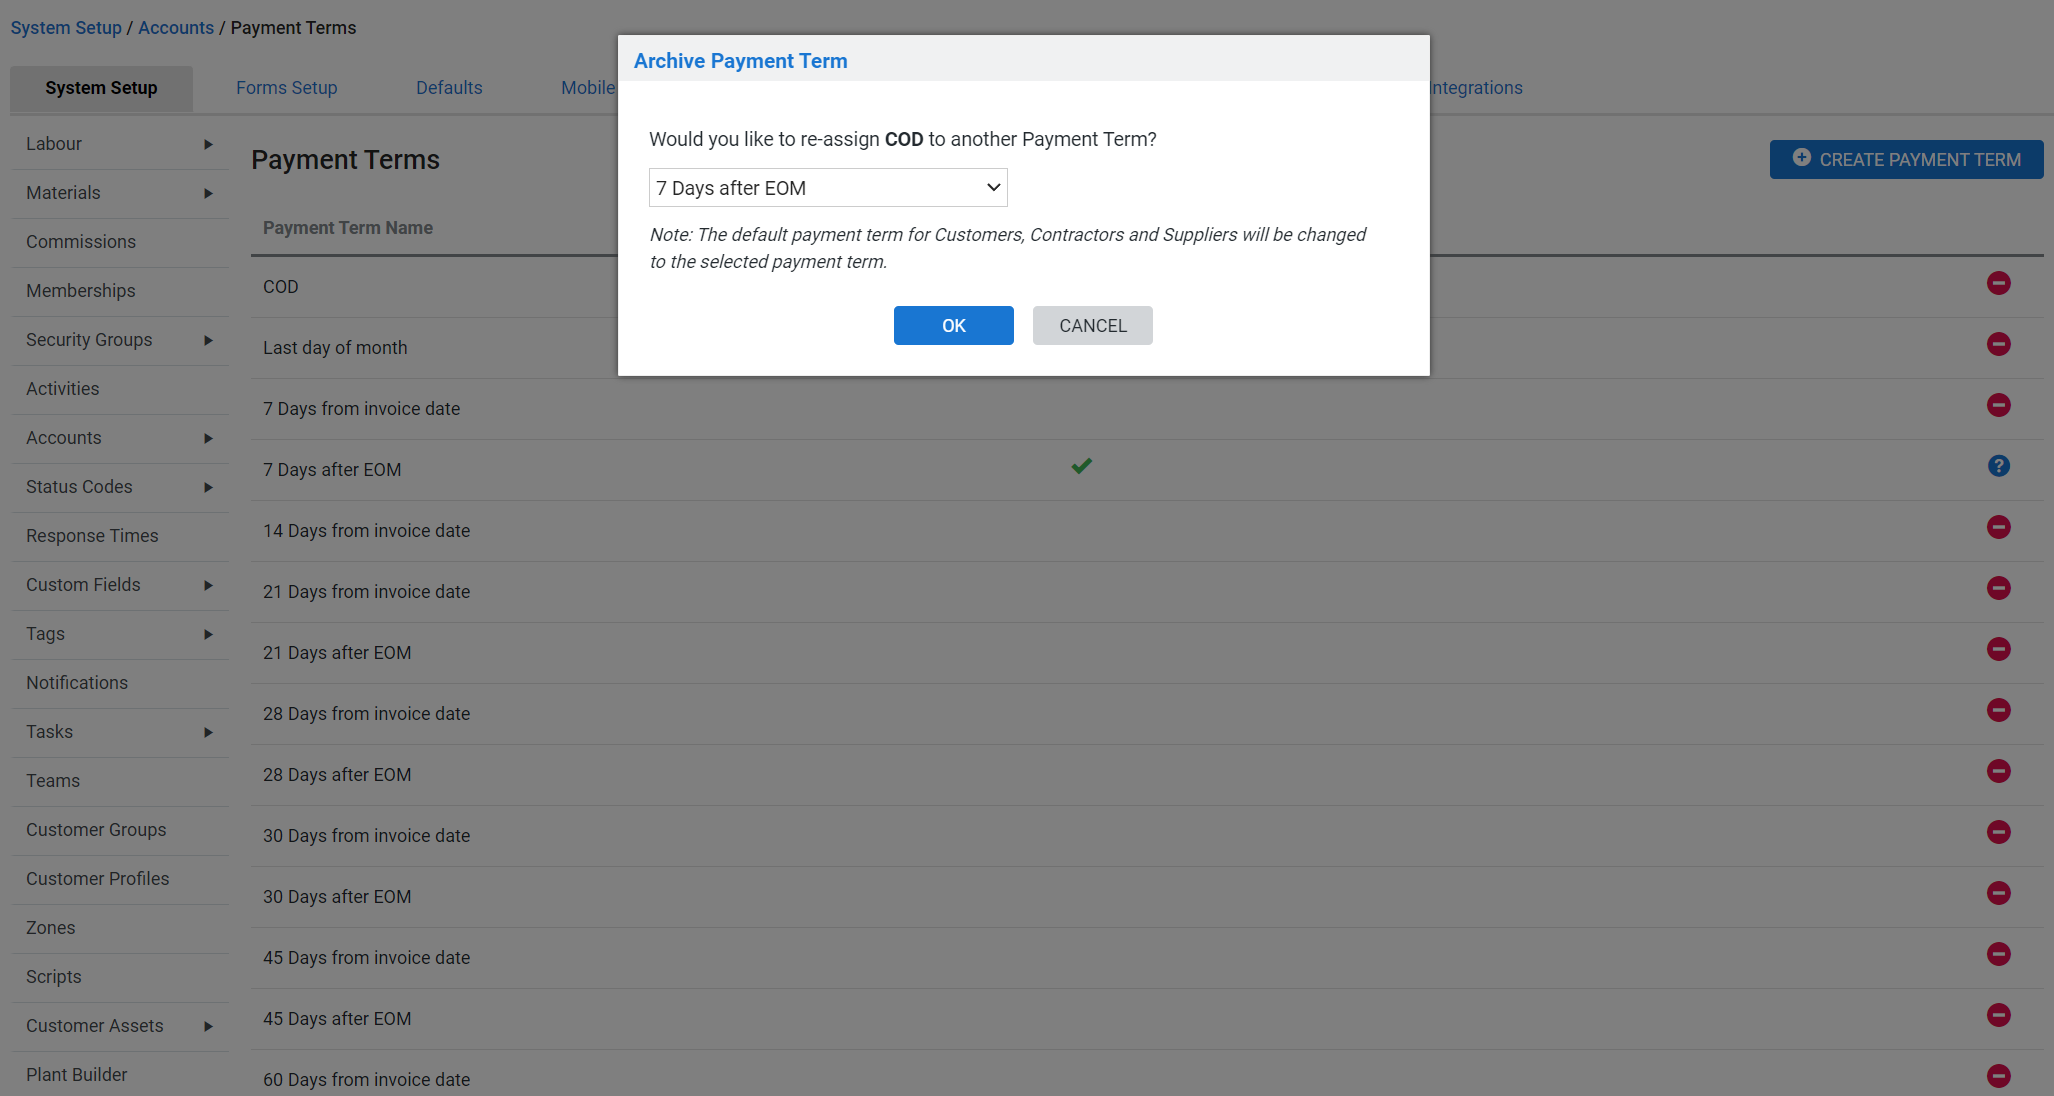
If a payment term is assigned or being used, option to re-assign the payment term is displayed.
Select the required payment term from the drop-down list to re-assign and click OK.
 Apply a payment term to a customer
To apply a payment term to an individual customer:
- Hover over People
 > Customers.
 - Search for and click the required customer.
- Go to the Settings tab and under Payment Terms select the relevant option.
- Set the relevant late payment fee, as required.
- Click Save and Finish.
Learn more in How to Create Customers.


