Last Updated: January 27 2026
How to Manage Customers in Delight
Overview
Filter and access customers to get a more granular view. See the total revenue, contact details, service opportunities, email activities, seasonal activity, equipment and the contact history of a customer.
Additionally, enable or disable marketing in bulk or individually to prevent or allow marketing emails to be sent to specific contacts.
Click the Customers tab to access your customer list.
 Filter Customers
Search for specific customers, use the headings at the top of the table to sort customers, or apply or remove filters.
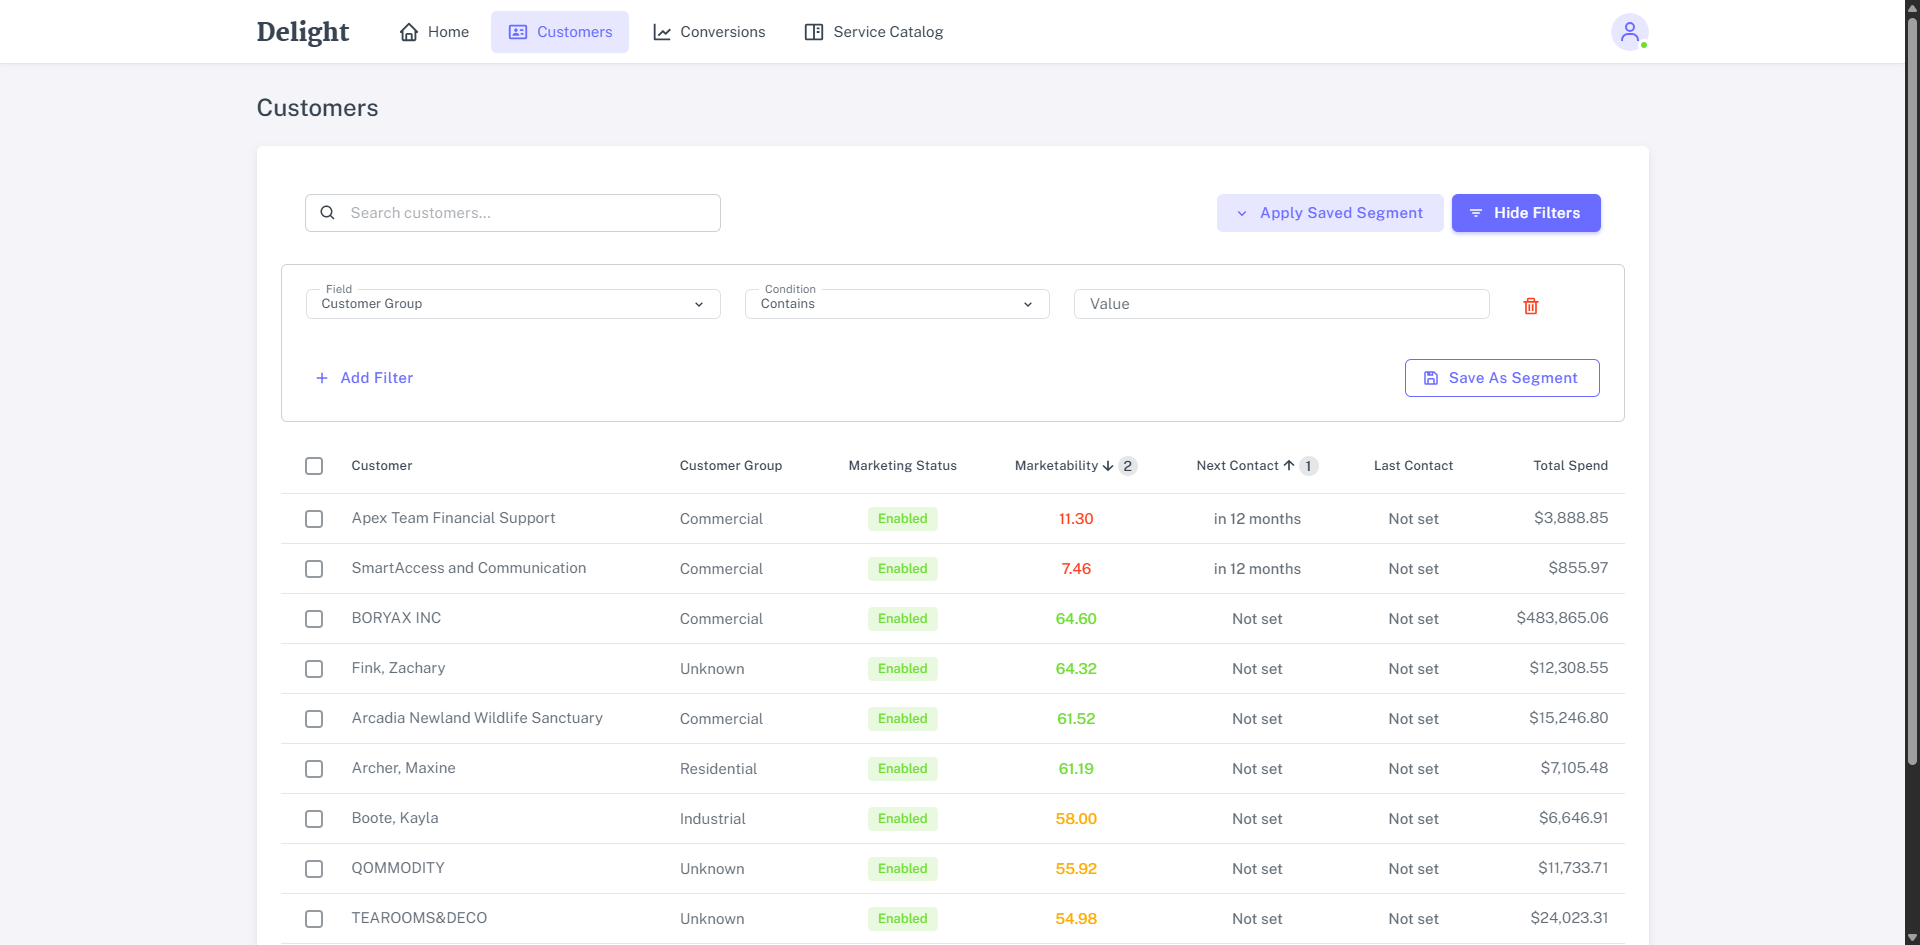
If you are frequently looking at the same list of customers, create a new filter and save it as a segment for future use:
- Click Show Filters.
- Click Field drop-down icon to select a type of field that will be applied.
- Use the Condition drop-down and Value field to select when you want the filter to be applied.
- Click Save Segment.
- Enter a Segment Name and Description to help identify your filter.
- This filter is applied to the list of customers.
- Click the x next to a filter to remove it.
- Click Apply Saved Segment to select a filter that has already been created.
Note: When you use multiple fields, only customers that meet all filter criteria will appear in the results.
To increase or decrease the number of customers displayed on the page, change the value in Items per page. The available options are 10, 25, 50, and 100.
Sort Customers
To sort customers list for a more specific view, you can sort by a single column or combine up to three columns.
| Sorting Type | Best practice | Sorting rules |
|---|---|---|
| Single Column Sorting | Click directly on the Column’s name. | First Click: Sorts from A-to-Z or lowest-to-highest (Ascending). Second Click: Sorts from Z-to-A or highest-to-lowest (Descending). Third Click: Removes the sort and returns the list to its Original Order. |
| Multiple Columns Sorting | Click by up to three columns at once. Note: The order in which you click them determines the priority. | Example: If you click Total Spend as the first column and then click Customer as the second column, the list will be sorted by Total spend from highest to lowest, and within the same total spend, the customer names will be sorted from A to Z. |
Use marketability score
Marketability score is Delight’s prediction of how likely emailing a customer is to generate a lead, job, or quote conversion.
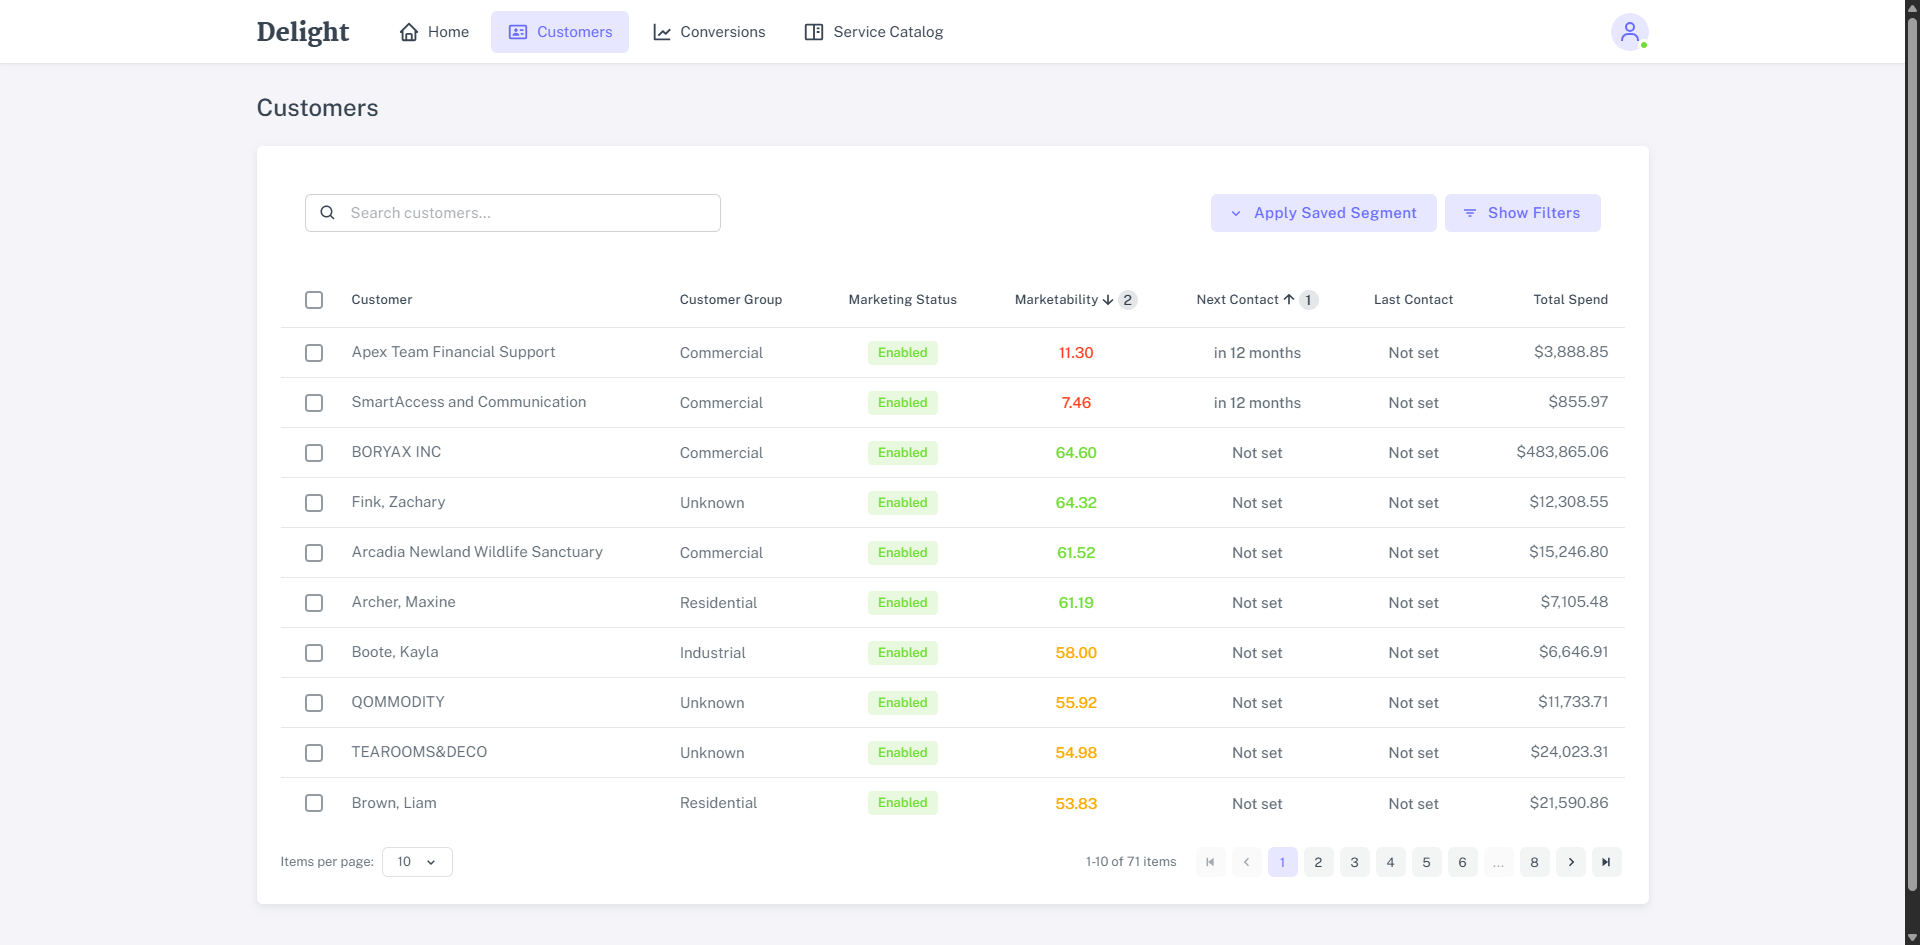
The score is based on historical buying patterns:
- The highest marketability score refers to customers who have a history of frequent purchases but have not had a recent lead, quote, or job.
- The marketability score of 0 refers to customers where there is no past data to assess the likelihood of conversion; these may be new customers in your system. Reaching out to these customers can still potentially lead to conversions.
Enable and Disable Marketing Status
On the Customers page, each customer has a Marketing Status, which shows whether they can receive the emails sent from Delight.
There are three types of marketing status:
| Marketing status | Description | Eligibility for emails |
|---|---|---|
| Enabled | The customer’s marketing status is enabled, and they have a valid contact email address. | Can receive the Delight emails. |
| Disabled | The customer’s marketing status is disabled. | Will not receive the Delight emails. |
| Enabled (greyed out) | The status is enabled, but the customer does not have a valid, opted-in email address. | Excluded from Delight email creation and sending. |
To add the valid email address to a customer, update customer contacts in Simpro Premium. Learn more in How to Create Contacts.
To enable or disable the marketing status individually:
- In the customer list, click the checkbox next to the Customer.
- Click Enable Marketing or Disable Marketing.
To enable or disable the marketing status in bulk:
- To update multiple customers, select the checkboxes next to each specific Customer. Alternatively, to update all customers in the list, click the checkbox next to the Customer column header.
- Click Enable Marketing or Disable Marketing to apply the change.
Manage a Customer
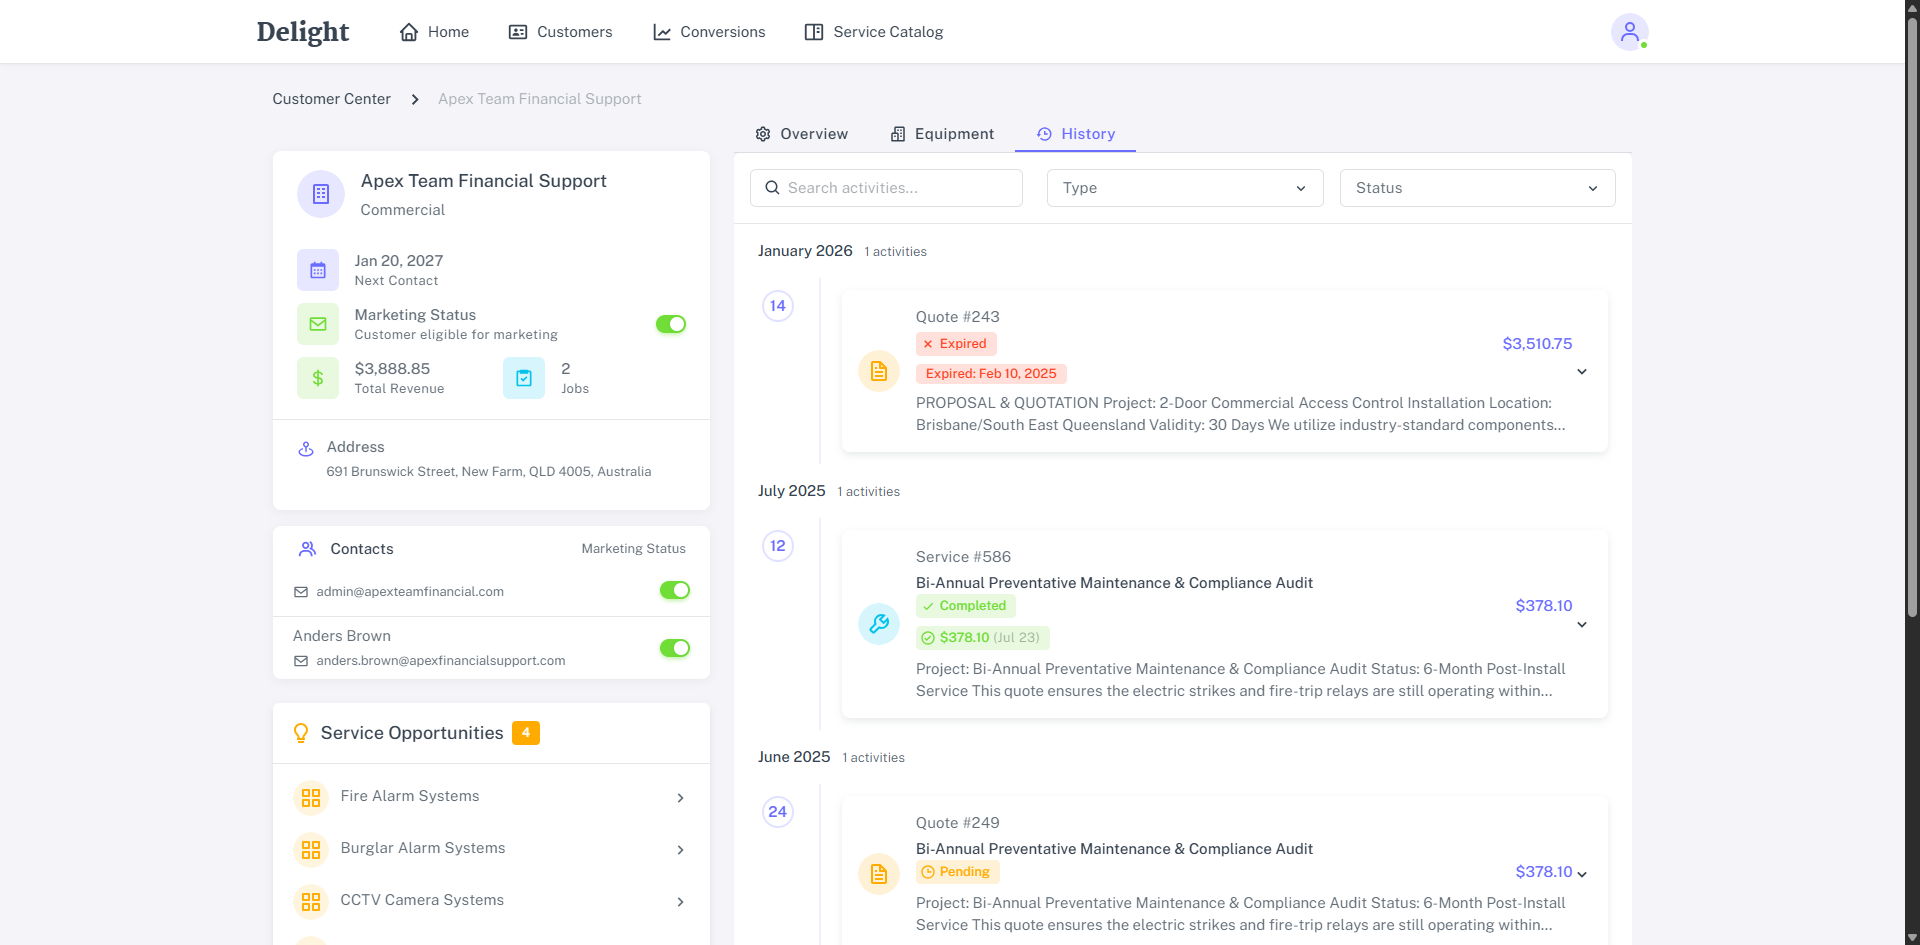
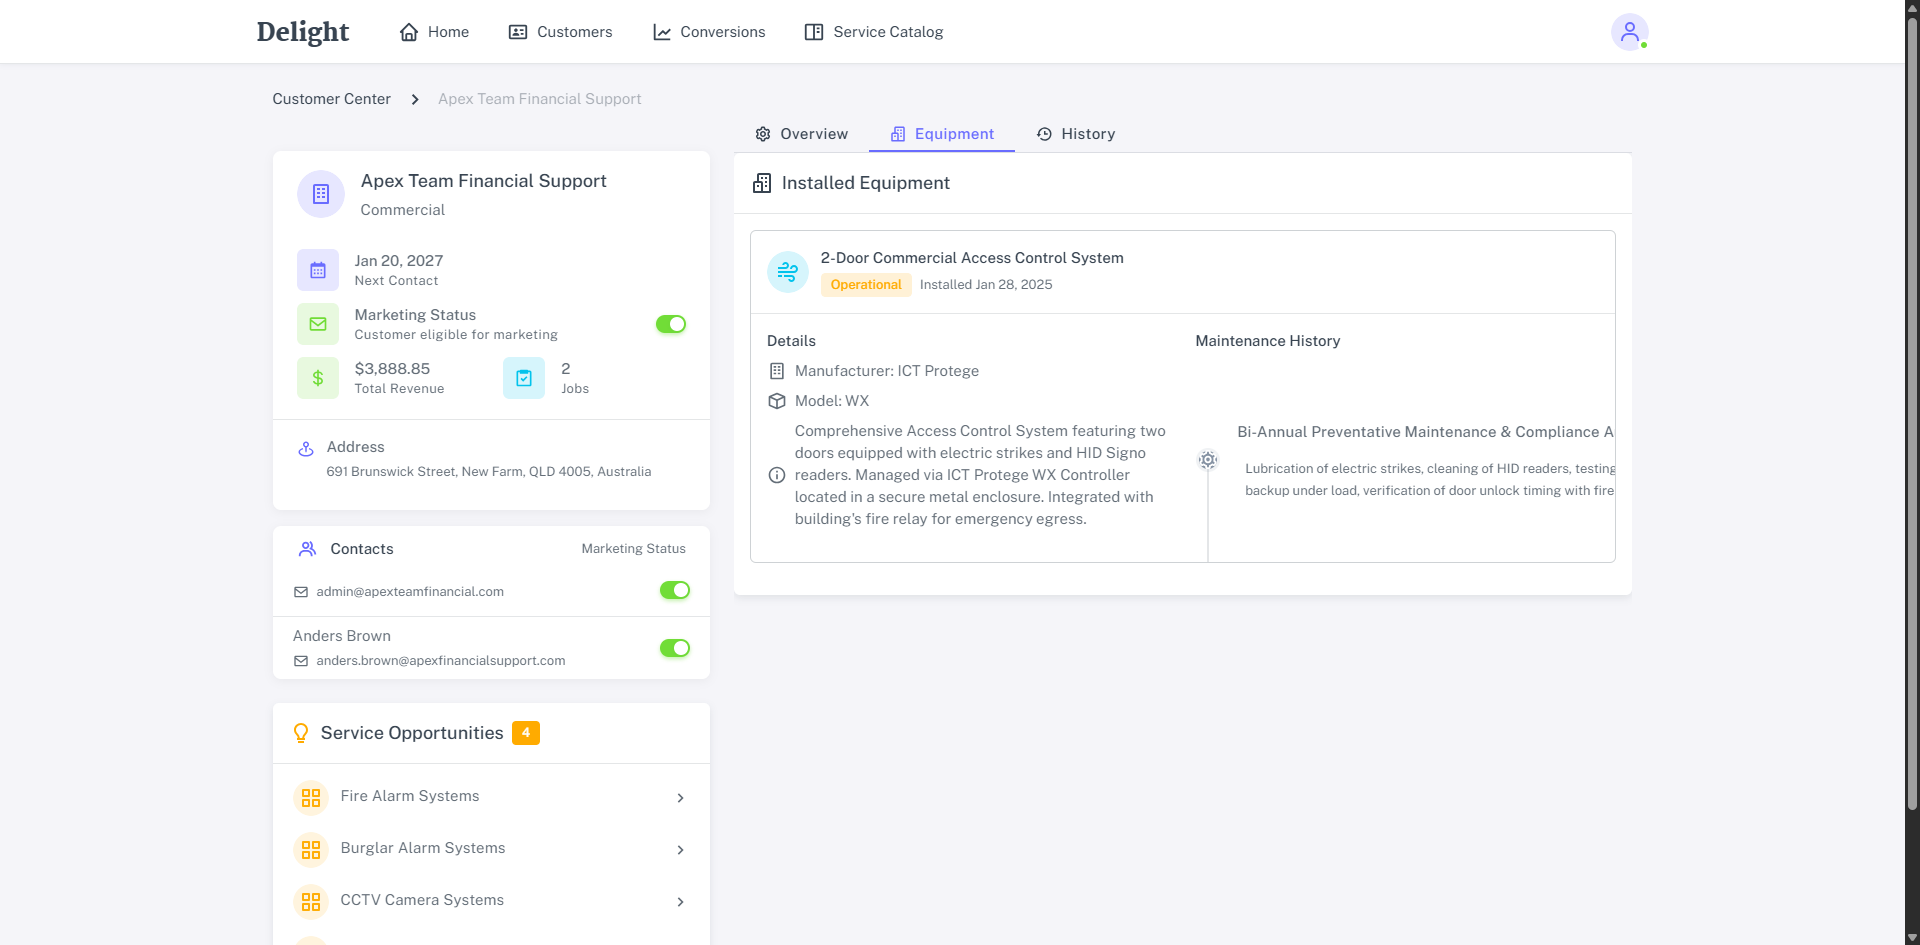
From the Customer page click on a customer to get a more detailed view of their details, contacts, service opportunities, email activities, equipment and history.
The customer details includes:
- Customer Name
- Customer Type: Residential or Commercial.
- Their Next scheduled Contact.
- Marketing Status: Enable to disable to allow or prevent the customer from receiving emails from Delight.
- The customer’s Total Revenue and quantity of Jobs.
- The customer’s primary Address.
The Customers Contacts includes a list of all contacts that include an email address. Each contact can have their marketing status enabled or disabled individually.
Service Opportunities that Delight recognises as relevant to the customer are listed. Click on each opportunity to see a rationale why this service makes sense for the customer.
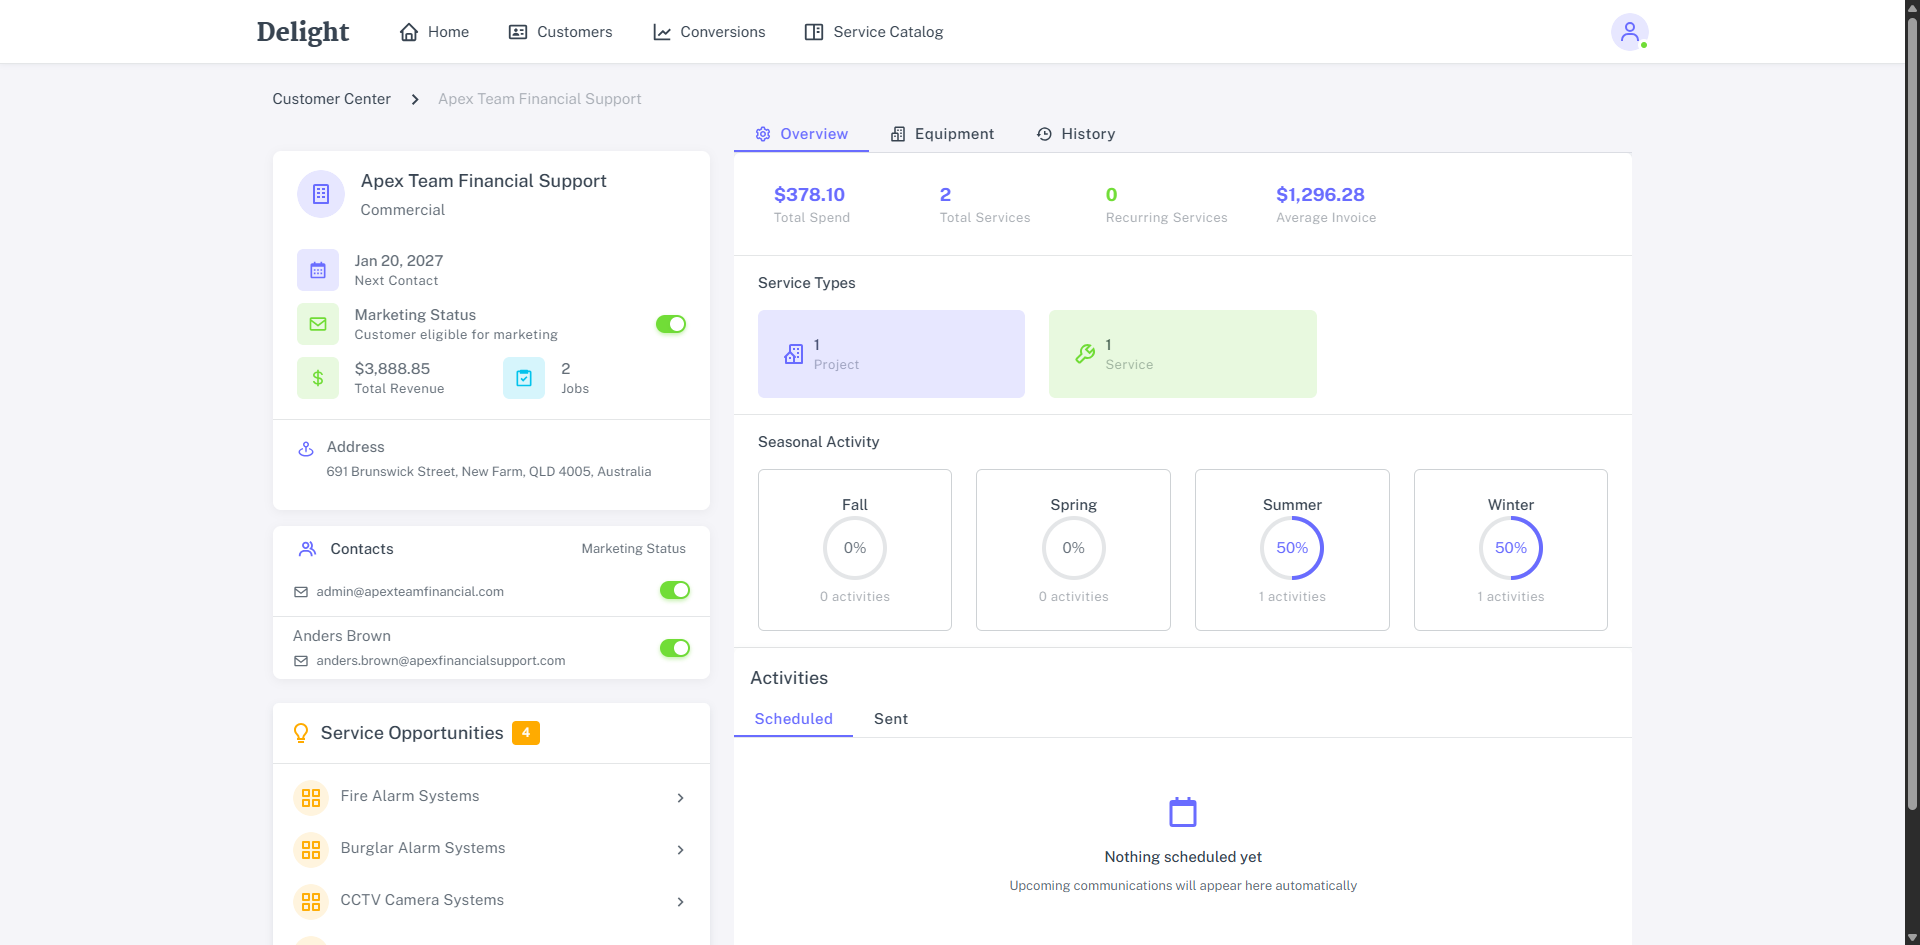
The Overview tab includes:
- The Total Spend for this customer.
- The Total Services purchased by the customer.
- The Recurring Services setup for the customer in Simpro Premium.
- The Average Invoice value for all of this customer’s jobs.
- The quantity of Project and Service jobs created for this customer.
- When the customer has had work completed based broken down into Seasonal Activity.
- A list of all Scheduled and Sent email Activities. Click on an individual email to review the email. Learn more in Review Email Activities.
The Equipment tab provides a list of Installed Equipment taken from jobs you’ve completed for this customer in Simpro Premium. The Installed Equipment includes:
- Name of the material.
- Whether it is operational and when it was installed.
- The Manufacturer, Model and Description of the material.
- The Maintenance History.
The History tab includes a list of quotes and jobs organized chronologically. Each entry includes the number, validity, value, description, stage and Related Invoices.