Last Updated: December 15 2025
Overview
If you have a Voice over Internet Protocol (VoIP) provider, you can integrate Simpro Premium with your VoIP service to make and receive phone calls in Simpro Premium.
VoIP is not supported in Internet Explorer. Access your Simpro Premium build through a different browser to use the VoIP integration. Additional setup is required for Mozilla Firefox.
 Required setup
In order to view content or perform actions referred to in this article you need to have the appropriate permissions enabled in your security group. Go to System![]() > Setup > Security Groups and access your security group to update your permissions. The relevant security group tab and specific permissions for this article can be found here:
> Setup > Security Groups and access your security group to update your permissions. The relevant security group tab and specific permissions for this article can be found here:
 Allow VoIP in your security group
To access VoIP, you must belong to a security group that has VoIP enabled.
To edit a security group:
- Go to System
 > Setup > Security Groups.
 - Click the relevant security group.
- Click the Setup tab.
- Select the VoIP check box at the bottom of the Admin sub-tab.
- Click the Reports tab and select the VoIP check box.
- Click Save and Finish.
 Adjust VoIP integration settings
To integrate Simpro Premium with your VoIP service:
- Go to System
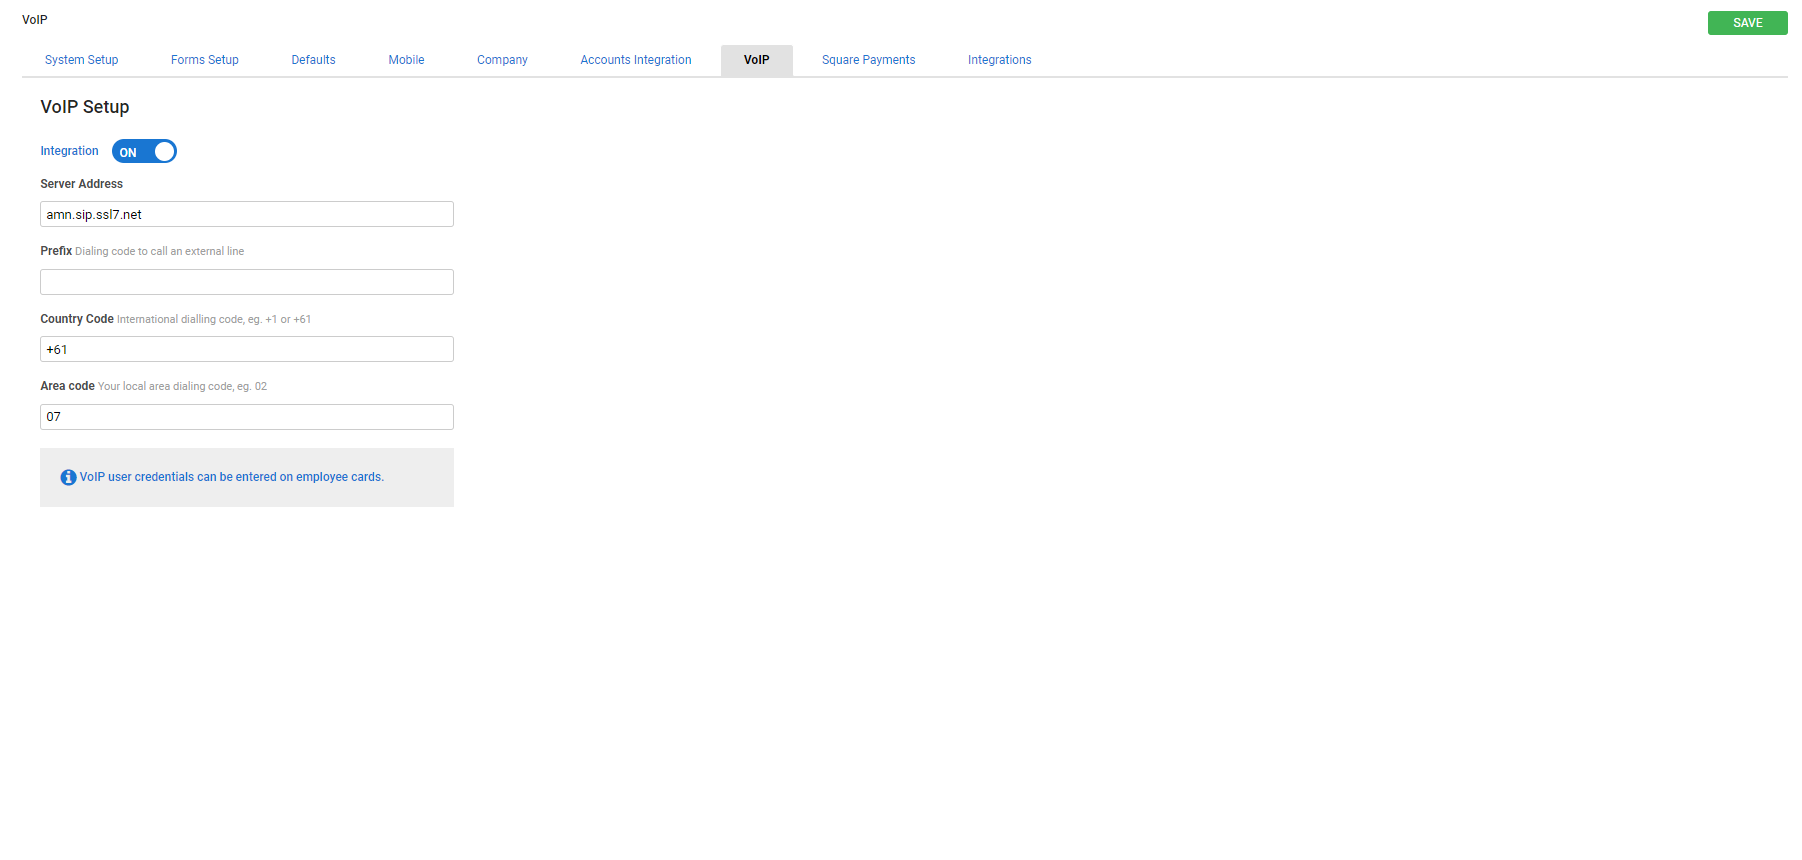
 > Setup > VoIP.
 - Click the toggle switch to Integration ON.
- Enter the Server Address from your VoIP service provider.
- For some SIP providers, you must include the port numbers after the server address. For example, amn.sip.ssl7.net:5060.
- Enter the Prefix if you dial an extension number to call an external line.
- Enter the Country Code for the phone numbers that you call most commonly. For example, in Australia this is +61.
- If your business operates in the US, we recommend that you do not use a system-wide country code.
- Enter the Area Code for the phone numbers that you call most commonly. For example, in Queensland this is 07.
- If your business operates in the US, we recommend that you do not use a system-wide area code.
- Click Save.
If you use a multi-company build, VoIP has its own sharing setting. Go to System ![]() > Setup > Company to view your VoIP sharing setting. If you have a shared setup with all companies, all companies share the same VoIP details. Alternatively, VoIP needs to be set up individually for each company that uses it.
> Setup > Company to view your VoIP sharing setting. If you have a shared setup with all companies, all companies share the same VoIP details. Alternatively, VoIP needs to be set up individually for each company that uses it.
When the integration is switched on, the ![]() icon is added to the system menu for all users. To use the softphone, individual users must have VoIP details entered in their card files.
icon is added to the system menu for all users. To use the softphone, individual users must have VoIP details entered in their card files.
The VoIP integration only supports the included softphone. A third-party softphone is not supported.
 Set up VoIP with multi-company
If you use multi-company, VoIP details can be shared between all companies, or you can have separate VoIP details for each company. VoIP also behaves differently if you have contacts, such as customers, shared between your companies.
If VoIP is not shared and customers and other contacts are shared, incoming numbers are checked against numbers in the user's default company.
For example, if a user with Company A as their default company receives a call from a customer card that is in Company B, the number displays as unknown.
If VoIP is shared but customers and other contacts are not shared, incoming numbers are checked against numbers in all companies the user has access to.
For example, if a user currently in Company A receives a call from a customer card that is in Company B, the customer card should be displayed if they have access to Company B, otherwise it displays as unknown.
If VoIP customers and other contacts are shared, they are counted as being in every company, so the relevant contact card displays regardless of VoIP sharing options, and regardless of which company the user is in.
Learn more in Multi-Company FAQs.
 Set up VoIP for individual users
Each employee who uses VoIP needs to have credentials entered in their employee card file.
To set up VoIP for staff:
- Go to People
 .
. - Click Employees or Contractors.
- Search for the relevant employee or contractor.
- Go to the Settings sub-tab.
- Under VoIP Details, enter the Username and Password provided by your VoIP service provider.
- If your VoIP application uses SIP authentication, enter the SIP Username.
- Click Save and Finish.
If an employee has been added to multiple companies, VoIP always uses their default company, even if they launch the softphone in a different company.
 Set up VoIP with Firefox
If you use Mozilla Firefox as your browser, additional setup is required for VoIP.
To set up VoIP with Firefox:
- Open Simpro Premium in Firefox and open the softphone window. There may be an error while VoIP tries to connect.
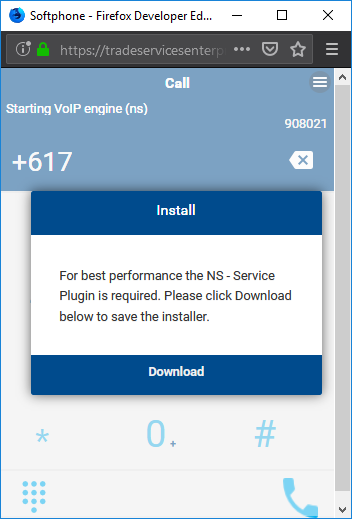
- Close the softphone window an open it again. A pop-up prompting you to install the NS - Service Plugin should appear.

- Click Download.
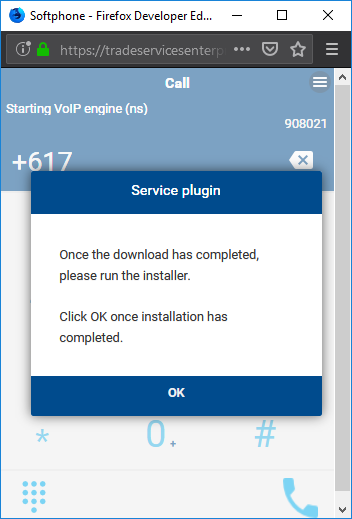
- When the download is complete, click the download to run the installer.
- After the installation is complete, click OK in the pop-up in the softphone.

- Close the softphone and open it again.
 Whitelist MizuPhone IP addresses
The Simpro Premium VoIP integration uses MizuPhone servers. You may be required to whitelist the MizuPhone IP addresses in order for VoIP to successfully integrate with Simpro Premium. Contact your IT administrator for assistance.
The following addresses are associated with the MizuPhone servers:
- mnt.mizu-voip.com
- rtc.mizu-voip.com
- rtc3.webvoipphone.com
- usrtcx.webvoipphone.com
- Usrtc.webvoipphone.com
- www.webvoipphone.com
- www.mizu-voip.com
- fcm.webvoipphone.com
- 107.175.156.227
- 204.12.197.100
- 204.12.197.98
- 148.251.28.176 / 28 (148.251.28.177 - 148.251.28.190)
