Last Updated: December 08 2025
Overview
simPOS is a point of sale system that processes jobs, allocates stock and creates everything in the background to comply with standard Simpro Premium workflows. It allows the user on the front end to simply scan or choose what they are selling and then process the transaction.
 Required setup
Before performing the steps detailed below, ensure that this part of your build is set up correctly. The relevant steps to set up the features and workflows detailed in this article can be found here:
 Perform a transaction
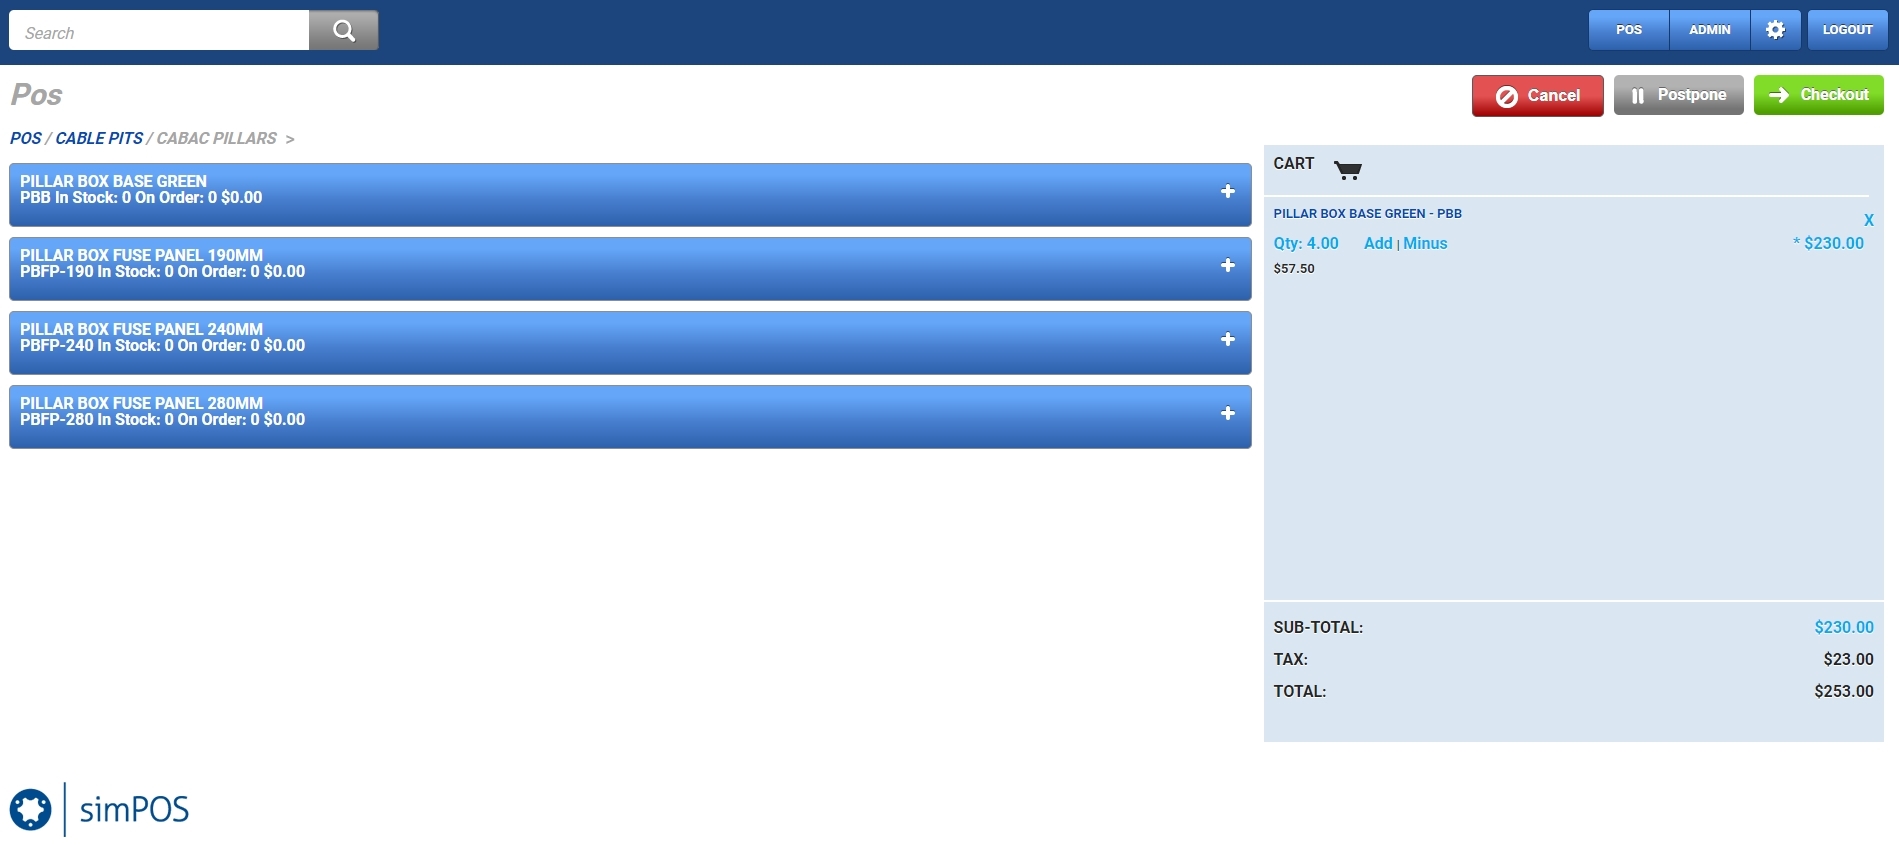
To carry out a transaction in simPOS you add items to a virtual shopping cart and then collect payment details in the check out.
To start a new transaction:
- Click POS in the top right corner.
- Click the groups and subgroups on the left to find items.
- Click an item to add it.
- To change the quantity of an item, click Qty in the cart and enter the number. Click Update.
- You can also click Add or Minus to add or remove one at a time.
- To adjust the price, click the price in the cart and enter the new price. Click Update.
- Your ability to adjust a price may be limited by your security group access.
- You can adjust the price for individual items, items on the same line, and the sub-total.
- Click Checkout.
- Make sure the correct Customer and Site are selected.
- Note that any special pricing, such as discounts / fees and memberships set up on the customer card in Simpro Premium, apply to the transaction created in simPOS.
- Enter an Order Number if applicable.
- This can be used for your company's internal reference to help search the transaction in Simpro Premium.
- Select the Salesperson.
- You need the correct security group permissions to change the salesperson.
- Enter a Description if required.
- If the purchase includes labour, click Add Labour Row. You need the correct security permissions to add labour.
- Select a labour rate from the Labour drop-down list.
- Enter the number of Labour Hours.
- Select a Cost Centre.
- Click Add Labour Row.
- For each item, select the Cost Centre if different from the default.
- If applicable, select a Discount for each item.
- You need the correct security group permissions to apply discounts.
- To adjust the price for items, click the Sub Total next to the item. To adjust the total price, click the Sub-Total at the bottom.
- You need the correct security group permissions to adjust the price.
- Click Next.
- Select the Payment Method.
- Click Add.
- For a partial or mixed method payment, adjust the amount.
- To finish the transaction, click Complete.
After the transaction is submitted, you can choose to:
| Print Docket Receipt | Create a PDF file of the docket receipt. |
| Print Itemised w/ Prices Invoice | Create a PDF file of the itemised invoice with prices. This is based on your Forms Setup in Simpro Premium. |
| Print Description Invoice | Create a PDF file of the description invoice. This is based on your Forms Setup in Simpro Premium. Learn more in How to Set Up Forms. |
| Back to POS | Return to the main simPOS page to start adding items to another cart. |
Pricing tiers from customer cards in Simpro Premium do not apply in simPOS.
 Credit invoiced items
You can create a credit to return invoiced items, while the actual refunds are handled in your accounting package or through your EFTPOS machine.
To credit items in an invoice:
- Go to ADMIN > Invoices.
- Search for the required invoice.
- Click the
 icon.
icon. - Adjust the Qty value for items to be credited.
- Make sure that the items being credited display a negative value in the Qty column while the quantity for other items is adjusted to 0.
- Alternatively, you can use the
 icon, to remove the items that are not to be credited.
 - Click Credit Inv.
When you credit the invoiced items, the individual items are credited back in the simPOS system. However, an itemised credit note is not available for printing purposes.
Learn more in Invoicing Overview.
 View today's transactions
To view all the transactions completed for the current day, go to Admin > Today's Takings. The table displays the payment method and amount.
The takings reset at the end of each day based on your local time zone.
 View invoices
To search for invoices from previous transactions, go to Admin > Invoices.


