Last Updated: December 12 2025
Overview
In Simpro Premium, you can set up accounting categories to track the profit and loss of various business arms in your accounting package. In QuickBooks Online, accounting categories are mapped to Locations. Learn more in How to Set Up the QuickBooks Online Accounting Link.
To track accounting categories in MYOB AccountRight Live, enable Category Tracking in the accounting link. Learn more in How to Set Up the MYOB Accounting Link.
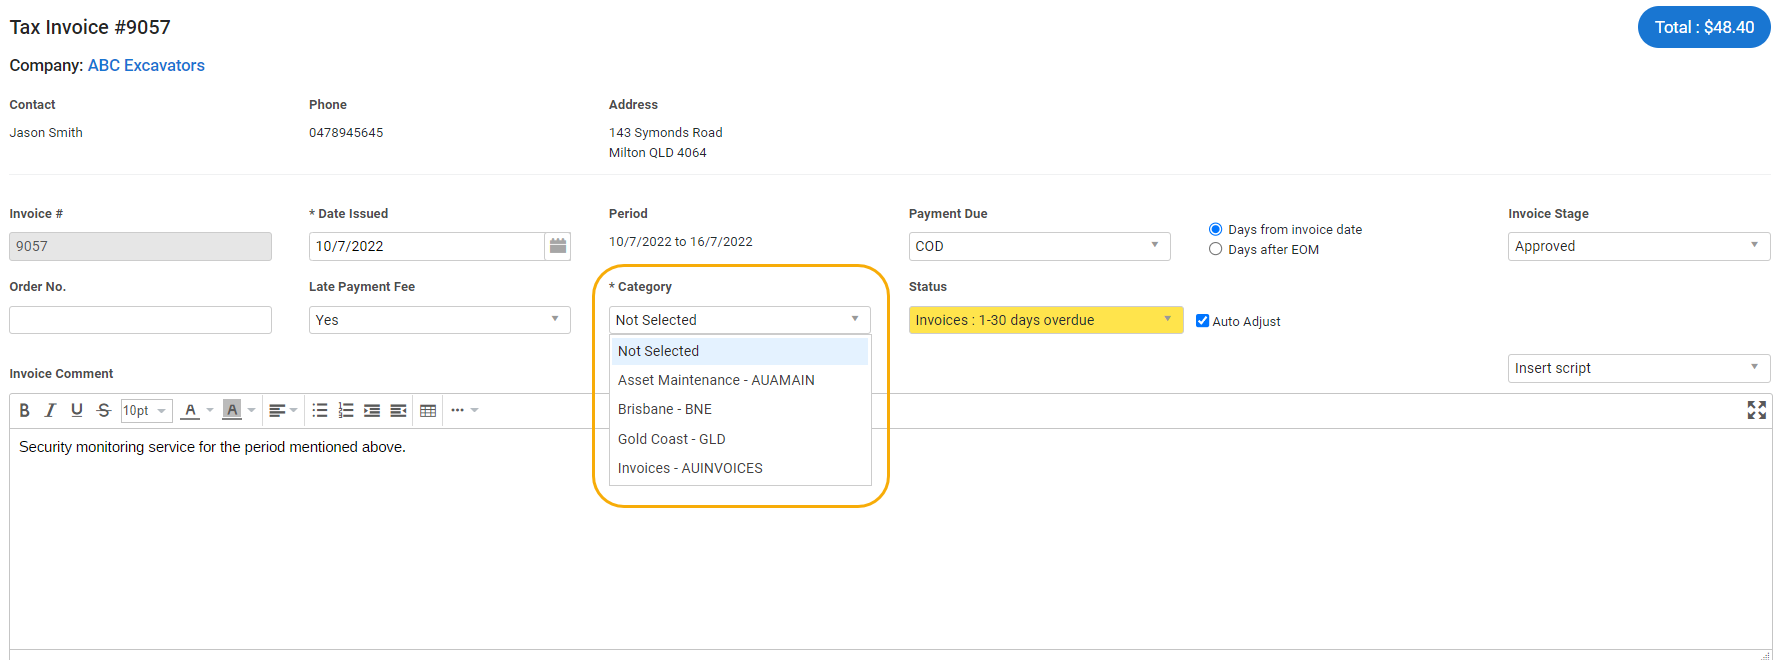
After setting up accounting categories, you are required to select a category for every financial transaction in Simpro Premium, including:
- invoices
- requests for claim
 A progress claim (US: progress invoice) that requires approval from your customer. This is not posted to your accounting package, so that if your customer rejects the request you do not need to void the claim.
- progress claims
- purchase order receipts
- contractor invoices
- retention claims
 AU, NZ, UK: Retention. A portion of your payment withheld either from you by the customer, or from a contractor by your business until the project is completed to specific standards.
- supplier credits
- customer credit notes
- void invoices
Accounting categories are not suitable for complex projects that might require multiple categories.
You cannot use accounting categories if you wish to use inventory tracking or business groups.
US only: If you use Simpro Premium in the United States, the term 'vendor' is used instead of 'supplier'.
 Required setup
In order to view content or perform actions referred to in this article you need to have the appropriate permissions enabled in your security group. Go to System![]() > Setup > Security Groups and access your security group to update your permissions. The relevant security group tab and specific permissions for this article can be found here:
> Setup > Security Groups and access your security group to update your permissions. The relevant security group tab and specific permissions for this article can be found here:
 Set up category tracking
Before you can use category tracking, you need to enable it in Simpro Premium.
To set up category tracking:
- Go to System
 > Setup > Defaults.
 - Click the Financial sub-tab.
- Under Invoicing, in the Tracking section, select Category Tracking.
- Click Save.
 Create an accounting category
To create an accounting category:
- Go to System
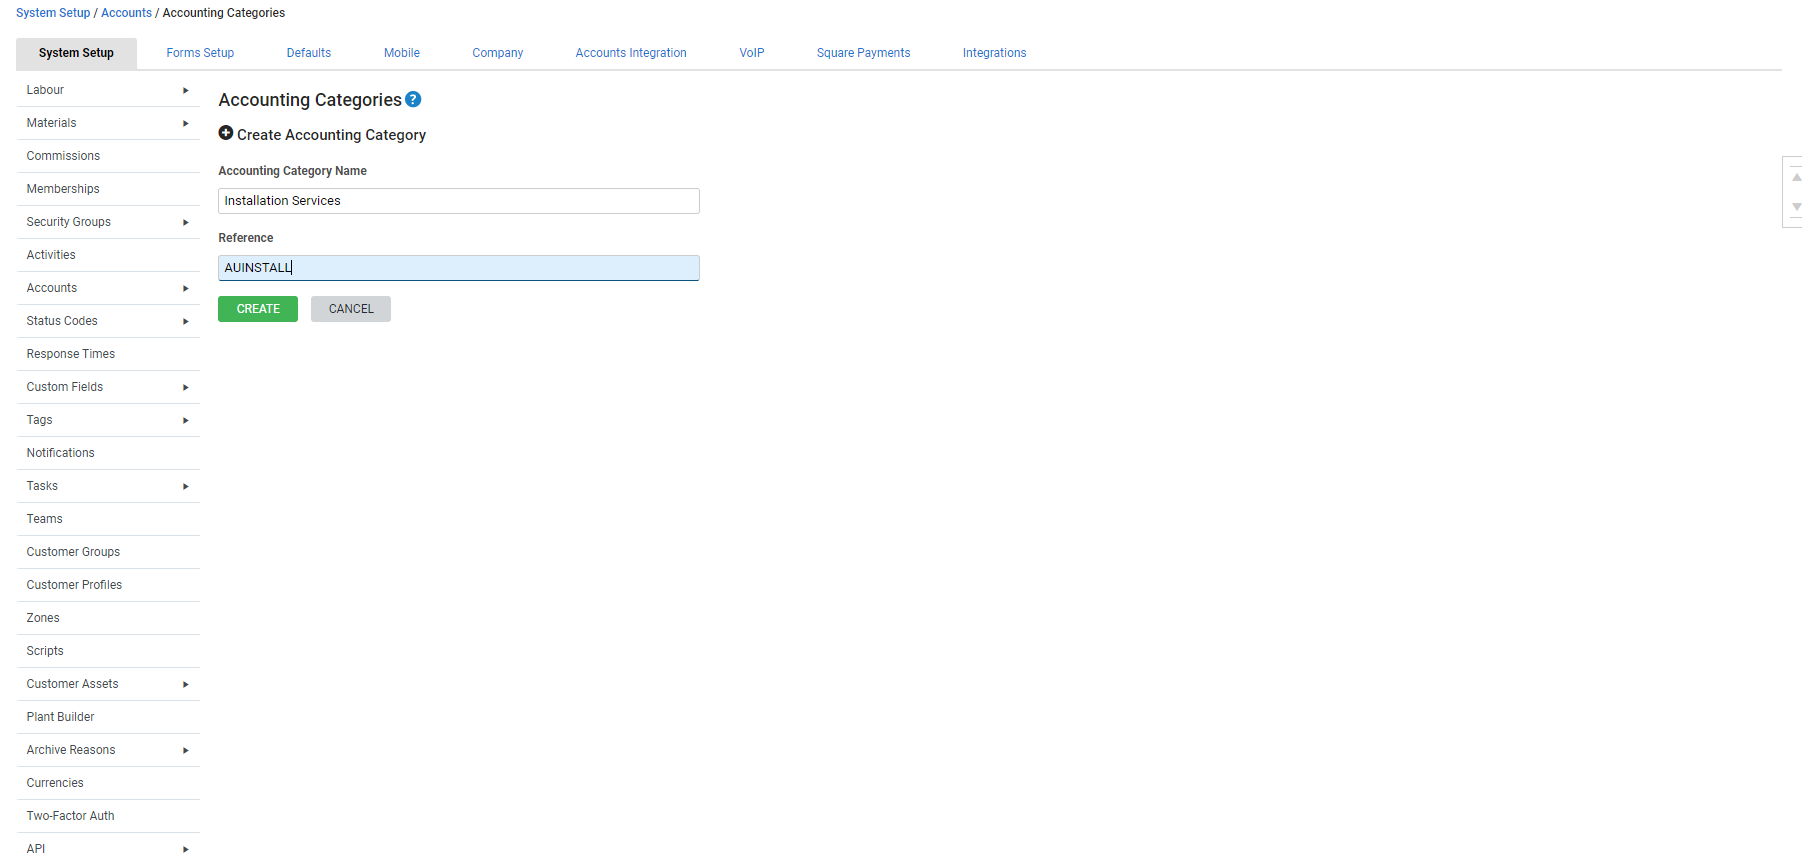
 > Setup > System Setup > Accounts > Accounting Categories.
 - Click Create Accounting Category.
- Enter an Accounting Category Name.
- Enter a Reference. This is used to link to your accounting package, and usually matches your package's Name field.
- Click Create.
To match Simpro Premium accounting categories to existing MYOB categories, enter the category name and reference from MYOB in the corresponding fields when setting up the Simpro Premium accounting category. Learn more in How to Set Up the MYOB Accounting Link.
 Edit an accounting category
To edit an accounting category:
- Go to System
 > Setup > System Setup > Accounts > Accounting Categories.
 - Click the category you wish to edit.
- Make changes as required.
- Click Save.
 Delete an accounting category
To delete an accounting category:
- Go to System
 > Setup > System Setup > Accounts > Accounting Categories.
 - On the category you wish to delete, click the
 icon.
icon. - Click OK.
 Learn more in the Learning Toolbox
For additional training, complete an interactive material in the Simpro's Learning Toolbox. Learn more in About Simpro's Learning Toolbox.

