Last Updated: December 08 2025
Overview
Asset record forms provide asset summaries and records based on quotes or jobs with associated assets. They are particularly useful if you do not have Maintenance Planner![]() An add-on that tracks customer assets and alerts you when they are due to be serviced. enabled and so do not have asset reporting.
An add-on that tracks customer assets and alerts you when they are due to be serviced. enabled and so do not have asset reporting.
To access various asset forms, open a quote or job and click the Forms tab, then select the appropriate form from the Form drop-down list. If they are not accessible from this menu, you need to add them in System![]() > Setup > Forms Setup > Job / Quote > Forms > Form List > Forms Assigned.
> Setup > Forms Setup > Job / Quote > Forms > Form List > Forms Assigned.
Learn more in How to Set Up Job Forms / How to Set Up Quote Forms.
 Required setup
In order to view content or perform actions referred to in this article you need to have the appropriate permissions enabled in your security group. Go to System![]() > Setup > Security Groups and access your security group to update your permissions. The relevant security group tab and specific permissions for this article can be found here:
> Setup > Security Groups and access your security group to update your permissions. The relevant security group tab and specific permissions for this article can be found here:
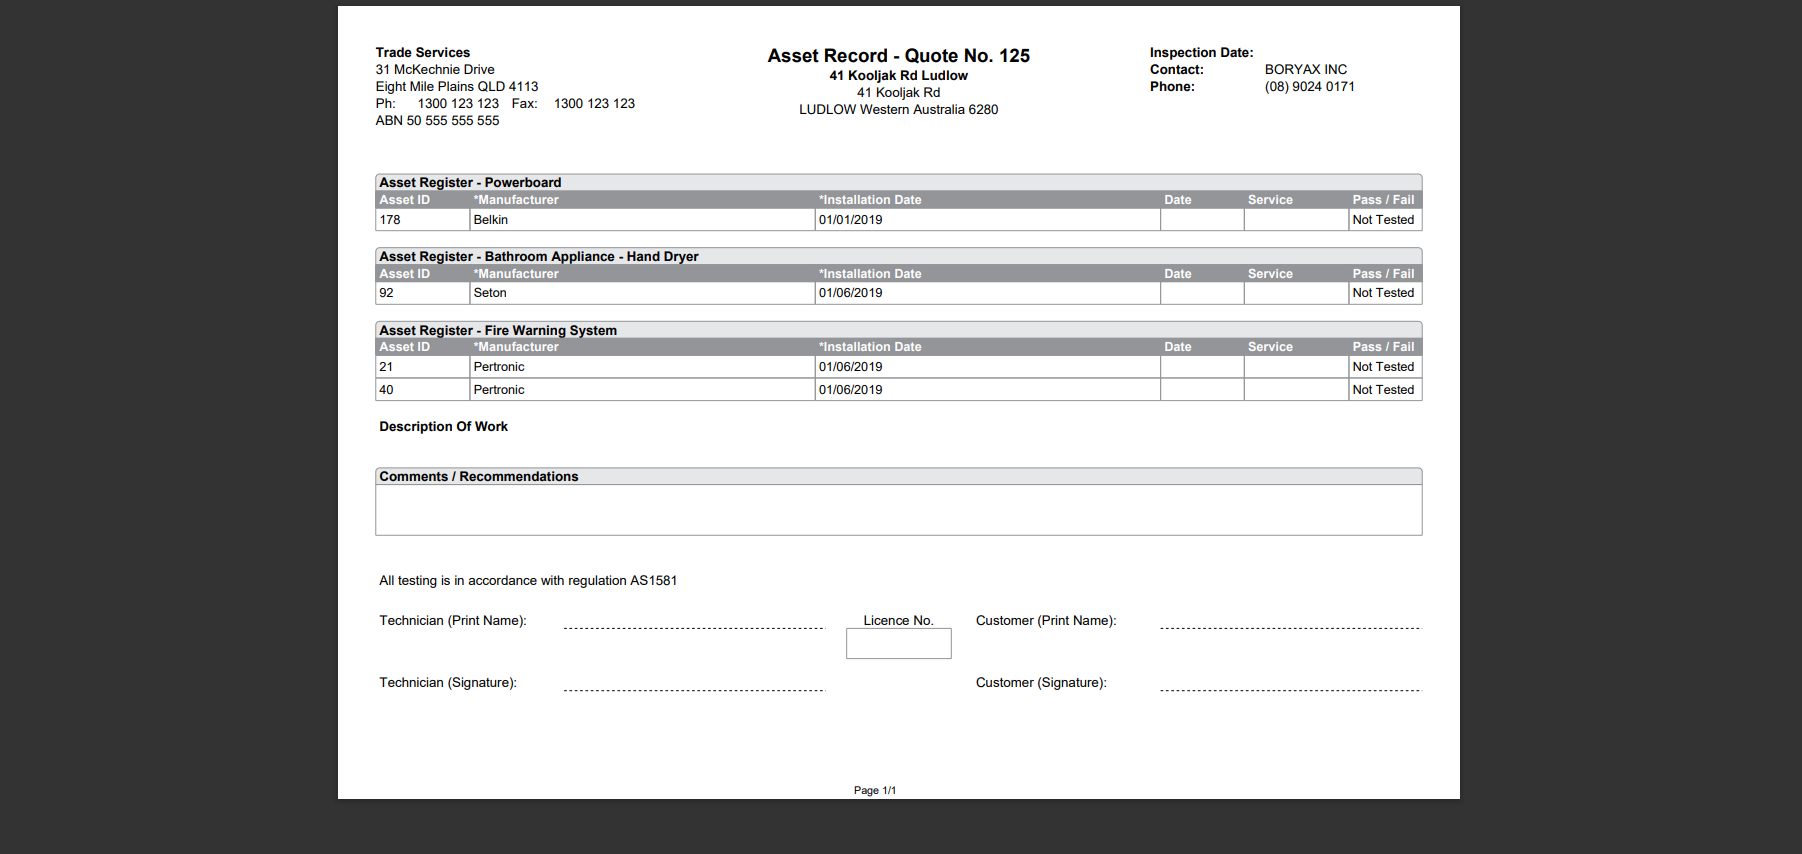
 Asset Record - Quote / Job form
The Asset Record - Job form is useful when you need to view or present all asset testing information specific to a job, and you can view previous job testing information using the Asset Record - Quote form.
The sections on the Asset Record - Quote / Job form include:
| Description of work | Displays a description of work generated from the job or quote summary. |
| Header | Displays your company's information based on your settings in System |
| Asset register | Displays assets grouped by asset type, along with failure points and technician recommendations. |
| Asset custom fields | Displays the Simpro Premium-generated Asset ID, the first six custom fields for each asset type, date of service, service level, and the pass / fail result. If you have more than six custom fields on your asset type, arrange the fields so the most important ones display here. |
| Comments / recommendations | Used only when manually entered on a printed form. |
| Signatures |
This is automatically populated by the technician's signature and . If the technician signs off on the job more than once, the most recently captured signature that also has a customer signature is used on the form. |
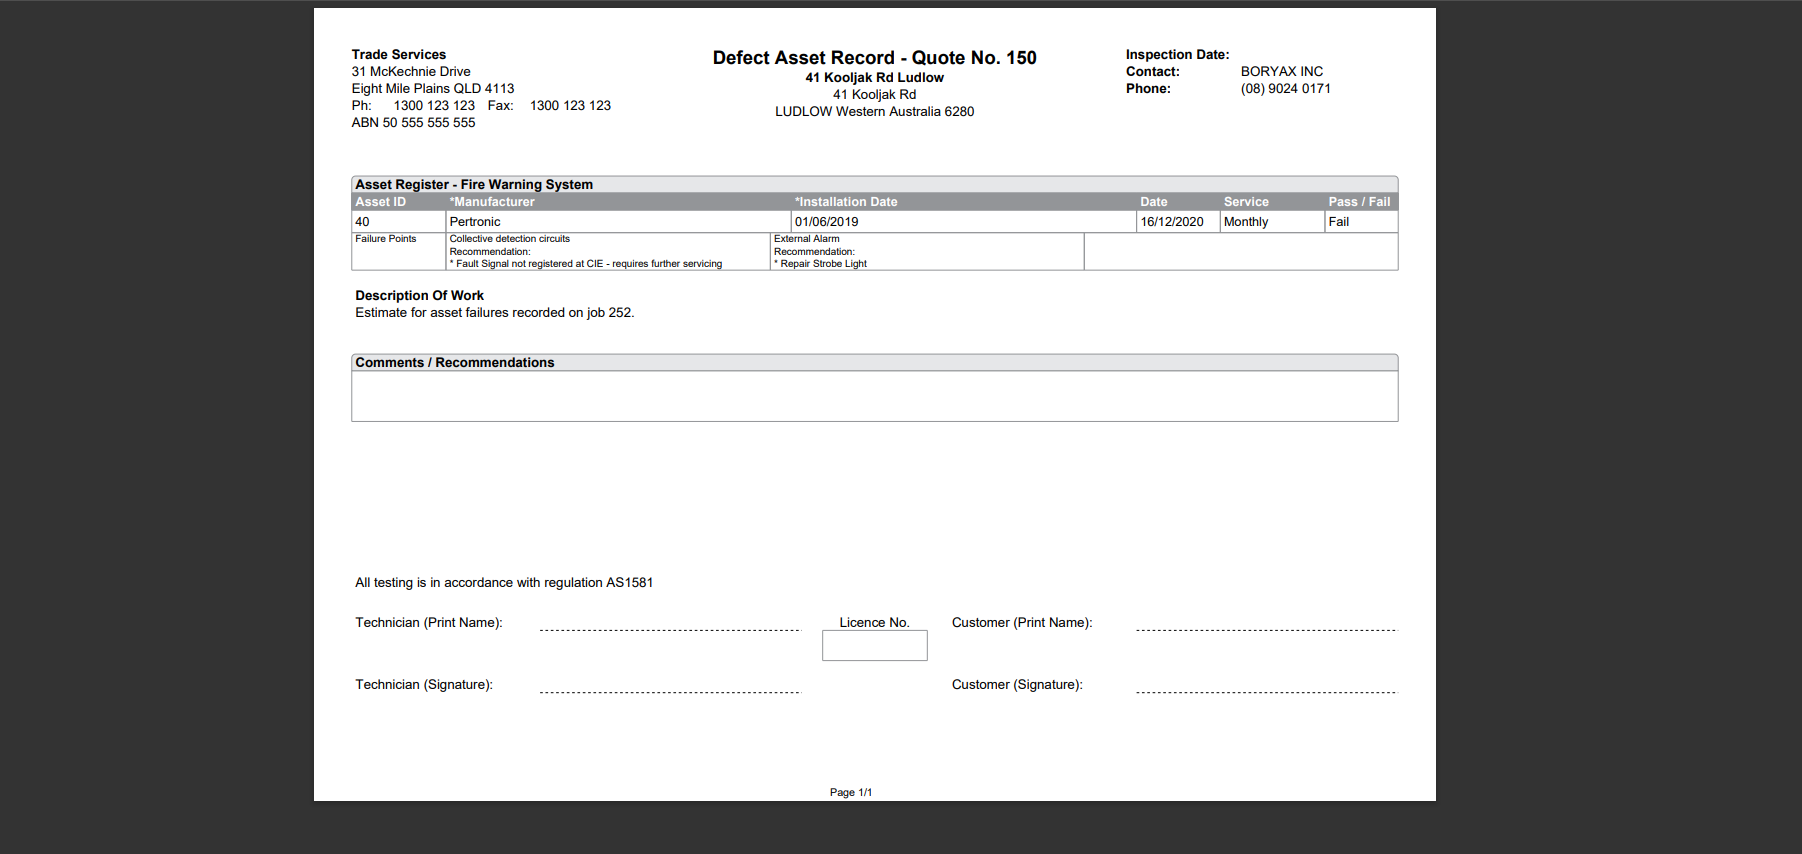
 Asset Record - Defect form
The Asset Record - Defect form is useful when you need to view or present only the assets which failed on a particular maintenance job. You can also view this form for quotes, and it displays the failed asset list referencing the service job and all failed asset details.
The sections on the Asset Record - Defect form include:
| Description of work | Displays a description of work generated from the job or quote summary. |
| Header | Displays your company's information based on your System |
| Asset register | Displays assets grouped by asset type, along with failure points and technician recommendations. |
| Asset custom fields | Displays the Simpro Premium-generated Asset ID, the first six custom fields for each asset type, date of service, service level, and the pass / fail result. If you have more than six custom fields on your asset type, arrange the fields so the most important ones display here. |
| Comments / recommendations | Used only when manually entered on a printed form. |
| Signatures |
This is automatically populated by the technician's and customer's signature captured. If the technician signs off on the job more than once, the most recently captured signature that also has a customer signature is used on the form. To include the technician's Licence No., learn more in How to Set Up Asset Record Forms. |
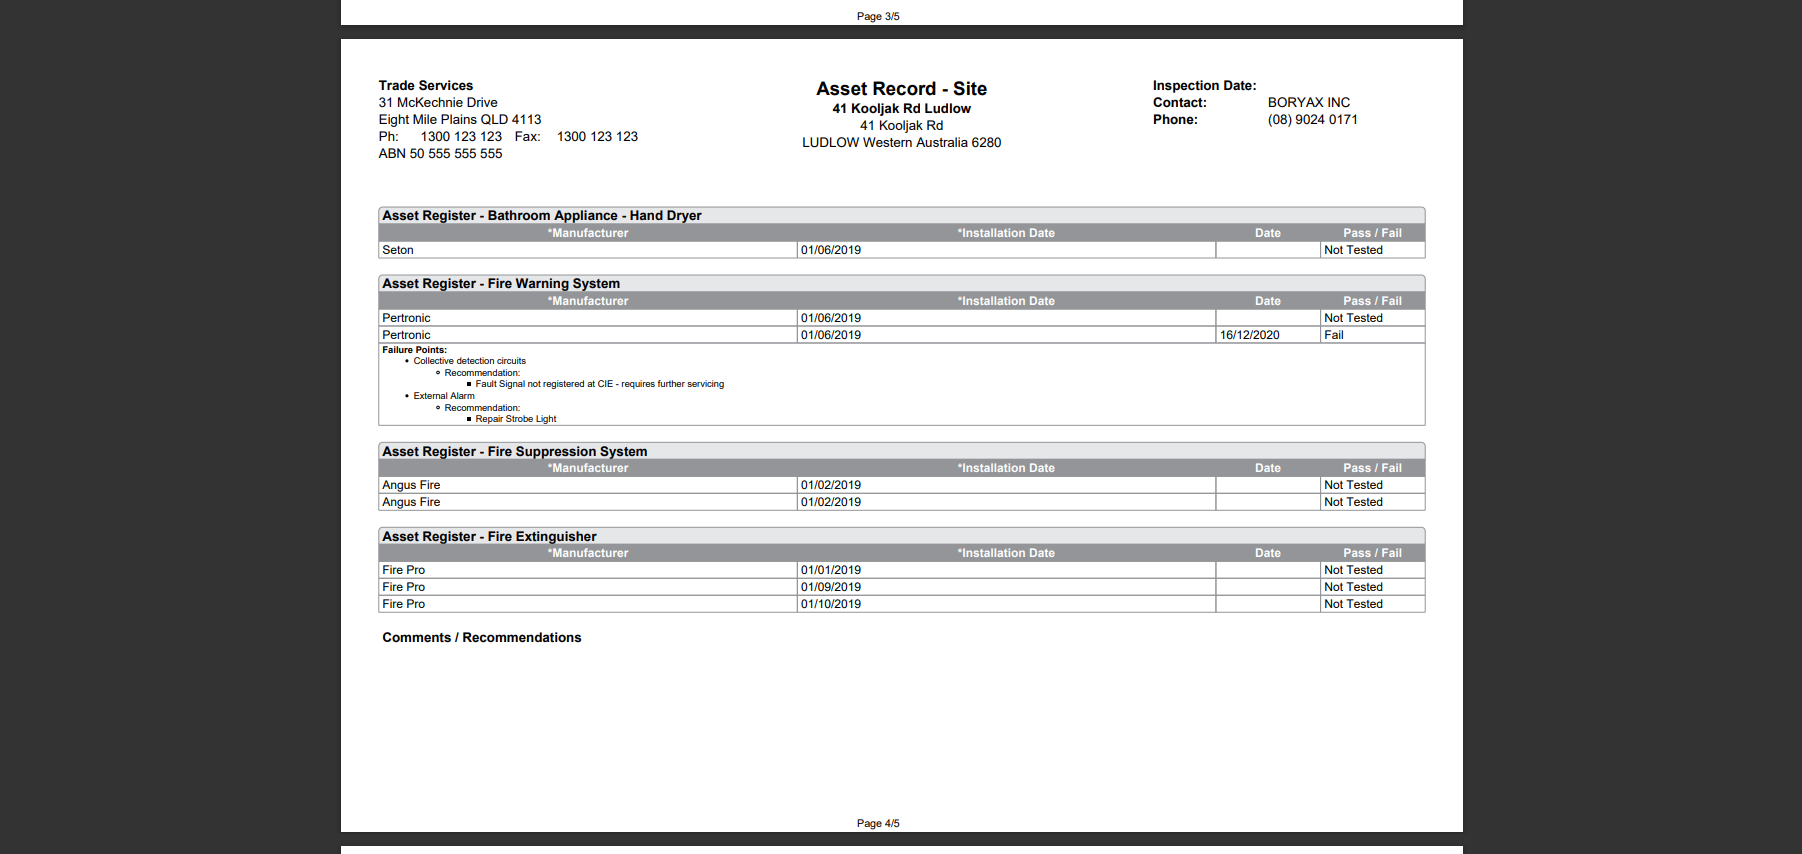
 Asset Record - Site form
The Asset Record - Site form is useful when you need to view or present all assets and associated test results for a specific site. It can be generated for a quote or a job, but displays all assets on a site and not just the ones assigned to that quote or job.
The sections on the Asset Record - Site form include:
| Header | Displays your company's information based on your System |
| Asset register | Displays assets grouped by asset type, along with failure points and technician recommendations. |
| Asset custom fields | Displays the Simpro Premium-generated Asset ID, the first six custom fields for each asset type, date of service, service level, and the pass / fail result. If you have more than six custom fields on your asset type, arrange the fields so the most important ones display here. |
| Comments / recommendations | Used only when manually entered on a printed form. |
| Signatures | Leaves a space to physically sign a printed form. |
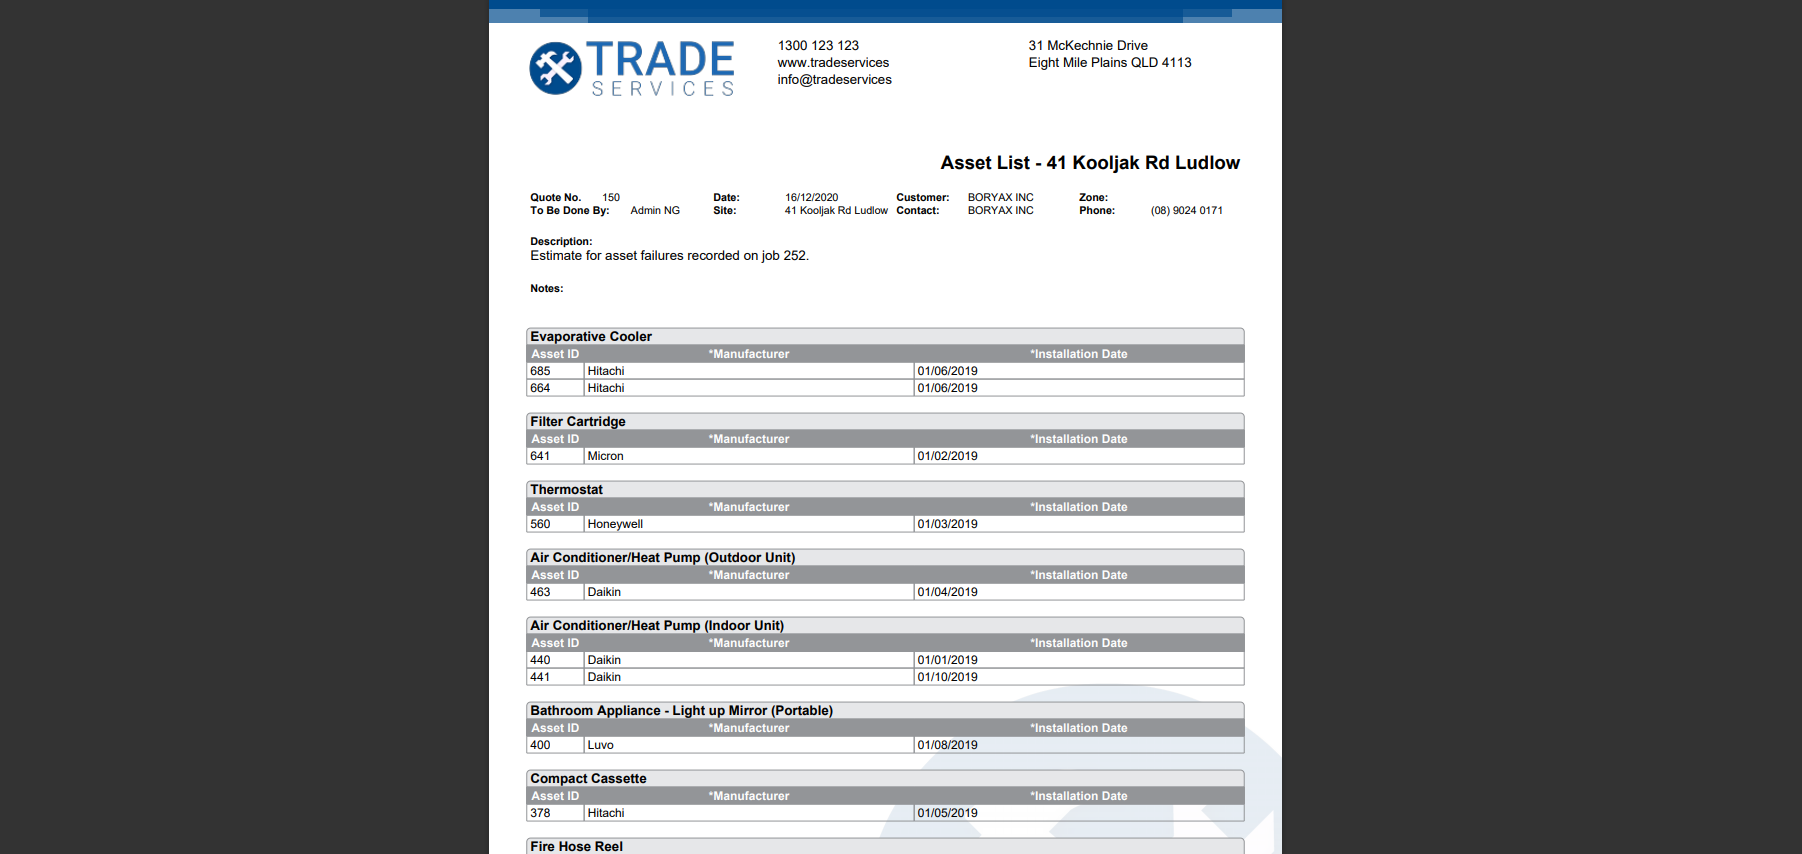
 Asset List - Site form
The Asset List - Site form is useful when you need to view or present a list of all assets on a site without any associated test results. It can be generated through a quote or a job.
The sections on the Asset List - Site form include:
| Header | Displays your company's letterhead as specified in System |
| Job / quote information | Displays job or quote information including job or quote number, technician's name, date of service, customer name, zone, site address and site contact name and phone number. |
| Notes | Displays notes entered by the technician during the service. |
| Description | Displays a description generated from the job or quote summary. |
| Assets | Displays assets grouped by asset type. |
| Asset details | Displays the Simpro Premium-generated Asset ID and the first six custom fields for each asset type. If you have more than six custom fields on your asset type, arrange the fields so the most important ones display here. |
| Signatures | Leaves a space to physically sign a printed form. |
 Quote - Defect Rectification form
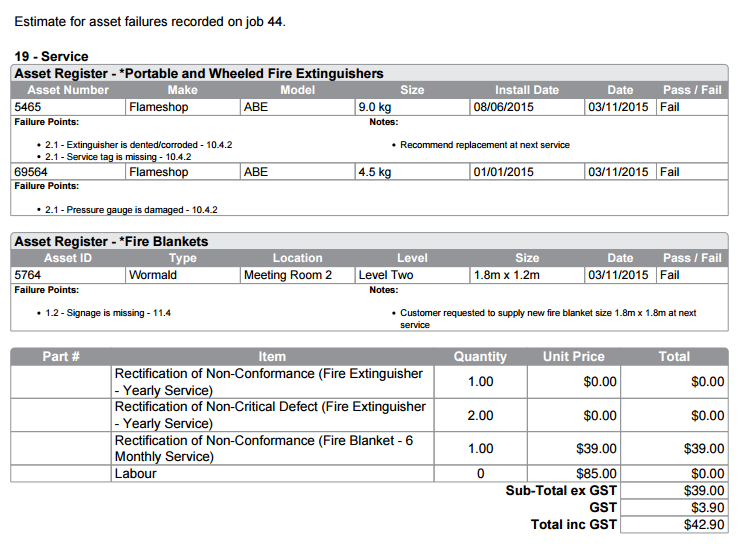
The Quote - Defect Rectification form is useful when you need to present a rectification proposal for failed assets on a specific site. The main difference between the standard quote forms and the Quote - Defect Rectification form is that the latter displays asset information and failure points, along with the pre-builds required to rectify the asset failures.
The sections on the Quote - Defect Rectification form include:
| Header | Displays your company's letterhead as specified in System |
| Quote information | Displays quote information including quote number, site, site contact, salesperson, phone number and quote validity. |
| Description | Displays the quote description. When no description was entered, a default description appears, such as 'Estimate for asset failures recorded on job XX.' |
| Asset register | Displays failed assets, failure points, test readings and recommendations. |
| Rectification quote | Displays pre-builds and labour needed to rectify the failure points, along with prices and a quote total. |
 Advanced
Attach an asset record form to a quote or job
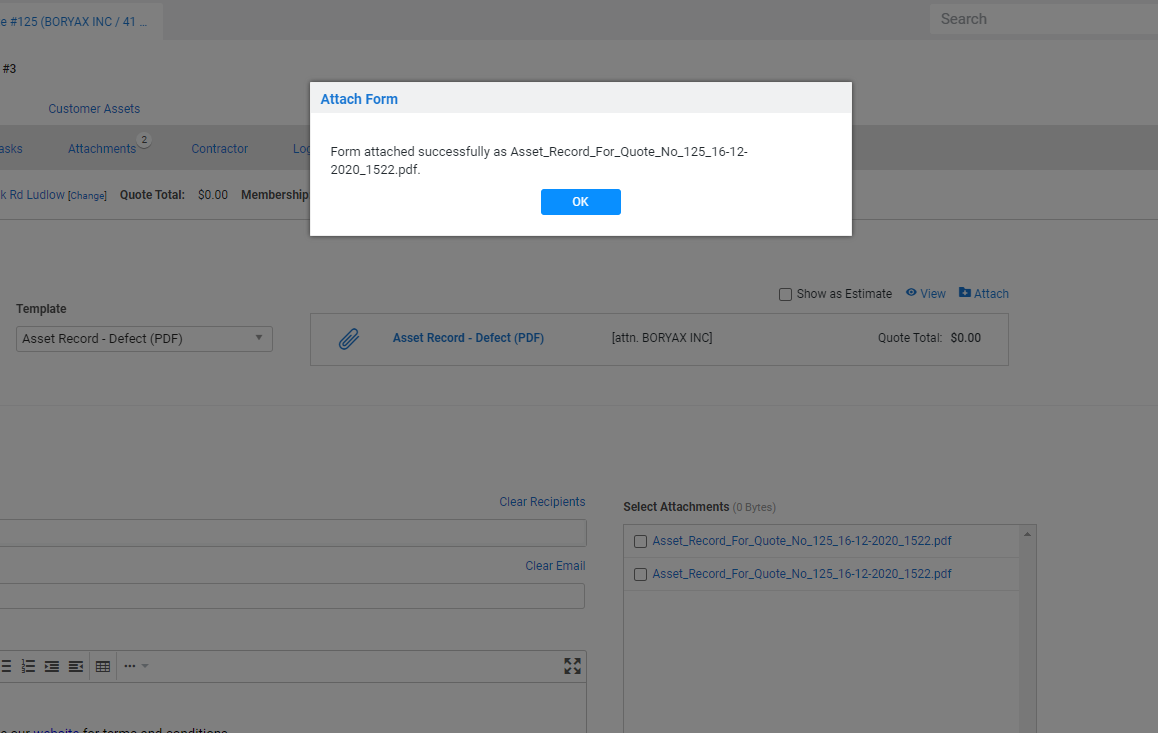
After you have generated and previewed a form, it is good practice to attach the PDF to the quote or job itself. The PDF name includes a timestamp that is helpful for future use.
To attach an asset record form to a quote or job:
- Open the quote or job.
- Go to Details > Forms.
- Select the Form.
- Click Attach.
If required, you can rename the attachment.
Email an asset record form
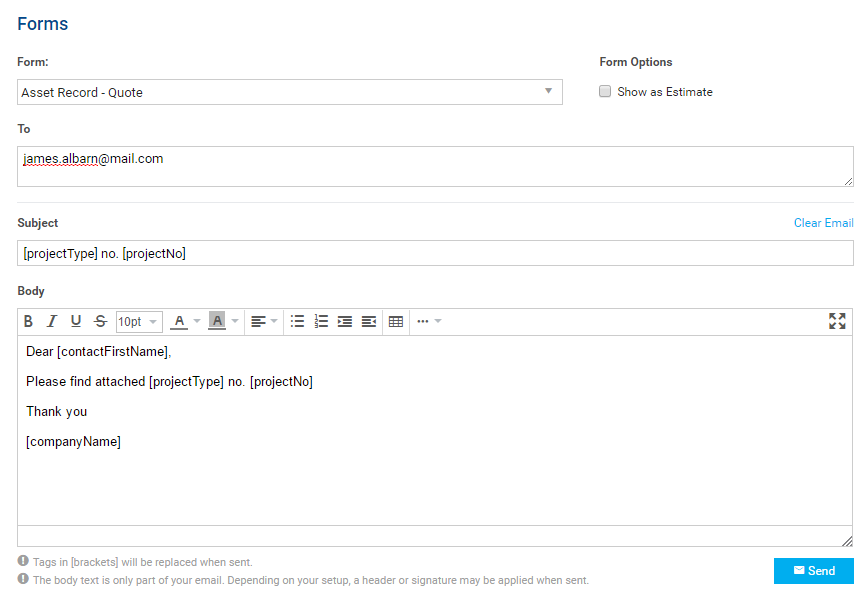
To email an asset record form from a quote or job:
- Open the quote or job.
- Go to Details > Forms.
- Select the Form.
- Select a contact, or enter an email address in the To field.
- Adjust the default Subject and Body if required. The default is set up in System
 > Setup > Forms Setup > Quote.
- Alternatively, click Clear Email to enter a new Subject and Body, or select a script from the Insert Script drop-down. Learn more in How to Use Scripts.
- Click Send.
To email an asset record form as an attachment when you email a quote or job:
- Open the quote or job.
- Make sure your attachments are already attached to that quote or job.
- Go to Details > Attachments.
- Select the Email check box for all required attachments.
- Email the quote or job as usual.
Attachments on a quote is emailed when the quote is emailed to a customer, while attachments on a job is emailed along with the invoice.
