Last Updated: December 12 2025
Overview
In Simpro Premium, attachments can be added to many areas, including quotes, jobs, items and people. You may wish to use attachments to easily store copies of agreements or contracts, images of items, and other associated documents. You can upload files up to 80MB in size to Simpro Premium, the customer portal, employee portal and contractor portal.
Attachments are managed through the Attachments tab in a quote, job, customer card file etc. This tab does not appear until the project has been saved at least once.
Access to creating, editing and deleting attachments and attachment folders may be restricted by a user's security group settings.
Changes to attachments updates in Simpro Mobile after syncing.
Any attachments you create in Simpro Premium are stored in Amazon's Simple Storage Service. Your attachments are secure, and large attachments do not affect Simpro Premium's performance.
 Required setup
In order to view content or perform actions referred to in this article you need to have the appropriate permissions enabled in your security group. Go to System![]() > Setup > Security Groups and access your security group to update your permissions. The relevant security group tab and specific permissions for this article can be found here:
> Setup > Security Groups and access your security group to update your permissions. The relevant security group tab and specific permissions for this article can be found here:
 Add an attachment
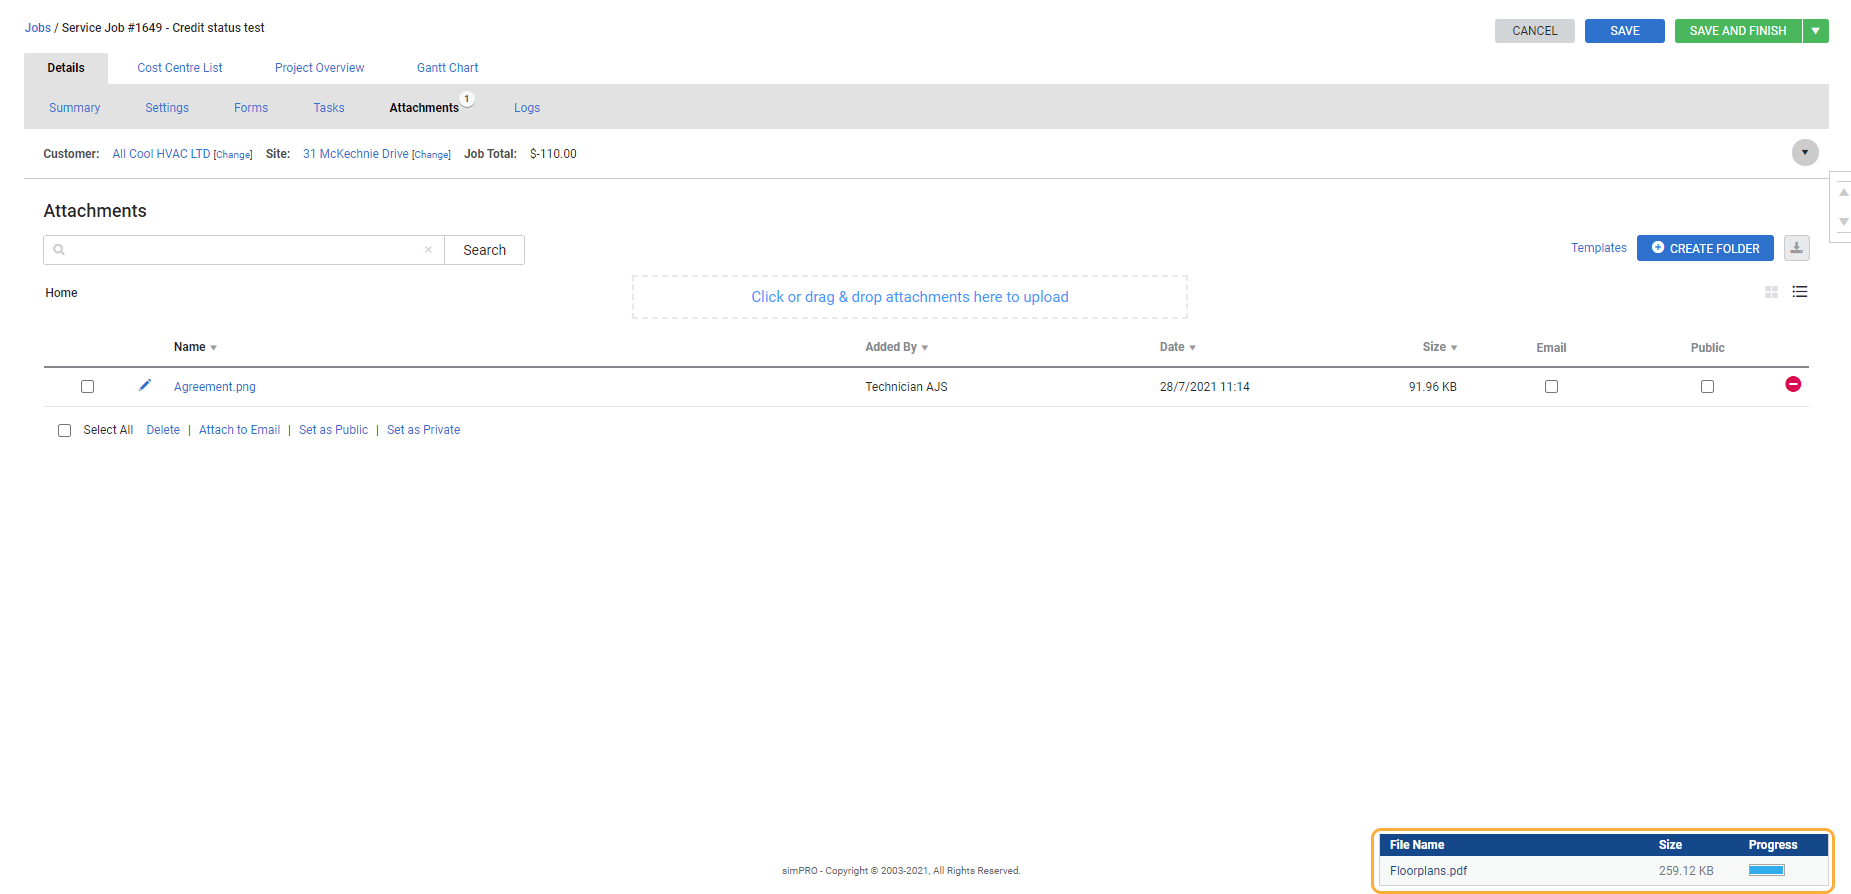
You can add an attachment by dragging and dropping a file into the upload section in the Attachments tab, or by manually uploading it. A progress bar appears while the file is uploading.
To drag and drop an attachment:
- Go the Attachments tab and open the folder as applicable.
- Drag a file from your computer and drop it in the attachments to upload box, or drop it on the folder.
- Click Save and Finish.
To upload an attachment in the attachments section:
- Go to the Attachments tab and open the folder as applicable.
- Click in the attachments section.
- Find the file in your local drive.
- Click Open.
- Click Save and Finish.
 Delete an attachment
To delete an attachment:
- Go the Attachments tab and open the folder as applicable.
- On the item you wish to delete, click the
 icon.
icon.- Alternatively, to remove attachments in bulk, select multiple attachments and click Delete.
- You cannot perform bulk action on folders.
- Click OK.
- Click Save and Finish.
 Adjust attachment options
Click an attachment to view the attachment and attachment options:
- Select Public or Email
- Delete the attachment
- Expand to full-screen
- Rotate 90 degrees
- Download the attachment
- Zoom in
View attached images in a table
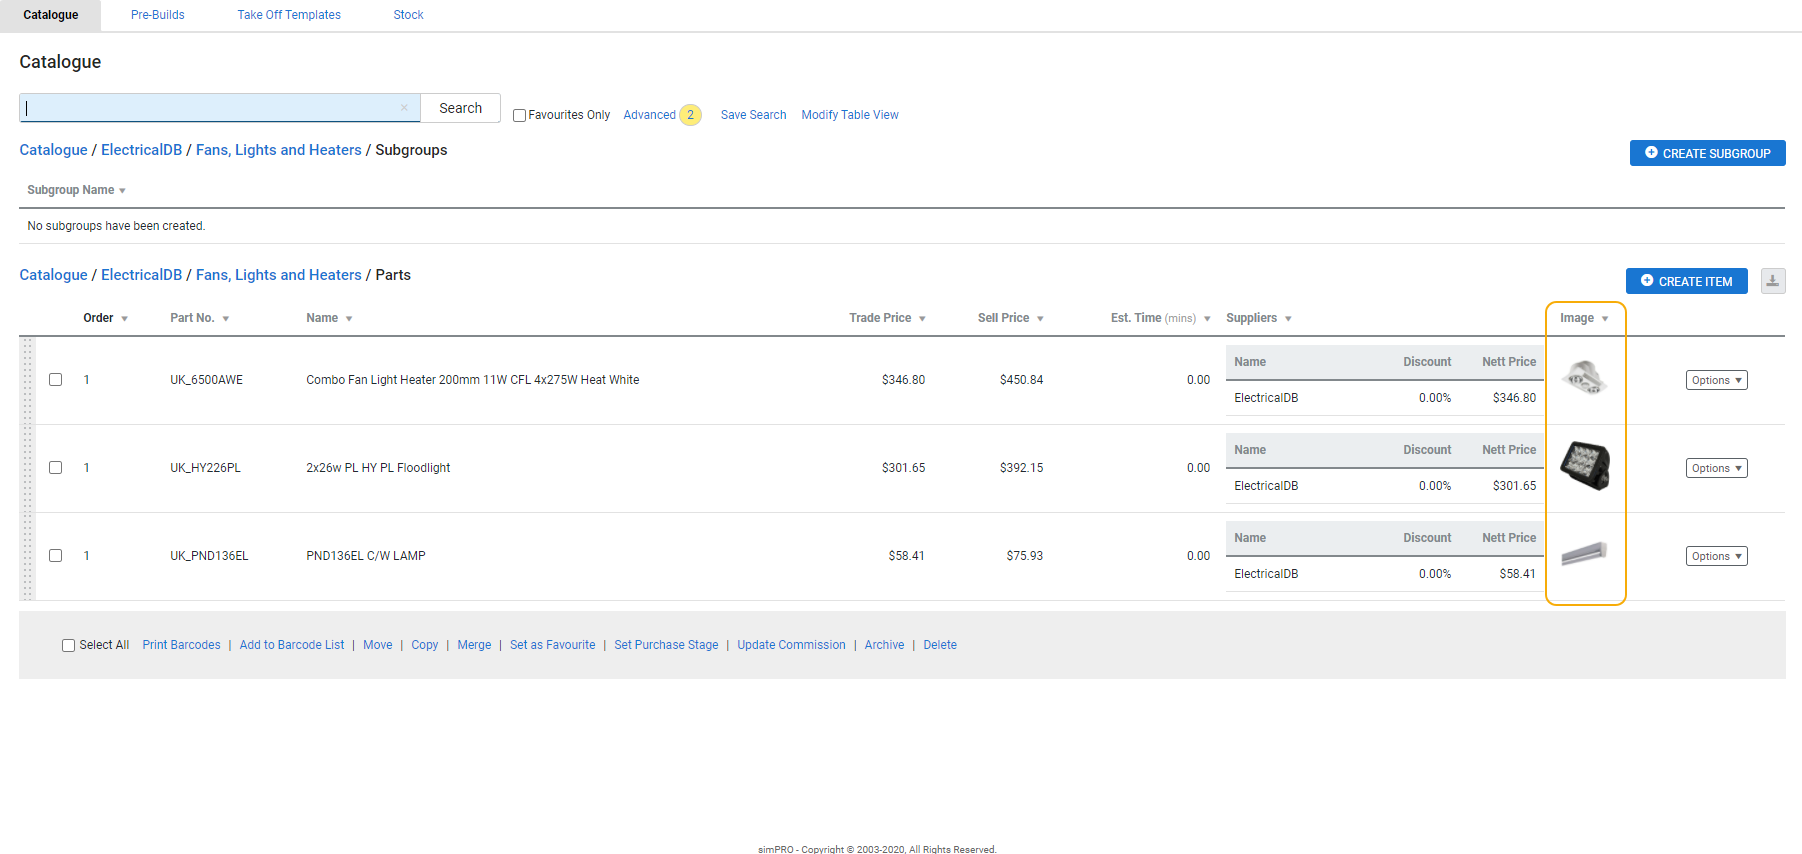
If you upload images of compatible file types as attachments on items, pre-builds and assets, you can then set them to display in table view for easy visual identification.
To view attached images in a table:
- Go the Attachments tab and open the folder as applicable.
- Upload the image, or locate it in the list.
- Select Default image for that attachment.
- Click Save and Finish.
- Go to the applicable table, such as a group in the Catalogue.
If the image does not appear in the table, modify the table view:
- Click Modify Table View.
- Ensure Image is selected.
- Click Save and Finish.
Access to the Modify Table View feature may be restricted by a user's security group settings.
Make an attachment public
If you make an attachment public, it is visible in the customer portal.
To make an attachment public:
- Go the Attachments tab and open the folder as applicable.
- Upload the attachment, or locate it in the list.
- Select Public for that attachment.
- Alternatively, select multiple attachments and click Set as Public.
- You cannot perform bulk action on folders.
- Click Save and Finish.
The ability to view Private attachments in Simpro Mobile depends on your settings in the System Setup. Learn more in Simpro Mobile Settings.
Email an attachment
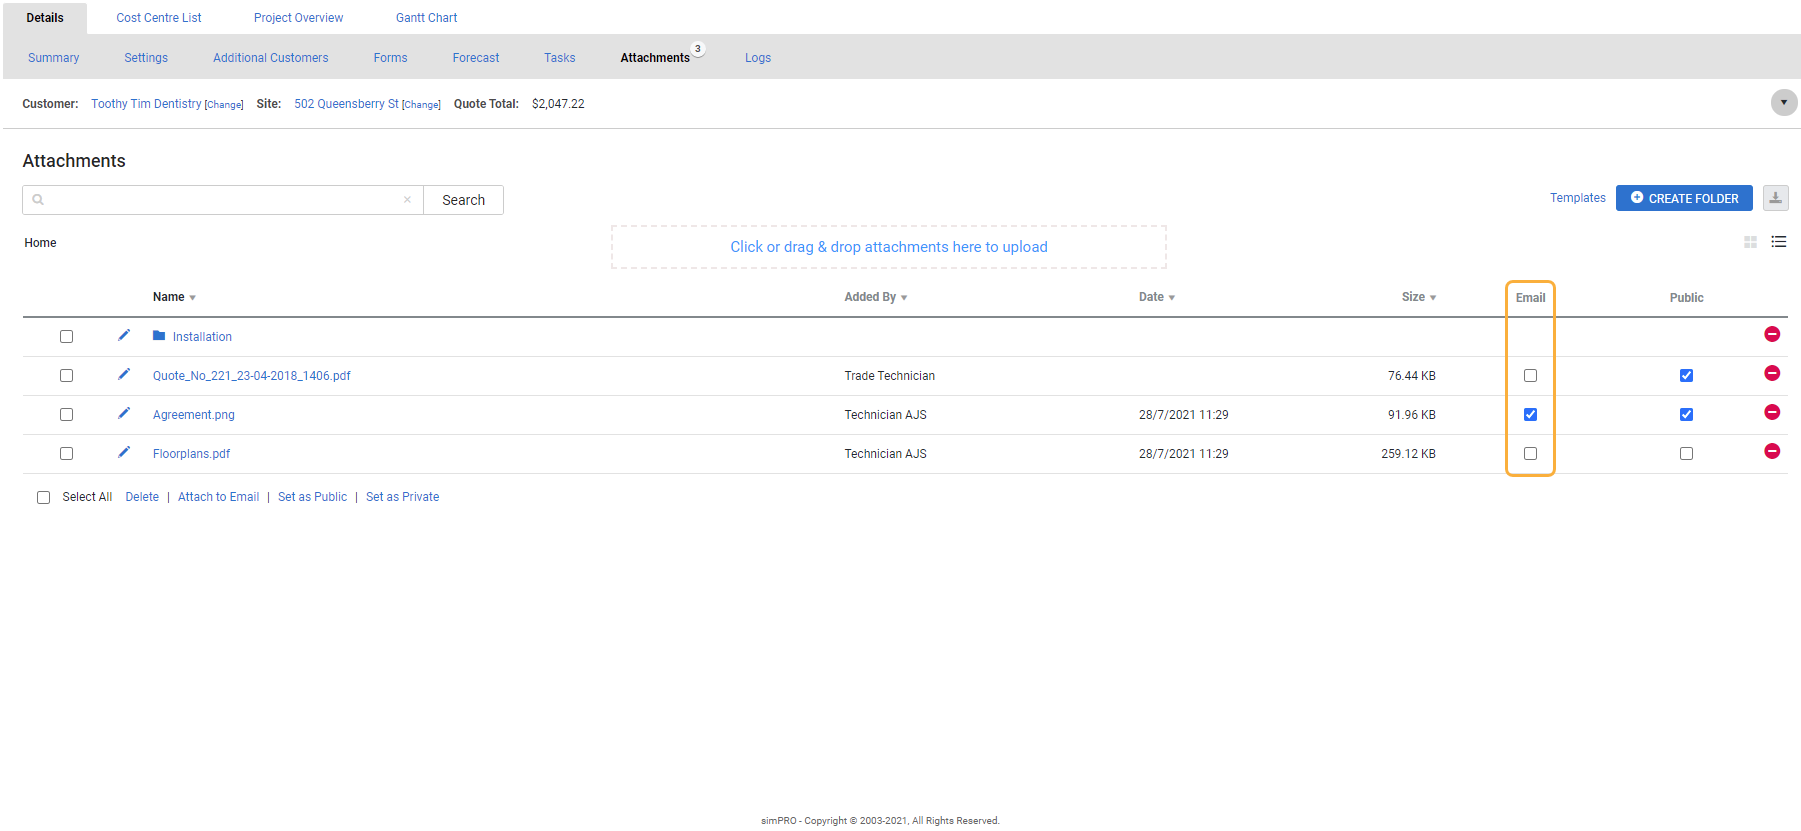
If you select Email on an attachment, it is available to email from the Forms tab. Selecting this option automatically makes the attachment public too.
To include an attachment when emailing a quote, invoice etc:
- Go the Attachments tab and open the folder as applicable.
- Upload the attachment, or locate it in the list.
- Select Email for that attachment.
- Alternatively, select multiple attachments and click Attach to email.
- You cannot perform bulk action on folders.
- Click Save and Finish.
The attachment is now available and automatically selected to email in the Select Attachments section of the Forms tab. To send an attachment on its own, select the Email Only form.
Attachments on items are for on-screen use only and do not carry over to quotes or jobs the item is assigned to.
 Rename an attachment
To rename an attachment after uploading it:
- Go the Attachments tab and open the folder as applicable.
- On the file you wish to rename, click the pencil icon.
- Edit the Attachment Name as required. See File name restrictions.
- Click Update.
- Click Save and Finish.
This change reflects in Simpro Mobile after syncing.
File name restrictions
Attachment file names cannot include the special characters / \ ? % * : | . " < > . If a special character is entered when renaming a file, the unsupported character is removed from the file name.
 Search for an attachment
To search for an attachment:
- Go to the Attachments tab.
- Enter search terms in the search bar under Attachments.
- Press Enter or click Search.
 Organise attachments
Organise your attachments by sorting them into folders and sub-folders. Click Home at any time to go back to the main attachment folder.
Create an attachment folder
To create an attachment folder:
- Go the Attachments tab and open the folder as applicable.
- Click Create Folder.
- Enter a Folder Name.
- Click Create.
- Click Save and Finish.
Delete an attachment folder
Attachment folders can only be deleted when they do not contain any attachments. If you wish to delete a folder, you must first delete all the attachments within it.
To delete an empty attachment folder:
- Go the Attachments tab and open the folder as applicable.
- On the folder you wish to delete, click the
 icon.
icon. - Click OK.
- Click Save and Finish.
Rename an attachment folder
To rename an attachment folder:
- Go to the Attachments tab and open the folder as applicable.
- On the folder you wish to rename, click the pencil icon.
- Click Update.
- Click Save and Finish.
Move an attachment into a folder
To move an attachment into a folder:
- Go the Attachments tab and open the folder as applicable.
- Locate the required attachment, then click and drag it into the folder.
- Click Save and Finish.
You can also drag and drop folders into other folders.
Switch between list and grid view
Change the way attachments and folders are displayed to suit your needs. In grid view, images of compatible file types and PDF documents are displayed as thumbnails.
Under the Create Folder button, click Switch to List View or Switch to Grid View to switch between views.
 Create folder templates
If you follow a standard process to perform repetitive or similar types of work, use default folder templates to save time, manage your work easily, and eliminate manual errors, such as creating incorrect folders.
You need to have the applicable security group permissions enabled to use default folder templates when creating leads, quotes and jobs in Simpro Premium.
- Go to System
 > Setup > System Setup > Security Groups.
 - Click the required security group from the list.
- In Actions > Leads, select Edit Leads Attachments and Edit and Delete.
- Go to the Quotes and Jobs sub-tabs and select the same options.
- Click Save and Finish.
To create attachment folder templates:
- Open a lead / quote / job.
- Go to the Attachments tab and create the required folder structure.
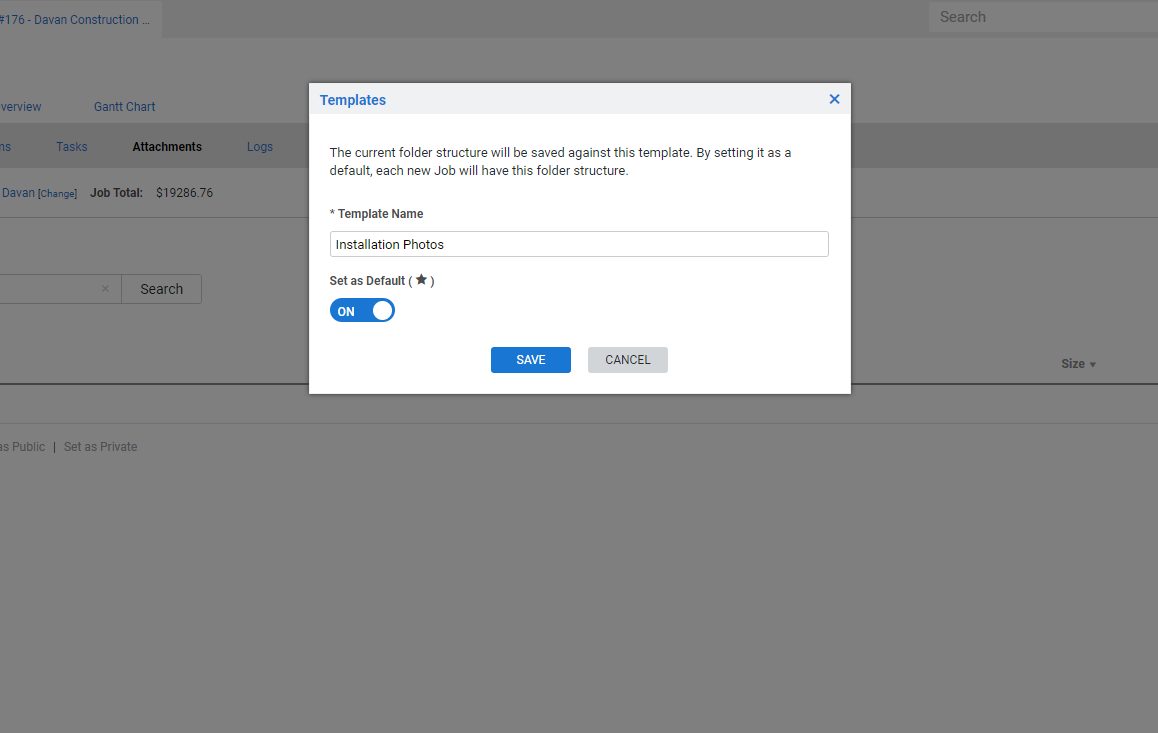
- Click Templates and add a Template Name.
- Toggle on Set as Default, if required, to add these folders to any new work of the same type. Note that:
- If you have created the template in a job, this folder structure is added to all new jobs.
- If you convert a lead into a quote and there are existing folders in the lead, the default folder structure for quotes is not added.
- If you convert a quote into a job and there are existing folders in the quote, the default folder structure for jobs is not added.
- Click Save.
- Click Save and Finish.
To create multiple folder structure templates, open different work with different structures and click Templates to save them as default.
To add a template to your work:
- Open a lead / quote / job.
- Go to the Attachments tab.
- Click Templates.
- Click the template that you want to add to your work.
- You can add multiple templates, if required.
 Download attachments
You can download attachments and attachment folders as a compressed file (a ZIP file).
When you click ZIP, the ZIP file contains all the attachments and folders on screen and their contents, retaining your folder and sub-folder structure. If you wish to download all your attachment folders for a certain project, make sure you are in the top Home folder when you click ZIP. If you only want to download the contents of a single folder, open that folder before clicking ZIP.
To download attachments:
- Go the Attachments tab and open the folder as applicable.
- In the top right of the Attachments section, click the
 icon.
icon. - Click ZIP.
You can then extract the folders and attachments as required.
To download an individual attachment, click its name to open it, then save the file to your device.
 Advanced
Save a quote or job as an attachment
When you email a quote or job form, you have the option to attach the form PDF to the quote or job itself. This feature is useful for keeping track of earlier versions of a quote or job if it is edited later.
To save a quote or job form as an attachment:
- Open the Forms tab in your quote or job.
- Select a Form type and adjust other details as required.
- Click View to preview the PDF, then close and return to the Forms page.
- Click Attach.
- Click Save and Finish.
Attach a signature image file
If you attach an image of a signature to an employee or contractor's card file, you can later insert that image as a signature on quote and job detail forms.
Image file type restrictions
To view an image in a table, as a thumbnail in grid view, or in a preview window, it must be one of the following compatible file types:
- .jpg or .jpeg
- .png
- .gif
You can also view TIFF images (.tif or .tiff) as thumbnails when in grid view.
Learn more in How to Create Employees.
 Manage multiple attachments
You can select multiple attachments simultaneously and make the required changes at once.
Select the required attachments using the corresponding check boxes or from the options below the Attachments table, Select All. And, you can choose one of the bulk action options from:
- Delete: Remove multiple attachments instead of deleting each attachment individually.
- Attach to Email: Make multiple attachments available to be attached when emailing contacts.
- Set as Public: Make attachments publicly available in Simpro Mobile and in the Customer Portal.
- Set as Private: Make the attachments inaccessible in Simpro Mobile and in the Customer Portal.
The available bulk actions cannot be applied to folders. Also, using the listed bulk actions on folders does not impact the attachments stored in those folders.
Additionally, attachments associated with customers, employees, contractors, site, suppliers, pre-builds, catalogue, and plant & equipment items do not have an option to Attach to Email as you cannot email those directly to the client associated with them.


