Last Updated: December 12 2025
Overview
Integrate Simpro Premium with your Exact accounting package to post transactions and card file information directly from Simpro Premium into Exact through the accounting link.
Before you begin posting your Simpro Premium transactions to Exact, you need to set up your Simpro Premium data and enable the Exact accounting link. Learn more in Set Up Simpro Premium for the Accounting Link.
 Required setup
In order to view content or perform actions referred to in this article you need to have the appropriate permissions enabled in your security group. Go to System![]() > Setup > Security Groups and access your security group to update your permissions. The relevant security group tab and specific permissions for this article can be found here:
> Setup > Security Groups and access your security group to update your permissions. The relevant security group tab and specific permissions for this article can be found here:
Before performing the steps detailed below, ensure that this part of your build is set up correctly. The relevant steps to set up the features and workflows detailed in this article can be found here:
 Map Exact accounts
Before using the accounting link you must map your financial accounts, chart of accounts and cost centres in Simpro Premium with your items and accounts in Exact. Learn more in How to Set Up Financial Defaults, How to Set up Chart of Accounts and How to Use Cost Centres.
When mapping accounts you need to locate the relevant Item number from Exact. You can find Item numbers in Exact under Company settings > Master Data > Items. This is used for relevant income and expense accounts.
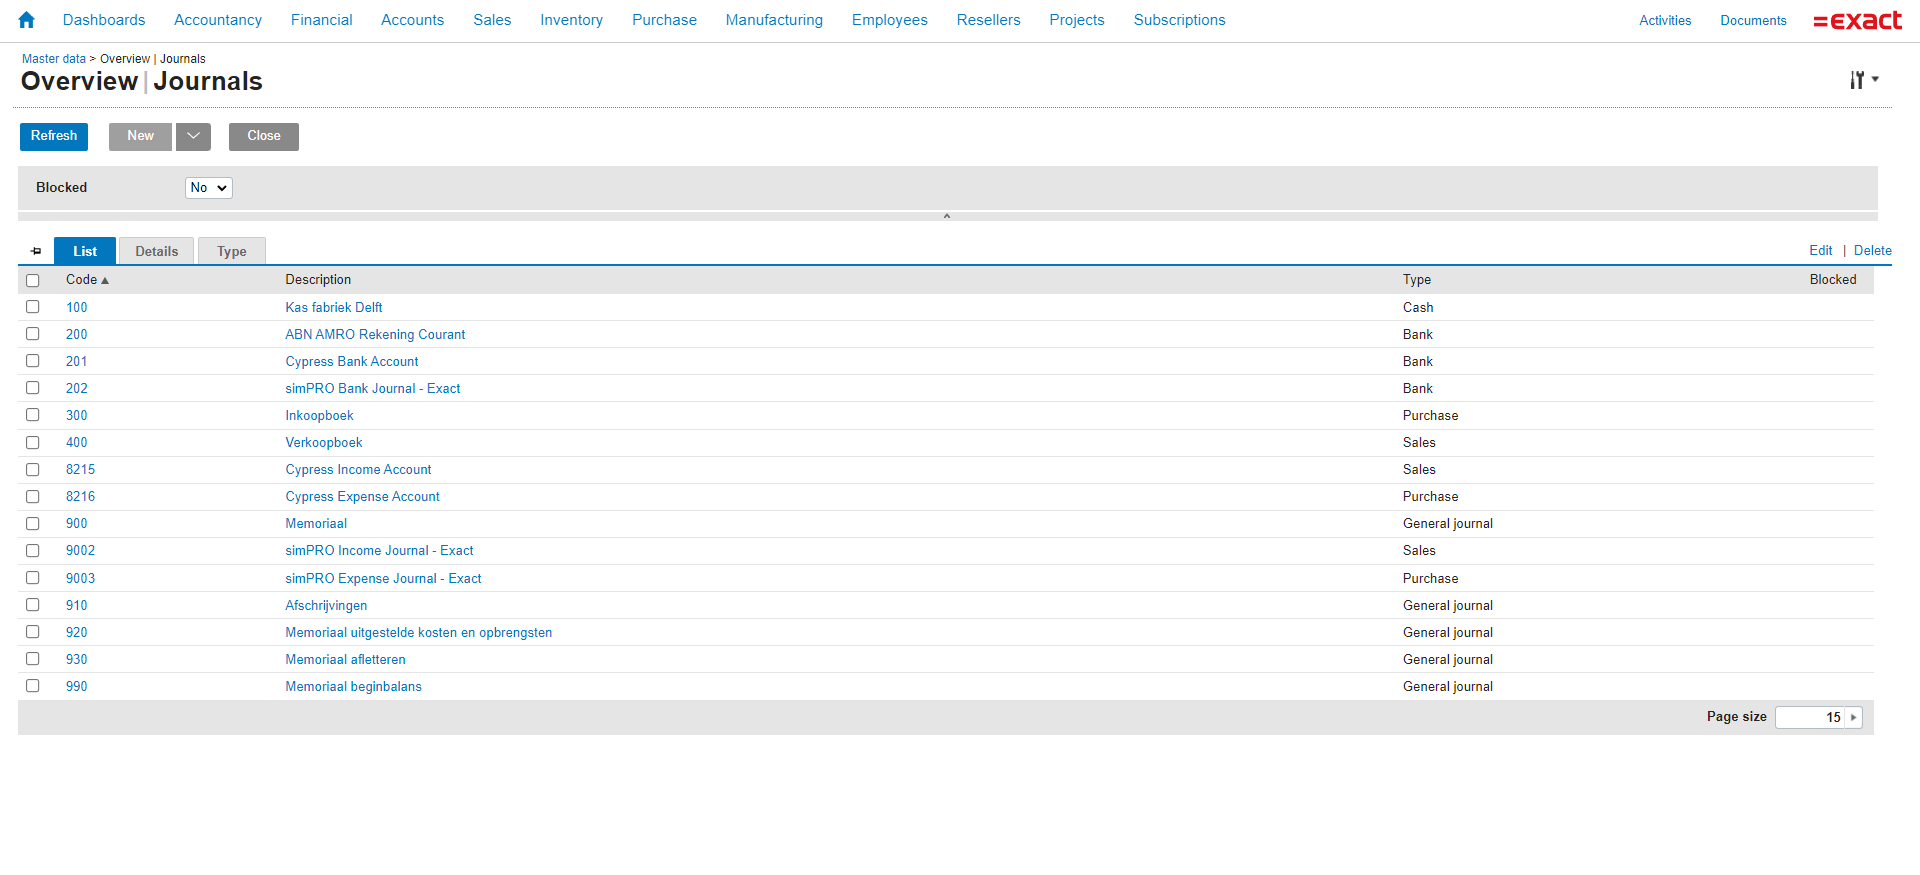
Any new customer invoice, supplier invoice, and payment will also need to have a journal type selected in Exact. You can find the journals in Exact under Company settings > Master Data > Journals.
To map your Simpro Premium accounts to accounts in Exact:
- Go to Utilities
 > Exact > Settings.
 - Connect to Exact, if necessary.
- Check to ensure each Exact Account is correct for your:
- Income Account, Bank Journal and Expense Account.
- If the automatically populated Exact Account is blank or incorrect, select the correct account from the drop-down list to map.
- Click Save.
 Connect to Exact
When you use Exact for the first time you need to connect Simpro Premium to Exact using your Exact login. To connect to Exact:
- Go to Utilities
 > Exact.
 - In the Connection tab, click CONNECT TO Exact.
- Enter your Exact username and password and click Log In.
- Click Continue to provide Simpro Premium access to integration with Exact.
Once you are connected to Exact you can adjust your Exact export options.
Learn more in Use the Exact Accounting Link - NL Only.
 Adjust Exact export options
You can export a variety of transaction types from Simpro Premium to Exact. Once you have connected to Exact, go to Utilities ![]() > Exact > Settings to define which card files and transactions are exported.
> Exact > Settings to define which card files and transactions are exported.
| Customers |
Export all new customers created in Simpro Premium to Exact. When you edit a customer in Simpro Premium, the changes export to the contact in Exact. |
| Customer Invoices | Export customer invoices and credits created in Simpro Premium to Exact. |
|
Vendors |
Export all new vendors and contractors created in Simpro Premium to Exact. When you edit a vendor / contractor in Simpro Premium, the changes export to the contact in Exact. |
| Vendors Invoices | Export vendor and contractor invoices and credits created in Simpro Premium to Exact. |
| Payments | Export customer payments created in Simpro Premium to Exact. |
To enable a transaction type to be transferred, select On. To prevent it from being transferred, select Off. Then click Save to update your changes.

