Last Updated: December 08 2025
How to Set up Chart of Accounts
Overview
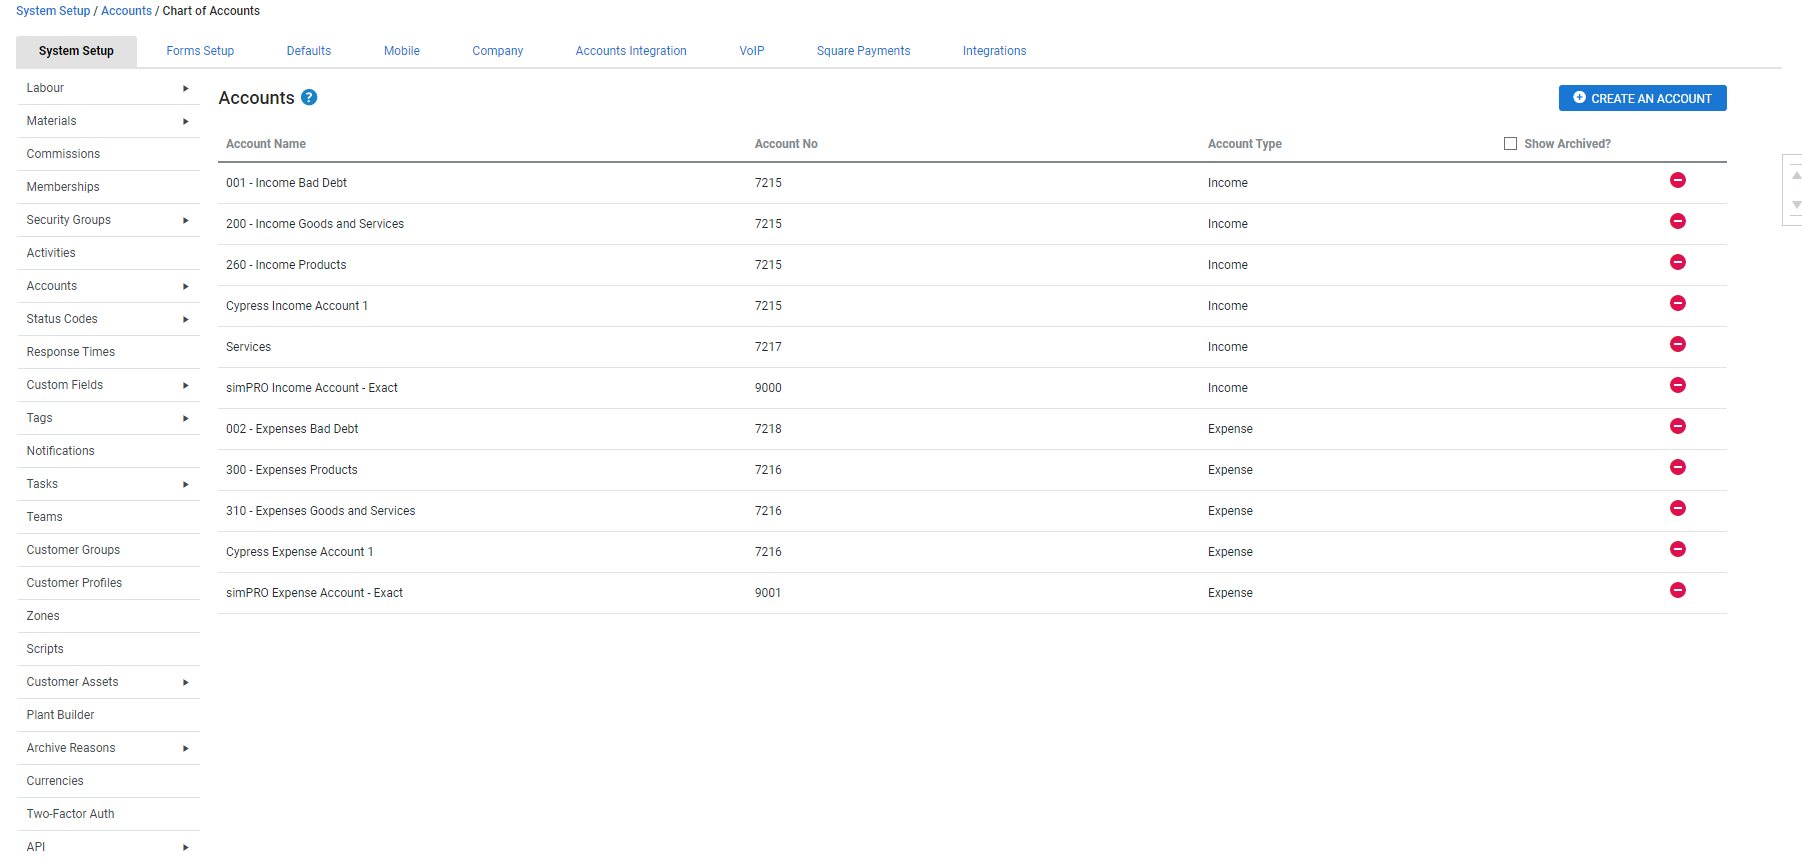
Create all your income and expense accounts in Simpro Premium. To access the chart of accounts, you must have the correct security group permissions.
 Required setup
In order to view content or perform actions referred to in this article you need to have the appropriate permissions enabled in your security group. Go to System![]() > Setup > Security Groups and access your security group to update your permissions. The relevant security group tab and specific permissions for this article can be found here:
> Setup > Security Groups and access your security group to update your permissions. The relevant security group tab and specific permissions for this article can be found here:
 Create new accounts
To create a new account:
- Go to System
 > Setup > Accounts > Chart of Accounts.
 - Click Create an Account.
- Enter the Name and Account No.
- Select an Account Type.
- The Account Type cannot be changed once the account has been saved.
- Learn more about Accrual Revenue and Deferral Revenue accounts in How to Set Up Accruals and Deferrals of Revenue.
- Click Create.
After accounts are created, you can assign them to cost centres. The Default Cost Centre Account is displayed within the job cost centre under the Settings tab. Learn more in How to Use Cost Centres.
 Edit existing accounts
To edit an account:
- Go to System
 > Setup > Accounts > Chart of Accounts.
 - Click the account and edit the name or account number.
- Click Save.
 Delete an account
To delete an account:
- Go to System
 > Setup > Accounts > Chart of Accounts.
 - Click the Remove icon to archive the account.
- If the account is assigned to a cost centre, select another account to re-assign the cost centre and click OK.
Any account that is removed from the Chart of Accounts is archived and remains against any line items that are already assigned to the account.
 Assign accounts to memberships
To assign accounts to memberships:
- Go to System
 > Setup > Memberships.
 - Select the membership.
- Select the relevant Income or Expense account from the account drop-down list.
- Click Save.
Learn more in How to Set Up Memberships.
 View and assign accounts to billable parts and labour
To view assigned income accounts for parts and labour in quotes, jobs, recurring jobs, recurring invoices, prepaid jobs and take off templates:
- Ensure that you have the correct security group permissions to modify job and quote table views.
- Open the quote, job, recurring job, recurring invoice, prepaid job or take off template.
- Go to Parts & Labour > Billable.
- Click Modify Table View.
- Select Income Account.
- Click Save.
Assign income accounts to each item in quotes, jobs, recurring jobs, recurring invoices, prepaid jobs and take off templates:
- Open the quote, job, recurring job, recurring invoice, prepaid job or take off template.
- Go to Parts & Labour > Billable.
- Next to the item select Options.
- Or select multiple items using the check boxes and use the options at the bottom of the list.
- Click Change Income Account.
- Select the relevant account from the drop-down list.
- Select Use cost centre default to use the default cost centre account.
- If adjusting the Income Account for items on a quote or job with an adjusted price, fee or discount, a warning appears that the Income Account cannot be changed.
- Click Save.
This option is not available if the job or quote cost centre is locked or invoiced, if the recurring invoice is locked from generated invoices or if all accounts are archived in System Setup.
Accounts assigned to billable items in quotes are kept when converted to a job.
