Last Updated: December 08 2025
Overview
Through integration between Simpro Premium and Outlook, you can easily create new leads / customers in Simpro Premium and add emails as notes to customers cards, leads, quotes and jobs without leaving Outlook.
Once the integration is installed, Simpro Premium automatically recognises the email sender in Outlook if their information is saved in Simpro Premium. Learn more in How to Set Up and Use the Outlook Calendar Integration.
The Simpro Premium add-in is only compatible with account types Office 365, Outlook.com and Exchange. The add-in does not currently support integrations with shared inboxes, please consult your internal IT support for more information.
 Required setup
In order to view content or perform actions referred to in this article you need to have the appropriate permissions enabled in your security group. Go to System![]() > Setup > Security Groups and access your security group to update your permissions. The relevant security group tab and specific permissions for this article can be found here:
> Setup > Security Groups and access your security group to update your permissions. The relevant security group tab and specific permissions for this article can be found here:
Before performing the steps detailed below, ensure that this part of your build is set up correctly. The relevant steps to set up the features and workflows detailed in this article can be found here:
 Install Simpro Premium Outlook Integration
The Simpro Premium add-in works both with the web and desktop versions.
To install the Simpro Premium Outlook Integration add-in for the web version:
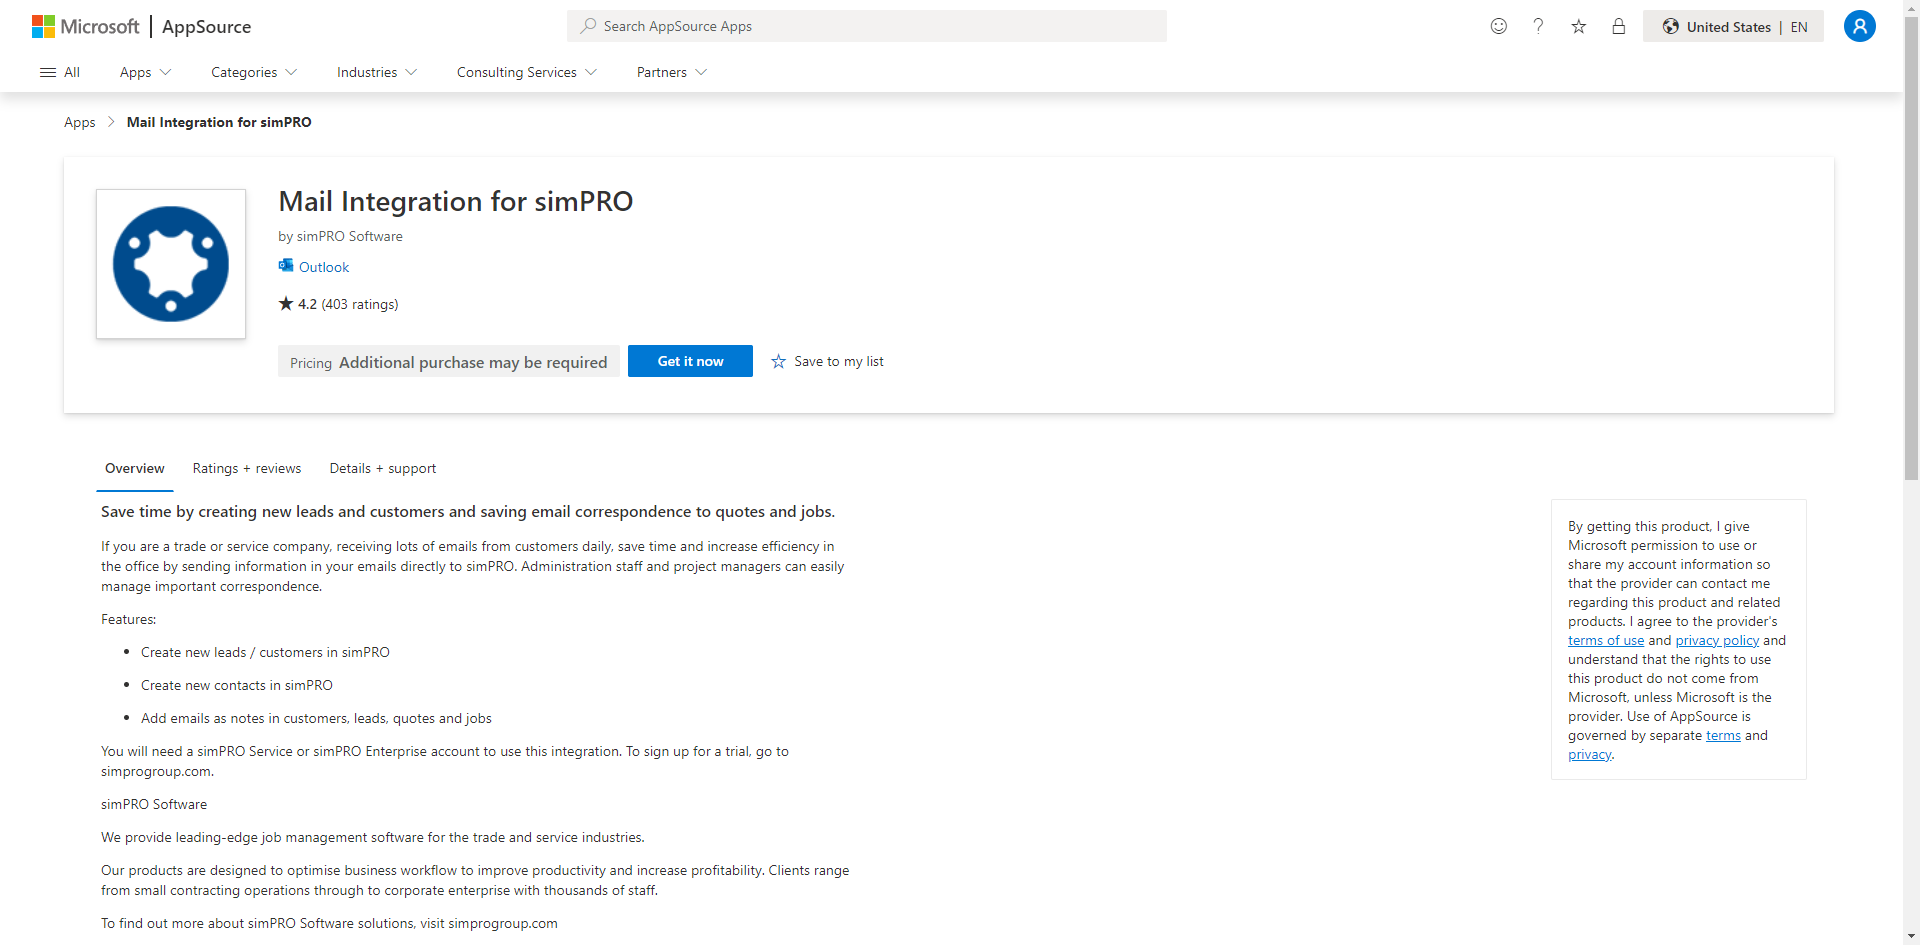
- Go to the Microsoft AppSourceOffice store.
- Log in using your Outlook email address.
- Search for “Mail Integration for simPRO” or click the following link: 'Mail Integration for Simpro Premium'.
- Click Get it now.
Once the add-ins have been installed to your outlook account, this will then connect the Simpro integration with both the Web version and the Desktop version.
To install the add-in for the desktop version:
Please note these steps may differ depending on your Outlook version.
- Open Outlook on your desktop.
- Click All Apps in the Home ribbon at the top of the page.
- Click on the Get Add In button.
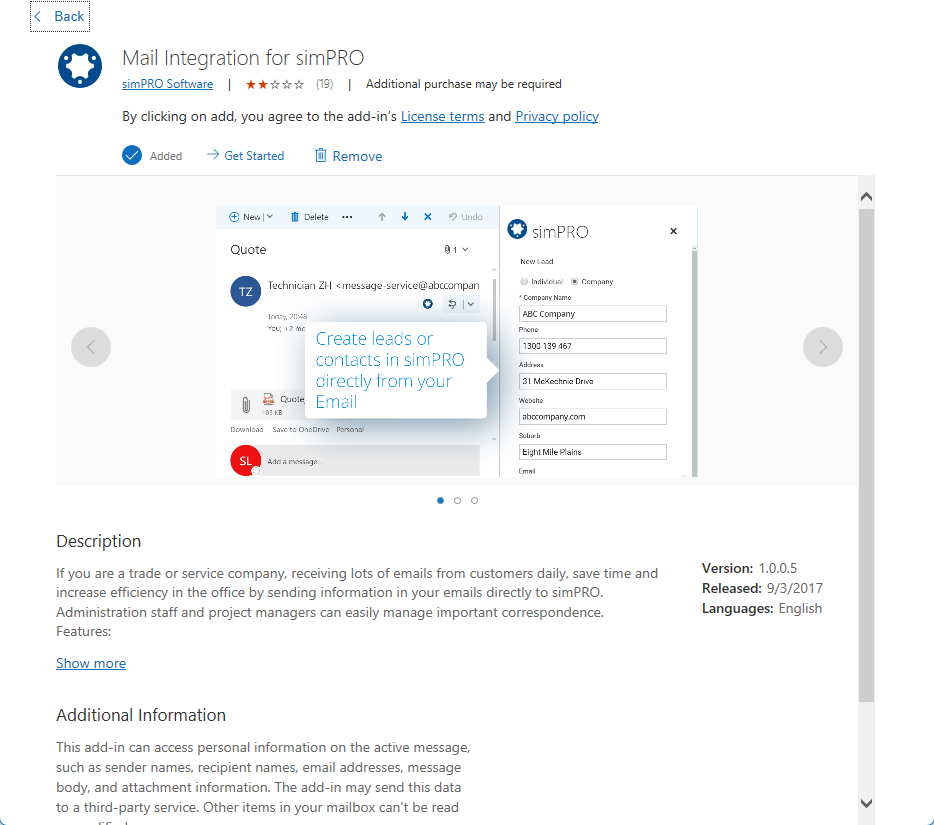
- Once the window pops up, in the search bar “Mail Integration for simPRO”.
- Select the results and click the Add button.
If you don't see the All Apps option in your version of Outlook, you might need to reach out to your IT administrator for further assistance.
 Log in to Simpro Premium Outlook Integration
To log in to Simpro Premium through your Outlook account for the first time:
- Log in to Outlook and open an email as normal.
- If you are using Outlook in your browser, click the Simpro Premium icon next to the Reply icon in the email. If you are using the desktop version of Outlook, click the Simpro Premium icon next to the Store icon in the Home ribbon.
- In the frame that opens on the right of the screen, click Continue.
- Enter your Company Identifier (the first part of the URL address you use to access Simpro Premium).
- Enter your Simpro Premium Username and Password.
- Click Login.
 Create a new lead, customer or contact through Outlook
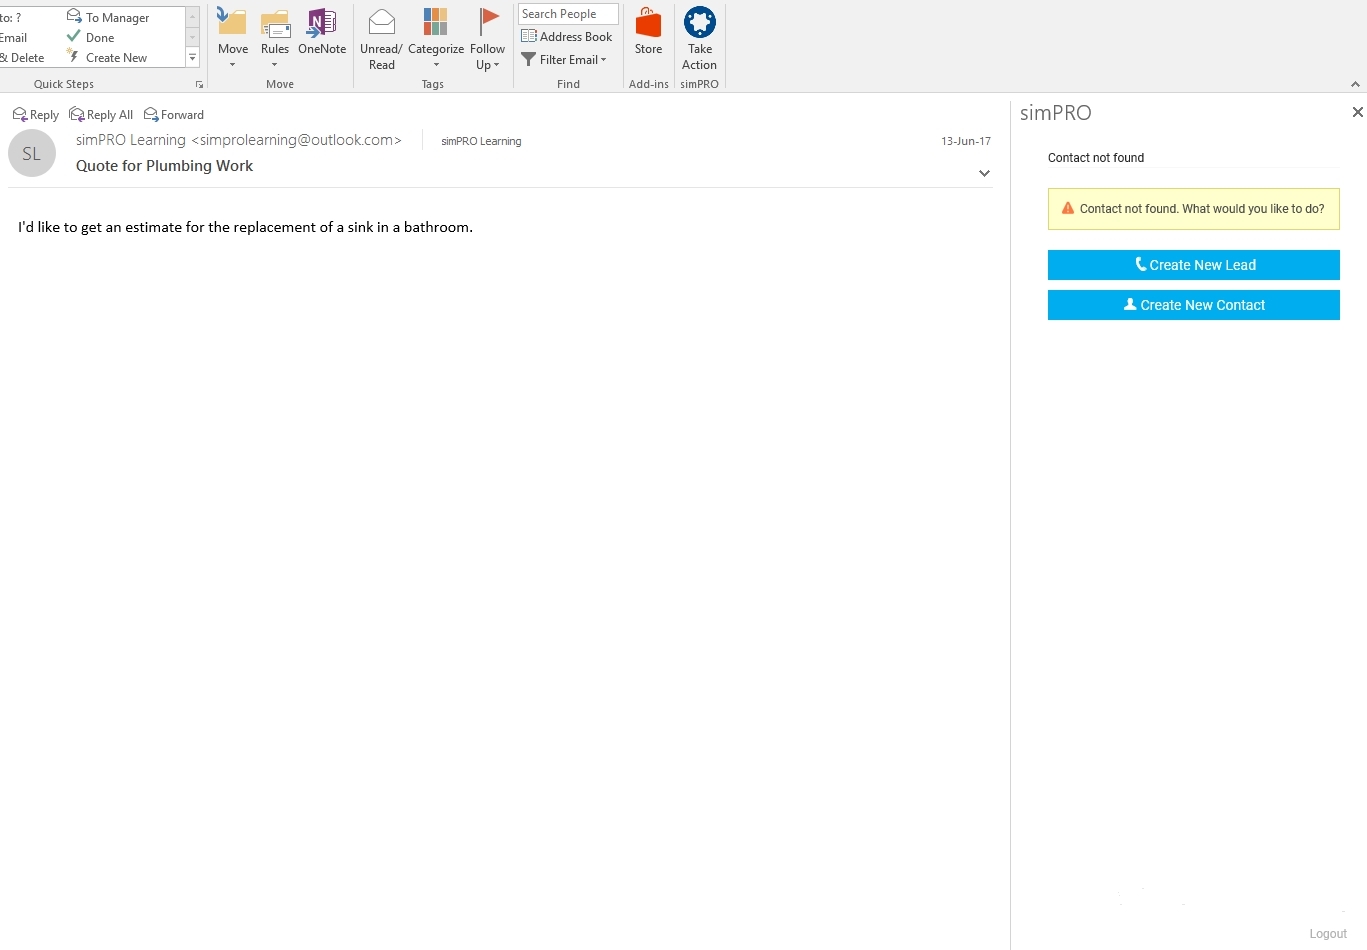
If you view an email from someone whose email address is not saved in Simpro Premium, you can create a new lead or new contact through the Simpro Premium Outlook Integration add-in.
If you are using a multi-company build, the lead, customer or contact is created in whichever company you are logged into at the time.
Create a new lead or customer through Outlook
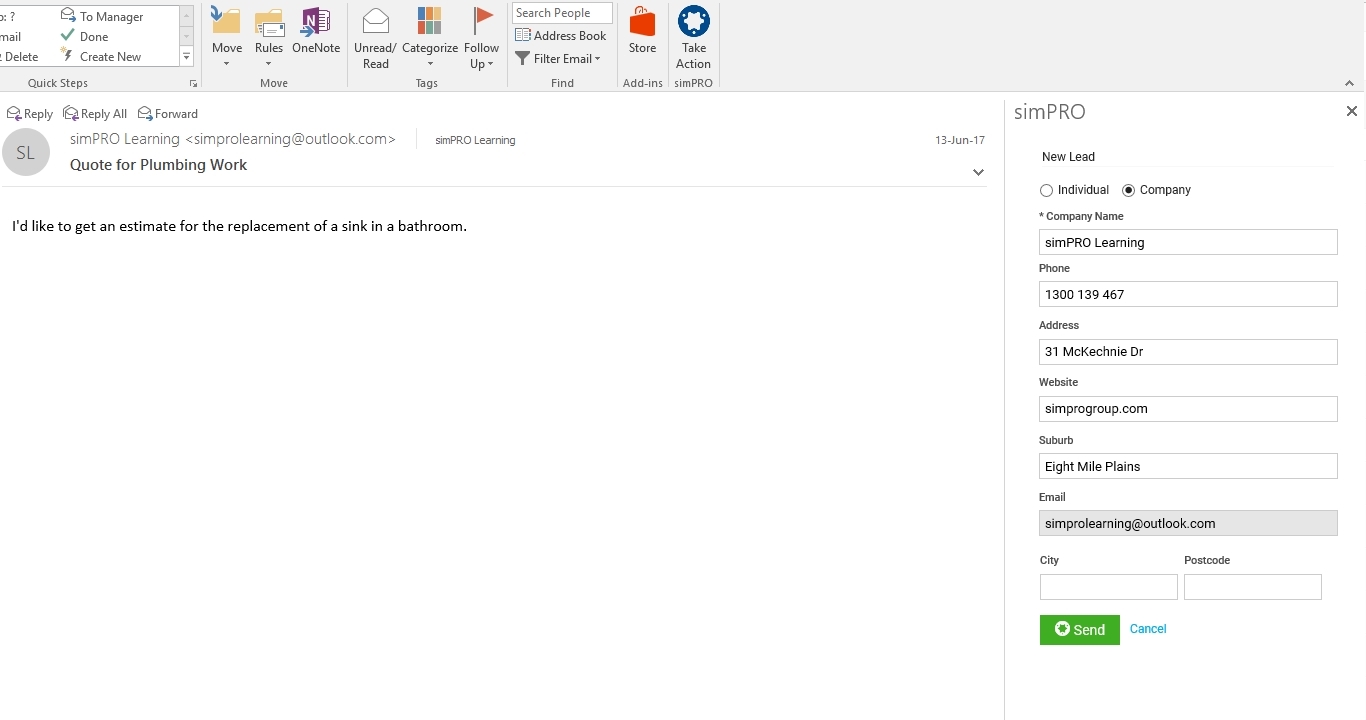
If Simpro Premium does not recognise a sender's email address, you have the option to create a new lead using their email address. Some fields automatically populate using email content.
To create a new lead through Outlook:
- In the Simpro Premium frame on the side of the screen, click Create New Lead.
- Select if the customer is a company or an individual.
- Enter and adjust details as required.
- The email address cannot be changed.
- Click Send.
The new lead-type customer is created in Simpro Premium, as well as a new lead, and the email saves as a note on that lead.
Create a new contact through Outlook
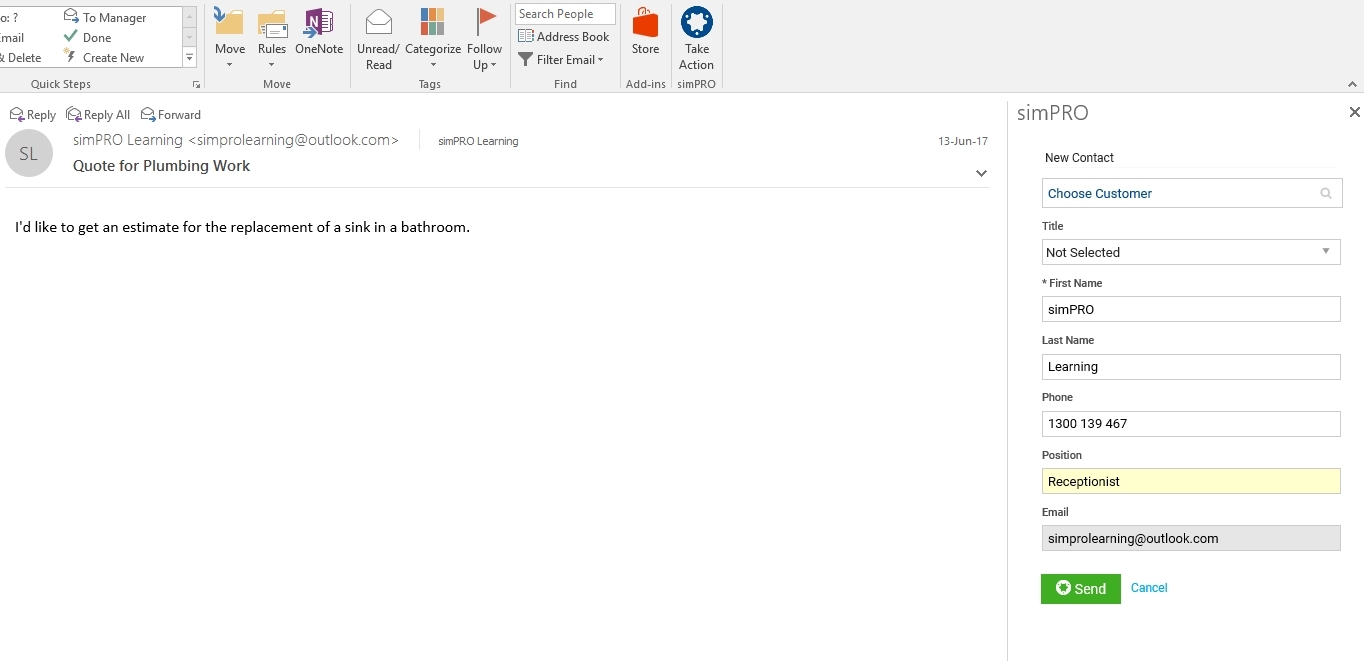
If you receive an email in Outlook from a customer that already exists in Simpro Premium, you can create a new contact for the customer using the sender's email address. Some fields automatically populate using email content.
To create a new contact for a customer through Outlook:
- In the Simpro Premium frame on the side of the screen, click Create New Contact.
- If the email address is not associated with a specific customer, search and select the customer to add this contact to.
- Enter and adjust contact details as required.
- Click Send.
The new contact is added to the selected customer's card file in Simpro Premium, and the email saves as a note on that customer.
 Attach an email as a note
To attach an email as a note:
- At the top of the email body, click Simpro Premium Outlook Integration > Attach Note.
- Select whether to attach the note to a Customer, Lead, Quote or Job.
- Search and select the customer, lead, quote or job.
- Click Attach.
That email then appears as a plain text note in Simpro Premium.
Email attachments do not save when you save a note. You need to manually drag and drop them into the Simpro Premium project's Attachments tab as an attachment if required. Learn more in How to Use Attachments.
 View saved notes in Simpro Premium
To view attached email notes:
- In Simpro Premium, open the customer, lead, quote or job the email was attached to.
- Go to:
- Details > Summary > Activity > Timeline in a quote or job.
- The Notes tab in a lead or customer.
- Notes appear in chronological order. Click a note to view more details or to edit it.
 Change the customer associated with an email
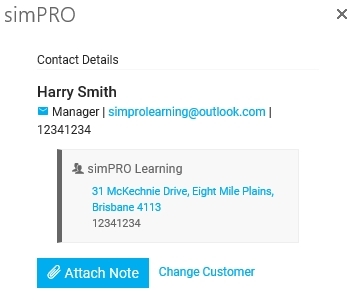
Once one email in a chain has been attached to a customer, lead, quote or job, Simpro Premium assumes all emails in that chain are related to that customer, lead, quote or job, and the Attach Note button changes to Attach Note to (name of customer / lead / quote / job). This can be changed by clicking Change Note Link.
If Simpro Premium automatically matches a received email with an existing customer or contact, and you want to add the email as a note to a different customer in your Simpro Premium database, click Change Customer and search for the customer.
 Log out of Simpro Premium
To log out of Simpro Premium in Outlook, click Logout in the bottom corner of the frame. If you have Simpro Premium open in a browser tab, you are logged out there as well.
