Last Updated: December 15 2025
How to Send Form Builder Templates
Overview
After you create form templates in the Form Builder, you can select them in quotes, invoices and credit notes to send to clients.
Learn more about the Form Builder in How to Use Form Builder Templates.
If you have set to attach terms and conditions to forms in the Form Setup of your project, these do not attach to Form Builder templates. Terms and conditions need to be copied at the end of the document template or attached separately to every individual form.
Learn more in How to Set Up Quote Forms.
 Required setup
In order to view content or perform actions referred to in this article you need to have the appropriate permissions enabled in your security group. Go to System![]() > Setup > Security Groups and access your security group to update your permissions. The relevant security group tab and specific permissions for this article can be found here:
> Setup > Security Groups and access your security group to update your permissions. The relevant security group tab and specific permissions for this article can be found here:
 Send form templates
To send a quote / invoice / credit note form template:
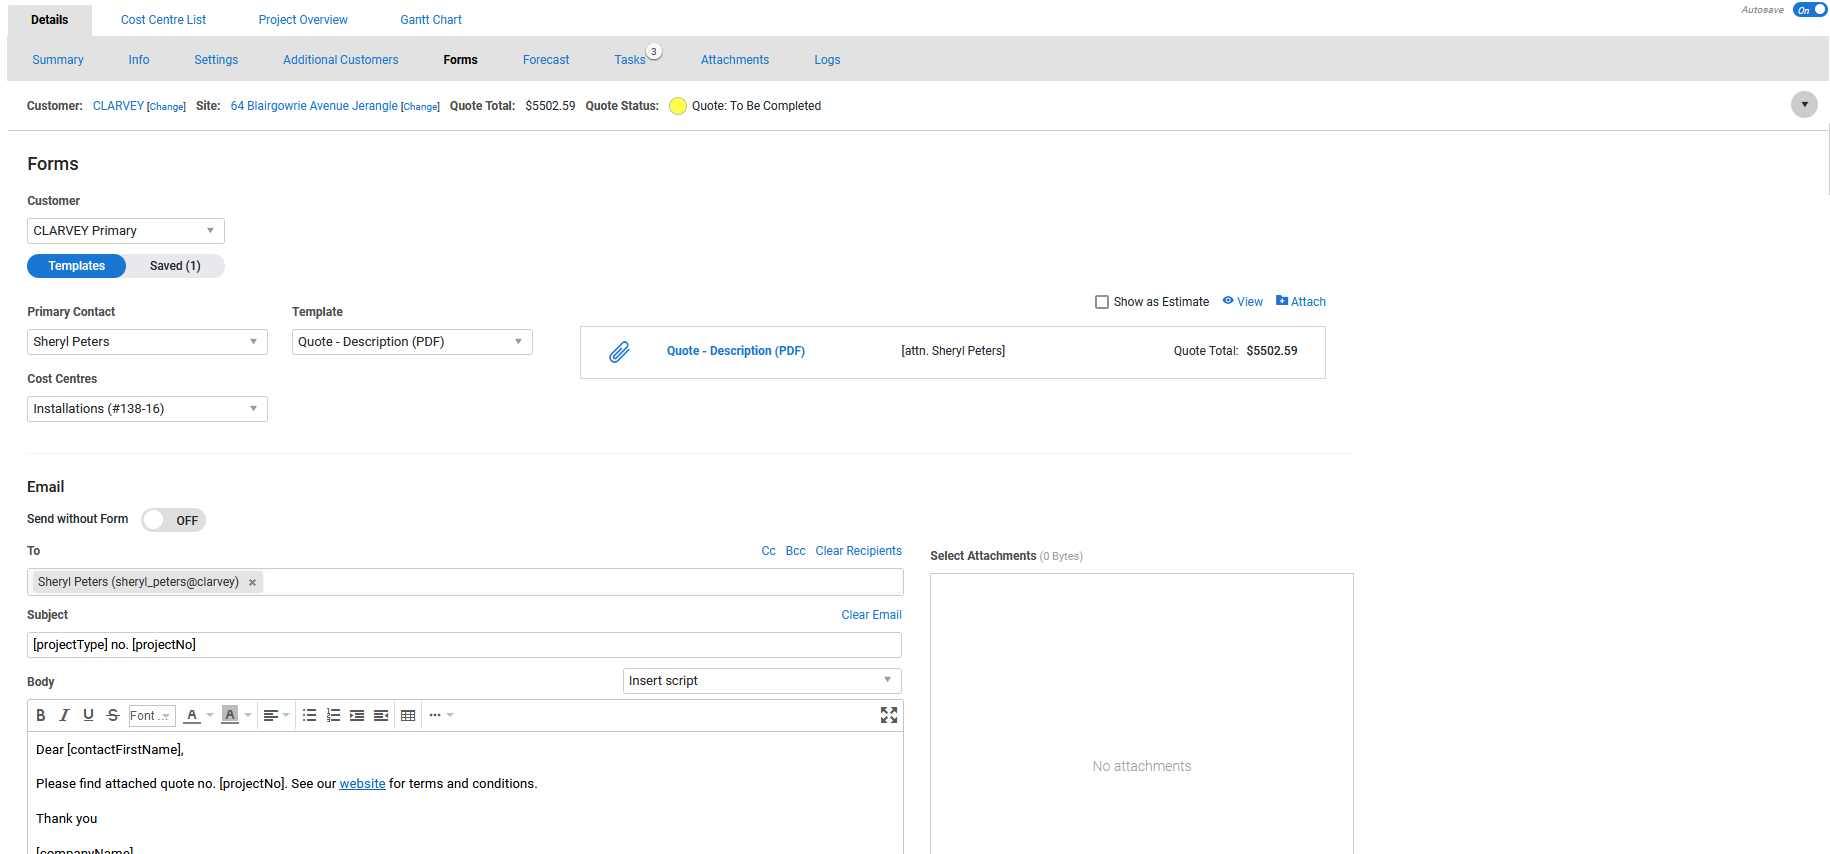
- Open the relevant project and go to the Forms tab.
- Under Template, select a form builder template.
- If your quote / job consists of more than one cost centre and you want to only display specific cost centres on the generated form, in the Cost Centres drop-down list select the required cost centres to be displayed.
- Select All to display all the available cost centres on the form.
- Click View to preview the final generated form output.
- To send copies of the email to multiple recipients, use the Cc and Bcc fields.
- Use the Cc and Bcc fields to search for employees and quote contacts.
- Click Send > OK to send the form.
- A pop-up may appear to confirm the email address you just sent the form to. Click OK to return to the Forms tab, and then click Attach to attach a copy of the sent form to the project for your records.
- After you save the project, a log entry is created in Details > Log, where you can view the email text and any form attachments.
Learn more about sending a quote acceptance form for customers to accept online in How to Use Quote Acceptance Forms.
 Filter forms
Asset type(s)
To filter a form so it only displays assets of selected type(s), the form builder template must contain at least one of the following fields:
- Cost Centre Asset Types Loop Start
- Job Card Asset Types Loop Start
- Asset Type Loop Start
Learn more in List of Fields in Form Builder.
Additionally, the job must contain multiple assets of different types.
- Open a quote / job and go to the Forms tab.
- Select the required form builder Template that includes an asset type loop in the body of the template.
- In the Asset Type drop-down, select which asset types should be displayed on the form.
- Click View or Send the form as attachment.
Cost centre(s)
To filter a form so it only displays selected cost centre(s), the form builder template must contain at least one of the following fields:
- Section Cost Centre Loop Start
- Section Optional Cost Centre Loop Start
- Quote Tax Breakdown Loop Start
- Job Tax Breakdown Loop Start
- Cost Centre Parts Loop Start
- Cost Centre Labor Loop Start
- Variation Section Cost Centre Loop Start
Learn more in List of Fields in Form Builder.
- Open a quote / job and go to the Forms tab.
- Select the required form builder Template that includes an asset type loop in the body of the template.
- In the Cost Centre drop-down select which cost centres should be displayed on the form.
- Click View or Send the form as attachment.
 Save a quote revision
If you are going to send multiple versions of the project, for example if the customer rejects the quote / invoice / credit note and you then revise it to send again, you can save all the previous versions of the form.
To save a form revision:
- Open the project and go to the Forms tab.
- Under Template, select a form builder template.
- Click View to preview the template. Edit and make changes which affect only the current version of the form, and do not affect the original template.
- Change the file name of the template, if required.
- Make changes to the template and click Finish > Finish & Close or Finish & Print.
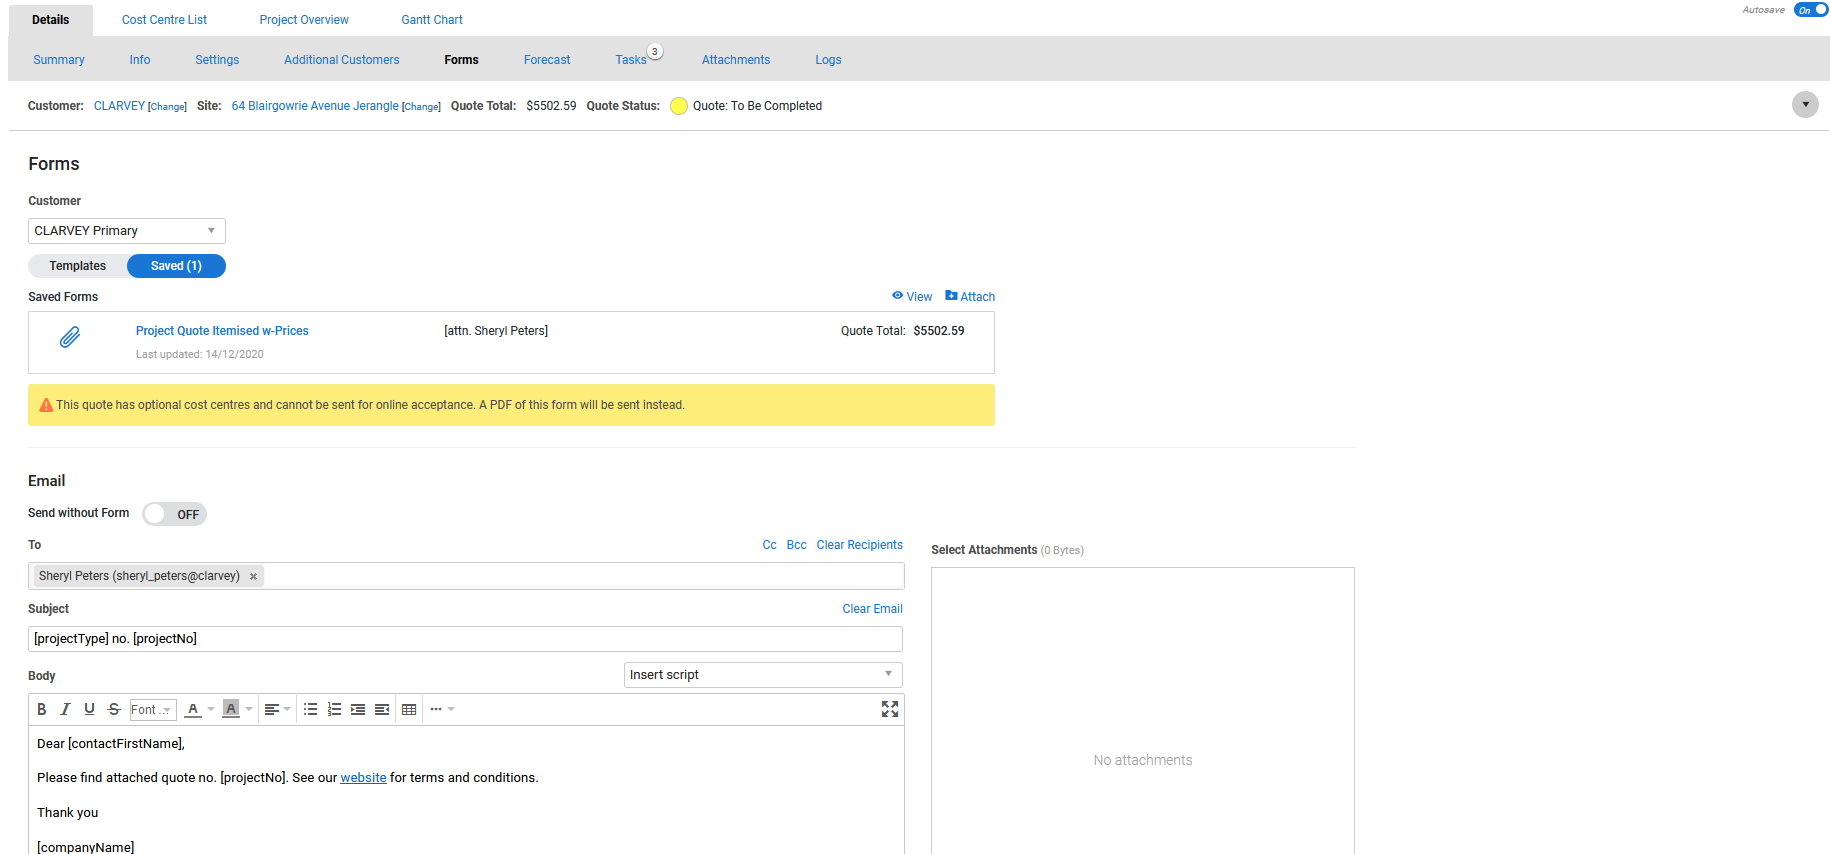
- In the Forms tab, the Saved toggle switch is now available. Click the toggle switch to view or edit your saved forms.
- The saved form displays the name of the form builder template, or updated form name, date the form was updated, primary contact, and sub total amount listed on the form.
- For quote forms, if the total in the form does not match the current total on the quote, the quote total is marked as Outdated.
- If you open a saved form and make additional edits, the changes are saved against that version of the form and do not create a new saved form.
- You can save additional separate revisions by opening a new template, editing and finishing.
If you have multiple saved forms, click the drop-down arrow to view older revisions.
Once saved, form template revisions cannot be deleted.

