Last Updated: December 15 2025
Overview
Integrated Payments (powered by Worldpay, formerly Payrix and IntegraPay) offers a range of convenient options for customers to pay you on-site, online, or over the phone
Payrix Payments are currently available for customers in AU, US and NZ only.
To activate, you need to follow the registration instructions, then Finalise Integrated Payments setup in your system to adjust this powerful feature to best suit your business.
Worldpay is a third-party provider for Integrated Payments. Worldpay is compliant with the Payment Card Industry (PCI) Data Security Standard v3.1, which means that payment security is in accordance with the highest level industry standard. By registering for Integrated Payments, you acknowledge that you are submitting your details to a third party, you agree to the Third Party Services clause of the Simpro Premium Terms & Conditions, and you agree to be contacted by Worldpay. Review Simpro's Terms & Conditions and Privacy Policy.
 Required setup
In order to view content or perform actions referred to in this article you need to have the appropriate permissions enabled in your security group. Go to System![]() > Setup > Security Groups and access your security group to update your permissions. The relevant security group tab and specific permissions for this article can be found here:
> Setup > Security Groups and access your security group to update your permissions. The relevant security group tab and specific permissions for this article can be found here:
 Fees and settlement periods
You receive a customer's payment approximately three business days from the date of their transaction. For example, if a customer pays your invoice through Integrated Payments on a Monday, your account is credited that Thursday. Payments processed on weekends, out of hours and on public holidays may take additional time.
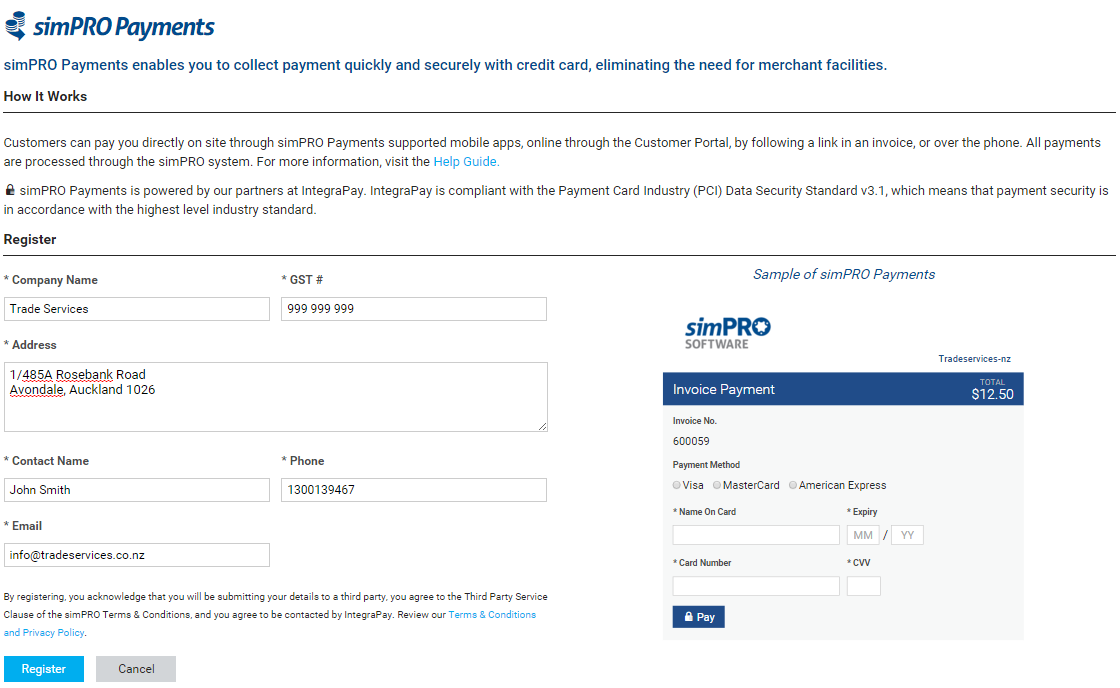
 Register for Integrated Payments
You can register for Integrated Payments (powered by Worldpay) through your Simpro Premium system. Only users with security group permission for System ![]() > Setup > Defaults can complete this process.
> Setup > Defaults can complete this process.
Please note that when you click Register, your information is sent to Worldpay, the third party provider for Integrated Payments. Worldpay then contacts you directly to set up your new merchant account.
By registering, you acknowledge that you are submitting your details to a third party, you agree to the Third Party Services clause of the Simpro Premium Terms & Conditions, and you agree to be contacted by Worldpay. Review Simpro's Terms & Conditions and Privacy Policy.
To register for Integrated Payments:
- Go to System
 > Setup > Defaults > Extensions.
 - Under Payrix, click Register.
- Enter all required information.
- Click Register.
After you register, Worldpay will contact you within 48 hours by phone or email. They will then email you detailed information, and an application form you need to complete and return to set up a merchant account with Worldpay.
If you have any questions about the application form, please contact Worldpay using the details provided on the application form.
 Receive confirmation of registration
After you return your completed application form to Worldpay, if your application is successful, you receive an email from Simpro Premium confirming you have successfully created a new merchant account and activated Integrated Payments. This occurs within three business days. You need to follow the instructions below to finalise setup in your system.
If your application for a merchant account is not successful, Worldpay will contact you directly.
 Finalise Integrated Payments setup in your system
After Simpro Premium has contacted you to confirm Integrated Payments has been activated in your system, you need to complete a few simple steps to make it work the way your business requires.
 Enable payment options
Once Integrated Payments is activated in your system, all invoices to customers contain a link to pay the invoice online (if set up through your invoice form setup).
To enable the remaining Integrated Payments options:
- Go to System
 > Setup > Defaults > Extensions.
 - Under Collect Payrix Payments Via, select payment options as required (see explanation below).
- Click Save.
- For each option you enable, you need to follow the steps below to finalise the Integrated Payments setup:
- Enable Invoice pages in the customer portal
- Add a link to invoices
- Add a link to emails
The three options are:
| Simpro Premium | Enable employees with the necessary security group permissions to collect payments over the phone through Simpro Premium. |
| Customer Portal | Enable customers to pay invoices through the customer portal, depending on the pages you have enabled. This option also enables the Pay Online link to appear in customer invoices. |
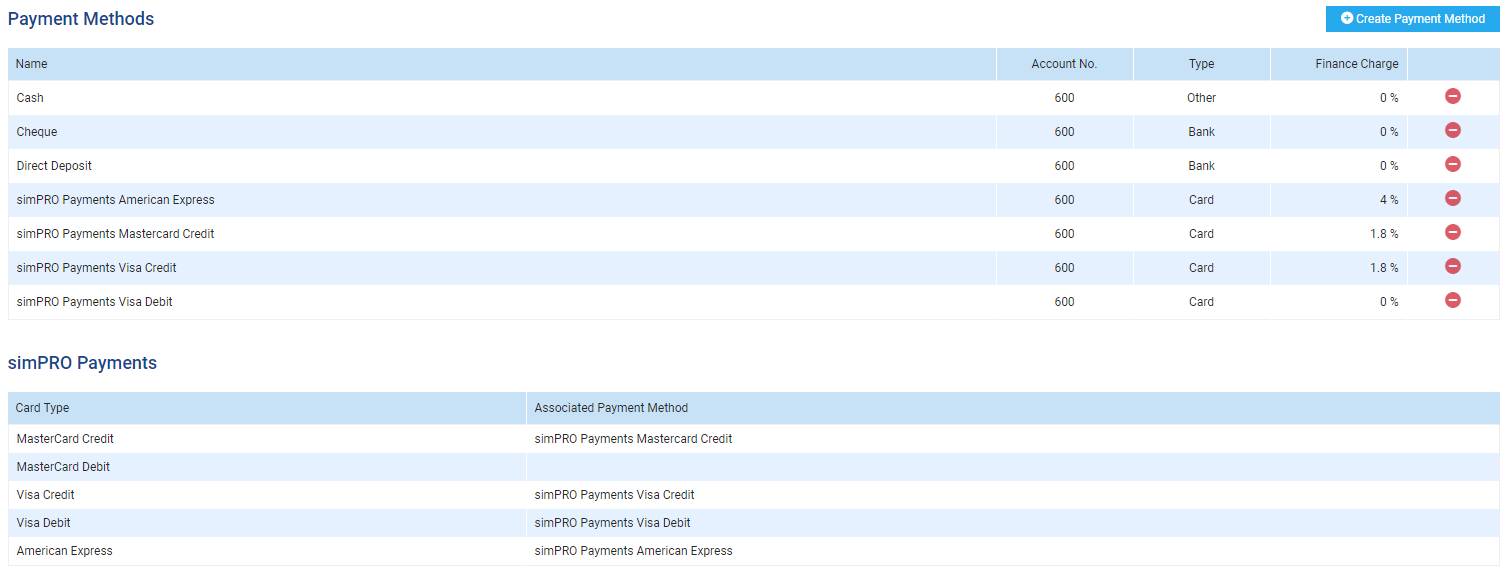
 Associate payment methods
To enable customers to pay you through Integrated Payments, you need to associate Integrated Payment credit and debit card types with your existing default payment methods. Learn more in How to Use Payment Methods.
To associate payment methods with Integrated Payments:
- Go to System
 > Setup > System Setup.
 - In the left column, click Accounts, then click Payment Methods.
- Under Payrix Payments, click the Card Type you wish to associate with an existing payment method.
- Under Edit Simpro Premium Payment Method, select the corresponding default payment method Type from the drop-down list for that card type.
- Click Save.
If you do not wish to make a certain card type available for customers to use in Integrated Payments, do not associate it with an existing payment method, or delete the existing payment method if necessary.
 Pass on transaction fees
To pass transaction fees on to your customers, you need to apply a Finance Charge to the relevant card type.
To apply a finance charge to a card type:
- Go to System
 > Setup > System Setup.
 - In the left column, click Accounts, then select Payment Methods.
- Click the payment method you wish to apply a finance charge to.
- Enter the Finance Charge percentage.
- Click Save.
 Add a link to invoices
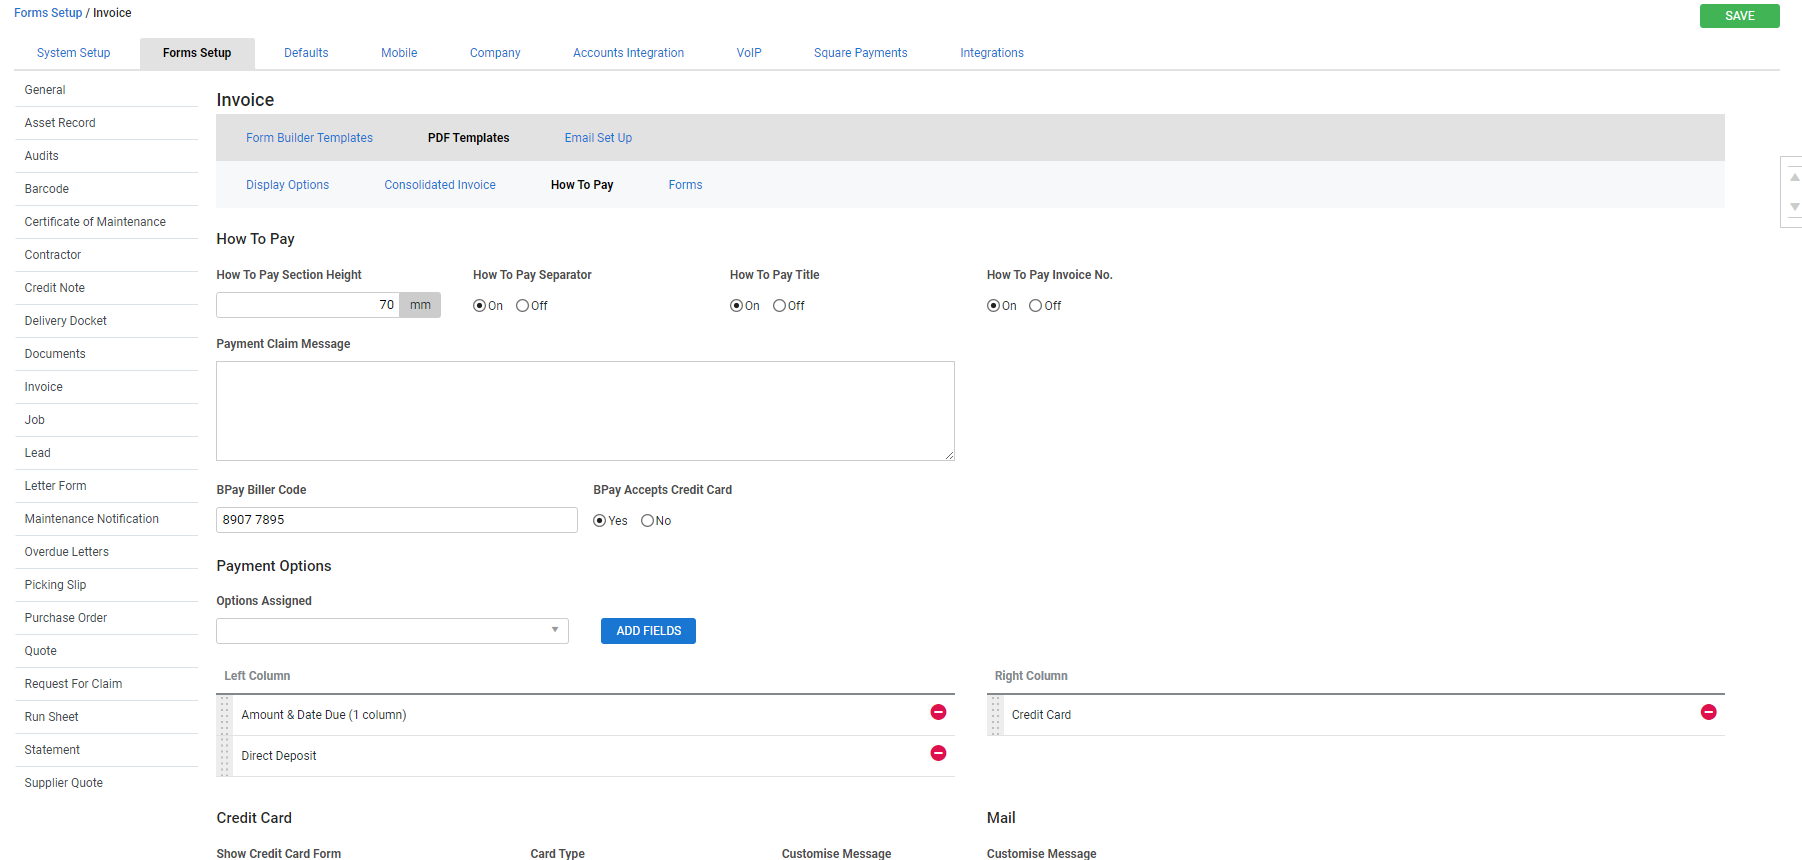
To add a Pay Online link to your invoices to customers, you need to include credit cards as a payment option in the How to Pay section of your invoice form setup.
To check or enable this:
- Go to the Forms tab.
- In the left column, click Invoice.
- Click the How to Pay sub-tab.
- Under Payment Options, check the columns to ensure that Credit Card has been assigned. To assign it, select it from the Options Assigned drop-down list, then click Add Fields.
- Click Save.
The Pay Online link only appears in your customers' invoices if you have enabled the Customer Portal payment option.
 Add a link to emails
To add an online payment link to the body of an email when emailing an invoice or statement, you need to adjust your Email Template settings.
To add an online payment link to emails:
- Go to the Forms tab.
- In the left column, click Invoice or Statement as required.
- Click the Email sub-tab.
- Place the cursor in the Body text box, in the place you want the link to appear.
- Under Insert Field, click Online Payment Link.
- Format the rest of the Body as required.
- Click Save.
Your invoice or statement emails now automatically include the online payment link.
If your invoices are in multiple or foreign currencies, do not use this feature. Foreign currency payments cannot be processed through Integrated Payments.
 Use Integrated Payments in a multi-company build
To set up Integrated Payments in a multi-company build that does not share default settings:
- Follow the registration process above for each company that requires Integrated Payments.
- After you are notified that Integrated Payments has been activated in your system, go into your Template company.
- Go to System
 > Setup > Defaults > Extensions.
 - Under Collect Payrix Payments Via, ensure Customer Portal is selected.
- Go to System Setup > Accounts > Payment Methods.
- Associate payment methods with the required Integrated Payments methods as above.
- Repeat this process for each individual company you want Integrated Payments to be available in.
 Start using Integrated Payments
Once you have finalised setup, you can start using Integrated Payments straight away! Learn more in How to Use Worldpay Payments.


