Last Updated: February 25 2026
Defect Management - Beta
Overview
![]()
The Defect Management tab within Simpro Premium's Maintenance Planner offers a clear, traceable workflow for managing and tracking defects. This feature ensures that every defect is accompanied by detailed audit trails that record all status changes, re-quotes, and resolutions.
You can access the Defect Management tab in Simpro Premium, and then defects identified within the Maintenance Planner can be marked as rectified using the Simpro Mobile App.
 Required setup
In order to view content or perform actions referred to in this article you need to have the appropriate permissions enabled in your security group. Go to System![]() > Setup > Security Groups and access your security group to update your permissions. The relevant security group tab and specific permissions for this article can be found here:
> Setup > Security Groups and access your security group to update your permissions. The relevant security group tab and specific permissions for this article can be found here:
Simpro Mobile Security Groups
Simpro Mobile users require the following:
Simpro Mobile Security Group > Service Module > Assets - Defect Management and Lifecycle
Important information and limitations
Before using the Defect tracking module feature there is important information to consider.
No Data Migration
What: Only defects created after enabling the defect management module will appear in the new work flow. Historical Defects from the old alerts/workflow will not be migrated. Similarly, data entered in the new module will not be converted back into the old process if you later decide to disable the module.
Why it matters: The new module provides a fresh start, so users will need to begin logging new defects there moving forward.
What to do: To help your team learn the new process for recording defects, give them updated asset training and explain exactly when the new system will be implemented.
Mobile Sync Drive Status Update
What: The defect status only becomes resolved when a technician marks it as rectified and then saves/syncs/marks the job as complete in Mobile. The job card in Simpro Premium is view only.
Why it matters: If technicians forget to sync (or are offline), Simpro Premium users cannot mark defects as rectified on the technician’s behalf.
What to do: Ensure that technicians sync at the job end and use the minimum app version that supports the module.
Quote/re-quote pricing depends on pre-builds
What: Re-quoting uses pre-builds. If you don’t use pre-builds, requoting may discard line-item pricing and archive the original quote—requotes will need manual price entry.
Why it matters: Without pre-builds mapped to failure points, requotes can require rework.
What to do: Map pre-builds to failure points before rolling out or you will have to requote manually.
Archiving behaviour
What: When a rectification quote is archived, its defects are moved to Cancelled instead of moving them back to the original state.
Why it matters: Archiving can inadvertently cancel defects.
What to do: Avoid archiving rectifications quotes until users are familiar with this behaviour.
Other important limitations
Concurrency / late-sync conflicts
Multiple technicians working the same job can create temporary status races. The system supports late-sync updates, but conflicts can occur.
If multiple technicians update the status on the same job, their status may overlap. The system supports late-sync updates, but conflicts can occur.
Reporting & Forms are out of scope
Defect management includes a table of data for reporting purposes that can be exported as a CSV but does not change the existing reports.
Enablement checklist
Before you enable this feature, make sure:
- Turning on defect management will not interrupt a significant number of assets being tested at the time.
- Pre-builds have been mapped to failure points.
- Mobile devices are updated to the required version.
- Technicians know that they need to sync after each job.
- Staff understand that archiving rectification quotes will cancel defects.
- You know how to export CSVs for reporting needs.
Defect requirements
To begin tracking data in the Defect Management tab, make sure your assets are set up properly.
Failure points and Service levels
Failure points are used to create defects, so failure points must be set up with any applicable assets before you can start adding data into the defect management system.
Service Levels
To create service levels:
- Go to System > Setup > System Setup > Customer Assets > Service Levels.
- Click Create Service Level.
- Enter a Service Level Name.
- Enter the frequency from the Years, Months, and Days fields.
- Click Create.
Failure Points
To create a failure point:
- Go to System > Setup > System Setup > Customer Assets > Asset Builder and select an asset type.
- Click Service Levels. In the drop-down menu, select a service level name, click Add and click Save.
- In the Service Level added, select Options > Edit Failure Points.
- Click New to nominate a new failure point, fill in the details of the failure point Name, Standard ID, Severity and a Pre-build.
- Users are also able to add recommendations in the drop-down menu.
- Click Save and Finish when the failure points are added.
To allow technicians to select the severity on the mobile, update all relevant existing failure points to the severity option Technician Chooses.
Note that:
- Each failure point must have a pre-build with the correct price for quoting mapped to the failure point.
- When only some defects are selected to convert to a job, the pre-builds in the newly created quote and the converted defect job reverts back to the original price in the pre-build mapped to the failure point.
- One off items or catalogue items added to the defect quote will all be removed when the new quote / job is created. You will need to find the archived quote to find the updated pricing and update the new quote and the newly created defect job with the updated pricing.
Legacy asset failures will not appear in the new Defect Management tab in the Maintenance Planner. The legacy asset failures will need to be managed from the Alerts tab as before the upgrade. If a quote is created for the legacy asset failure, the newly created quote and job will not be part of the new defect management workflow.
Learn more about failure points in How to Create Asset Types.
Simpro Mobile Version
Technicians will be able to rectify defects from Simpro Mobile. Make sure that all users are running the most current version of the app.
What is an Asset Defect?
In Simpro Premium, a defect is generated when a technician fails an asset assigned to a job. Technicians follow these steps:
- Tests an asset on a job.
- Identifies a fault and marks the asset as failed due to a specific failure point.
- Once this information is added to the job card, completing the job will ensure it syncs with Simpro Premium.
Once these steps are completed, a defect is automatically generated for that asset in the Defect Management tab.
Defect tracking is critical for maintaining asset performance and extending asset lifespan. Managing defects efficiently is key to avoiding operational inefficiencies and preventing assets from failing prematurely.
Within a customer's assets there may be multiple failure points which would result in several defects. Defect management assists with tracking all the defects related to any and all assets.
Access Defect Management
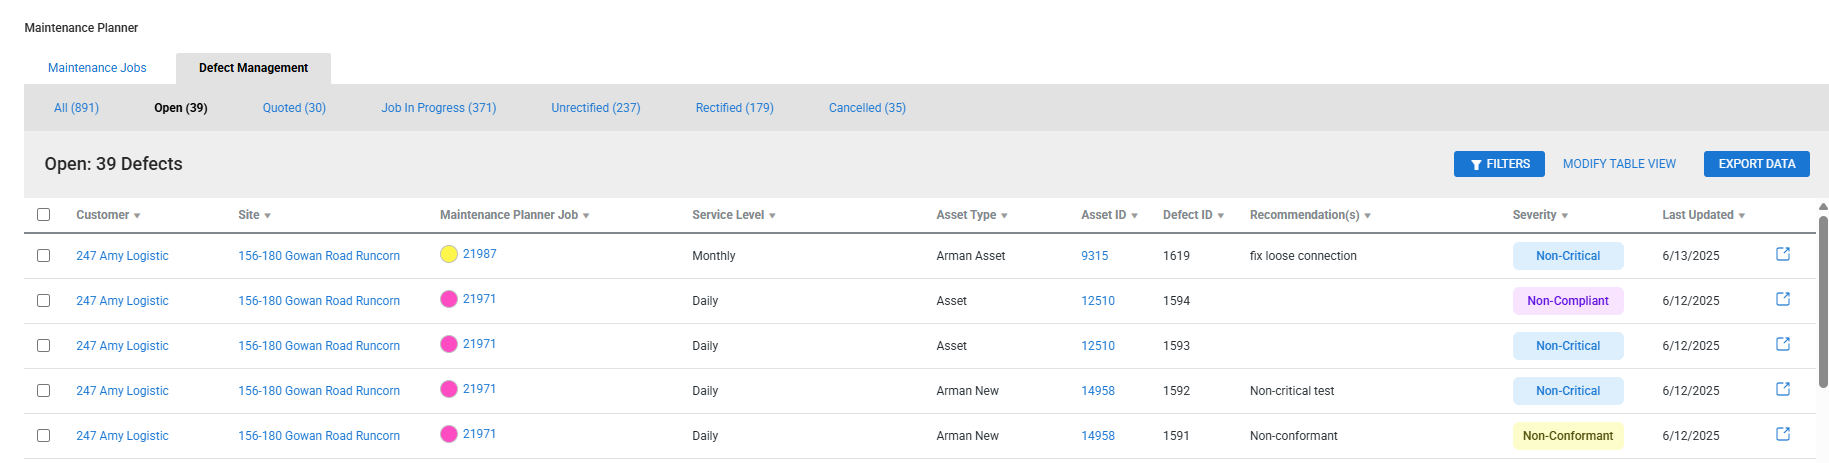
To access defect management, go to Utilities > Maintenance Planner > Defect Management to view the list of defects.
All defect information is now easily accessible within the Defect Management tab. The sub-tabs categorise different statuses.
Only defects created after this feature is enabled will show up in this module. All previously raised asset fails will follow the existing workflow.
Defect management list
This section lists the defects, along with information such as Customer Details, Asset ID, Failure Points and Defect Statuses.
The list contains multiple different status categories that organise the stage of the defect:
| All | Entire list of all defects that have been created. | View a list of all assets |
| Open | New or recent defects that are awaiting action. |
Create a quote or rectification job. Change Status. |
| Quoted | Defects that have been quoted. |
Create rectification job to have the defect fixed Re-quote option is available if the defect needs to be reviewed again. Change Status. |
| Job in Progress |
The defect has moved from the quoting stage to the job stage. A technician has been scheduled to visit the site to rectify the defect. |
Rectify defects to resolve and move to a Rectified status. Change Status. |
| Unrectified | Outstanding defects that have not yet been resolved. Defects that have been quoted or scheduled for a job but have not yet been actioned. |
Create a rectification job Move to Rectified or Cancelled. |
| Rectified | Defects that have been successfully resolved. | View the list of resolved defects. |
| Cancelled | Defects that are no longer active or were dismissed. | View the list of any cancelled assets. |
Use Defect Management
The Defect Management tab helps you to manage defects by updating statuses, rectifying defects, and viewing defect history.
Navigation and view options
In the Defect Management tab you can view the life cycle of defects based on their current status: Open, Quoted, Job in Progress, Unrectified, Resolved, Cancelled, and All.
Use the Filters options to group defects, for example:
- Filter by Site to view all defects associated with a particular location.
- Filter by Asset/Failure Point to identify duplicate defects and consolidate them into a single job or cancel them, as required.
- Filter by Severity to see which defects are critical and urgent.
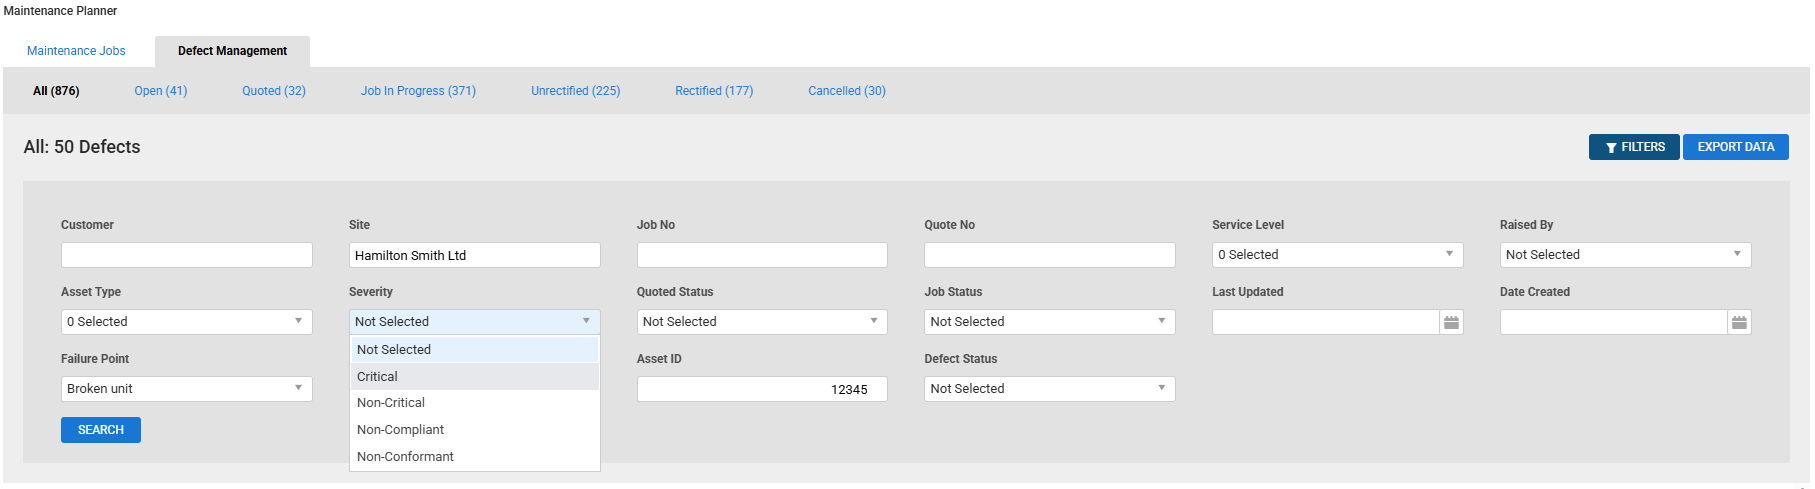
Modify Table View allows you to customise the displayed columns for each tab and apply stage-specific filters, for example, Date Unrectified, Quote No., Asset ID.
The Export data option is also available for downloading this list of the information in a CSV format.
Raise a defect
Defects are raised in the Defect Management tab when a technician submits a job card for a failed asset via Simpro Mobile. Learn more in Defect Management - Simpro Mobile - Beta.
Action defects
When a defect is submitted via a job card, there are a few options to action the defect, depending on the stage of the defects.
Within each tab selecting a defect will provide you with different options to action a defect:
From the Open tab:
- Select a defect.
- Click Create Quotes or Create Jobs.
- Create Quotes: allows for the customer to review the work and accept the quote.
- Create Job: A new recertification job is created to start the repair work.
- View the new quote or job number and click Continue.
Generating a new quote allows you to schedule a technician for the defect assessment.
From the Quoted tab:
- Select the defect.
- Click Create Job or Re-quote.
- Create Job: Creates a new recertification job to start the repair work.
- Re-quote: Creates a new quote for reassessment. The original quote will be archived but remains accessible for auditing.
- View the new quote or job number and click continue.
Generating a new job allows you to schedule a technician to work on fixing the defect.
From the Unrectified tab:
- Select the defect.
- Click Create Job.
- View the new job number and click Continue.
Or
- Select the defect.
- Click Rectify Selected.
- Review and click Continue.
Rectifying the defect will confirm the defect has been resolved and move it to the Rectified tab
You can also choose Cancel Selected to close off the defect and send it to the Cancelled tab.
Within any active stage, you can change defect status by selecting the defect, clicking Change defect status and nominating a new status.
Defects that are re-quoted, modifications to the original quote's pricing or materials are not automatically included. The re-quote will solely reflect the pre-existing build specifications, requiring any further adjustments to be made manually.
You need the correct security group permissions to finalise jobs, take action on unrectified defects, or override defect statuses.
Note that when a defect has not been rectified, over a period of time if the defect has failed again it will create a duplicated defect. The number of times a defect has been duplicated will be shown in the duplicated column on the defect management table.
Rectify defects
Simpro Premium
To rectify defects, go to the Job in Progress, selecting a defect and click Rectify Selected.
It is important that the defect has been properly assessed by a technician prior to updating it through Simpro Premium, to ensure the validity of the asset.
Simpro Mobile
Technicians can mark defects as Rectified directly on their devices.
Learn more about resolving defects in Simpro Mobile.
To reflect these status updates in Defect Tracking, technicians must save, sync, or complete the job. Also, be aware that other technicians using Simpro Mobile can override rectification statuses on the same test.
Defects not marked as rectified in Simpro Mobile will appear as unrectified in the Unrectified tab of Defect Management in Simpro Premium.
Review defect history
Each defect record provides a complete history, including status changes, job assignments, quotes, and rectification timestamps, which helps in audits and client inquiries.
To access the history of a defect, click Actions.
When viewing the history, you can view the asset details as well as all actions related to this specific defect.
Merge quotes / jobs
When quotes or jobs with existing defects are merged for the same site, these defects are added to and combined into the new quote/job. This change is also recorded in the defect's History tab, as the original quote or job will be archived.