Last Updated: December 04 2023
Overview
After you have created your sites![]() The physical location where a job is performed., you can manage them from the Sites table. Use the search feature to find specific sites, filter the table according to certain criteria, and access site options.
The physical location where a job is performed., you can manage them from the Sites table. Use the search feature to find specific sites, filter the table according to certain criteria, and access site options.
 Required setup
In order to view content or perform actions referred to in this article you need to have the appropriate permissions enabled in your security group. Go to System ![]() > Setup > Security Groups and access your security group to update your permissions. The relevant security group tab and specific permissions for this article can be found here:
> Setup > Security Groups and access your security group to update your permissions. The relevant security group tab and specific permissions for this article can be found here:
Before performing the steps detailed below, ensure that this part of your build is set up correctly. The relevant steps to set up the features and workflows detailed in this article can be found here:
 View sites
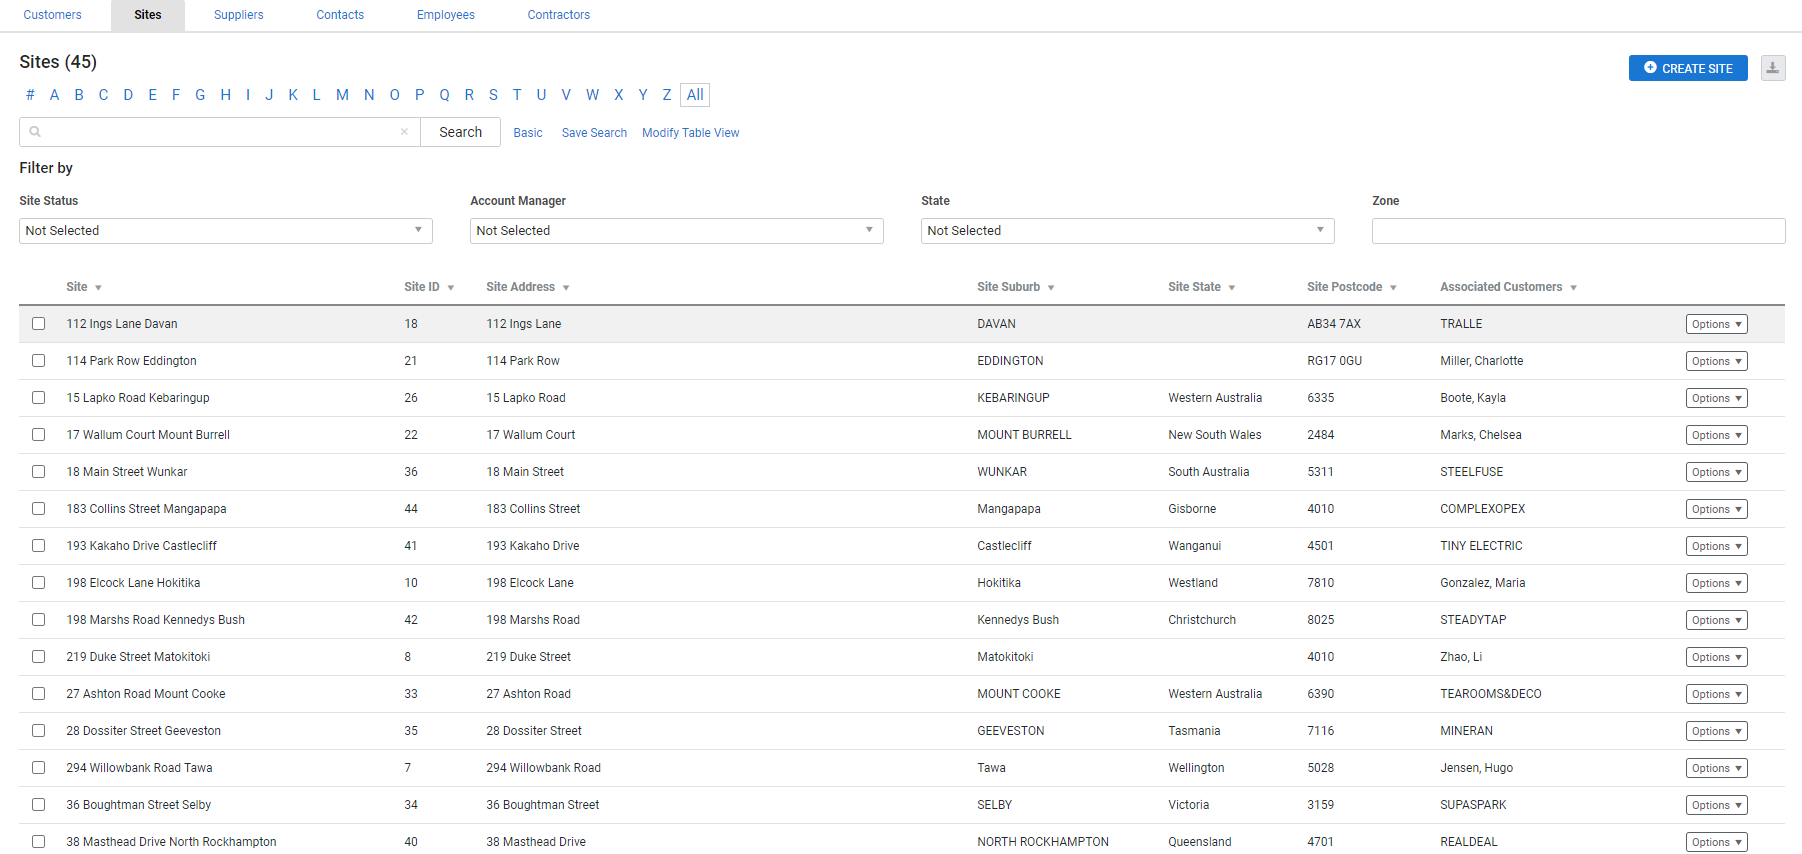
To view your list of sites, go to People ![]() in the main menu, then click Sites in the Go To sub-menu.
in the main menu, then click Sites in the Go To sub-menu.
To locate a site, click the starting letter of the site name above the search bar. Alternatively, enter the site name, ID number, address or associated customer in the search bar and click Search.
If you have a large site database, you can narrow your search results by Site Status, Account Manager, State and Zone![]() A designated area or territory that can assist in scheduling and reporting. by clicking Advanced.
A designated area or territory that can assist in scheduling and reporting. by clicking Advanced.
You can then save these filter options as a saved search to access a site or group of sites more quickly.
 Access site options
Access the following options when you right-click or click Options on a site, or in the footer below the table:
| Edit Site Details | Enter the site card file and edit details. You can also access the site card file by clicking the site in the Sites table. |
| Map Site | Map the site location. |
| Create | Create a Lead |
| Merge Site | Merge a site and all of its details, jobs and quotes into another selected site. This is recommended if you have duplicated sites in your system. |
| Archive Site | Archive a site. |
| Delete Site | Permanently delete a site. |
 Map sites
To see the physical addresses of sites, you can view them on a map.
To map sites:
- People
 > Sites.
 - Select the check boxes for the sites you wish to map.
- Click Map Sites at the bottom of the page. Each site is displayed as a pin on the map.
- On the left side of the map, click the name of the customer to zoom in on them on the map.
 Create leads, quotes and jobs from sites
If you have a site associated with only one customer, you can save time by creating a new lead, quote or job from the site table, which automatically fills in the customer and site.
To create a new lead / quote / job:
- Next to the site, click Options > Create > Lead / Quote / Job / Recurring Job / Recurring Invoice.
- Continue creating the lead / quote / job as normal.
 Send sites to Simtrac
If you have integrated your Simpro Premium build with Simtrac, you can send new sites to Simtrac, or link to existing sites. Learn more in How to Integrate Simtrac and Simpro Premium.
To send a new site to Simtrac:
- Access your Simpro Premium build.
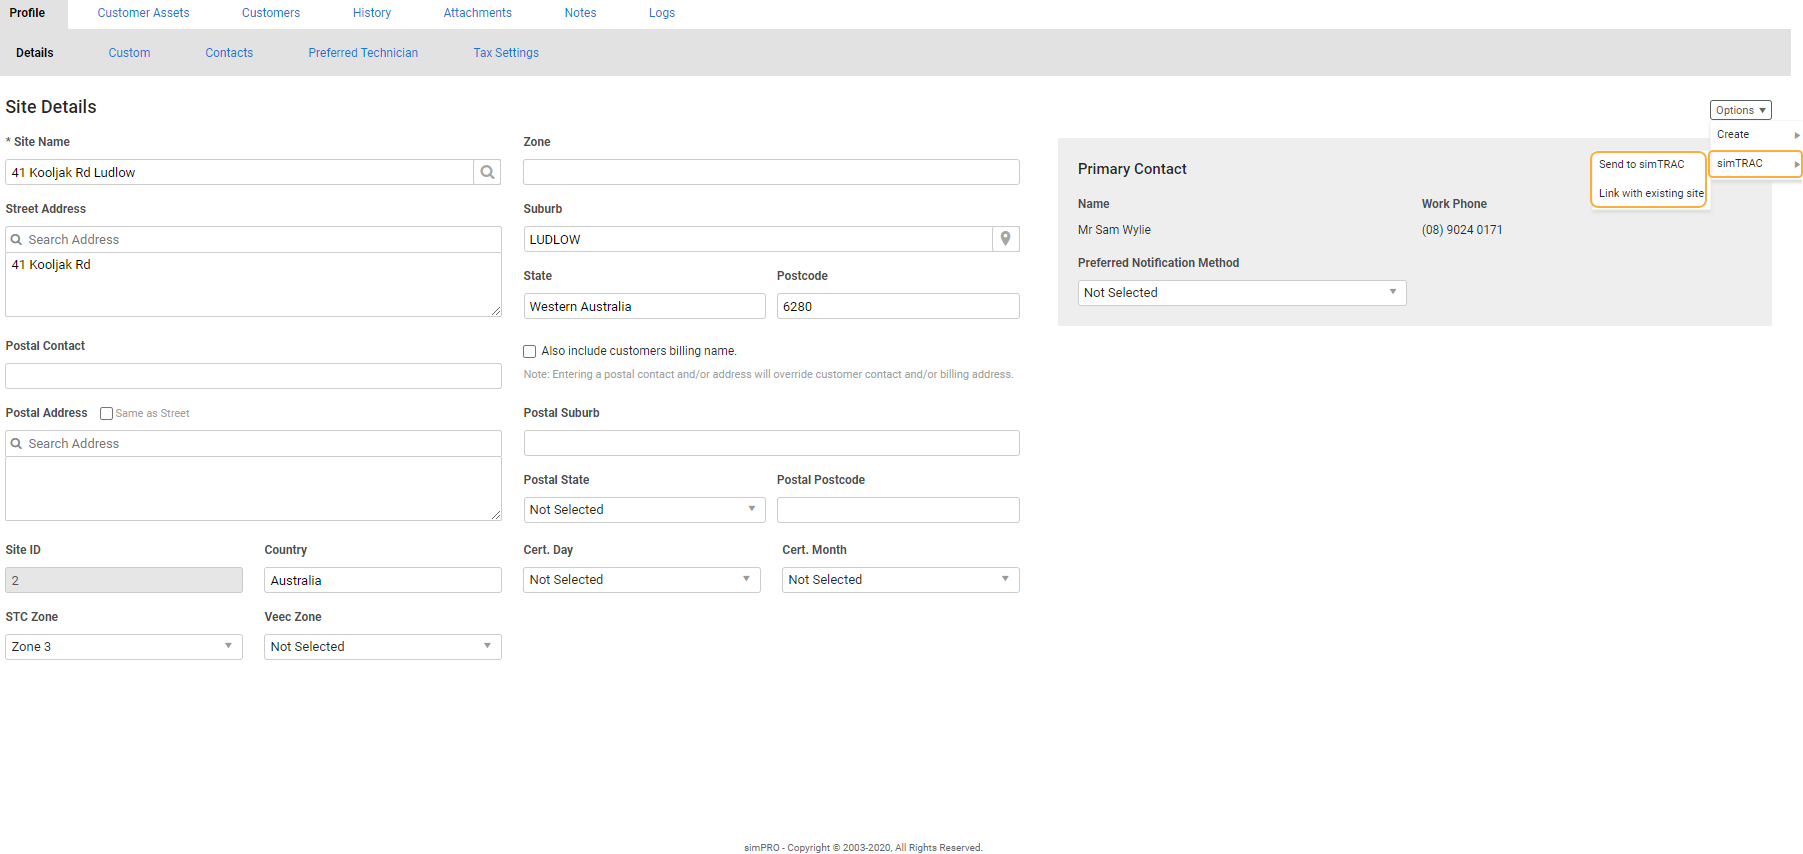
- Go to Profile > Details.
- Click Options > Simtrac > Send site to Simtrac > OK.
Sites are created based on their Simpro Premium ID. Even if a site in Simpro Premium has the same address as a site in Simtrac, if the Simpro Premium ID is different they are two different sites.
To link to an existing site in Simtrac:
- Access your Simpro Premium build.
- Go to Profile > Details.
- Click Options > Simtrac > Link with existing site.
- Search the site ID.
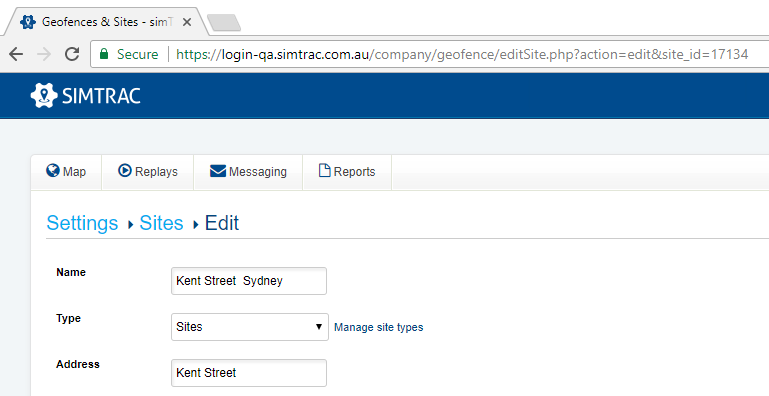
- In Simtrac, you can locate the site ID at the end of the URL when editing a site.
- Click OK to close the message.
If you have selected to automatically send sites to Simtrac, each time you update a site and click Save and Finish, the changes are also updated in Simtrac. Alternatively, you can click Options > Simtrac > Update on the site in Simpro Premium to update the site in Simtrac with your changes.
To remove the link, click Options > Simtrac > Delete Link.
 Merge sites
If you find duplicate sites in your system, reconcile this by merging the two. All of a site's details and transaction history are moved to another site.
Please take caution when merging sites as you cannot split them again.
To merge sites:
- People
 > Sites.
 - Find the site you wish to merge and click Options > Merge Site.
- Search for and select the other site as the merge destination.
- Click Merge.
The first site disappears from the table and their information is transferred to the second site.
 Archive sites
If a site is inactive, remove it from the main sites table by archiving it, and you won't be able to select the site when creating quotes and jobs. If you need to use the site again, you can reactivate it.
To archive a site:
- People
 > Sites.
 - Select the check boxes for each site you wish to archive.
- Below the table, click Archive > OK.
To view archived sites, click Advanced and select Archived from the Site Status drop-down list.
Activate an archived site
To reactivate an archived site:
- People
 > Sites.
 - Click Advanced.
- Under Site Status, select Archived.
- In the table, select the check boxes for each site you wish to activate.
- Click Activate > OK.
The activated sites are moved back to the main table.
 Delete sites
When you delete a site, they are permanently removed from your system and cannot be restored like archived sites can be.
To delete a site:
- People
 > Sites.
 - Select the check boxes for each site you wish to archive.
- Below the table, click Delete > OK.


