Last Updated: December 08 2025
How to Use Nested Assets
Overview
You can organise assets within a site by linking them with parent-child relationships. ![]() You can then choose to have the child asset inherit service levels from parent assets.
You can then choose to have the child asset inherit service levels from parent assets.
 Required setup
In order to view content or perform actions referred to in this article you need to have the appropriate permissions enabled in your security group. Go to System![]() > Setup > Security Groups and access your security group to update your permissions. The relevant security group tab and specific permissions for this article can be found here:
> Setup > Security Groups and access your security group to update your permissions. The relevant security group tab and specific permissions for this article can be found here:
Before performing the steps detailed below, ensure that this part of your build is set up correctly. The relevant steps to set up the features and workflows detailed in this article can be found here:
 Add related assets
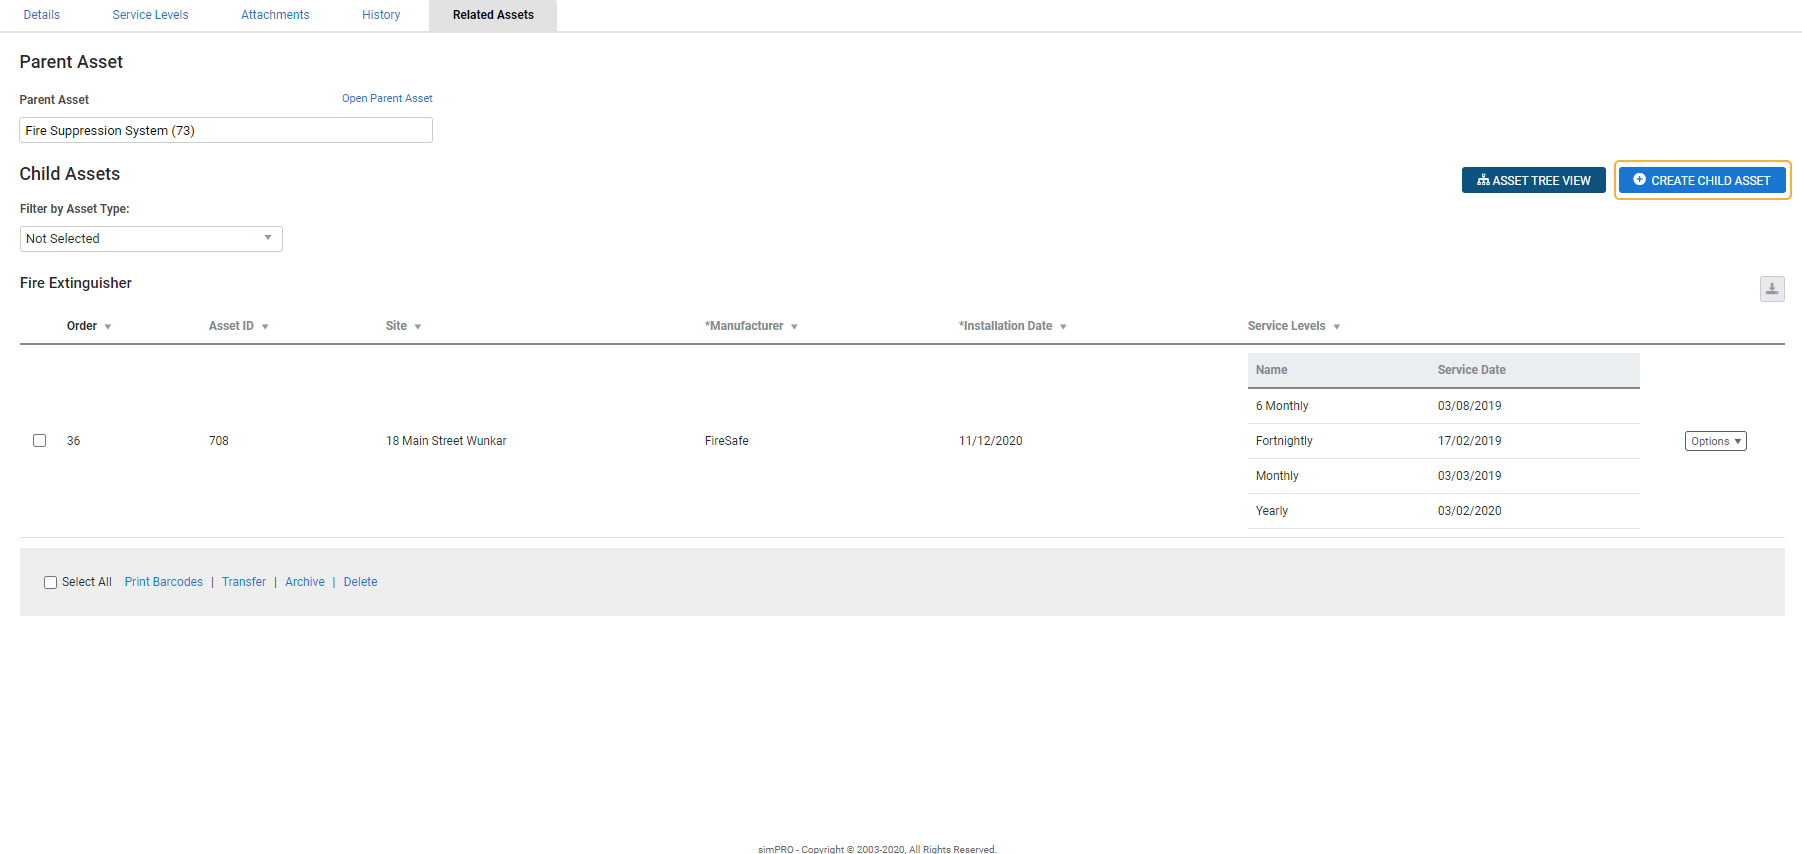
Click Related Assets to link an asset to a parent or child asset.
To link an asset to a parent asset, search and select the Parent Asset.
To link to and create a child asset:
- Access the parent asset as normal.
- Go to Related Assets.
- Click Create Child Asset.
- Create the asset as normal.
- Click Save and Finish.
To link an asset to an existing child asset, you need to access the child asset, then search and select the parent asset as applicable.
Learn more in How to Manage Customer Assets.
 Inherit service levels
![]()
To set up assets to inherit service levels from parent assets:
- Go to People
 > Sites and open the relevant site.
 - Go to Customer Assets.
- Open the asset that you need as a child in the relationship.
- Go to Related Assets.
- Enter the ID of the asset that you need as the parent in the relationship.
- Click Save.
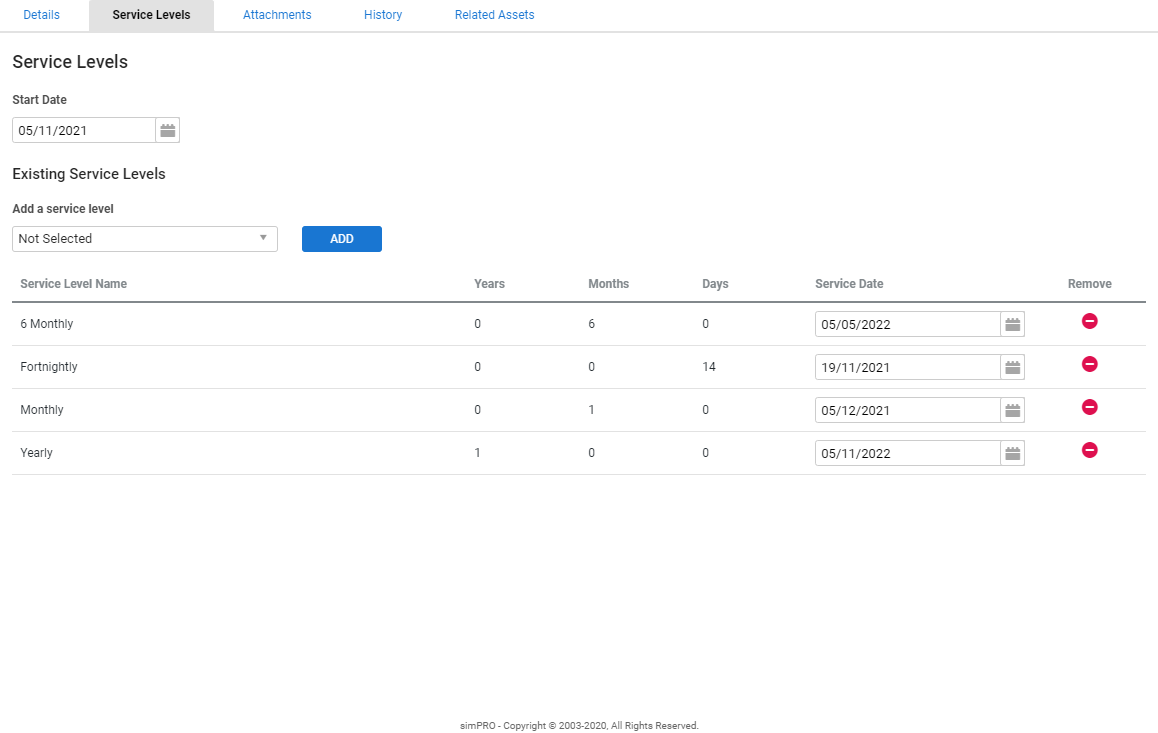
- Go to Service Levels.
- Toggle on Use Parent Asset Levels.
- This removes any service levels from the asset and replaces them with the service level from the parent asset.
- Once you toggle on, you cannot add, remove or edit the service levels on the child asset.
- If you update the service levels on the parent asset, they are also updated on the child asset.
- You can create a hierarchy of assets by making child assets parents of other assets. In this instance, you can only affect the service levels of the child assets by editing the service levels of the parent that is highest in the hierarchy.
- Click Save and Finish.
 Search for parent assets in Maintenance Planner
![]()
Once you have set a child asset to use a parent asset's service levels and you run the maintenance planner for a period including these asset's service period, only the parent asset appear.
- Go to Utilities
 > Maintenance Planner.
 - Select a Date Range that includes the service date for the parent / child asset.
- Select other filters.
- If the parent and child assets are on different contracts or sites, have different asset types or different zones associated with their sites, and you filter by the child asset's details, the child asset is hidden under the parent asset. You can only use the customer, site, customer asset type and zone when filtering by the parent asset's details.
- Click Search.
- Only the parent asset is displayed. All of the child assets using the parent's service levels are hidden under the parent. If you have multiple generations of child-parent assets, only the asset at the top of the hierarchy is displayed.
- Select the parent asset and click Create Jobs.
- All the assets in the parent-child hierarchy are added to the job.
- If the parent and child assets are different asset types, they are all added to the job but without failure points or recommendations.
 Import parent and child assets
To import child assets that inherit service levels from the parent asset, ensure the Parent Asset ID is entered in the Parent Asset column and enter a 1 in the Inherit parent asset service level column. If there is no 1 in this column, or the Parent Asset ID is not populated, the asset does not inherit service levels from the parent.
Learn more about importing assets in How to Import Assets.
 Perform bulk actions on a child asset
If a child asset is using the parent's service levels, and the user attempts to perform one of the bulk following actions:
- Change Contract
- Change Service Start Date
- Change Service Dates
-
 Remove Service Levels
 -
 Add Service Levels
You cannot update the child if the parent is not included.
 View assets in tree view
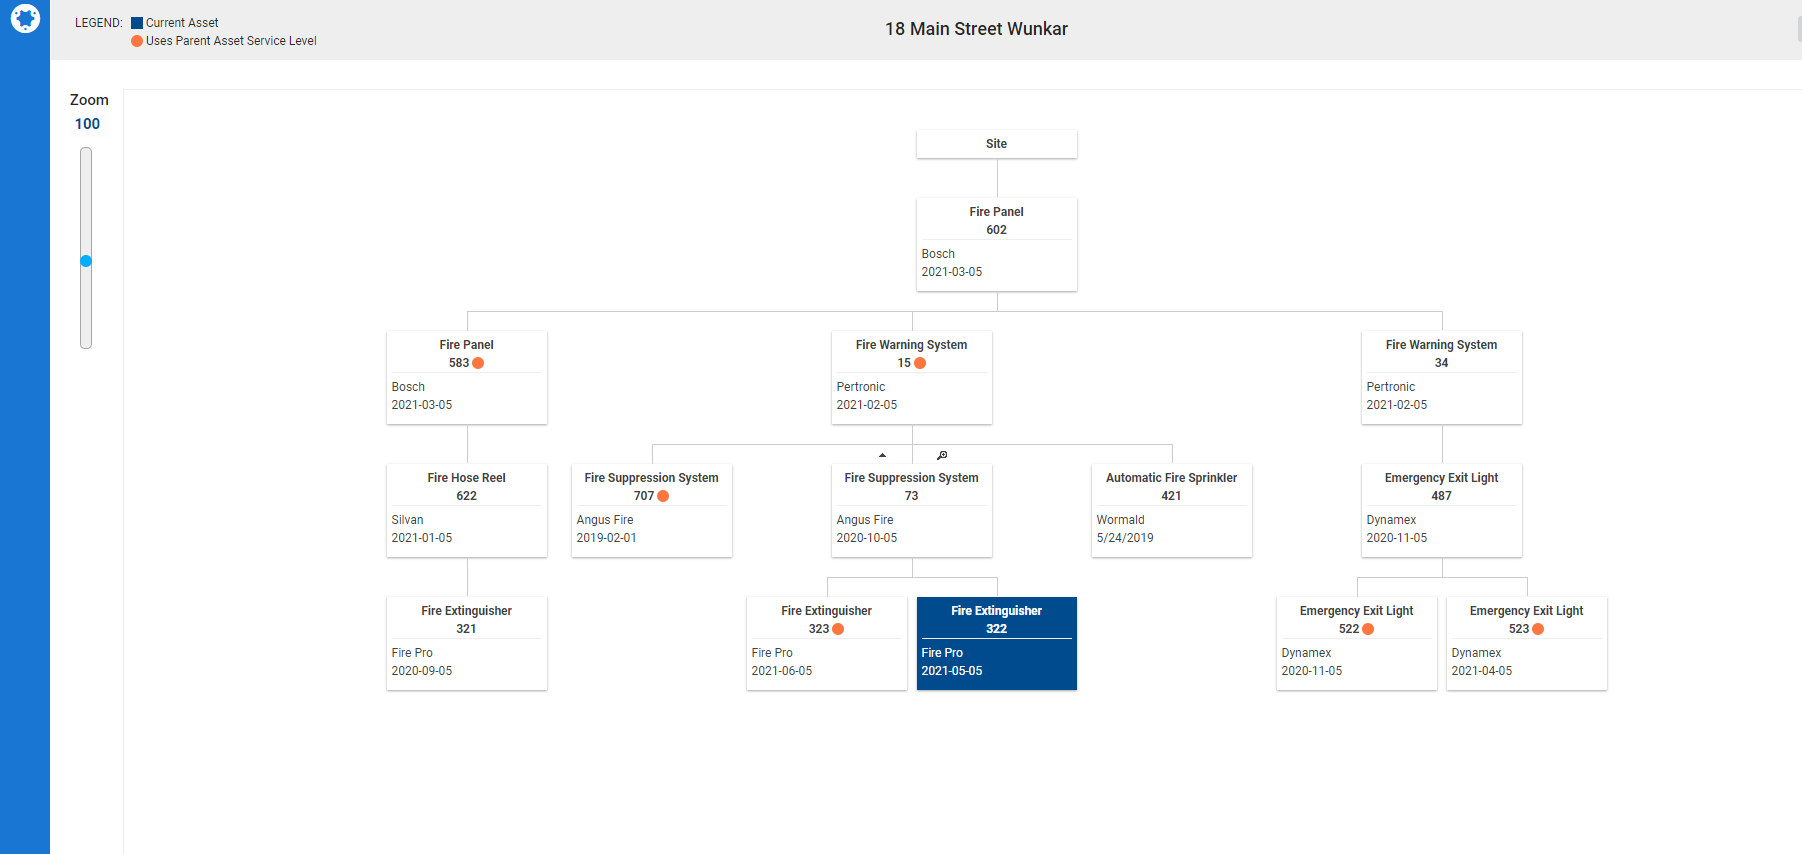
To see relationships between assets more easily, use the asset tree view.
- In a site card file, go to the Customer Assets tab.
- Click an asset.
- Go to the Related Assets tab.
- Click Asset Tree View.
- Alternatively, click Options > Asset Tree View.
The asset tree view opens in a new tab.
Use the scroll bar on the left to zoom in and out of the tree view.
To collapse the children underneath an asset, click the arrow icon above the asset.
To focus on a direct line of relationships and collapse all other assets on the same level, click the magnifying glass icon.
Click Close to close the tab and return to Simpro Premium.
 Merge parent and child assets
Assets merged into other assets maintain or break parent-child relationships depending on the circumstances.
Merging Assets
Here are some examples of what happens in your Simpro Premium build when you merge certain assets. Use the buttons to see the outcome of a specific merge.
Merge A with F
Merge A with C
Merge C with E
Merge F with C
Merge B with H
Click one of the merge buttons to view the outcome.
Merging assets in Simpro Premium will follow a parent child hierarchy.
 Delete / archive parent and child assets
Assets merged into other assets maintain or break parent-child relationships depending on the circumstances.
Deleting Assets
Here are some examples of what happens in your Simpro Premium build when you delete certain assets. Use the buttons to see the outcome of a specific delete action.
Delete A
Delete E
Delete B and C
Delete F
Click one of the delete buttons to view the outcome.
Deleting assets in Simpro Premium follow a parent child hierarchy. Deleting assets with service history archives the asset.


