Last Updated: December 15 2025
Overview
After creating prepaid labour types, you can create prepaid blocks to sell prepaid time to a customer through a prepaid job. Learn more in How to Create Prepaid Labour Types. The prepaid time that the customer has purchased is visible in the Rates tab of their customer card file. This credit can then be applied to the customer's invoice for a job that uses that labour type.
You can create a catalogue of prepaid blocks, sorted into groups and subgroups, to suit various customers and work types.
Learn more about generating reports on prepaid time in Prepaid Time Reports.
 Required setup
In order to view content or perform actions referred to in this article you need to have the appropriate permissions enabled in your security group. Go to System![]() > Setup > Security Groups and access your security group to update your permissions. The relevant security group tab and specific permissions for this article can be found here:
> Setup > Security Groups and access your security group to update your permissions. The relevant security group tab and specific permissions for this article can be found here:
 Create a prepaid block group or subgroup
Before you create a prepaid block, you first need to create a group for it.
To create a prepaid block group or subgroup:
- Go to System
 > Setup > System Setup > Labour > Prepaid Blocks.
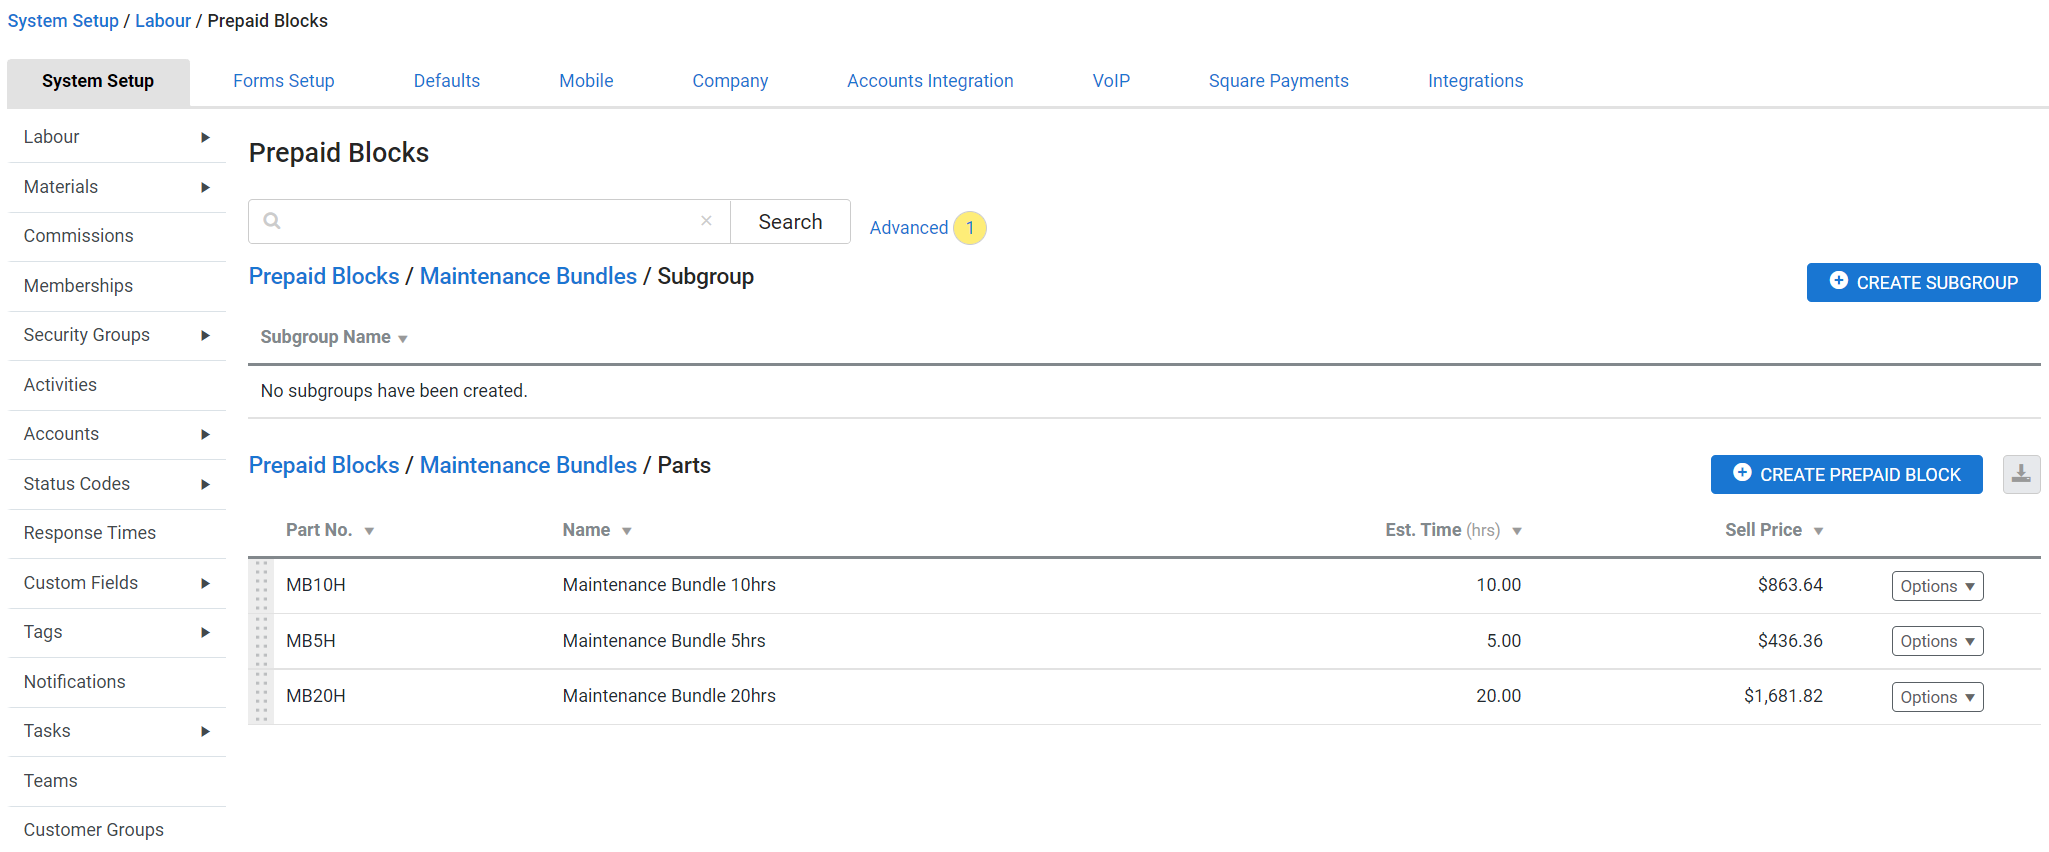
 - Click Create Group, or click an existing group then click Create Subgroup.
- Enter a Name.
- Click Save.
To edit a prepaid block group or subgroup, return to System ![]() > Setup > System Setup > Labour > Prepaid Blocks, then click Options > Edit Group / Subgroup Details, make change as required and click Save.
> Setup > System Setup > Labour > Prepaid Blocks, then click Options > Edit Group / Subgroup Details, make change as required and click Save.
To delete an individual prepaid block group or subgroup, click Options > Delete Group / Subgroup > OK. Alternatively, to delete multiple groups or subgroups at once, select the groups or subgroups you wish to delete, or select Select All, then click Delete > OK below the groups.
Deleting a group or subgroup archives or deletes all prepaid blocks within it. Prepaid blocks with history are archived, while prepaid blocks without history are deleted. Users without the relevant security group settings are not able to perform this function.
 Create a prepaid block
When creating and editing a block, you can choose the amount of time it is for. If you sell prepaid time by the hour, enter one hour. If you want to sell large blocks of time, such as 20 hours, enter that length.
To create a prepaid block:
- Go to System
 > Setup > System Setup > Labour > Prepaid Blocks.
 - Create or access a group or subgroup.
- Click Create Prepaid Block.
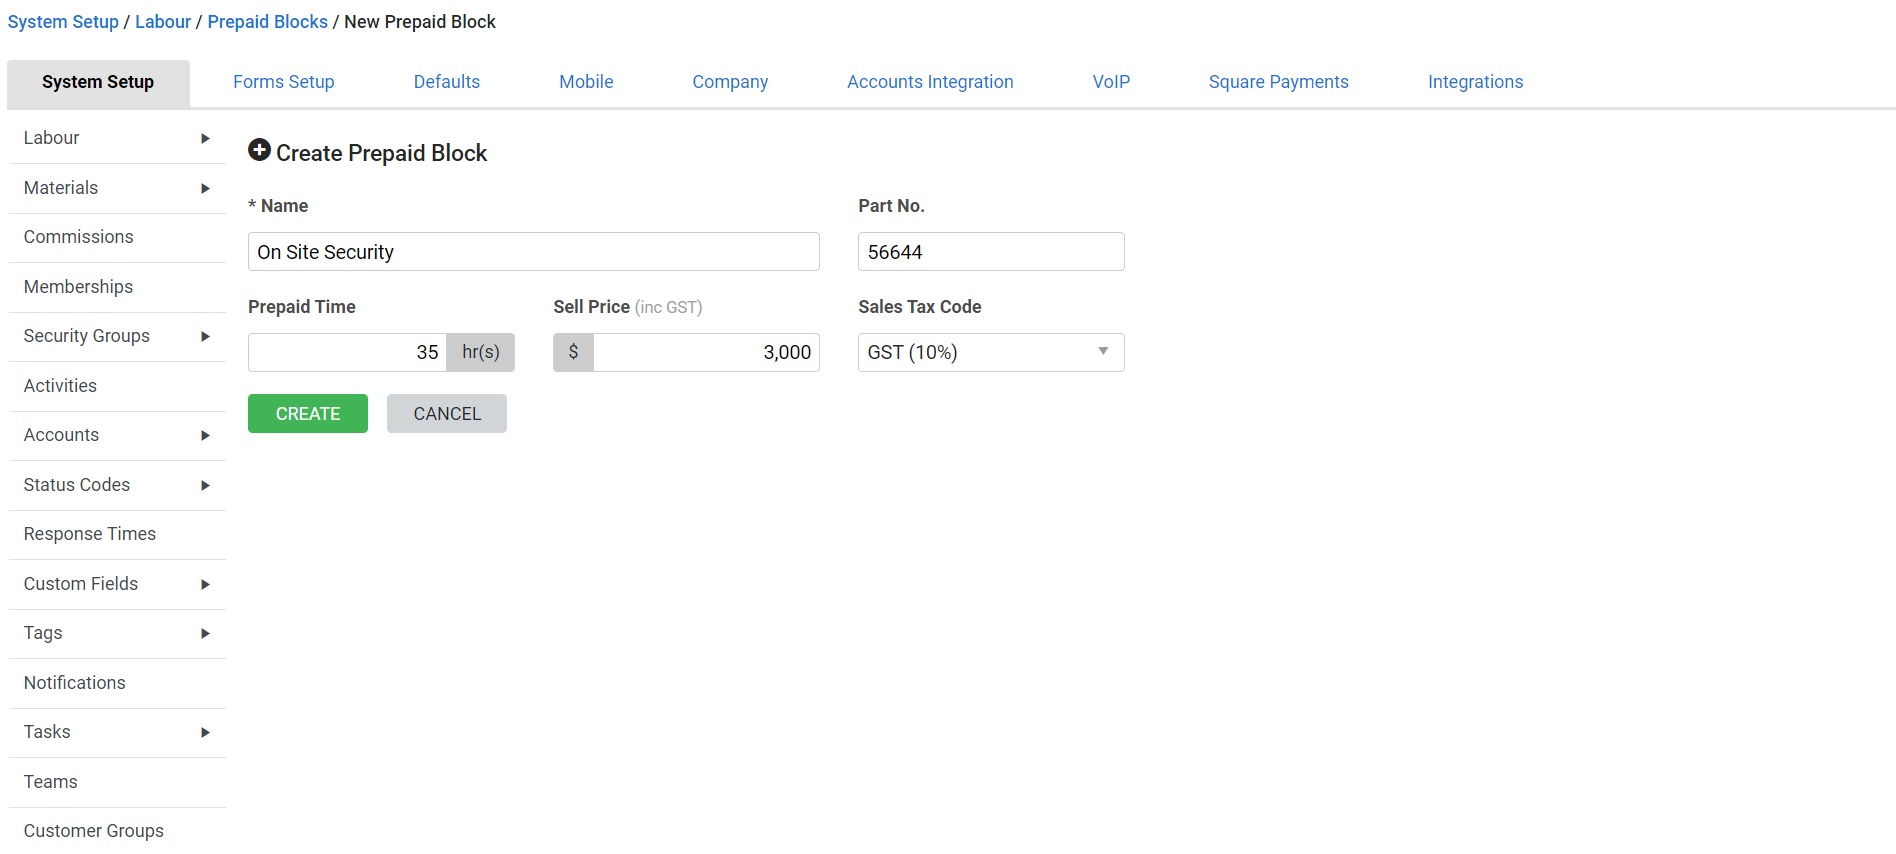
- Enter a Name and Part No..
- Under Prepaid Time, enter the number of hours you wish to sell in the block.
- Enter the Sell Price and select a Sales Tax Code.
- Click Create.
 Edit a prepaid block
To edit a prepaid block:
- Go to System
 > Setup > System Setup > Labour > Prepaid Blocks.
 - Click the relevant group and subgroup.
- Click the prepaid block you wish to edit.
- Make changes as required.
- Click Save.
 Sell prepaid time to a customer
After setting up prepaid blocks, you can sell them to a customer by adding them to a prepaid job and invoicing the job.
To sell prepaid time to a customer:
- Go to Jobs
 > Create New Prepaid Job.
 - Search and select a customer name and site, and insert other relevant details.
- Selecting an existing customer may display a warning message if the customer has invoices that are outstanding. The message indicates if the invoice is more than 30 or 90 days overdue. Click View Statement in the warning message box to open the customer statement and email it, if required. Learn more in View and email the customer statement.
- Selecting an existing customer may display a warning message if the customer has invoices that are outstanding. The message indicates if the invoice is more than 30 or 90 days overdue. Click View Statement in the warning message box to open the customer statement and email it, if required. Learn more in View and email the customer statement.
- Click Next.
- Select a Cost Centre and click Add.
- Click the cost centre you just added.
- Enter a Description.
- Click the Prepaid Blocks tab, then click the sub-tab Prepaid Blocks.
- Click through the prepaid block group and subgroup to find your prepaid blocks.
- On the prepaid block you want to add, enter the number of blocks required.
- Click Add Items.
- Edit the remaining job details as required.
- Click Save and Finish.
- Click Invoice Job.
- Finish and send the invoice as usual.
To convert a service job to a prepaid job, open the job, go to Details > Settings, click Job Setup, then select Prepaid as the Job Type.
 Use prepaid time on a job
To use prepaid time on a job:
- Create a job as usual and invoice it.
- If prepaid time is available for that customer and labour type, the Prepaid Time section appears at the bottom of the Tax Invoice page.
- Enter the amount of prepaid Time To Use.
- Finish and send the invoice as usual.
Expired prepaid time cannot be used on a job.
If a multiplier was selected when creating the prepaid labour type, real labour hours are reduced accordingly. For example, if a prepaid labour rate has a multiplier of 2, two prepaid labour hours are worth one real hour of labour.


