Last Updated: December 08 2025
Overview
In Simpro Premium, all the customers![]() The entity (individual or company) that receives the invoice for work provided. A customer may be associated with multiple sites, for example, if they are a franchise. you have created are managed from the customers table. You can use the search feature to find specific customers, filter the table according to certain criteria, and edit customers to change their details.
The entity (individual or company) that receives the invoice for work provided. A customer may be associated with multiple sites, for example, if they are a franchise. you have created are managed from the customers table. You can use the search feature to find specific customers, filter the table according to certain criteria, and edit customers to change their details.
To learn how to create customers, go to How to Create Customers.
 Required setup
In order to view content or perform actions referred to in this article you need to have the appropriate permissions enabled in your security group. Go to System![]() > Setup > Security Groups and access your security group to update your permissions. The relevant security group tab and specific permissions for this article can be found here:
> Setup > Security Groups and access your security group to update your permissions. The relevant security group tab and specific permissions for this article can be found here:
 View customers
To view customers, go to People ![]() in the main menu, then click Customers in the Go To sub-menu.
in the main menu, then click Customers in the Go To sub-menu.
To quickly locate a customer, click the starting letter of the customer name above the search bar or simply enter the name in the search bar and click Search.
If you have a large customer database, you may need to narrow your customer search results using the Advanced filter options. You can filter customers according to Customer Status, Customer Type, Account Manager, State (AU and US only), Customer Group, Customer Profile and Tags.
You can then save these filter options as a saved search to access a customer or group of customers more quickly. Learn more in Save searches.
 Access customer options
Access the following options when you right-click or click Options on a customer, or in the footer below the table:
| Edit Customer Details | Access the customer card file and edit details. You can also access the customer card file by clicking the customer in the Customers table. |
| View |
Click Statement to view a customer statement for payments owed. Click Notes to view and create notes of correspondence between the customer and your business. Click Customer Portal to view a log of all customer portal activity if applicable. |
| Create | Create a Lead, Quote, Job, Recurring Job or Recurring Invoice against that customer. |
| Map Customer | Map the customer address as entered in their card file. |
| Merge Customer | Merge a customer and all of their details, jobs and quotes into another selected customer. This is recommended if you have duplicated customers in your system. |
| Archive Customer | Archive a customer. |
| Delete Customer | Permanently delete a customer. |
 View and email the customer statement
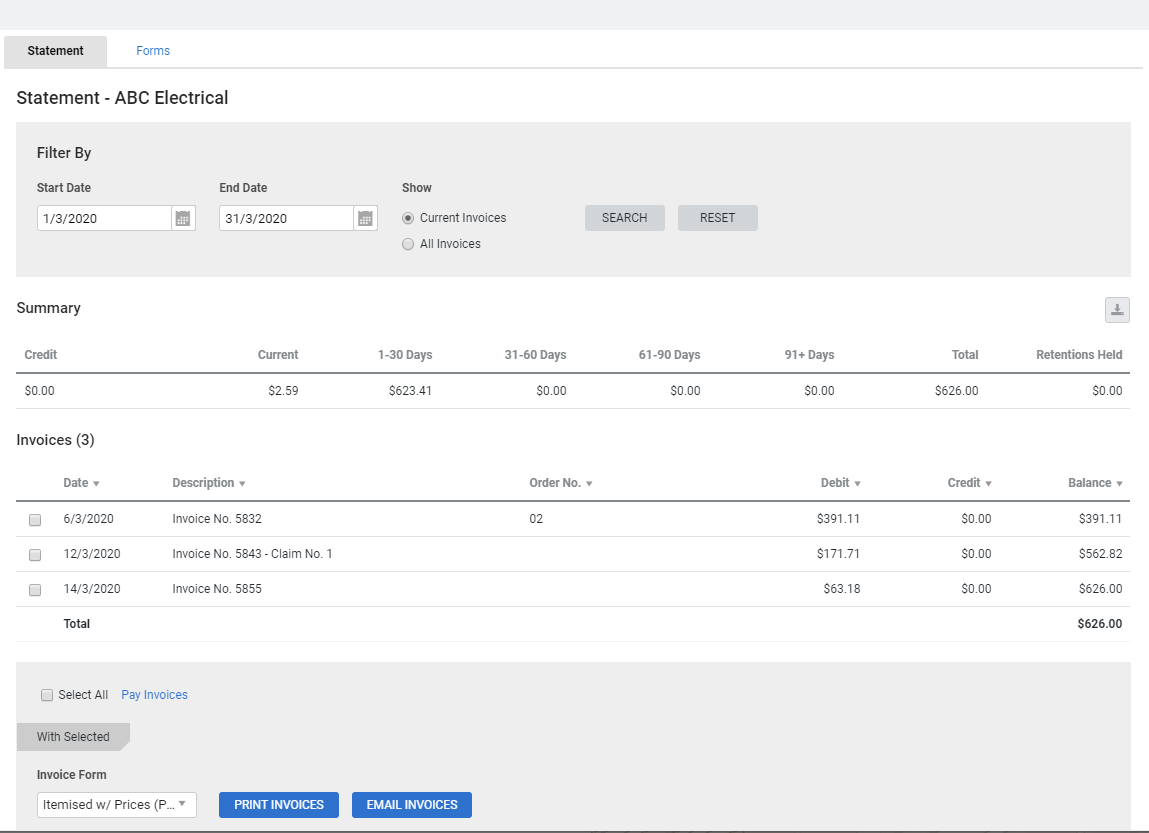
To view the customer statement, go to People ![]() > Customers, then click Options > View > Statement on the customer. Alternatively, access the customer, then go to Profile > Details, and click Options > View Statement. You can also use the Aged Receivables report to batch print statements. Learn more in Print or email statement / overdue letter.
> Customers, then click Options > View > Statement on the customer. Alternatively, access the customer, then go to Profile > Details, and click Options > View Statement. You can also use the Aged Receivables report to batch print statements. Learn more in Print or email statement / overdue letter.
Selecting a customer, when you create a new quote, job, recurring job, prepaid job, or recurring invoice, displays a warning message if the customer has invoices that are over 90 days outstanding. Click View Statement in the warning message box to open the customer statement and email it, if required.
The View Statement button makes it easier to access the statement of overdue invoices for the selected customer. You can still create quotes or jobs for customers that have the warning message displayed for overdue invoices.
You can change the look and layout of your customer statements in Forms Setup. Learn more in How to Set Up Statement Forms.
You can then view the statement Summary and Invoices created against the customer, as well as filter invoices by Start / End Date, view Current Invoices or All Invoices, apply payments to multiple invoices at once, and print / email multiple invoices, the customer statement, an overdue letter, or a final overdue letter.
You can also apply outstanding credits to existing invoices and process a refund. Learn more in Refund a paid invoice.
To apply payments to multiple customer invoices at once, select the invoices, click Pay Invoices, then apply the payment as normal.
Print / email multiple invoices
To print or email multiple invoices:
- Access the customer statement.
- Select the Invoices you wish to print / email.
- Alternatively, you can Select All.
- Select the Invoice Form.
- Click Print / Email Invoices.
You can then view which email addresses the invoices have been sent to, and if any invoices failed in sending.
Emailed invoices automatically send to the primary contact for invoices as set in the customer card file.
Other invoice contacts are included in the Cc field.
Email the customer statement / overdue letter / final overdue letter
To email the customer statement, overdue letter, or final overdue letter:
- Access the customer statement.
- Click Forms.
- Select the Form.
- Click View to preview the statement / overdue letter / final overdue letter.
- Select a Primary Contact to address the form to and click to add additional Contacts if required.
- Alternatively, you can manually enter email addresses and separate them with a comma.
- Adjust the default Subject and Body if required. The default is set up in System
 > Setup > Forms Setup > Statement.
- Alternatively, click Clear Email to enter a new Subject and Body.
- Click Send > OK.
Go to System ![]() > Setup > Forms Setup > Statement / Overdue Letters > Display Options to enter a new form title to display on the printable form document. The form still retains its Simpro Premium default title when you select it from the Form drop-down list.
> Setup > Forms Setup > Statement / Overdue Letters > Display Options to enter a new form title to display on the printable form document. The form still retains its Simpro Premium default title when you select it from the Form drop-down list.
Apply an outstanding credit to an invoice
To apply an outstanding credit to an existing invoice:
- Go to People
 > Customers.
 - Click Options > View > Statement on the customer.
- Under Summary, click Apply on the credit.
- In the Credits table in the pop-up, click Apply on the credit.
- Under Invoices, enter the credit Amount Applied against the invoice.
- Click Apply Credit.
 View customer notes
Instead of opening a customer card file and going to the Notes tab, you can view the same notes from the customer table.
Click Options > View > Notes.
 View customer portal activity
If you have given your customers access to the customer portal, you can view a log of their activity in the portal. Learn more in How to Set Up the Customer Portal.
To view customer portal activity:
- Go to People
 > Customers.
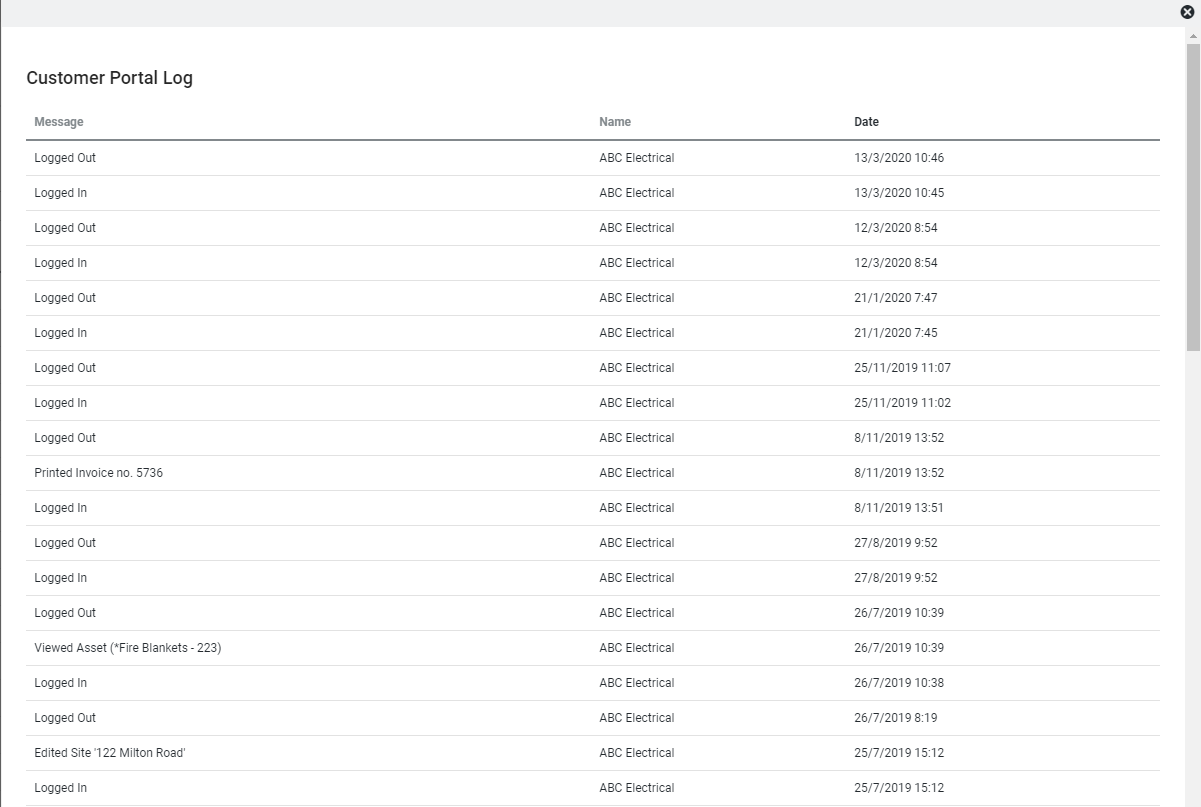
 - Next to the customer, click Options > View > Customer Portal Log.
You can see the date and time for every time the customer logged in and logged out, along with any actions they performed, such as booking jobs, accepting quotes, creating sites, viewing assets, and printing forms.
 Create new leads, quotes, and jobs
When you create a new lead / quote / job from the customer table, or from within the customer card file, the customer is automatically selected and you can continue filling in details as normal.
To create a new lead, quote or job from the customer table:
- Go to People
 > Customers.
 - Next to the customer, click Options > Create > Lead / Quote / Job / Recurring Job / Recurring Invoice.
- Continue creating the lead / quote / job as normal.
 Map customers
If you record your customers' street addresses, you can view their locations on a map.
To map customers:
- Go to People
 > Customers.
 - Select the check boxes for each customer you wish to map.
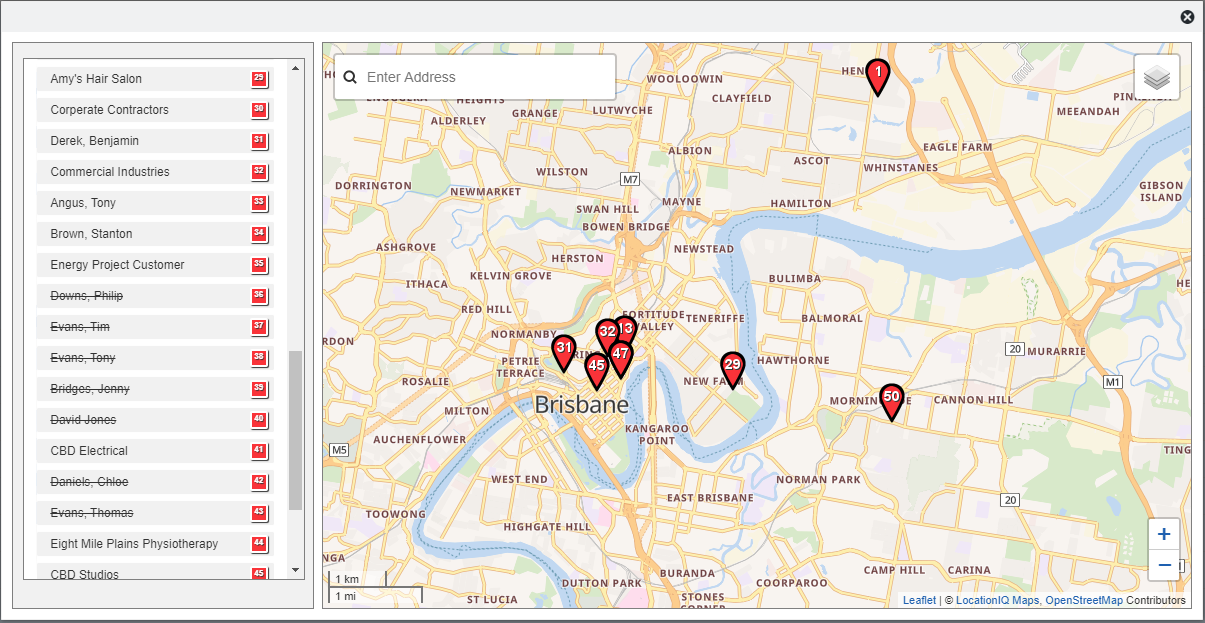
- Click Map Customers. Each customer is displayed as a pin on the map.
- On the left side of the map, click the name of the customer to zoom in on them on the map.
 Merge customers
If you find duplicate customers in your system, reconcile this by merging the two customers. All of a customer's details and transaction history are moved to another customer.
Please take caution when merging customers as you cannot split them again.
To merge customers:
- Go to People
 > Customers.
 - Find the customer you wish to merge and click Options > Merge Customer.
- Search for and select the other customer as the merge destination.
- Click Merge.
The first customer disappears from the table and their information is transferred to the second customer.
If you have customers you are going to merge together, you can retain their contact details by creating a contact before merging.
For example, if you have one customer, ‘Peter Smith’, that is going to be merged into another customer, create a contact within ‘Peter Smith’ with the relevant details. The ‘Peter Smith’ contact is then available in the merged customer.
 Archive customers
If a customer is no longer active, you can archive them. This means that leads, quotes and jobs can't be created for them, but you can still access the customer's details for reference purposes.
To archive a customer:
- Go to People
 > Customers.
 - Select the check boxes for each customer you wish to archive.
- Below the table, click Archive > OK.
To view archived customers, click Advanced and select Archived from the Customer Status drop-down list.
All existing leads, quotes and jobs, recurring jobs and recurring invoice templates remain in Simpro Premium. Recurring templates can be used to create new jobs and invoices until they are individually archived.
Activate an archived customer
To reactivate an archived customer:
- Go to People
 > Customers.
 - Click Advanced.
- Under Customer Status, select Archived.
- In the table, select the check boxes for each customer you wish to activate.
- Click Activate > OK.
The activated customers are moved back to the main table.
 Delete customers
When you delete a customer, they are permanently removed from your system and cannot be restored like archived customers can be.
To delete a customer:
- Go to People
 > Customers.
 - Select the check boxes for each customer you wish to archive.
- Below the table, click Delete > OK.


