Last Updated: December 15 2025
Overview
With this editable form you can provide a detailed PDF document to customers for a quote or job, as might be needed for large projects and tenders. You may also choose to use it for smaller quotes and jobs. You can create detail forms from scratch each time, but it is more efficient to create and use templates.
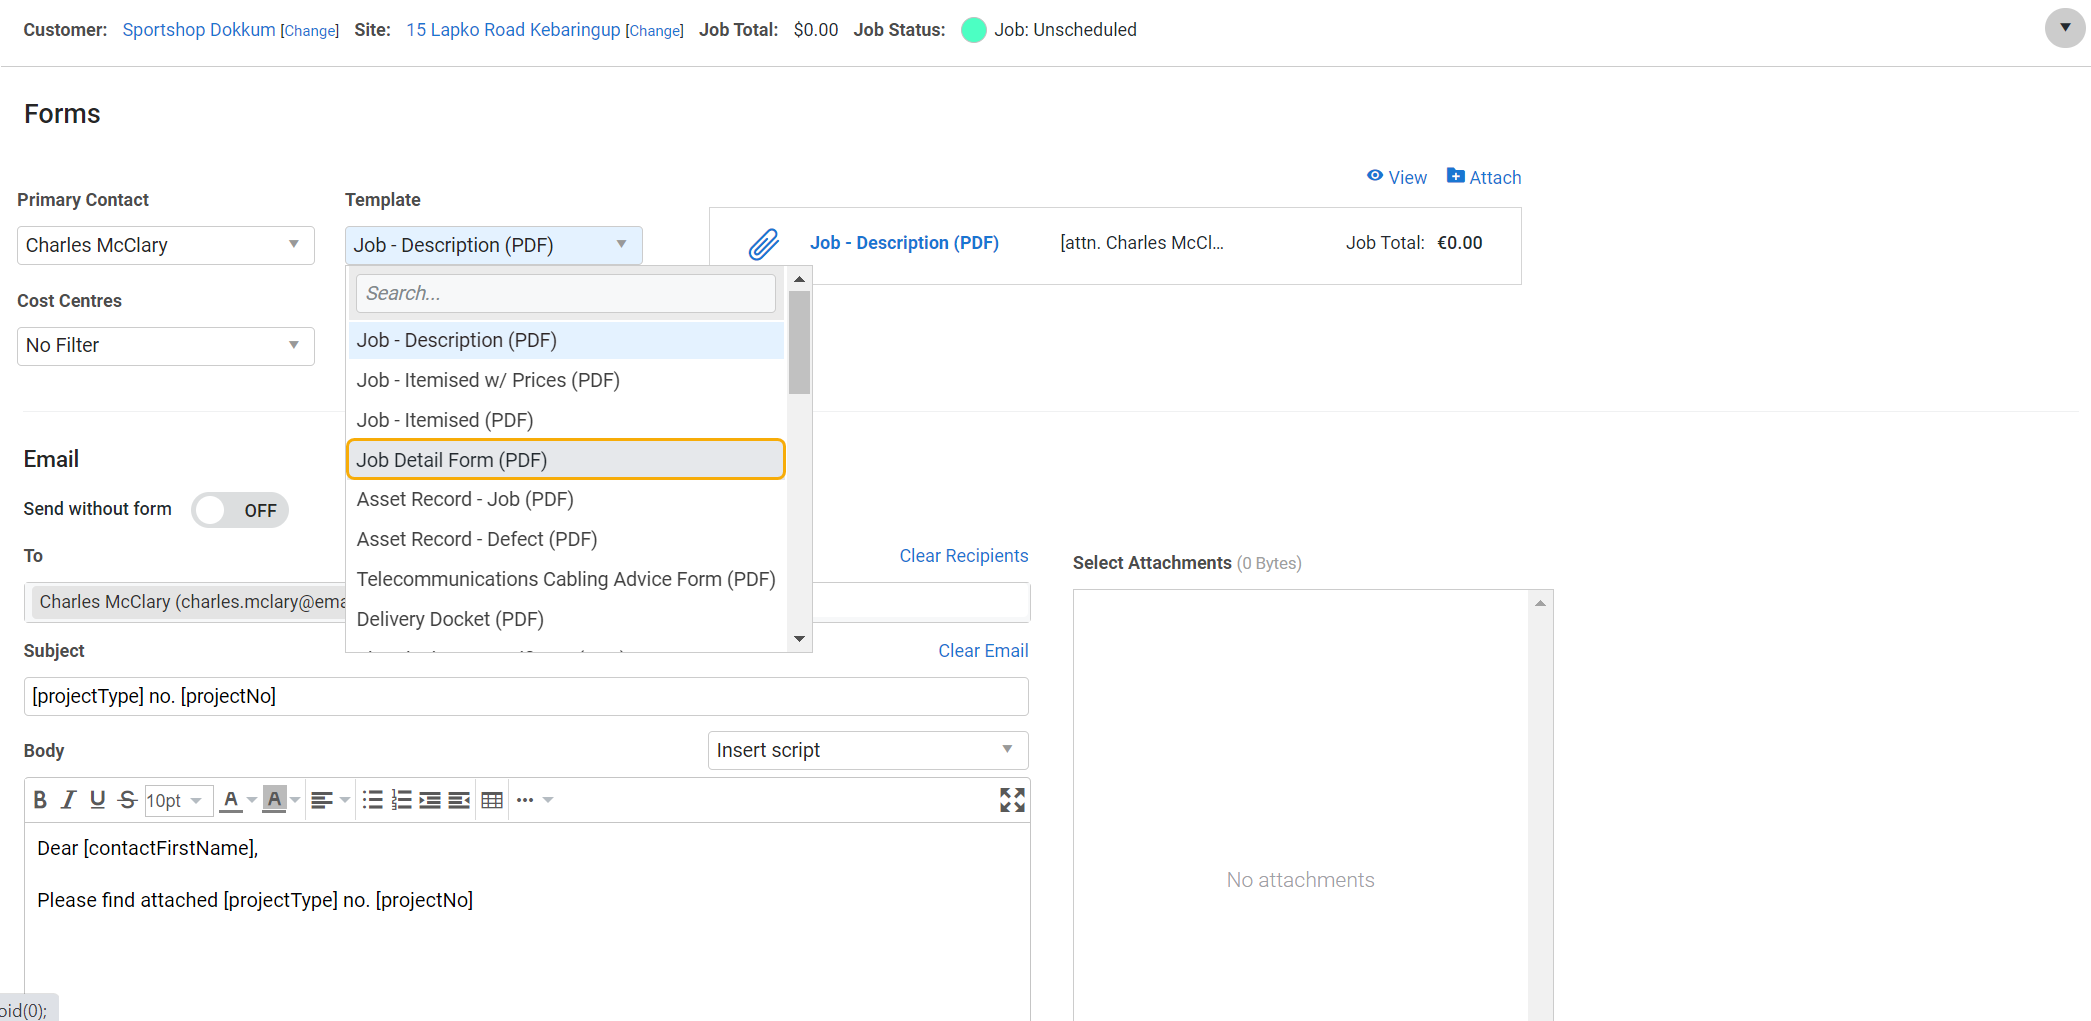
After opening an existing quote or job, the Quote Detail Form or Job Detail Form is available on the Forms tab, under the Form drop-down list.
Unlike other forms in the list, clicking this form opens a pop-up window. From this window you can edit the form and send it to your customer along with your quote or job, then return to the open quote or job.
For even more customisation options consider using Form Builder Templates. Learn more in How to Use Form Builder Templates.
 Required setup
In order to view content or perform actions referred to in this article you need to have the appropriate permissions enabled in your security group. Go to System![]() > Setup > Security Groups and access your security group to update your permissions. The relevant security group tab and specific permissions for this article can be found here:
> Setup > Security Groups and access your security group to update your permissions. The relevant security group tab and specific permissions for this article can be found here:
 Create a detail form template
Creating and using detail form templates makes your detail forms efficient and consistent. When you use a detail form template to generate your detail form, you can edit it to suit that particular quote, job, or customer. The selected information is only populated into the body of the form and applies the form header as set up under System Setup > Forms.
To create a detail form template:
- In an existing quote or job, click the Forms tab.
- In the Forms drop-down list, select Quote Detail Form or Job Detail Form (depending on which you are viewing). A Quote / Job Detail Form pop-up window opens.
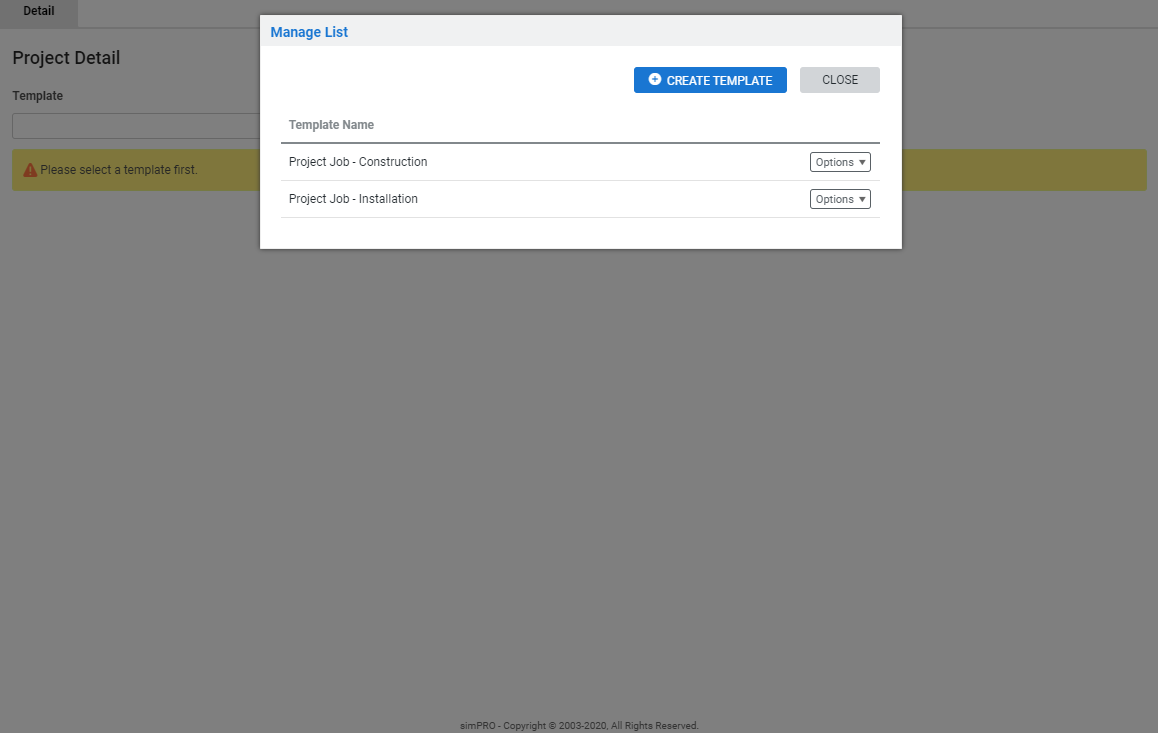
- In the Detail tab, click Manage.
- Click Create Template.
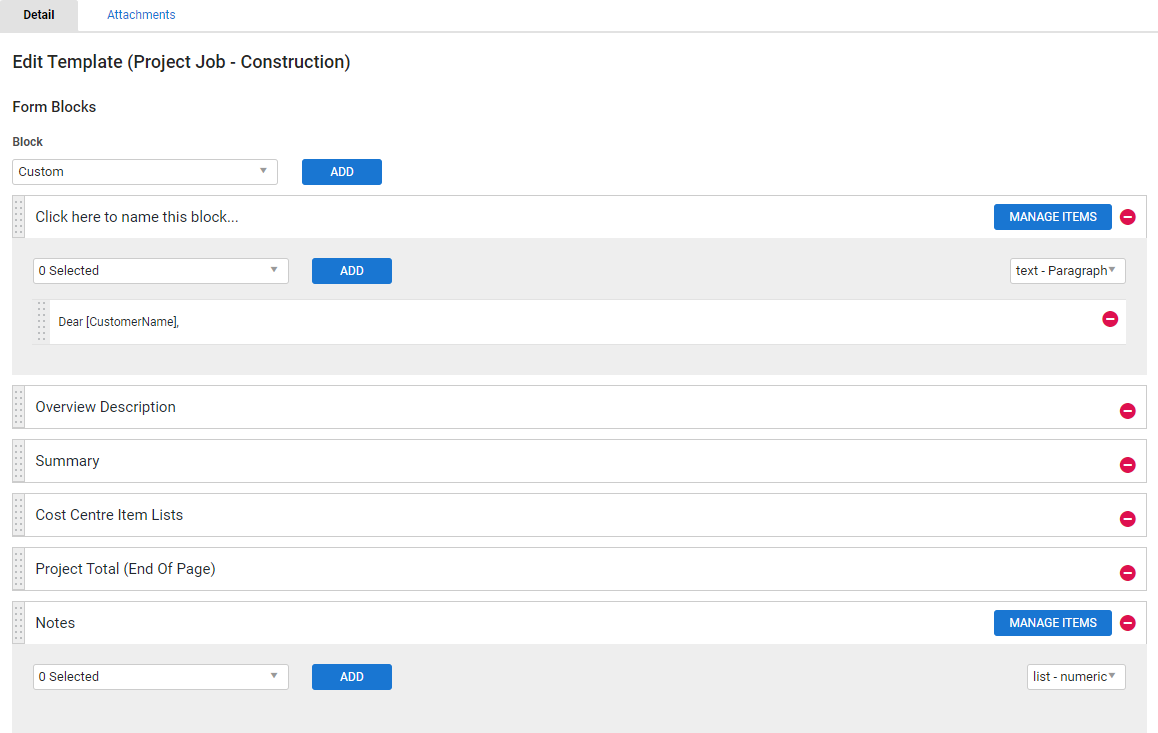
- Enter the name of your template, then click Save. The Edit Template page opens.
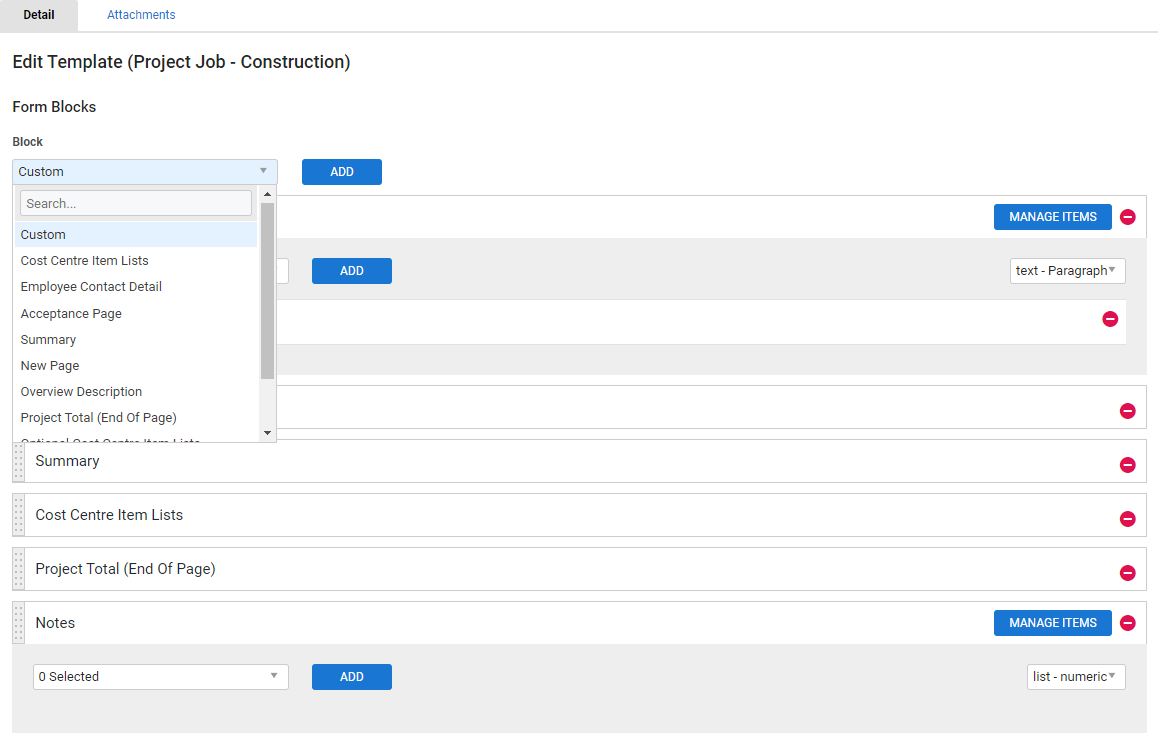
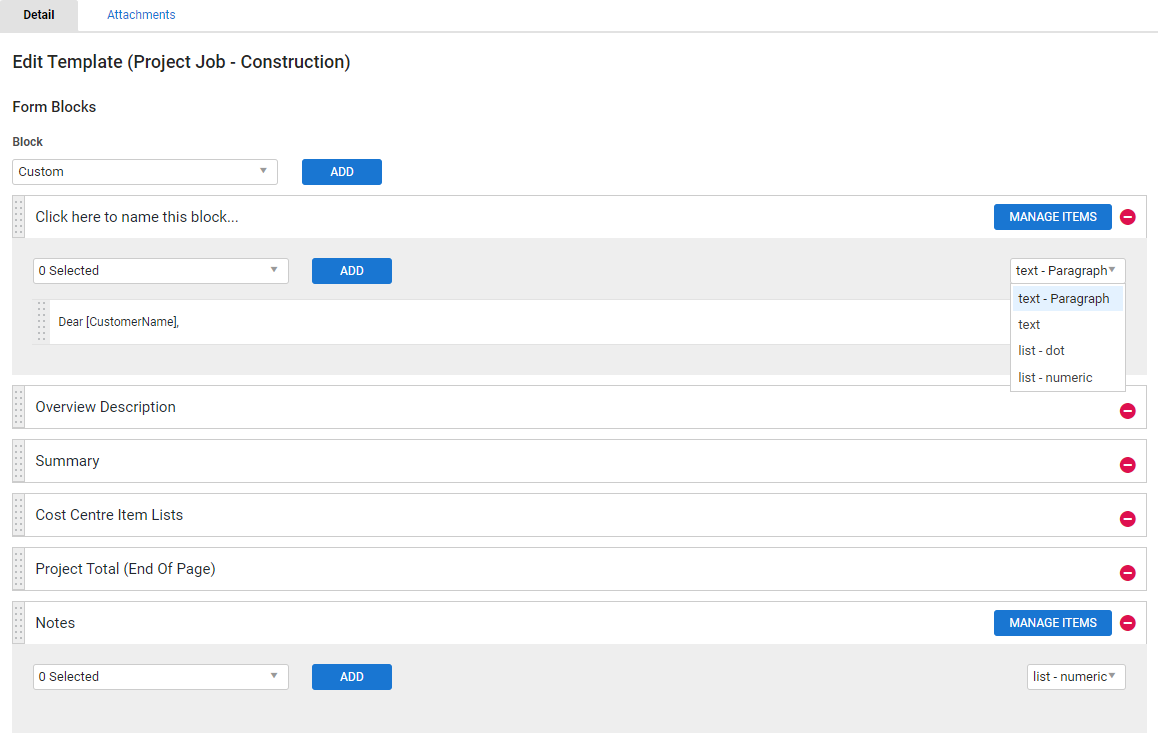
- Use the Block drop-down list to Add blocks and rearrange them as required.
- Click Finish, then OK.
Your new template is ready to use from the Template drop-down list.
 Add blocks
Use Add blocks to structure your quote or job detail form and customise the information displayed.
To add a block to a detail form or detail form template:
- Navigate to the Edit Template or Project Detail page within your quote or job detail form.
- Select the block from the Block drop-down list and click Add.
- Your new block appears at the bottom of the page.
- Use the drag handles to rearrange the blocks and any associated fields.
To edit a block in detail, click Manage Items.
To delete unwanted fields or an entire block, click the associated ![]() icon.
icon.
 Block types
| Acceptance Page | Usually found towards the end of a form, this can include a cost structure summary, acceptance message, space for a customer signature, and purchase order details. |
| Cost Centre Item List | A list of cost centre items. |
| Custom | A customisable block. See To edit a Custom block:. |
| Employee Contact Detail |
Usually found at the bottom of quotes and jobs, this can include employee and company details, along with an employee signature image file. This image file needs to be saved as the Default image in the Attachments tab in the employee card file. See Add attachments to learn more. |
| How To Pay (End Of Page) | Insert your How To Pay information (as entered in your How to Set Up Forms) at the bottom of the current page. |
| New Page | A page break to control your document's layout and readability. |
| Optional Cost Centre Item Lists | A list of optional cost centre items. |
| Overview Description | The text entered into the Description field in the quote or job's overview. |
| Project Total | Project total and sub-total details. |
| Project Total (End Of Page) | Project total and sub-total details, at the bottom of the current page. |
| Summary |
A summary of costs broken down by cost centre. Note that this is for project quotes and jobs, not for service quotes or jobs. |
- Add a Custom block to your detail form.
- On the new block, click Manage Items.
- Click Create Item.
- Enter information and format as required.
- Click Save.
- Repeat as needed, then click Close.
- On the custom block, use the right drop-down list to select whether your item appears as text, paragraph text, a bulleted list, or a numeric list.
 Edit a detail form template
To edit an existing detail form template:
- In an existing quote or job, click the Forms tab.
- In the Forms drop-down list, select Quote Detail Form or Job Detail Form (depending on which you are viewing).
- In the Detail tab, click Manage.
- Click the template you wish to edit.
- Edit as required, then click Finish and OK.
If you want to edit a detail form for a specific quote, job or customer, do not edit the template as these changes are permanent. Instead, add or delete individual items after selecting the detail form template.
 Delete a detail form template
To delete an existing detail form template:
- In an existing quote or job, click the Forms tab.
- In the Forms drop-down list, select Quote Detail Form or Job Detail Form (depending on which you are viewing).
- In the Detail tab, click Manage.
- Click Options on the template you wish to delete.
- Click Delete and OK.
 Use a detail form template
To use a detail form template to email a customer a quote or job detail form:
- Open the quote or job and finalise any changes.
- In the Forms tab, select Quote Detail Form or Job Detail Form (depending on which you are viewing).
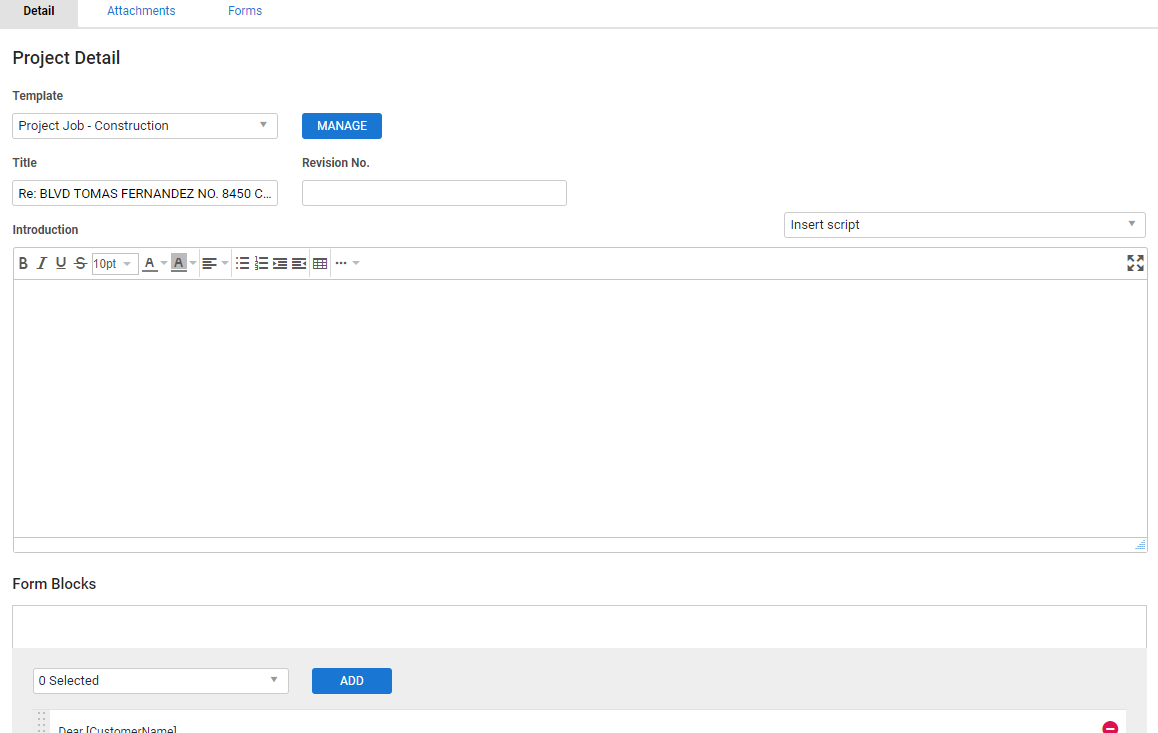
- In the Detail tab, select the detail form template from the Template drop-down list.
- Enter or edit the Title, Revision No., and Introduction as needed. The Title is the name of your PDF.
- Edit the form blocks as required to control the information this specific customer sees.
- If you wish to add attachments, upload on the Attachments tab.
- Uploaded attachments can be embedded into the PDF or attached to the email.
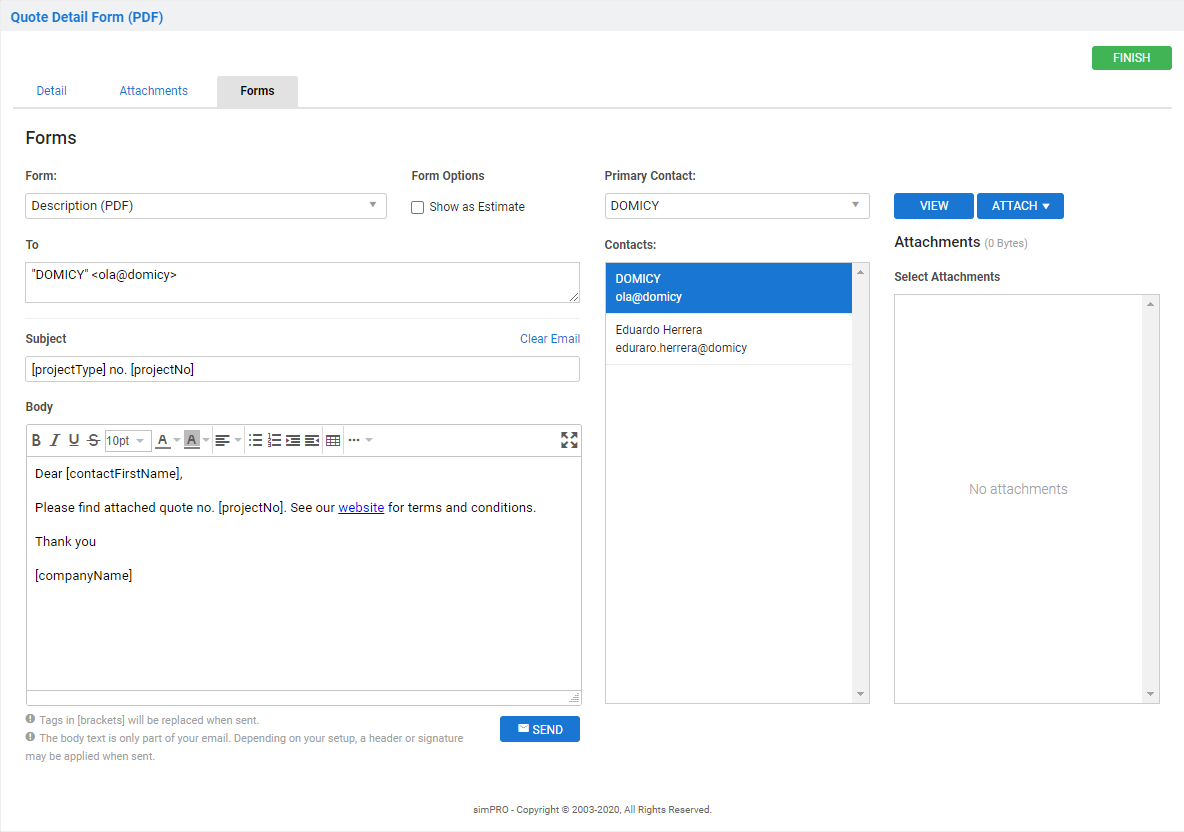
- Click the Forms tab.
- From the Form drop-down list, select the type of details you want to display (such as Itemised w/Prices).
- Edit the remaining email fields as needed.
- Click Send > OK > OK.
- Click Save and Finish.
Before emailing, use the Attach button on the Forms tab to keep a copy of this form in your system for future reference.
Advanced
 Page break for optional cost centres
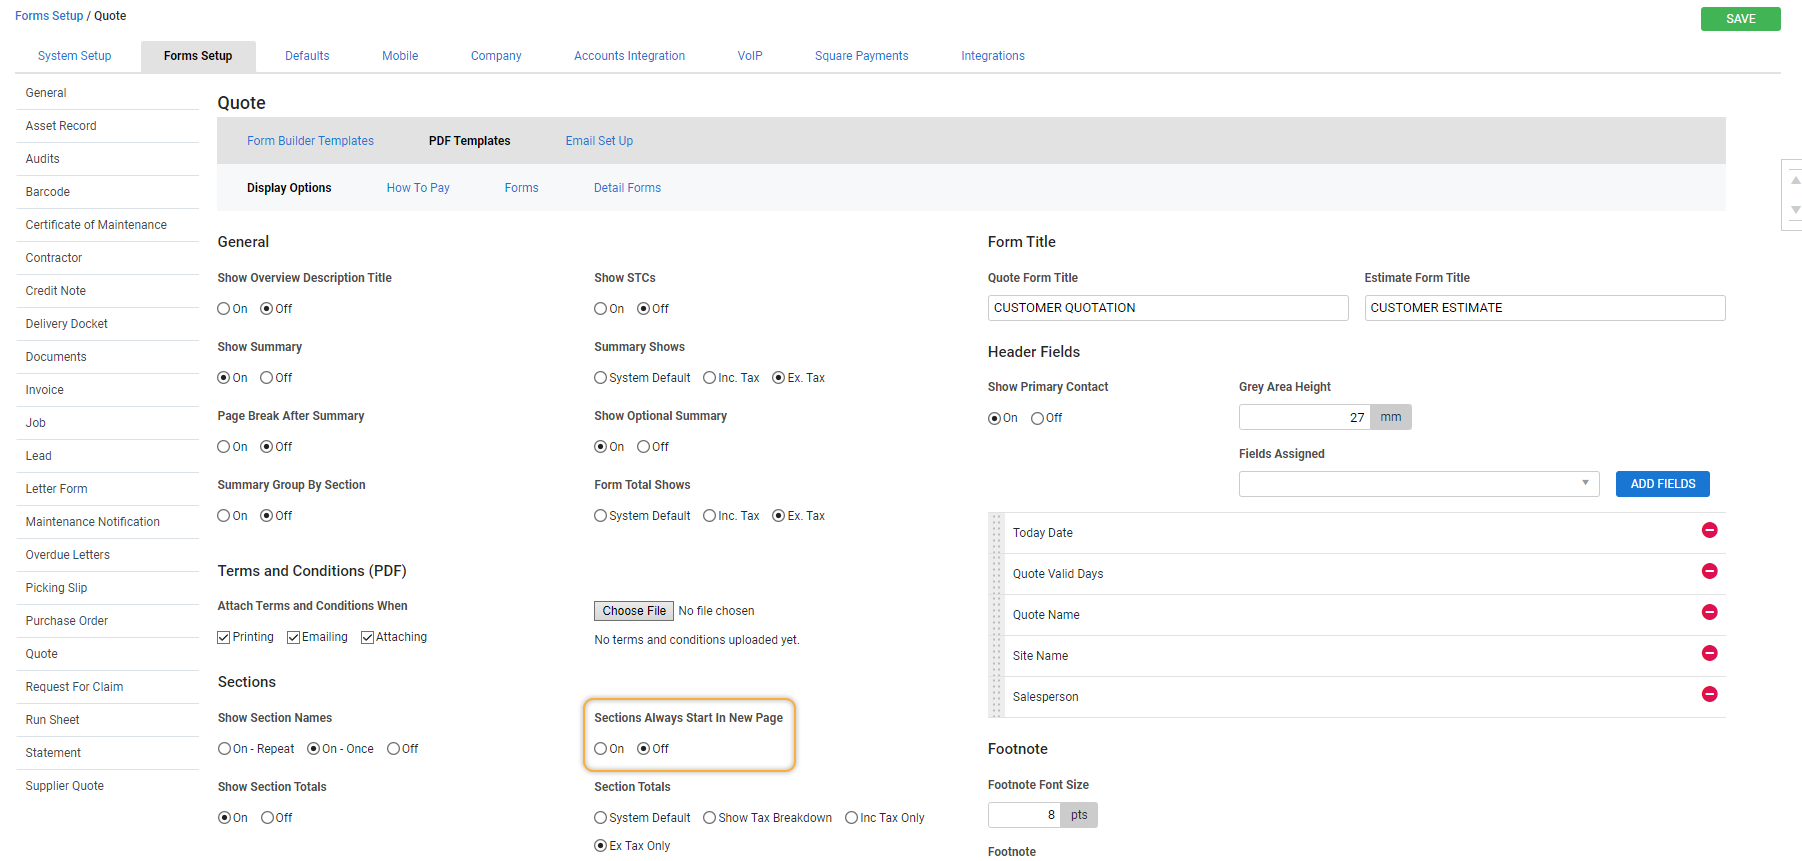
If the System ![]() > Setup > Forms Setup > Quote > Display Options > Sections > Options > Section Always Start In New Page option is enabled, your optional cost centres display on a new page.
> Setup > Forms Setup > Quote > Display Options > Sections > Options > Section Always Start In New Page option is enabled, your optional cost centres display on a new page.
When using the quote detail form, this setting is replaced with your quote detail form setup structure. Make sure you have included the Optional Cost Centre Item Lists block.
For more information about adjusting quote detail forms, including the form title to display on the printable form document, see How to Set Up Quote Forms.
