Last Updated: December 15 2025
Overview
Create suppliers![]() US: Vendor. A business that you order materials from using purchase orders. in Simpro Premium to import catalogues and create and send catalogue purchase orders
US: Vendor. A business that you order materials from using purchase orders. in Simpro Premium to import catalogues and create and send catalogue purchase orders![]() US: Catalog Purchase Order. A formal request to a supplier to provide an item or service. A purchase order can be created across multiple cost centres..
US: Catalog Purchase Order. A formal request to a supplier to provide an item or service. A purchase order can be created across multiple cost centres..
You can add multiple suppliers at once by importing a CSV, TXT, or ZIP file list. See How to Import Suppliers to learn how.
After you have created your suppliers, manage them from the supplier table. Learn more in How to Manage Suppliers.
US only: If you use Simpro Premium in the United States, the term 'vendor' is used instead of 'supplier'.
 Required setup
In order to view content or perform actions referred to in this article you need to have the appropriate permissions enabled in your security group. Go to System![]() > Setup > Security Groups and access your security group to update your permissions. The relevant security group tab and specific permissions for this article can be found here:
> Setup > Security Groups and access your security group to update your permissions. The relevant security group tab and specific permissions for this article can be found here:
 Create a supplier
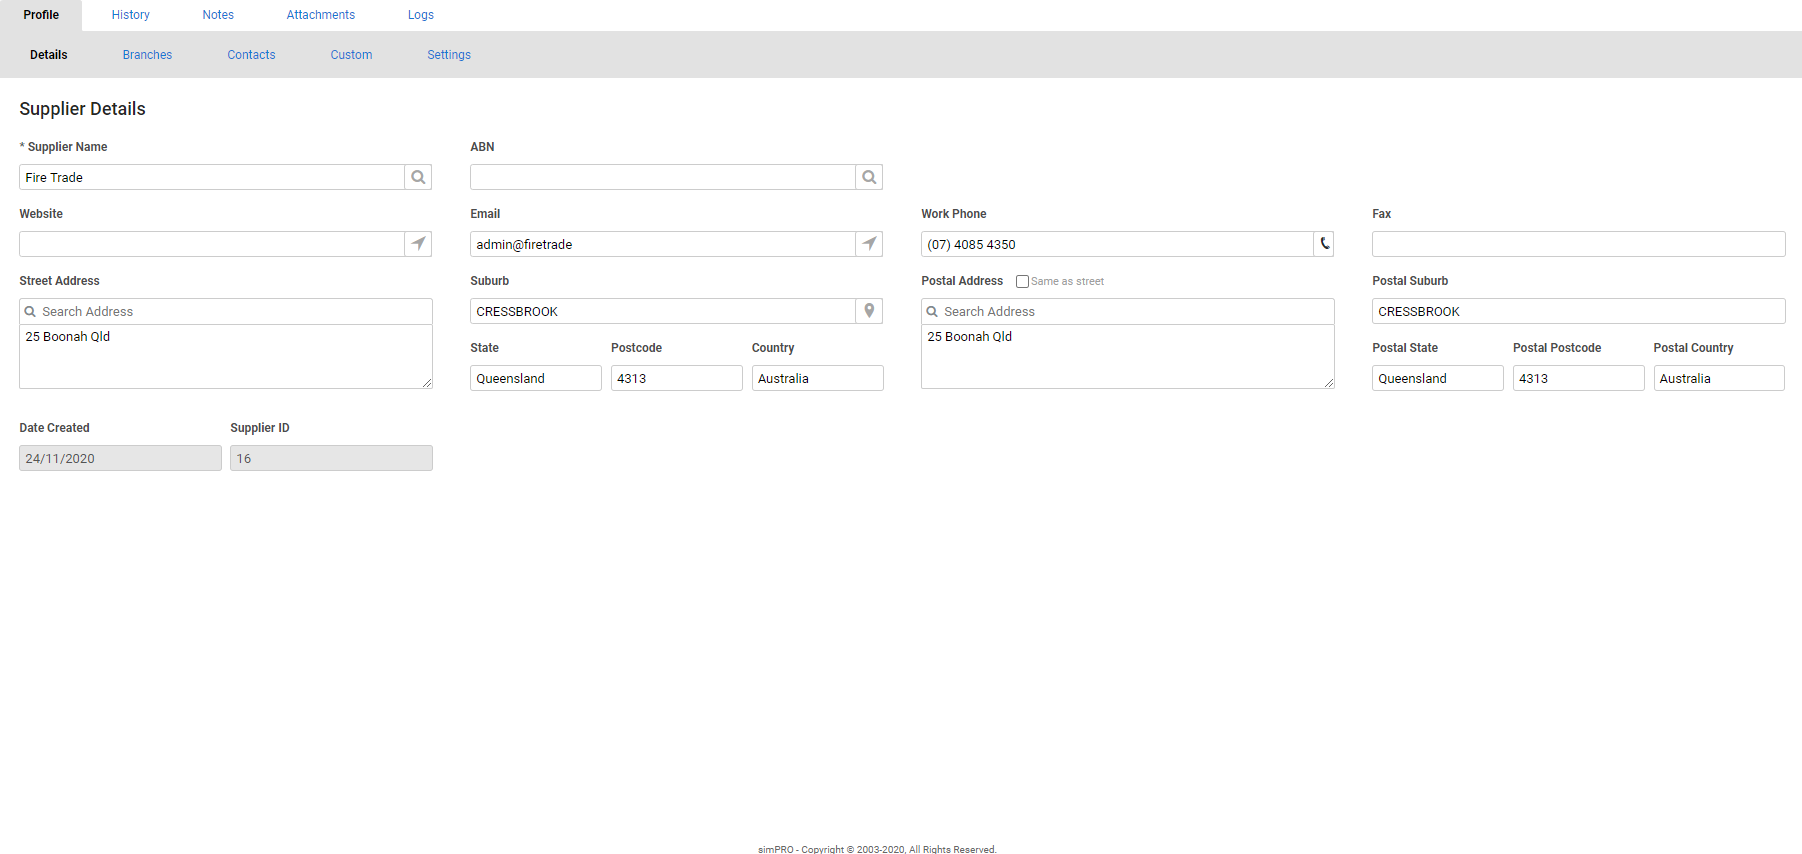
To create a supplier:
- Hover over People
 , then click Create New Supplier. Alternatively, go to People
  > Suppliers > Create Supplier.
 - Enter the Supplier Name.
- Enter the ABN / GST # / VAT Reg. No. / EIN as applicable.
- If you do not know this information, click the
 icon to search for an existing ABN / GST # / VAT Reg. No. that matches the details you have already entered. Please ensure that you check with the supplier that this number is correct.
- If you do not know this information, click the
- UK only: Enter the Company No. as applicable.
- If you do not know this information, click the
 icon to search for an existing number that matches the details you have already entered. Please ensure that you check with the supplier that this number is correct.
- If you do not know this information, click the
- Enter contact details, as required.
- AU / NZ / US: Click Search Address and enter the required address. Choose from the suggestions list to populate the Street Address, Suburb, State / Province and Postcode.
- Alternatively, enter the Street Address details manually.
- If your site does not have a street address, such as a sign on the side of a road or a structure in the middle of a large park, you can enter the longitude and latitude of the site, for example -27.580695, 153.129879, and Simpro Premium will pin the site to that exact location on the map.
- UK: Enter the Street Address details manually. Enter the Postcode, then click outside the text box to generate a selection of addresses.
- IE: Enter the Street Address and Eircode manually.
- To record international addresses, you can select the required country and enter in the appropriate address manually.
- If you are sending correspondence to a different address, similarly enter a Postal / Billing Address. Otherwise, select Same as Street.
- If a Postal / Billing Address is entered it overrides the branch address on Purchase Order forms.
- Click Save and Finish.
 Add supplier branches
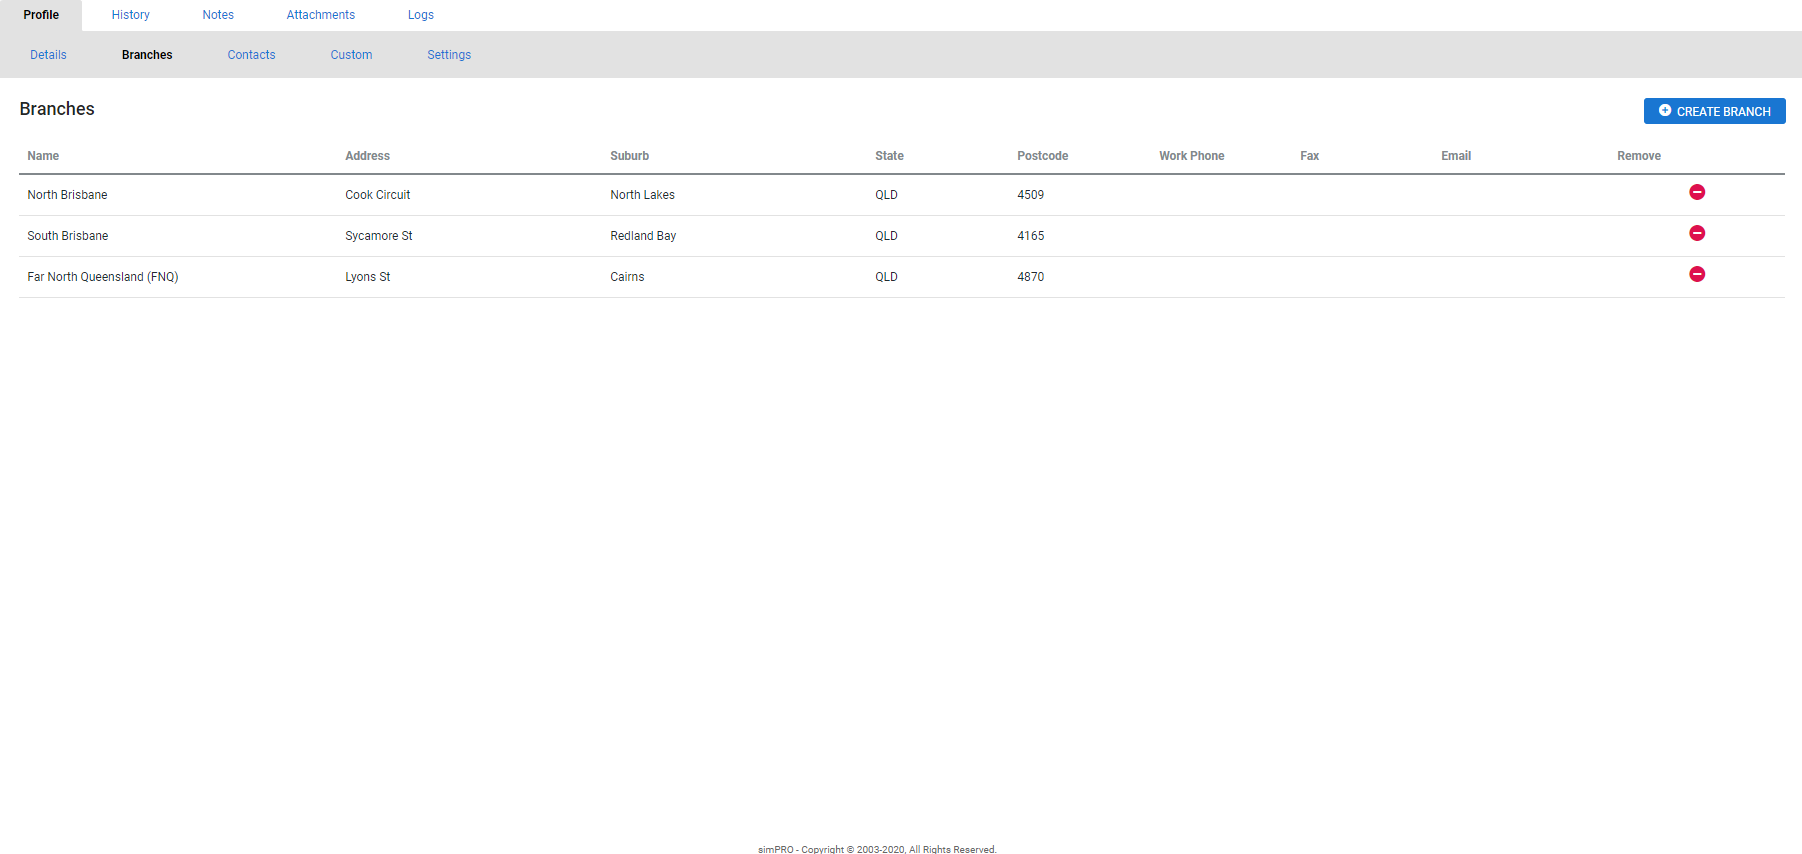
Create supplier branches to manage the different localities you purchase from for the one supplier. You can then purchase items from branches that are close to a specific job site, as well as email purchase orders directly to a specific branch from the Forms tab.
To create a supplier branch:
- Access the supplier, then go to Profile > Branches.
- Click Create New Branch.
- Enter the branch Name.
- Enter contact details as required.
- Enter Street Address details for the specific branch.
- Click Save.
- Click Save and Finish to update your changes. Click Save and Finish.
You can include the branch address on purchase order forms in System ![]() > Setup > Forms Setup > Purchase Order.
> Setup > Forms Setup > Purchase Order.
 Add supplier contacts
You can create additional contacts for a supplier if, for example, you need to contact their accounting or IT departments. Learn more in How to Create Contacts.
 Enter custom information
If you have created custom fields for suppliers, use the Custom sub-tab to store additional supplier information. Learn more in How to Use Custom Fields.
You can then search custom information in local and global searches.
 Adjust supplier settings
Go to Profile > Settings > Supplier Profile to adjust supplier settings in Simpro Premium, including entering an Account, as well as selecting a Currency, Purchase Tax Code and Preferred Notification Method.
Once you have selected the supplier's currency, you cannot change it if you have:
- raised a purchase order for the supplier
- raised a supplier quote for the supplier
- selected the supplier in a catalogue item.
Under Banking, enter the supplier Account No. and select Payment Terms to assist in accurately transferring supplier invoices to your accounting package.
 Enter private supplier notes
Go to the Notes tab to enter and format private notes about the supplier for internal reference.
 Manage supplier attachments
Go to the Attachments tab to add, organise and download supplier-specific attachments for internal reference only. Learn more in How to Use Attachments.
 View Logs
The information displayed on the Logs tab details all the actions and changes performed for the selected record in Simpro Premium. You can use this for accurate and comprehensive auditing.
The details displayed include:
| Message | A short description of the update performed on the record. |
| Date & Time | Date and timestamp of when the action was taken. |
| ID | The Simpro Premium ID of the user who performed the action. |
| Name | Name of the user who performed the update on the record. |
| Event |
The type of action performed.
|
 Walk Me Through
Need additional help?
Try Walk Me Through, our step-by-step guidance tool, to create suppliers.
In Simpro Premium, go to Help ![]() > Walk Me Through and search Suppliers or Vendor.
> Walk Me Through and search Suppliers or Vendor.
Learn more in How to Use Walk Me Through in Simpro Premium.
 Learn more in the Learning Toolbox
For additional training, complete an interactive material in the Simpro's Learning Toolbox. Learn more in About Simpro's Learning Toolbox.


