Last Updated: December 15 2025
Overview
Teams are groups of employees, contractors, and plant items![]() Equipment that your business owns and maintains, such as vehicles, mobile devices, machinery, specific tools, etc. that can be scheduled as one unit. This is useful for avoiding scheduling conflicts and making your scheduling workflow more efficient.
Equipment that your business owns and maintains, such as vehicles, mobile devices, machinery, specific tools, etc. that can be scheduled as one unit. This is useful for avoiding scheduling conflicts and making your scheduling workflow more efficient.
If any employee, contractor, or plant item in a team has already been scheduled to another job, the team as a whole appears unavailable for scheduling, although the employees, contractors, and plant items are still available individually. Individual employees, contractors, and plant items can be assigned to multiple teams.
This feature is best used for teams that are assembled for the long term, rather than teams that change regularly.
You may wish to create a team for all employees so that you can easily schedule public holidays for everyone at once. You can also create a team for all technicians to schedule activities such as safety meetings.
 Required setup
In order to view content or perform actions referred to in this article you need to have the appropriate permissions enabled in your security group. Go to System![]() > Setup > Security Groups and access your security group to update your permissions. The relevant security group tab and specific permissions for this article can be found here:
> Setup > Security Groups and access your security group to update your permissions. The relevant security group tab and specific permissions for this article can be found here:
 Create a team
To create a team:
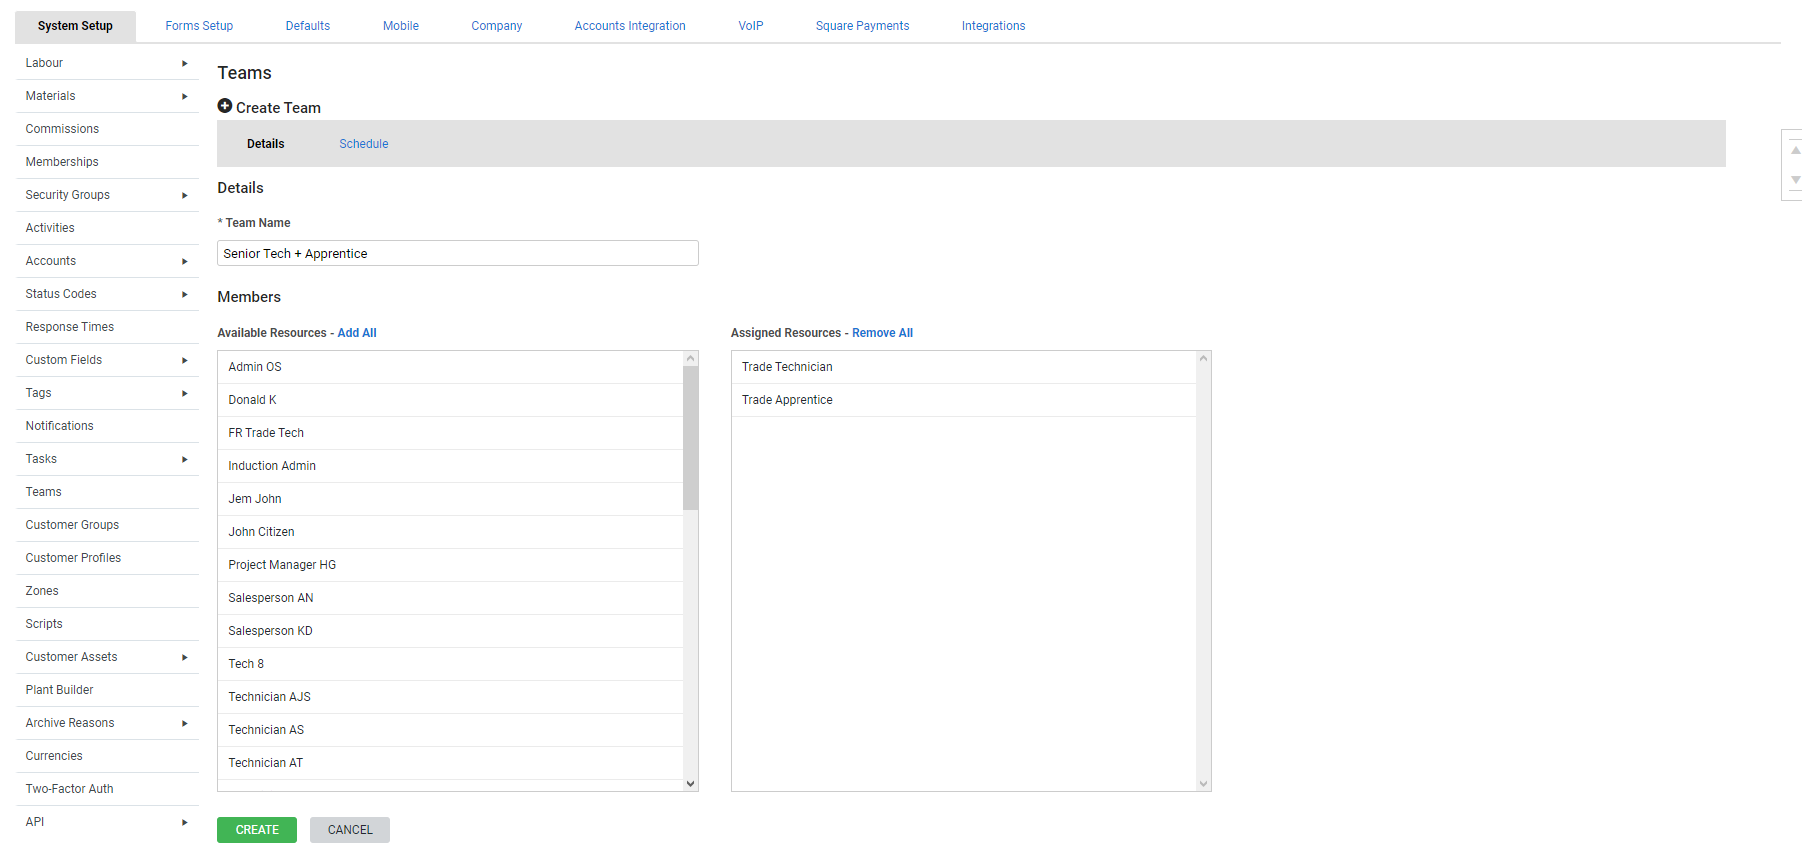
- Go to System
 > Setup > System Setup > Teams.
 - Click Create Team.
- Enter the team Name.
- Under Members, click the Available Resources you wish to add to the team, including employees, contractors, and plant items.
- Alternatively, click Add All.
- Click Assigned Resources to remove them, or alternatively, click Remove All.
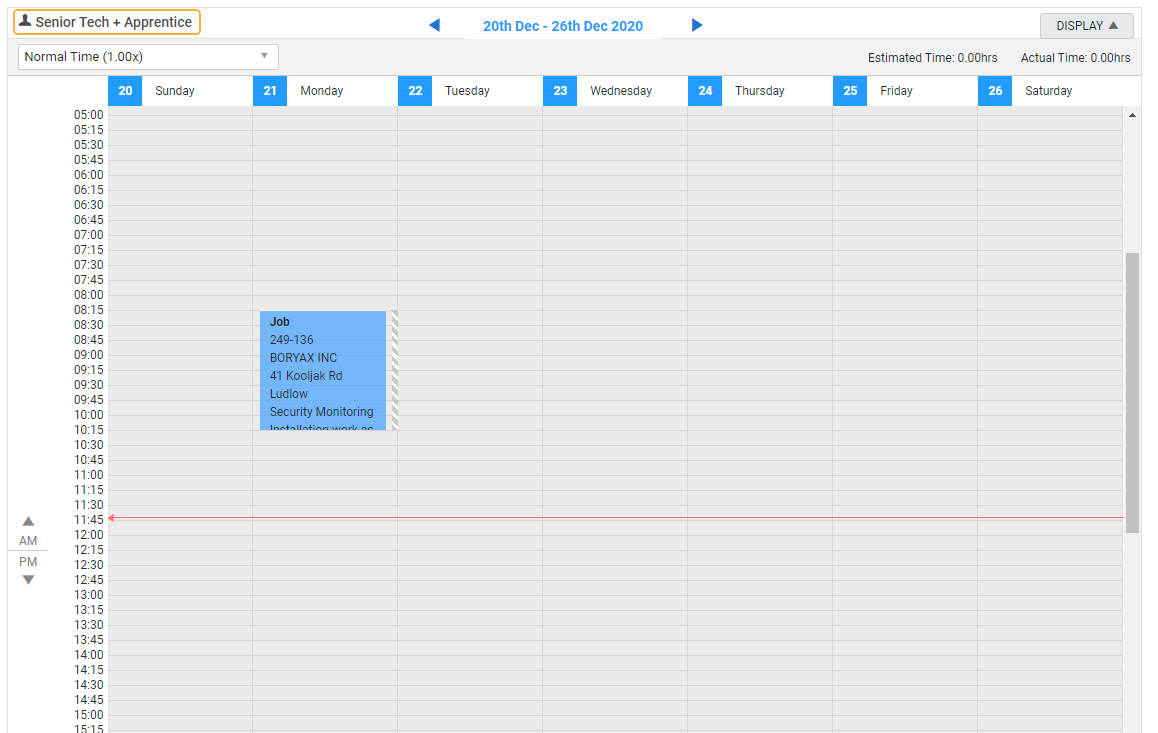
- Click Schedule.
- Select the Shift Start and Shift End days and times for the team, then click Add.
- Click the Available Cost Centres and Available Zones to assign them.
- Teams can only be scheduled to quotes / jobs with the same cost centre and / or zone assigned.
- Click Create.
To delete a team, click the ![]() icon. This does not delete the individual members of the team. Schedules that were created for the team continue to apply to the individual members after the team is deleted, but no longer display as a team in the schedule view.
icon. This does not delete the individual members of the team. Schedules that were created for the team continue to apply to the individual members after the team is deleted, but no longer display as a team in the schedule view.
Only plant items that have been enabled to be scheduled are available in the list.
 Schedule a team
You can schedule teams both within a job and in the schedule Day / Week View. Hover over a team schedule block to view the team members and assigned hours.
 Schedule a team from a job
You can schedule teams to a job or quote the same way you would schedule an individual employee, contractor, or plant item.
To schedule a team:
- Access the quote / job.
- Click the Schedule tab.
- Under Teams, click the
 icon next to the team you wish to schedule.
 - Click and drag the schedule block to the time.
- Click the
 icon to close the window.
 - Click Finish.
The schedule is then split between the team members under Scheduled Resources.
Learn more in Schedule or assign a service job.
 Set a default team for an employee / contractor
- Access an employee / contractor card file.
- Go to Profile > Schedule.
- Under Team Default, select a team. When the employee / contractor views the schedule, the schedule automatically filters the resources in this team.
- Click Save.
Learn more in How to Create Employees.
 Schedule a team in Day / Week View
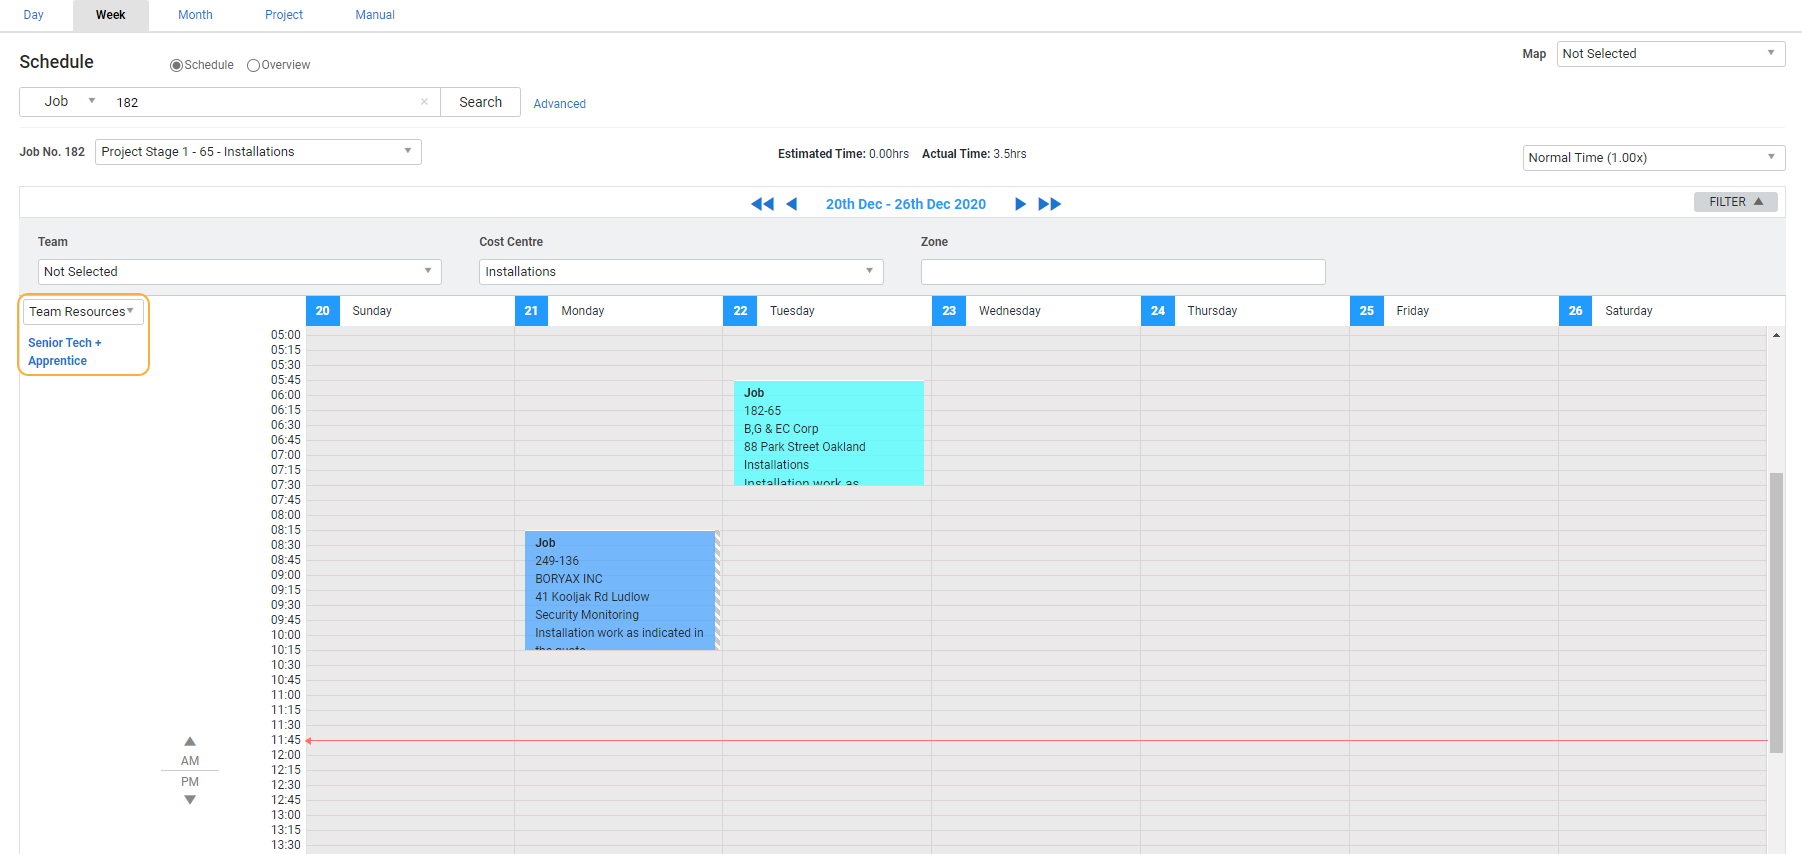
You can also schedule teams in the schedule Day View and Week View. Here, you can schedule teams to activities as well as jobs and quotes.
To schedule a team to a job, quote, or activity:
- Go to Schedules
 > Day View / Week View.
 - Select Job, Quote or Activity as required from the drop-down list next to the search bar, then search and select the job / quote / activity.
- Select Team Resources from the drop-down list above the list of resources.
- Click and drag the schedule block on the line of the team you wish to schedule.
- Click Finish.
When you select Individual Resources, a schedule block appears for each individual team member.
Learn more in How to Schedule in Day View and How to Schedule in Week View.
Temporarily change team resources
If a team member is unavailable and another needs to be swapped in, you can change the makeup of a team temporarily in Day View without needing to edit the permanent members of the team.
To temporarily edit team members:
- Go to Schedules
 > Day View.
 - Make sure Team Resources is selected from the drop-down list.
- Click the name of the team you wish to edit, then click Edit Team Members.
- Resources that are currently assigned to the team are listed under Assigned Employees. Click to remove them from the team.
- To add new team members, click the resources under Available Employees, and they are moved across to Assigned Employees.
- Click Finish.
- Schedule the team as normal.
The edited team resets to its permanent members after you click Finish to exit the schedule view.


