Last Updated: February 09 2026
How to Set Up Simpro Payments
Overview
With Simpro Payments you can process card payments in Simpro Premium or in person using Simpro Mobile's Tap to Pay feature or Stripe Terminals.
New to Stripe? You can sign up for an account while completing the Simpro and Stripe integration process. Learn more in Activate Simpro Payments.
Processed Simpro payments appear as a Payment Processor Charge in invoices and in Xero.
Please note that any Stripe accounts registered or integrated with Simpro prior to the 8th of September 2024 are now legacy accounts. Integrations with legacy Stripe accounts do not include any of the features or improvements released for Simpro Payments, after the 8th of September. This includes Simpro payments on Simpro Mobile. To get access to the latest features, disconnect your existing Stripe account from Simpro Premium and reconnect to create a new Stripe account.
 Required setup
In order to view content or perform actions referred to in this article you need to have the appropriate permissions enabled in your security group. Go to System![]() > Setup > Security Groups and access your security group to update your permissions. The relevant security group tab and specific permissions for this article can be found here:
> Setup > Security Groups and access your security group to update your permissions. The relevant security group tab and specific permissions for this article can be found here:
 Cancel Integrated Payments (Worldpay payments)
If you have been using Integrated Payments powered by Worldpay (formerly Payrix and IntegraPay), you will need to cancel it prior to activating Simpro Payments using Stripe.
To disconnect from Worldpay:
- Go to System > Setup > Defaults > Extensions.
- Disable the Worldpay (Integrapay) integration.
- If you do not see this option you will need to contact Simpro Support to disconnect Worldpay for you.
- Click Save.
Once you have disabled the integration, you'll need to contact Worldpay to cancel your Worldpay account.
Once disabled, Worldpay Payments cannot be re-enabled.
 Create a payment method for Stripe
To create a payment method for Simpro Payments using Stripe:
- Go to System
 > Setup > Accounts > Payment Methods.
- Note that you can also create the payment method from the Simpro Payments Integration page using the Add Payment Method button.
- Click Create Payment Method.
- Enter a Name.
- Select Card as the Type.
- Select Bank for BECS
- Select Other for Buy Now Pay Later
- Enter the relevant Posting Account No. from your accounting package.
- Enter a Finance Charge.
- Note that Stripe applies their processing fee to the entire payment amount applied, including the finance charge set in Simpro Premium. Therefore, if your finance charge in Simpro Premium is set to the same percentage as the Stripe processing fee, the Stripe processing fee applied to the transaction is larger than your calculated finance charge in Simpro Premium. Learn more in Simpro Payments Powered by Stripe.
- Click Create.
Learn more in Stripe Payment Methods.
 Activate Simpro Payments
To activate Simpro Payments powered by Stripe:
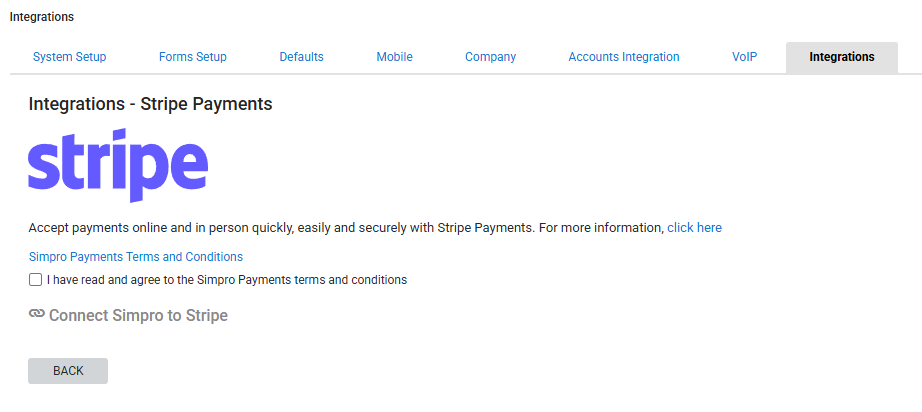
- Go to System
 > Setup > Integrations > Stripe Payments. Alternatively, go to Invoices
 > Simpro Payments.
 - Click to open and review the Simpro Payments Terms and Conditions.
- Select the check box to confirm and proceed.
- Click Connect Simpro to Stripe.
- In order to connect Simpro Premium to Stripe the business owner must register for a new Stripe account. If you have an existing Stripe account you can use the email address that is used to register for the existing account so that the accounts are connected. Enter an Email address that you will use for the integrated Stripe account.
- Click Continue.
- Set up two-step authentication using the Google Authenticator app.
- Note down your account security code.
- Enter your business details and click Continue.
- Verify your ownership over the company and click Continue.
- Verify your identity and click Continue.
- Confirm any other owners or executives and click Continue.
- Enter a bank account for transactions and click Continue.
- Enter how you want your company details to appear on transactions and click Continue.
- Review your details and click Agree and submit.
- If you have multi-company and Defaults are not shared, or multiple Simpro Premium companies, a different Stripe account is required for each Simpro Premium company as the Stripe account can only be connected to one company at a time.
- Select and toggle ON to enable the required payment type from Stripe.
- Note that Card payment type is set as default and cannot be disabled.
- Select the relevant Payment Method from the corresponding drop- down.
- The payment methods listed are based on what is enabled or turned on in the connected Stripe account.
- Click Save.
Disconnecting Stripe Integration : Note that disconnecting your Stripe integration is an irreversible action. Once disconnected, the connection between Simpro Premium and your Stripe account will be removed. To reconnect Stripe to Simpro Premium in the future, you will need to create a new Stripe account through the Simpro Premium Stripe integration link. Different rates apply when creating a Stripe account through Simpro Premium and you will need to adjust your Credit Card Surcharge on your Simpro Payment Methods to reflect this. Therefore it is not recommended to disconnect from Stripe, unless you are prepared to adopt the new rates and create a new Stripe account through the Simpro Stripe integration. Learn more about rates for Simpro Payments powered by Stripe.
Once you have integrated Stripe with Simpro Premium, you can manage your Stripe account in the Stripe dashboard.
 Set up financial defaults
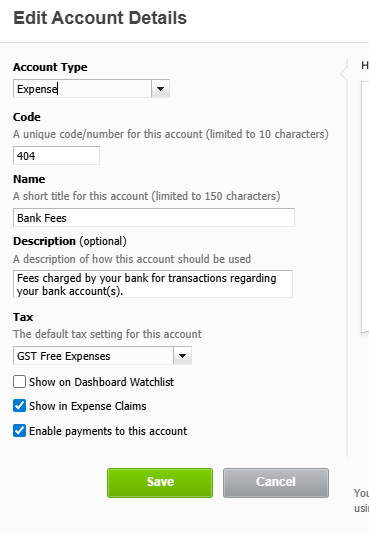
If you are using Xero as your accounting package, you can export Stripe processing fees to Xero as separate transactions so that they are reconciled automatically. To ensure that your Stripe processing fees are sent to Xero correctly you must map the relevant Xero account in the financial defaults in Simpro Premium.
You can export Stripe processing fees to your accounting package as a separate transaction so that they are reconciled automatically. To ensure that your Stripe processing fees are sent to the account package correctly you must map the relevant account in the financial defaults in Simpro Premium.
To set up your financial defaults for Stripe:
- Go to System
 > Setup > Defaults > Financial.
 - In the Stripe Processor Charge Account field enter the code for the account that Stripe finance charges will be posted against.
- In the Vendor Contact for Stripe Processor Charge field search for and select an existing supplier from Simpro Premium that your Stripe finance charges will be associated with.
- Stripe Processor Charges must be associated with a supplier when they are sent to your accounting package. All transactions in your accounting package require either a customer for income, or a supplier for expenses.
- If you do not have an appropriate supplier setup you can create one from People
 > Suppliers > Create Supplier. Once it has been created, ensure to export it to your accounting package. Learn more in How to Create Suppliers.
- When configuring the financial charge and payment processor fees to your accounting package, ensure that the mapped accounts are set up to receive payments.
- Enter codes for other Accounts, as required. Learn more in How to Set Up Financial Defaults.
- Click Save.
Note that the Stripe Processor Charge Account and Vendor Contact for Stripe Processor Charge fields do not appear unless you have integrated your Simpro Premium build with your accounting package and activated the Simpro payments integration with Stripe.
 Stripe Transaction Fees Calculator
This calculator is designed for Stripe payment processing fees. It helps determine the Finance Charge percentage you need to apply to your invoices to ensure that Stripe's processing fees are set up correctly.
Download: Stripe Transaction Fees Calculator
 Add payment link to invoices
To add a payment link to invoice forms:
- Go to System
 > Setup > Forms Setup.
 - Click Invoice > PDF Templates.
- Click the How to Pay sub-tab.
- Under Payment Options, check the columns to ensure that Credit Card has been assigned. To assign it, select it from the Options Assigned drop-down, then click Add Fields.
- Click Save.
Payment links can also be added to form builder templates. Learn more in How to Use Fields in Form Builder.
If Credit Card Customise Message is turned on, this will overwrite the Simpro payment link on invoices.
 Add payment link to invoices via Form Builder
To add a payment link to invoice forms:
- Go to System
 > Setup > Forms Setup.
 - Click Invoice > Form Builder Templates.
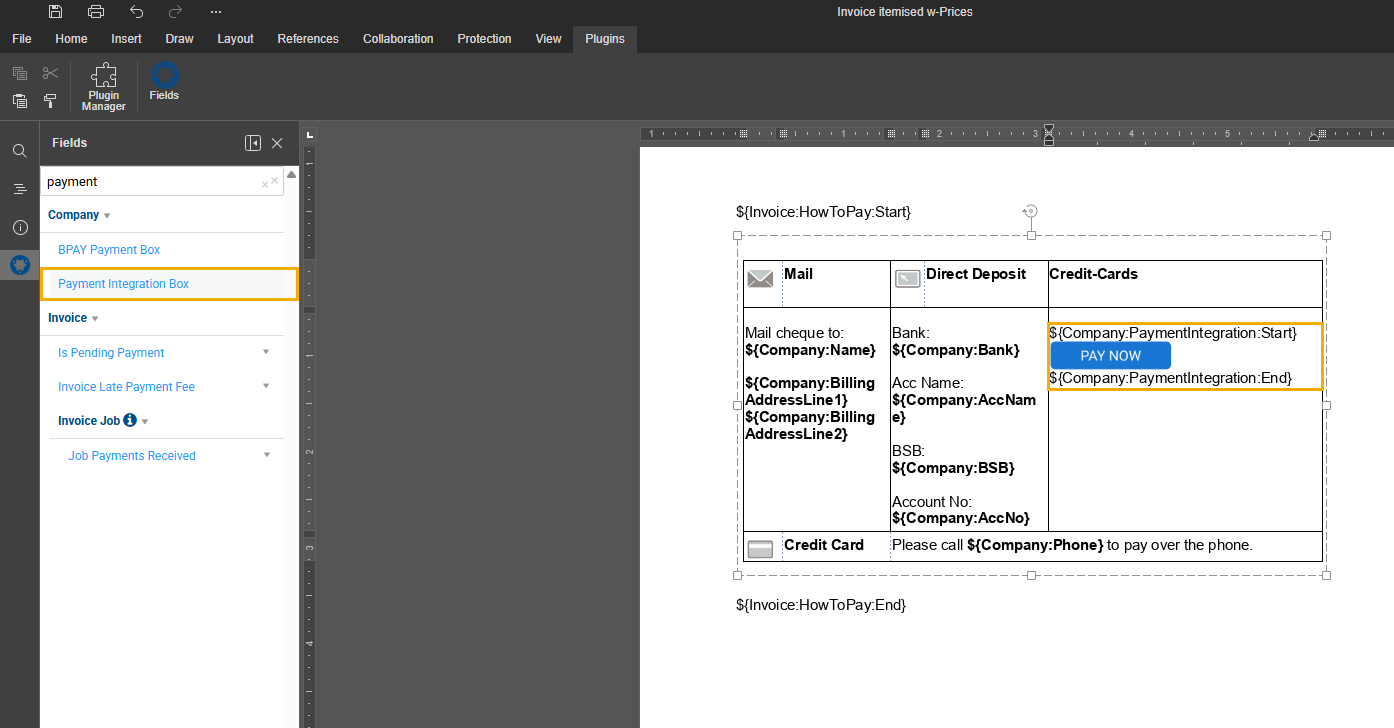
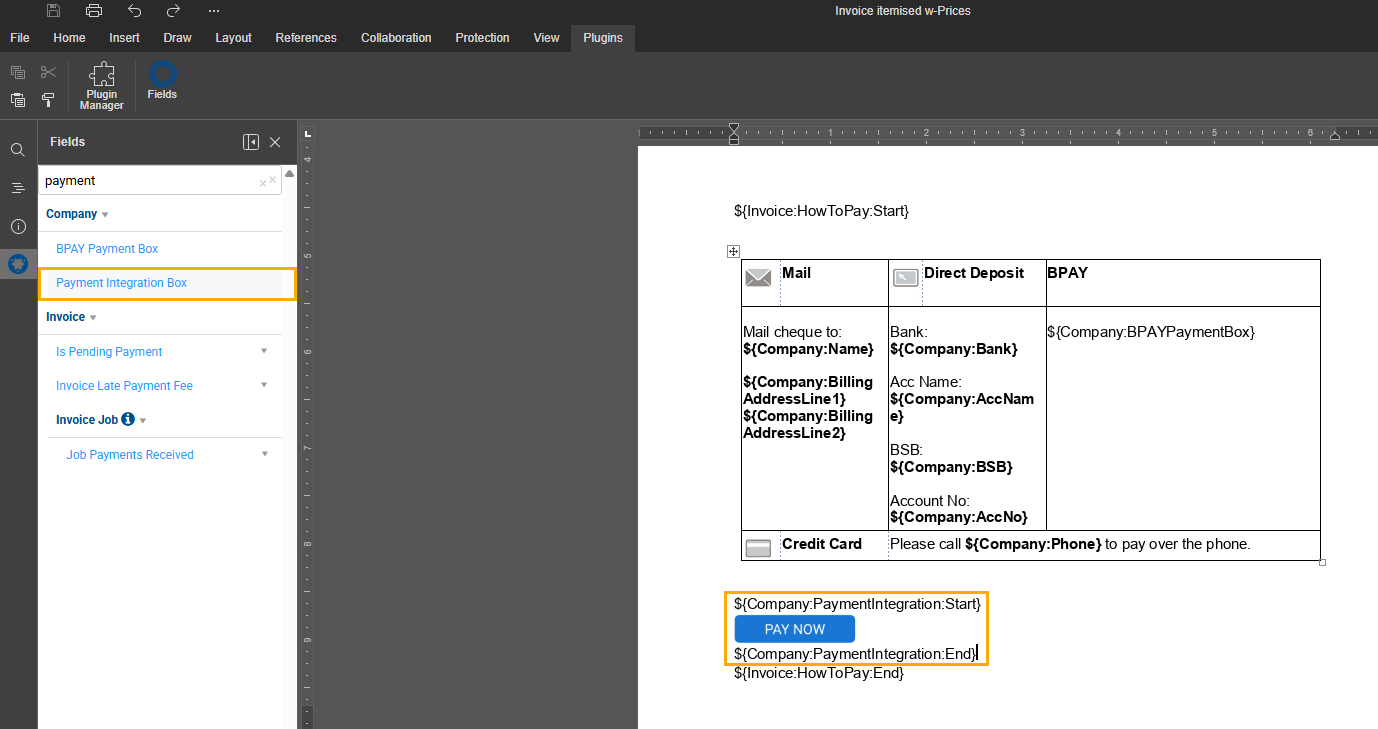
- At the bottom of the form, add Pay with Simpro Payments in bold.
- Click Plug-Ins > Fields.
- Search for the Payment Integration Box and select.
- Click Save.
- Note that it is recommended to test if the Pay Now button is functional.
 Add payment link to emails
To add a payment link to emails:
- Go to System
 > Setup > Forms Setup.
 - In the left column, click Invoice or Statement as required.
- Click the Email Set Up sub-tab.
- Place the cursor in the Body text box, in the place you want the link to appear.
- Under Insert Field, select Online Payment Link.
- Format the rest of the Body as required.
- Click Save.
- Note that it is recommended to test if the email link is functional.
 Add Payment Link to Invoices via PDF Templates
To add a payment link to invoice forms:
- Go to System > Setup > Forms Setup.
- In the left column, click Invoice > PDF Templates.
- Click the How to Pay sub-tab.
- Under Payment Options, check the columns to ensure that the Credit Card has been assigned. To assign it, select it from the Options Assigned drop-down, then click Add Fields.
- Click Save.
- If you want to remove "Please call to pay over the phone.”, you can replace this with a custom message. Note that this will overwrite the payment link.
- Replace the custom message by going to System > Setup > Form Setup > Invoice > PDF Templates > How to pay. Under Credit Card, toggle on customise message, enter the message and click Save.
Test Transactions
It may be useful to do some initial test transactions when first setting up Simpro Payments.
- Create a test invoice/job for a test customer. You can use any dollar amount for testing.
- Start sending invoices.
- Once test transaction payment has been received, you can now start sending invoices.
- Monitor first pay-out.
- There is a seven-day waiting period for the first payout. This delay is necessary for risk mitigation and cannot be waived under any circumstances. It may take between two-seven business days for the money to land in your account if processing payments through Stripe depends on your bank and region. Time varies as follows:
- AU up to 2 business days
- NZ up to 4 business days
- UK up to 7 calendar days
- US up to 2 business days
- There is a seven-day waiting period for the first payout. This delay is necessary for risk mitigation and cannot be waived under any circumstances. It may take between two-seven business days for the money to land in your account if processing payments through Stripe depends on your bank and region. Time varies as follows:
- Set up financial defaults (Xero Only)
If you are using Xero as your accounting package, you can export Stripe processing fees to Xero as separate transactions so that they are reconciled automatically. To ensure that your Stripe processing fees are sent to Xero correctly you must map the relevant Xero account in the financial defaults in Simpro Premium.
To set up your financial defaults for Stripe and Xero:
- Go to System > Setup > Defaults > Financial.
- In the Stripe Processor Charge Account field, enter the code for the account that Stripe finance charges will be posted against.
- In the Xero Contact for Stripe Processor Charge field, search for and select an existing supplier from Simpro Premium that your Stripe finance charges will be associated with.
- Stripe Processor Charges must be associated with a supplier when they are sent to Xero. All transactions in Xero require either a customer for income, or a supplier for expenses.
- If you do not have an appropriate supplier setup you can create one from People > Suppliers > Create Supplier. Once it has been created, ensure to export it to Xero. Learn more in How to Create Suppliers.
- Enter codes for other Accounts, as required. Learn more in How to Set Up Financial Defaults.
- Click Save.
For more questions, learn more in Simpro Payments FAQs.


_thumb_0_0.png)


_thumb_0_0.png)