Last Updated: December 12 2025
Overview
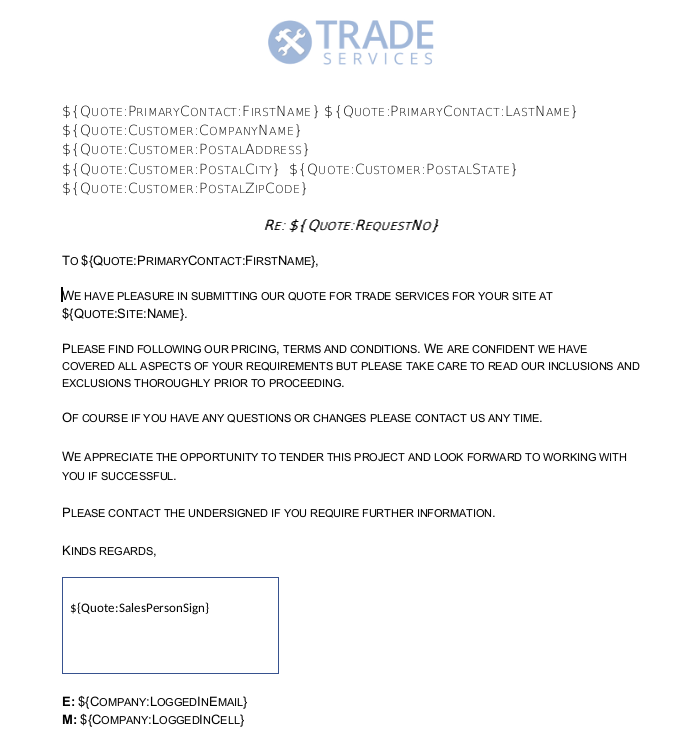
Use Fields in Form Builder fields to auto-populate the template, when it is printed or emailed with information from the applicable customer, relevant project and your company details.
Learn more in How to Use Form Builder Templates.
 Required setup
In order to view content or perform actions referred to in this article you need to have the appropriate permissions enabled in your security group. Go to System![]() > Setup > Security Groups and access your security group to update your permissions. The relevant security group tab and specific permissions for this article can be found here:
> Setup > Security Groups and access your security group to update your permissions. The relevant security group tab and specific permissions for this article can be found here:
 Manage fields in template
After you format the form template using the standard word processing features, go to Plugins and click Fields. Depending on whether you are editing a Quote, Job, Invoice or Credit Note, the fields are organised under different headers. For example, when editing Quote form templates:
- The fields listed under Company pull data, such as your company's logo, name and address. Additionally, there are fields to pull banking details from the corresponding tab in System Setup. You can also populate the logged-in employee’s details, such as the corresponding signature from the Attachments tab of the employee card.
- The fields listed under Quote populate the entire set of project data including the quote settings, cost centres and parts and labour from the quote. You can also choose to use data from the applicable customer and site card files. Additionally, you can pull data from the custom fields created in the System Setup for the project, customer and site.
Use the Search field to locate the required fields from the list. For instance, enter and search Quote to view all the corresponding results organised under respective headings. Click the required field from the search results to add it to the template.
When added to the template, Fields are represented in curly brackets, preceded by a dollar sign, for example, ${Company:Name}. You can format the field text including the fields that appear in the header and footer to match your document specifications.
The formatting you apply to the field text is applied to the text populated on the generated quote form. For example, if you format the ${Company:Name} field as bold or change the font colour, the updates reflect for your company name on the final form. Quote, Job, Cost Centre Descriptions, Pre-build Descriptions, Invoice Comments and Credit Note Comments are an exception to this formatting rule, as they use the formatting from the respective quote. Fields that you can use to insert images appear in a text box and you can resize the box to change dimensions of the populated image.
Some fields in the Form Builder templates point to components that typically repeat throughout a project, such as a table listing parts, different labour types, cost centres and sections. To populate these field types and repeat the sequence, create different loops using the respective Start and End fields. Fields listed under categories with the ![]() icon must be inserted into a loop. A loop continues populating fields, one after another, until all items are included in the quote. This completes the loop and ensures that all repeating components are populated on the generated quote form. Learn more in How to Use Loops in Form Builder. Use How to Use Conditional Fields in Form Builder in Form Builder to display information that differs for projects using the same template.
icon must be inserted into a loop. A loop continues populating fields, one after another, until all items are included in the quote. This completes the loop and ensures that all repeating components are populated on the generated quote form. Learn more in How to Use Loops in Form Builder. Use How to Use Conditional Fields in Form Builder in Form Builder to display information that differs for projects using the same template.
For more details on the available fields, see List of Fields in Form Builder.
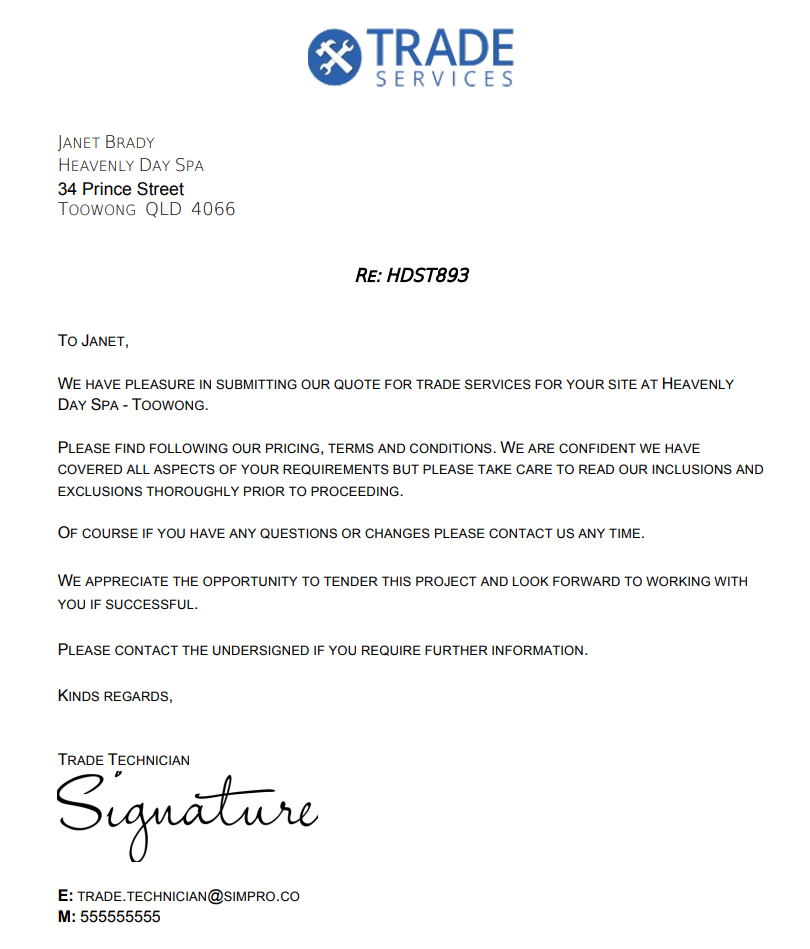
Example of a generated quote form with information populated from the Quote, Company, Customer and Site:
Learn more in How to Set Up Company Information and How to Use Custom Fields.
 Add catalogue and pre-build images in forms
If you have uploaded images of your catalogue items and pre-builds, you can include these images automatically on quotes, jobs and invoices.
To add part images to a form template:
- Click Plugins > Fields.
- Expand Quote > Quote Section > Section Cost Centres > Cost Centre Parts or Job > Job Section > Section Cost Centres > Cost Centre Parts.
- Click Part Image. Make sure this field is placed inside a parts and labour table.
Any items that are included on the quote, job or invoice display the relevant image.
Learn more in How to Create a Catalogue Item and How to Create a Pre-Build.
 Add asset fields
In quote and invoice forms, you can add asset details to form templates. To add asset fields to a template:
- Click Plugins > Fields.
- Search for the relevant field, or go to Job > Job Section > Job Cost Centre > Cost Centre Asset Type.
- Asset fields must be contained within a loop and should be organised into a table. Assets that appear on the form builder templates are organised by walk order, not type. You can add up to ten asset custom fields.
Learn more about adding individual test readings to a form template and compliance certificates for asset testing in Compliance Certificates for Asset Testing in Form Builder.
 Add a payment integration link
In invoice forms, you can add a link for customers to pay online using a payment integration, such as Square.
To add a payment link to a form builder template:
- Go to System > Setup > Form Setup > Invoice.
- Open the relevant template.
- Click in the form where you want to insert the payment link.
- Click Plugins > Fields.
- Search and select Payment Integration Box.
- By default, a PAY NOW box is inserted between the Payment Integration Start and End fields. You can insert your own text or image to replace the PAY NOW box if required.
When the customer receives their invoice, they can access the payment portal by clicking the PAY NOW box or the text / image you have used.
 Preview a form builder template
You can preview a form builder template with placeholder data to confirm whether the layout and information is displayed as intended. This saves your time and effort to create and edit form builder templates, as per your requirements.
- Go to System
 > Setup > Forms Setup.
 - Click the relevant form type, Credit Note, Invoice, Job or Quote.
- Open an existing template or create a new template. Learn more in Create new templates.
- Click Preview to generate a version of the form with data populated in a new tab.
You can verify the layout and ensure whether all loops and conditional fields from the template are populating correctly.

