Last Updated: December 15 2025
How to Create Advanced Forms
Overview
Use Simpro Digital Forms to create Advanced forms that users will complete in the field. Add a range of different fields to collect different types of information, including, text numbers, photos, signatures, dates, locations, mirror other fields and barcodes. Apply conditions to your fields so that they only appear when relevant. Allow your fields to pull reference data from Simpro Premium such as quote, job or site or customer details or pull reference data from uploaded CSVs.
Once you have built an Advanced Form you can decide how it will appear as a PDF. Learn more in How to Design PDF Forms.
Instead of creating an Advanced Form using a series of fields and screens and generating a PDF, Basic Forms are available if you would prefer to overlay fields over an existing PDF form. Learn more in How to Create Basic Forms.
Only users with the Department Admin Role can build forms. Learn more in Sign up and login to Digital Forms.
 Create, save and test a new form
When creating a new form it might be more efficient to copy an existing form and edit the copy as required. Learn more in How to Manage Digital Forms.
To create an original form in Simpro Digital Forms:
- Click Forms.
- Click Create New > Advanced Form.
- Click [Your Name] New Form # and enter a new name for the form.
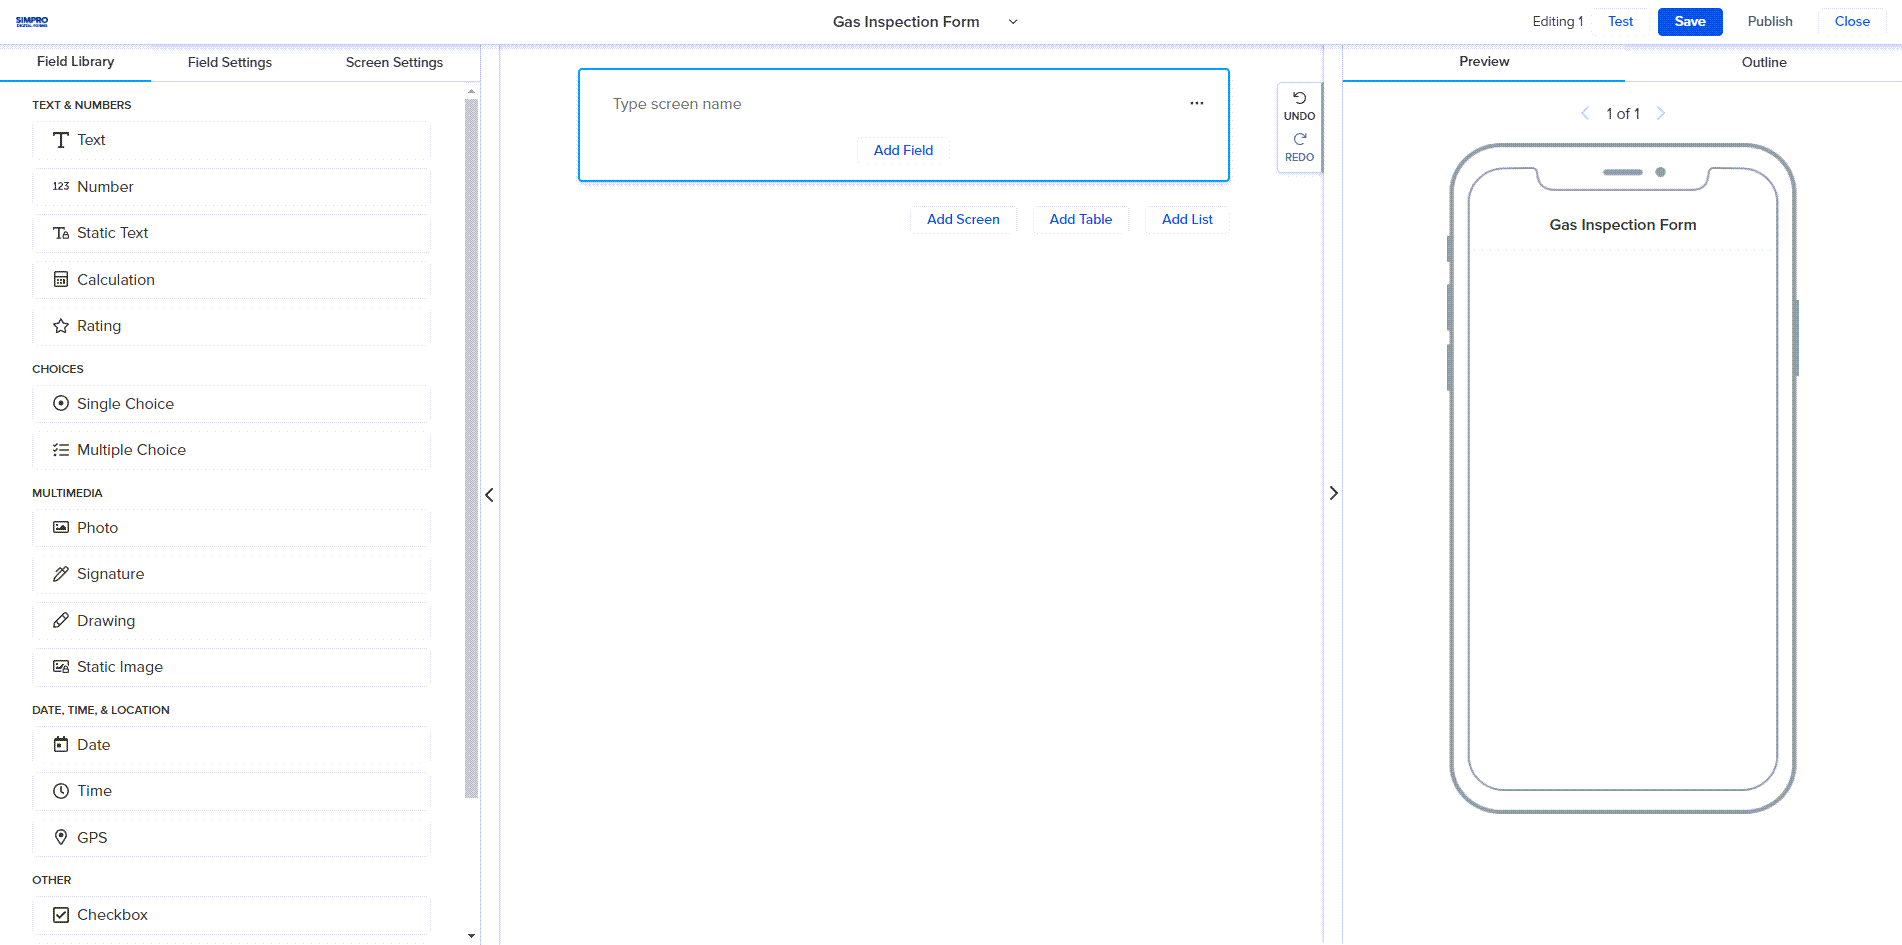
- The current tab is the FORM tab where the form is built and fields are added and removed. Click the down arrow besides the form name and click Edit PDF. The PDF tab will take you to the PDF designer. Ensure to finish building the form before you design how it will appear as a PDF. Learn more in How to Design PDF Forms.
- Click Save to ensure that the form is saved as a draft.
- Click Test while you are building the form to test how the form must be completed on the Simpro Digital Forms mobile app. Click the X to return to building the form.
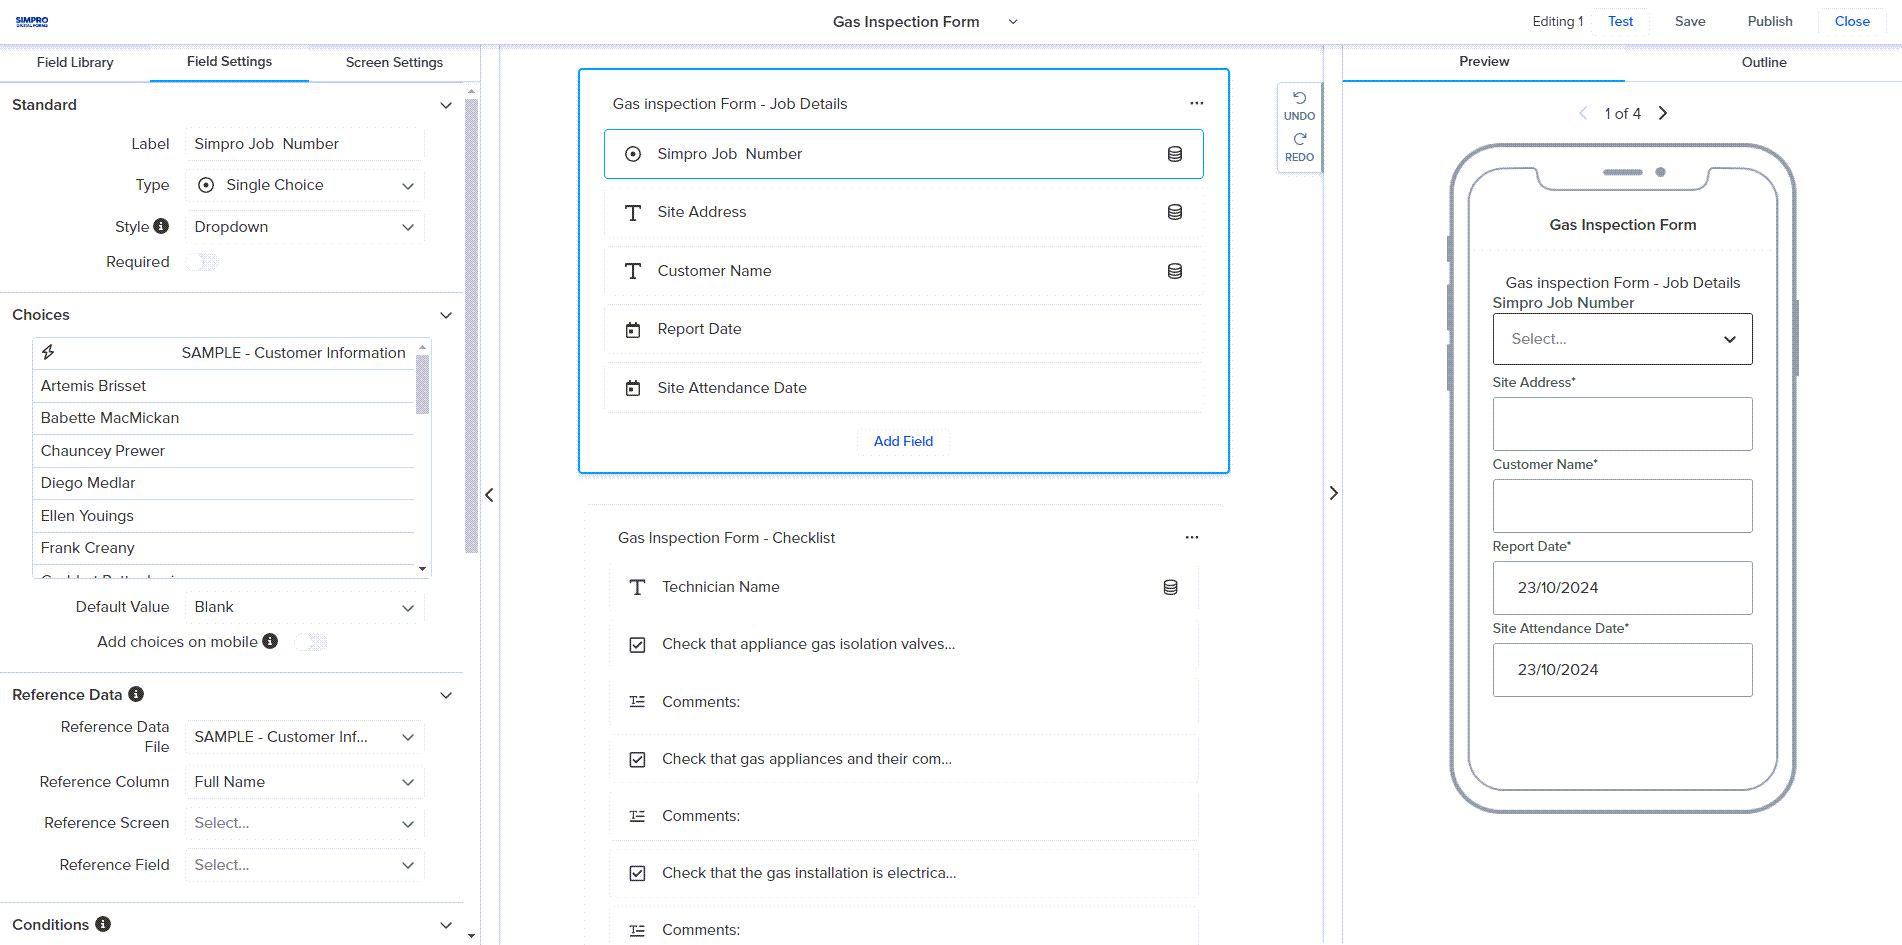
- The Preview section shows how the form will appear on the Simpro Digital Forms mobile app.
- The Outline section allows you to quickly navigate to and reorder different screens in the form. Learn more in Manage Screens, Tables and Lists.
- Click Publish and select the relevant users.
- Select whether to Send notification to the users via email and click PUBLISH TO DEVICE to make the form available on the Simpro Digital Forms mobile app.
 Manage Screens, Tables and Lists
In Simpro Digital Forms each form consists of a range of fields, organised into screens, lists and tables. The way that you organise fields when building a form determines the way in which fields appear in the Simpro Digital Forms mobile app. For example if you have five fields on one screen and more fields on a second screen, the field user will see the first five fields on their device, but they will need to tap NEXT to access the fields on the second screen. Tables and Screens are a good way to break down what information needs recording into different steps, or ensure that certain details are captured in a set order.
Tables work similarly to screens though they are generally used to record information that needs to be captured multiple more than once. This might include a list of parts, quantities, and costs, a list of asset names and service details or a list of employees and license details. Each table appears on a separate screen with each field arranged in columns and headers. Unlike a typical field, field columns on a tables allow the person filling in the form to capture multiple rows of information. For example, if you add a Text field to a table to capture the part names of some items, and a number field to the same table to capture quantities a field user could enter multiple part names and quantities for each item with each item separated onto their own row.
Note that Tables are best used for capturing six or fewer fields as a table with fewer than six columns will fit comfortably on a completed PDF form. Lists work like tables but are generally used to capture a single column of information.
New forms start with a single screen. Each screen is represented by a name and a grey outline that appears around the added fields when the screen is selected. To add more screens or tables:
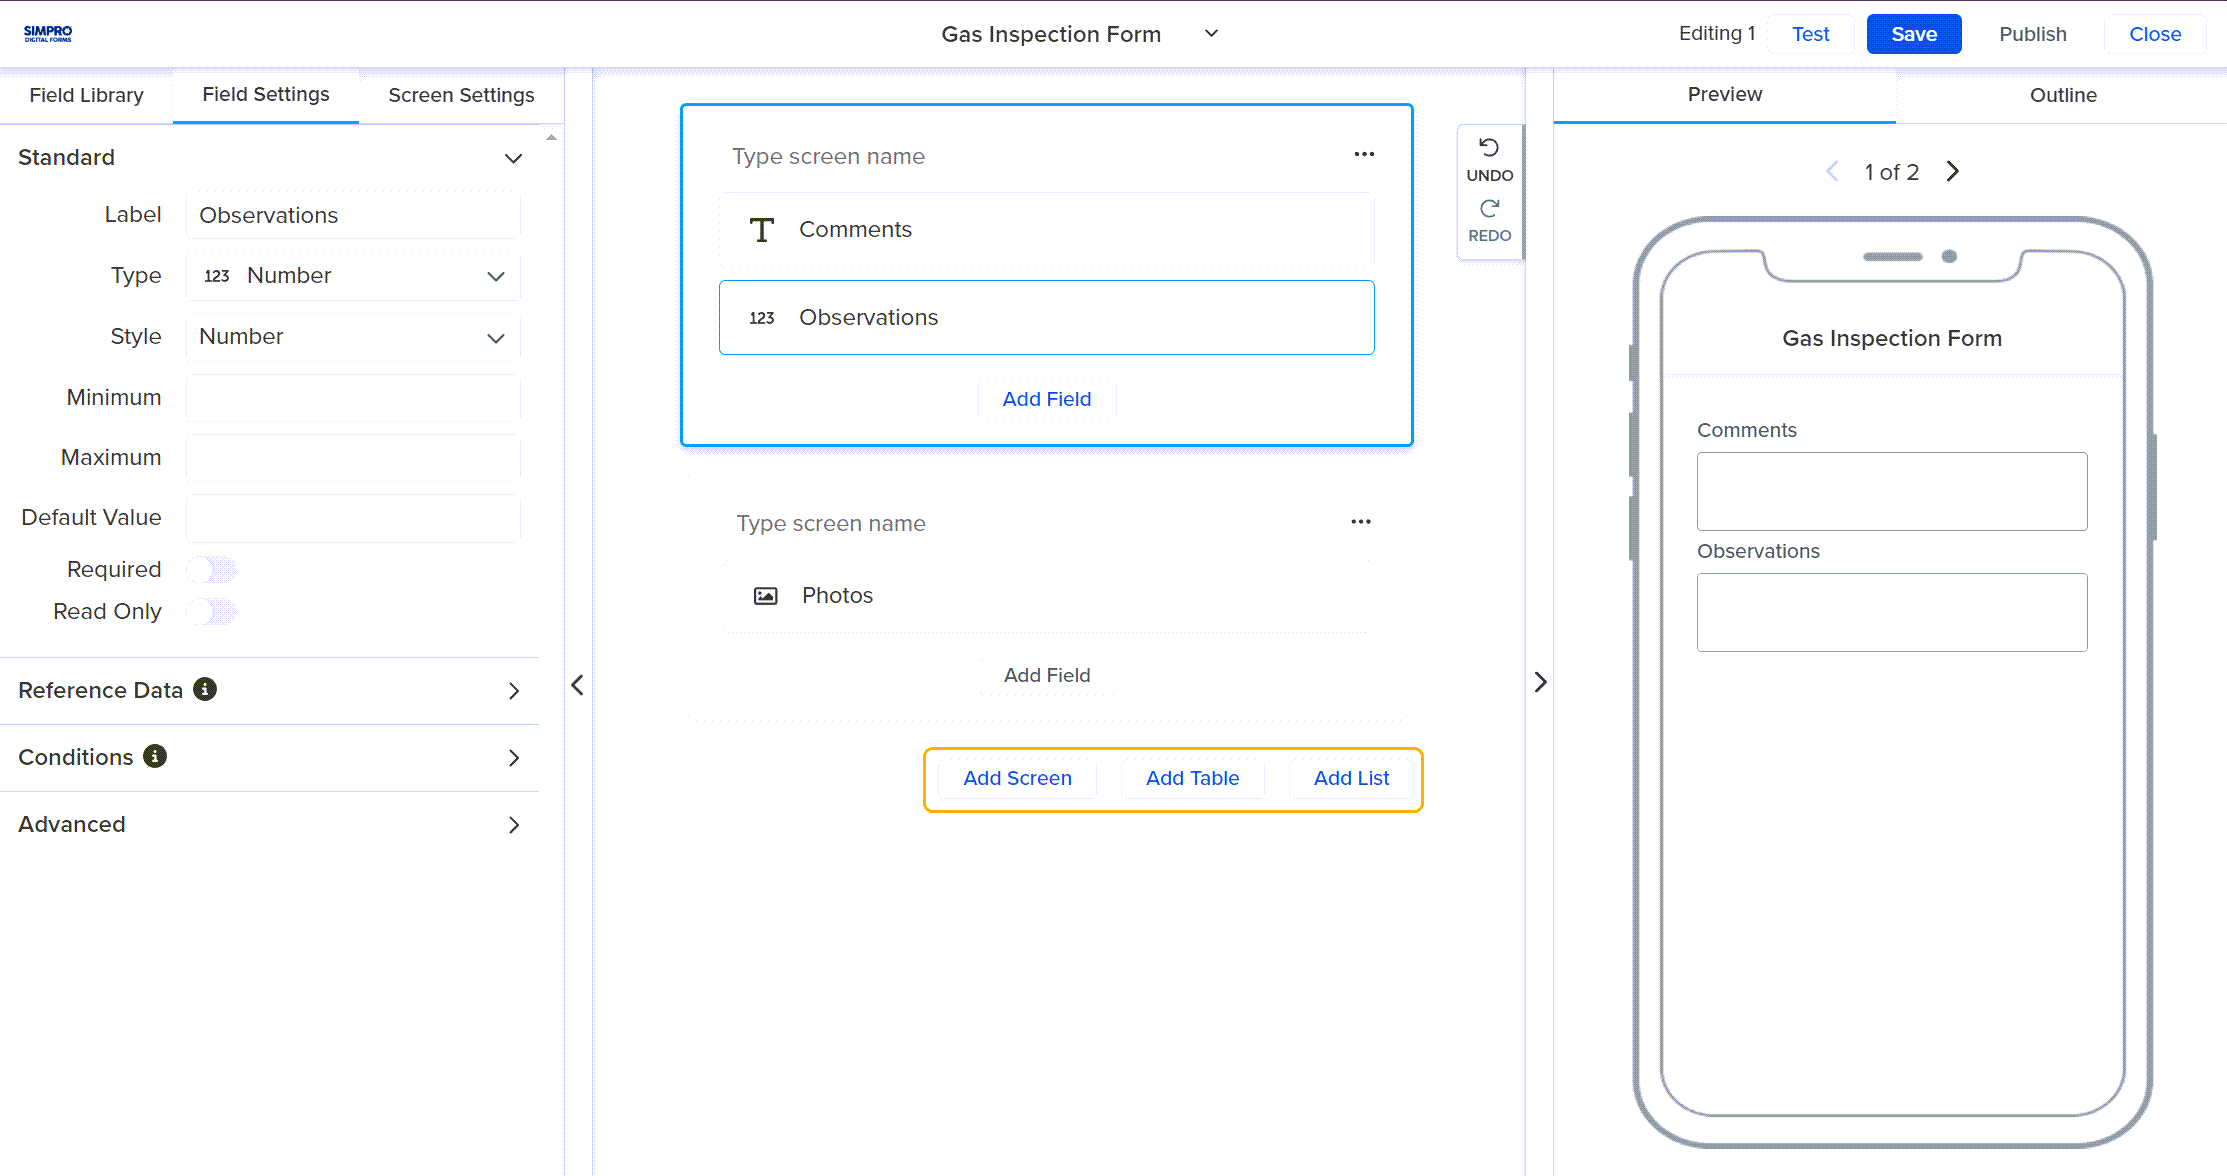
- Scroll to the bottom of the form and click Add Screen, Add Table or Add List.
- Alternatively, to add a screen or table between two existing screens, hover over the space between the screens until the perforated line appears and click
 > Add Field or Screen Break.
- Alternatively, to add a screen or table between two existing screens, hover over the space between the screens until the perforated line appears and click
- Click Type screen name and enter the text that you want to appear at the top of the screen or table in the mobile app.
- The Field Settings and Screen Settings are arranged in tabs in the left pane, alongside the Field Library. When you click a field or screen, the form builder will navigate to the relevant settings tab and settings for the selected field or screen type are displayed. Click Screen Settings to update the settings below:
- Rename the Screen as required.
- Select the Style - Table which is your standard container of data or Labels Above which is more of a modular table design, breaking the data into rows.
- Under Show all fields on PDF select when the data recorded in the fields on the screen should be shown on the PDF that is generated once the form is submitted.
- Under Show This Field on Web select when the data recorded in the fields on the screen should be shown on the web view under Submissions once the form is submitted.
- The Display Field works with the Style of screens, it allows you to nominate the Label which will be displayed on the initial table.
- Select Show Screen Name to make the screen name visible on the PDF and web view of the form that is generated once it is submitted.
- Select Page Break After to have a page break appear on the PDF form after the information recorded in the screen is populated.
- Click the Conditions drop-down to Add Condition and to have the screen only show when a field has been filled in with certain information. Learn more in Add conditions.
- Click
 to access More Options for the screen or table.
- Click Duplicate Screen to make a copy of the screen including any fields contained in the screen.
- Click Delete Screen to permanently remove the screen and all containing fields.
- Click Add List to record the same information for a single field multiple times.
- Click Type list name and enter the text that you want to appear at the top of the page in the mobile app when the list is being populated.
- Add a Label under the Field Settings to indicate what information should be captured in this list.
- Click and drag on the blank space around the edge of a screen to move it before or after another screen.
- Alternatively if you have a lot of screens and tables, click Outline to view a condensed layout of your screens and reposition them with the drag handles.
- Once you have added screens under Preview click < 1 of # > to navigate through your screens and tables to see how they’ll appear in the Digital Forms Mobile App.
 Loop screens
You can convert screens to loop screens where fields can be repeated multiple times. This is helpful for filling in forms with repeated data, such as line items on invoices or inspections. You can also add loops within loops to repeat fields across different sections of a form, providing greater flexibility in collecting the required data.
To add a loop to a form:
- From Forms click Create New or click Edit on an existing form.
- Click Add Screen.
- Type screen name that you want to appear at the top of the screen when the form is being populated.
- Click Add Field or drag and drop the required field into the screen from the Field Library.
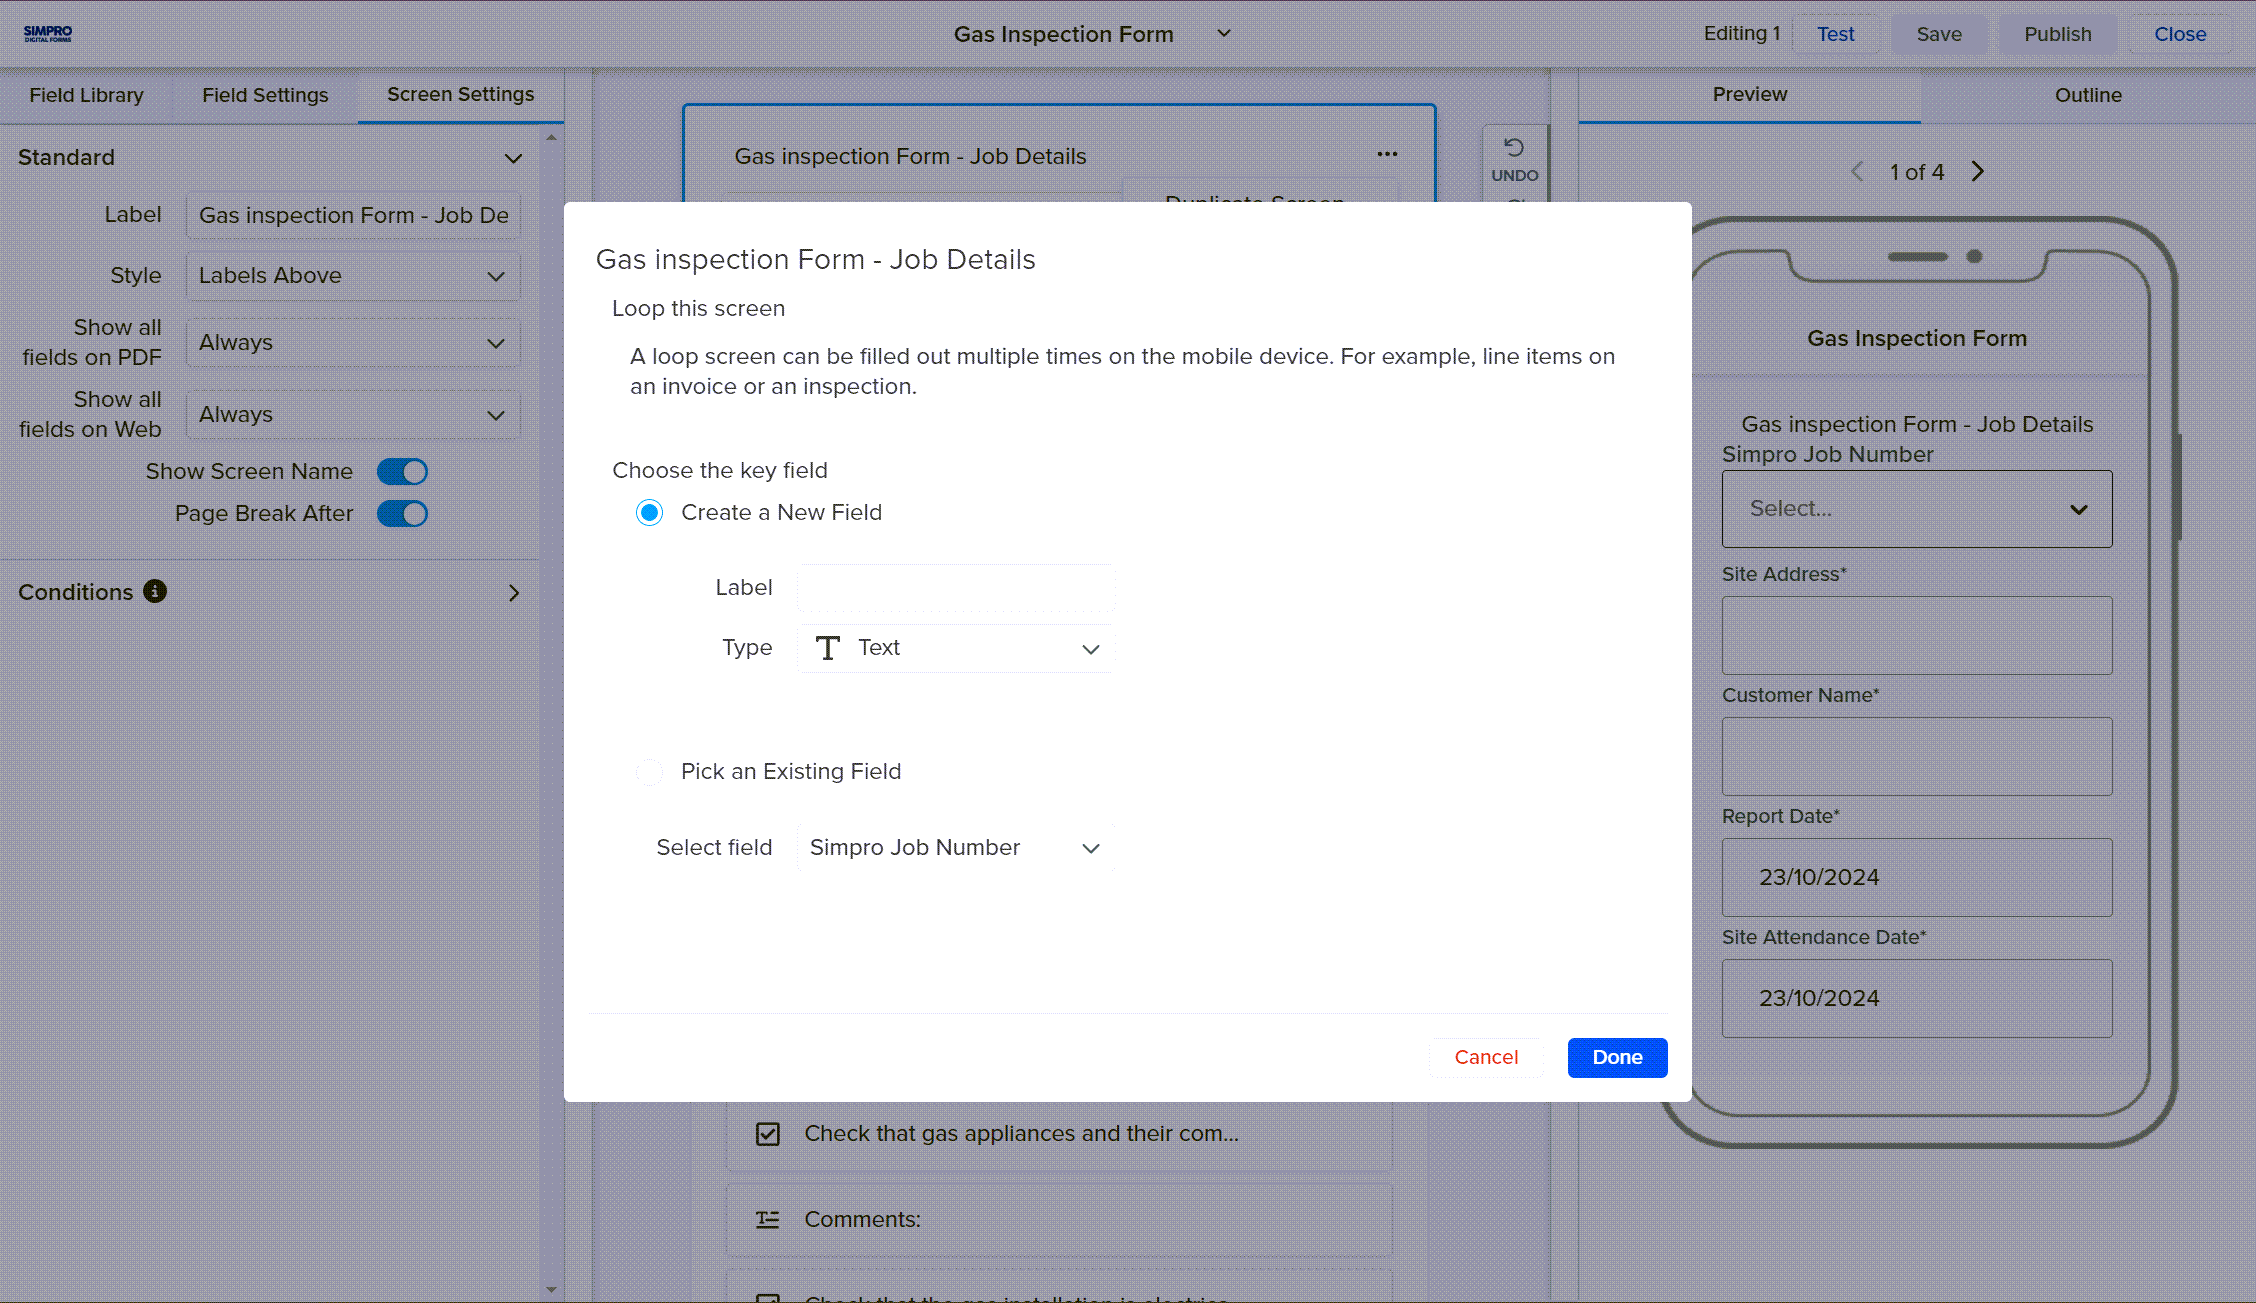
- Click … for More Options on the screen and click Convert to Loop.
- Enter a Label for the key field that will identify each entry in this loop. For example, if you are creating a loop for a list of line items, the item number or name could be used as the key field. If you have already added a field that you want to use as the key field select Pick an Existing Field instead and select the field.
- Click Done.
You can also add loops within loops for multiple items that need to be recorded across multiple parts of a form. For example, line items that appear in multiple sections of a quote.
To contain a loop within another loop:
- From Forms click Create New or click Edit on an existing form.
- Add or locate the existing loop.
- Click … on the loop name for More Options and click Convert to Loop.
- Enter a Label for the key field that will identify each entry of this loop.
- This will create a loop around your existing loop. For example, on a quote you might create a section loop around a line item loop, if you wanted to include multiple lists of line items contained in multiple sections.
- You will need to edit your key fields and loop names in order to ensure that the correct fields are contained in the correct hierarchy.
 Manage Fields
Each form can be built with a range of different fields to capture different types of information. Fields can be populated with information manually or use Reference Data to populate information from tables imported into Digital Forms, or directly from Simpro Premium. Learn more in How to Use Reference Data and Images.
 Add fields
To add a field:
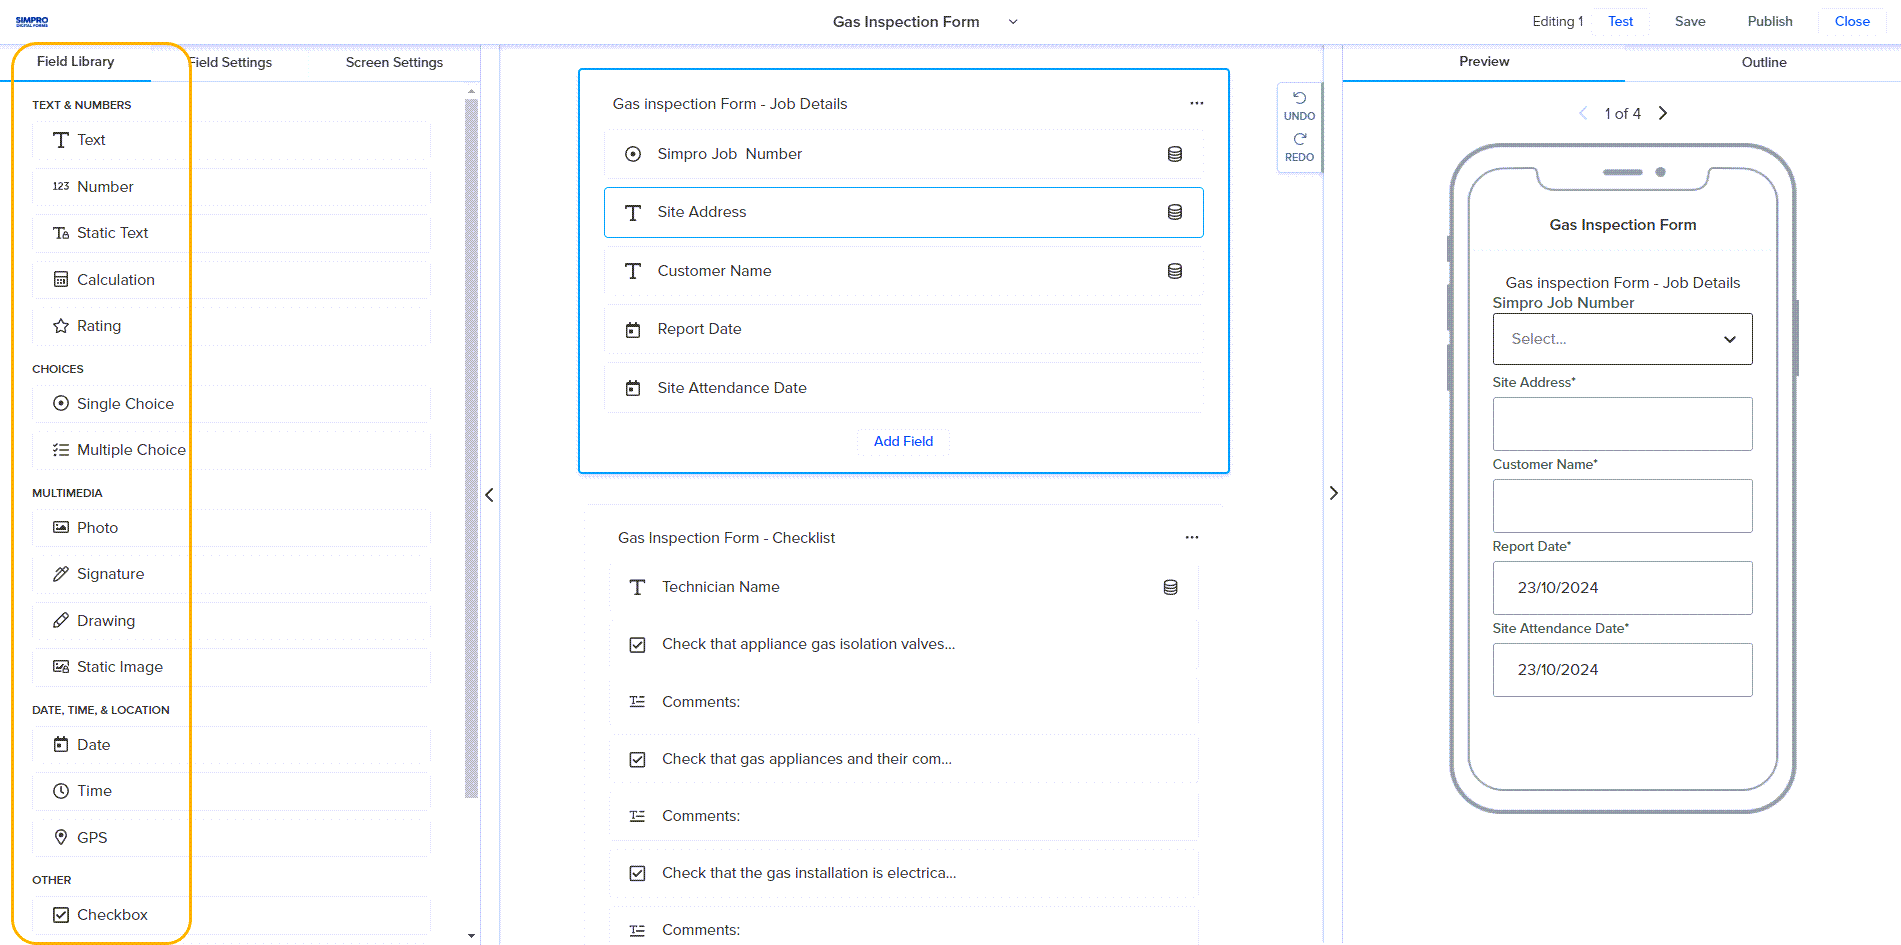
- Select the screen you want to add the field to and click on the type of field in the Field Library. Each time you click, a new field is added.
- Alternatively, you can click and drag the field type from the Field Library into the screen that you want it to appear in or click Add Field, enter a name and press Enter.
- If you click Add Field and enter a name, Simpro Digital Forms uses certain terms included in the name to figure out the field type for you. For example if you enter “Date” or “Week” as the field name, the field type will default to a Date field.
- Click on the field name to rename it. By default a field is named New followed by the type of fields. For example a text field is named New Text.
- Click
 to Delete a field that is no longer required.
 - Click
 to Copy a field and create a duplicate field with the same name and settings applied.
 - The Field Settings are arranged in tabs in the left pane, alongside the Field Library. In addition to some Standard settings and Conditions each type of field has its own unique settings. Reference data can also be applied to certain fields from their Settings. Learn more in Field settings, Add conditions and How to Use Reference Data and Images. If a Single Choice, Multiple Choice or Calculation field is added, a warning icon appears besides the field prompting you to add choices and calculations, as required. Additionally, fields that have reference data and conditions are now marked with their own unique symbols,
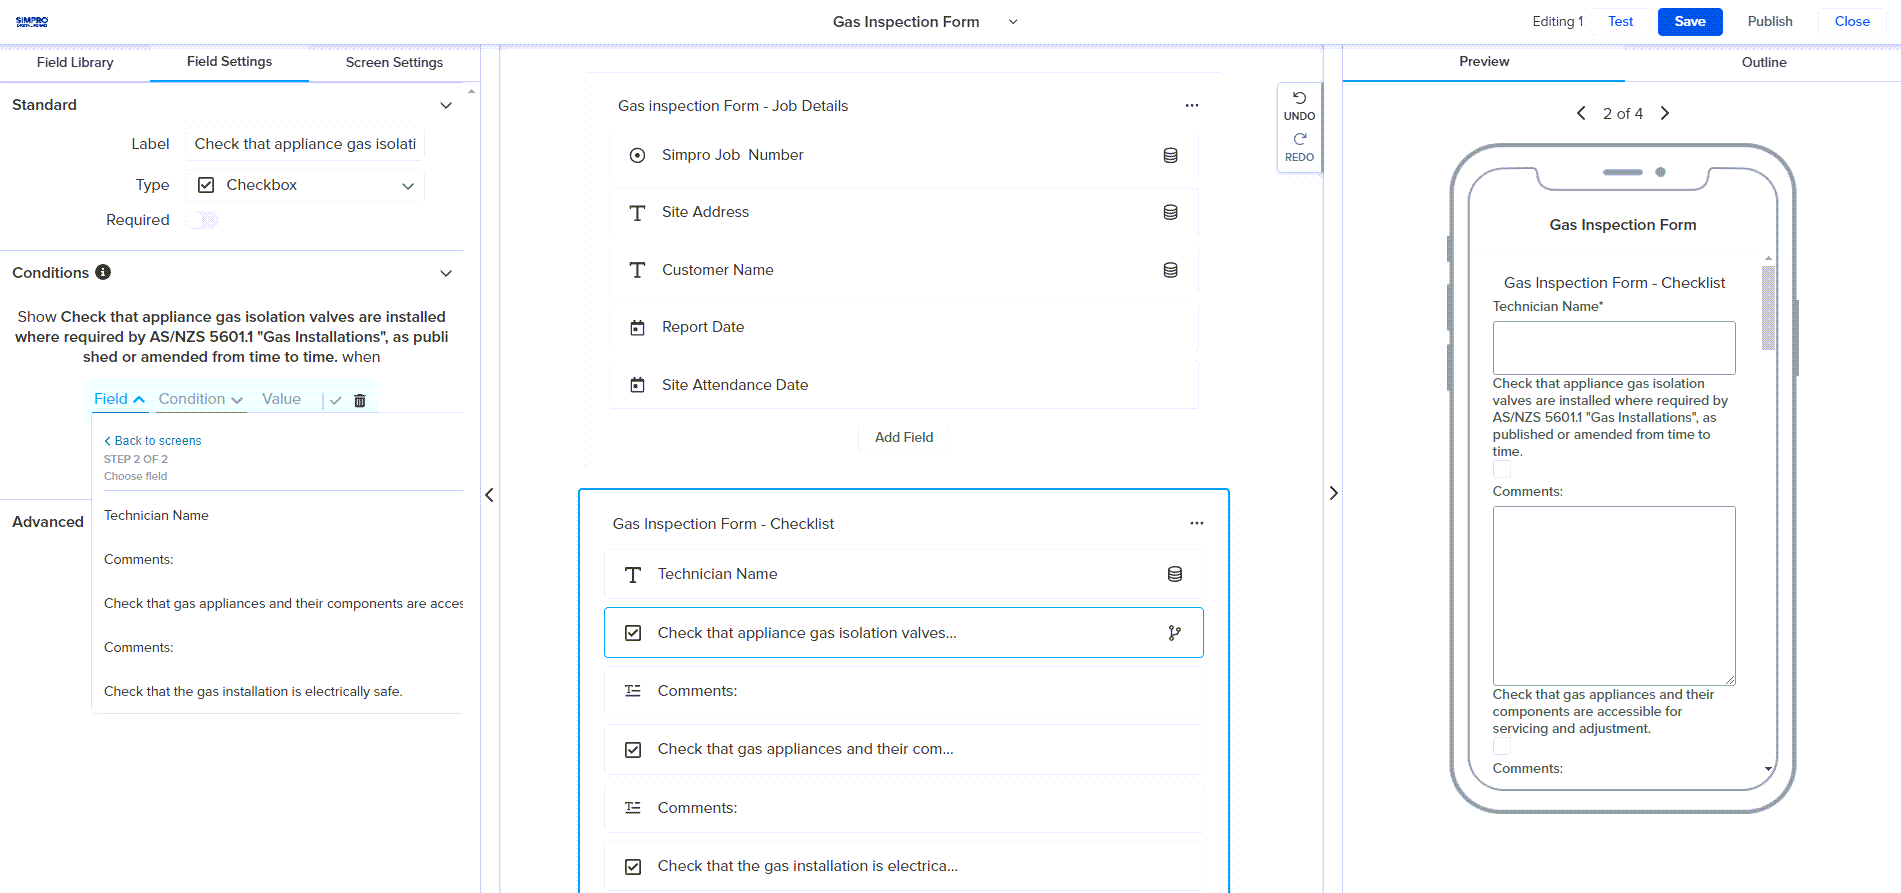
 indicates that a field has conditions and
  indicates that a field is linked to reference data.
 - Click and drag on the field to move it before or after another field or to another screen.
- As you add more fields they will appear on the relevant screen in the PREVIEW panel. You can also click TEST to ensure the field Settings have applied correctly and ensure the field can be used to capture information on the Mobile app as intended.
 Field library
The Fields Library contains a wide range of different field types designed to capture different types of information. Add the relevant fields to your form to allow the relevant information to be captured on the mobile application. Each field type has its own unique Settings and Reference Data can only be applied to certain fields. Learn more in How to Use Reference Data and Images.
| Field Type | Description |
|---|---|
| Text | Capture a single or multiple lines of text. |
| Number | Capture a number, quantity or select from a number range. |
| Static Text | Not used for capturing information, but providing a specified line of text to provide information to the person filling in the form. |
| Calculation | Include a calculated value based on Numbers, Ratings, Dates, and Times entered in other fields on the form. For example multiply a quantity entered in a Number field with the unit cost entered in another Number field to calculate a total cost, or add a set quantity of days to an entered Date to calculate a due date. |
| Rating | Capture a rating out of 5 stars. |
| Dropdown | Select a single option from a dropdown of different choices. |
| Single Choice | Select a single option from multiple radio buttons or boxes. |
| Multiple Choice | Select multiple options from multiple radio buttons or boxes. |
| Photo | Add one or more photos using a mobile device’s camera. |
| Signature | Capture a signature, signed by hand on the mobile app. |
| Drawing | Capture an image that is drawn by hand on the mobile app. |
| Static Image | Select an image from the reference images to include on the form. |
| Date | Capture a date including the current date that the form is filled in. |
| Time | Capture a time including the current time that the form is filled in. |
| GPS | Capture the GPS coordinates using an image of the area on a map, longitude and latitude or a link to the map. |
| Checkbox | Check a box to capture simple yes or no details, such as whether a step has been completed. |
| Link | Include a button or a written link that can take the person filling out the form to a specific URL. |
| Mirror | Populate content from other fields that have already been filled in. |
| Barcode | Use the mobile device’s camera to scan and record a barcode. |
 Field settings
The Field Settings tab is in the left pane, alongside the Field Library. When you click a field or screen, the form builder will navigate to the relevant settings tab and settings for the selected field are displayed. There are a number of common settings that apply to multiple types of fields, including:
| Field Type | Description | |
|---|---|---|
| Field Name | Enter a new name for the field. | All fields. |
| Field Type | Change the field to a different type. | All fields. |
| Required | Makes the field mandatory. Other screens and submitting the form are inaccessible until this field is filled out. | Text, Number, Rating, Dropdown, Single Choice, Multiple Choice, Photo, Signature, Drawing, Date, Time, GPS, Check Box, Barcode |
| Read Only | Makes it so the information populated in the field cannot be edited. Fields with this setting enabled must be populated using other settings and not manually entered. | Text, Number, Rating, Date, Barcode |
| Default Value | Enter a value that appears populated in the field by default. For Date and Time fields set the default value to Current Date or Current Time to automatically populate the date or time on the device when the form is being filled in. | Text, Number, Rating, Date, Time, Barcode, Dropdown |
| Show This Field on PDF | Select when data recorded in the field should be shown on the PDF form that is generated once the form is submitted. | Text, Number, Static Text, Calculation, Rating, Dropdown, Single Choice, Multiple Choice, Photo, Signature, Drawing, Date, Time, GPS, Check Box, Link, Mirror, Barcode |
| Show This Field on Web | Select when the data recorded in the field should be shown on the web view under Submissions once the form is submitted. | Text, Number, Static Text, Calculation, Rating, Dropdown, Single Choice, Multiple Choice, Photo, Signature, Drawing, , Date, Time, Check Box, Link, Mirror, Barcode |
| Page Break After | Toggle on Page Break After to have a page break appear on the PDF form after the information recorded in the field is populated. | Text, Number, Static Text, Calculation, Rating, Dropdown, Single Choice, Multiple Choice, Date, Time, GPS, Check Box, Link, Mirror, Barcode |
| Mobile Visible | Toggle off to hide this field from the person filling out the form in the Digital Forms Mobile app. This is useful if you want to include fields that are required to populate other fields but you don’t need them to be visible. | Text, Number, Static Text, Calculation, Rating, Dropdown, Single Choice, Multiple Choice, Date, Time, Link, Mirror, Barcode |
| Place value in | Select to include the value entered in the field in the Email Subject, Email Body, PDF File Name or Submission Name. | Text, Number, Static Text, Calculation, Rating, Dropdown, Single Choice, Multiple Choice, Drawing, Date, Time, GPS, Check Box, Link, Mirror, Barcode |
| Export Label |
Enter the label that should appear instead of the field name when the form is exported. For example your field name might be "What color is the widget on the X Drive,” which you wouldn't want as a column header in Excel. So, you might shorten the Export Label to "Widget Color.” PDF & Web Label to help users identify what information to enter when filling out the form. |
Text, Number, Static Text, Calculation, Rating, Dropdown, Single Choice, Multiple Choice, Photo, Signature, Drawing, Date, Time, GPS, Check Box, Link, Mirror, Barcode |
| Receipt Label | Used for labeling fields that mirror values that have been entered on previous Submissions. This functionality is not currently available in Digital Forms. | Text, Number, Static Text, Calculation, Rating, Dropdown, Single Choice, Multiple Choice, Photo, Signature, Drawing, Date, Time, GPS, Check Box, Link, Mirror, Barcode |
| PDF & Web Label | Enter a label that should appear instead of the field name when the form is submitted as a PDF form or viewed under Submissions. | Text, Number, Static Text, Calculation, Rating, Dropdown, Single Choice, Multiple Choice, Photo, Signature, Drawing, Date, Time, GPS, Check Box, Link, Mirror, Barcode |
The following settings are unique to the Text field type:
- Single Line: Provides a single line for the person filling in the form to enter the required information.
- Multiple Lines: Provides multiple lines for the person filling in the form to enter the required information. Use the drag handle in the corner of the Default Value box to alter the default size of the text box.
The following settings are unique to the Number field type:
- Style: Determines how the number can be entered.
- Number: Enter a simple number.
- Increment: Enter a simple number or tap + and - buttons to increase and decrease the number. Useful for counting item quantities.
- Slider: Select the number using a horizontal slider, from the Minimum and Maximum numbers.
- Currency: Enter currency symbols in addition to a number.
- Decimals: Enter a decimal point in addition to simple numbers or times.
- Minimum - Maximum: Enter the lowest and highest numbers that can be entered or selected if using a Slider.
The following settings are unique to the Static Text field type:
- Static Text: Enter the text you want to display to the person filling out the form.
The following settings are unique to the Calculation field type:
- Calculation: Base the calculation on any Number, Rating, Date, and Time fields recorded in the form.
- Value: Select the fields that the values should pull from to make the calculation. Select Add Constant to make the calculation using a set number. For example you might select a Date field as the first value, select Add Constant and enter '30' to calculate a due date that occurs 30 days after the date entered in the initial Date field.
- Click
 to change the mathematical symbol used in the calculation.
 - Click + ADD VALUE to include additional values in the calculation.
- Table Calculation: Base the calculation on Number fields recorded in a Table on the form.
- Table: Select which table you want to pull the numbers from.
- Column: Select which column you want to pull the numbers from.
- Format: Select how many decimal places to round the calculated number or if the number should be presented as a currency value.
- Decimal places: Select how many decimal places to round the calculated number to. This changes based on the Format.
The following settings are unique to the Dropdown, Single Choice and Multiple Choice field types:
- Start from Scratch: Manually type the choices that will be available to select when filling in the form. Type the choice and press enter to add it.
- Edit a Common List: Select from a common list of choices that are regularly included on forms. You can choose from a common list as required. This includes:
- State Abbreviations
- State Names
- Month
- Weekday
- Province Abbreviations
- Province Names
- Allow users to add choices on mobile: The person filling in the form can manually type additional choices to select.
- Style: Select whether choices should appear as Radio Buttons or Boxes for Single Choice or Multiple Choice fields.
The following settings are unique to the Drawing field type:
- Drawing Size: Select a set size for how your drawing will appear on Standard PDFs. This does not affect the size of the drawing in the Designer PDF.
The following settings are unique to the Photo field type:
- Style: Select whether a Single Photo or Multiple Photos can be added to the field when someone is completing the form.
- Allow Drawing on photo(s): Allows the person filling in the form to draw on the photos using their mobile device.
- Image Source: Allow the person filling in the form to add photos from their Camera, Gallery or both.
- Unsecured Access: Allow the photos added using this field to be accessed using the image’s URL even if someone isn’t logged into Simpro Digital Forms.
The following setting is unique to the Date field type:
- Style: Select whether the date should be formatted MM/DD/YYYY, DD/MM/YYYY or YYYY/MM/DD.
The following setting is unique to the Time field type:
- Style: Select whether the date should be formatted AM/PM, 24 Hour, HH:MM:SS or MM:SS.
The following settings are unique to the GPS field type:
- Display on PDF and Web: Select whether to record the GPS as a Small Map, Large Map, Latitude/Longitude or a Link to view the map.
- Map Zoom: If recording the GPS as a map select how far the map should be zoomed in.
- Accuracy(m): Specify how accurate the GPS location must be in meters for the location. When acquiring a location from satellites, the first points reported by the hardware can often be inaccurate. By choosing a focus on accuracy, Simpro Digital Forms will reject any reported location coordinates until the desired accuracy is met or until the timeout expires.
- Timeout (ms): Decide the maximum amount of time, in milliseconds, to wait for location coordinates. If it takes too long, and accuracy hasn't been met, the location will be reported without the specified Accuracy. You stop it from capturing an inaccurate location by turning on the force accuracy option.
- Forces Accuracy: If enabled and the mobile application doesn't get the accurate location before timing out, no location is captured.
The following settings are unique to the Link field type:
- Style: Select whether the link should be accessible by pressing a Button or by tapping on the complete Link address.
- Button Label: If the link is presented as a Button, enter what label should appear on the button in place of the full URL.
- URL: Enter the link address that should be accessible to the person filling out the form.
The following settings are unique to the Mirror field type:
- Mirror from which screen: Select the screen that contains the field that should be mirrored.
- Mirror from which field: Select the field that should be mirrored.
The following settings are unique to the Barcode field type:
- Max Character Length: Enter the maximum number of characters that can be recorded in this field.
- Field Mask: Enter a sequence of the following abbreviations to define the types of characters and in what order they can be recorded. For example if you only want to accept barcodes that start with a letter followed by five numbers you would enter “L00000”.
- 0: Digit
- L: Letter
- A: Digit or letter
- ?: Digit, letter, space, symbol
- 9: Digit (Optional)
- l: Letter (Optional)
- a: Digit or letter (Optional)
- *: used to signify an undetermined number of characters. This is useful if you only want to define how the field should start or end. For example if you only want to accept barcodes that start with a letter then a number, but don’t have a standard sequence for what comes after you would enter “L0*”
 Add conditions
Add a condition to a field or screen so that it only displays if certain fields are filled in with particular information. This allows you to ensure screens and fields are only shown when they are relevant. For example you might want to include a screen in an audit to ask follow up questions if a safety regulation is not met.
To add a condition to a screen or a field:
- Click into the required screen or field and expand the Conditions drop down under the relevant Field or Screen Settings in the left pane.
- Click Add Condition.
- Under the Fields drop-down select the Screen that the field appears on and select the Field.
- The Field drop-down is where you can select the field that determines whether this field or screen should appear.
- For example, if you have an audit that asks a question such as “Are there any visible hazards?” and the screen you are making conditional includes follow up questions about the hazards, you would select the “Are there any visible hazards” field.
- Select the Condition and the Value that must be met in order for this screen or field to appear.
- For example, if your initial field is “Are there any visible hazards?”, and the screen you are making conditional includes follow up questions about the hazards, the Condition could be Contains and the Value could be Yes.
- Alternatively, if you need to capture a signature if the total value of an order form exceeds $1000 the Condition could be > Greater Than and the Value could by 1000.
- Click
 to create the condition.
You can add more conditions to a field or screen to further limit when it is shown.
