Last Updated: December 15 2025
How to Manage Digital Forms
Overview
Create folders, filter by status, search or sort to keep your forms organised in Simpro Digital Forms.
 View Forms
You must have the Department Admin or Department Designer Role to access and create forms. Learn more in Sign up and login to Digital Forms.
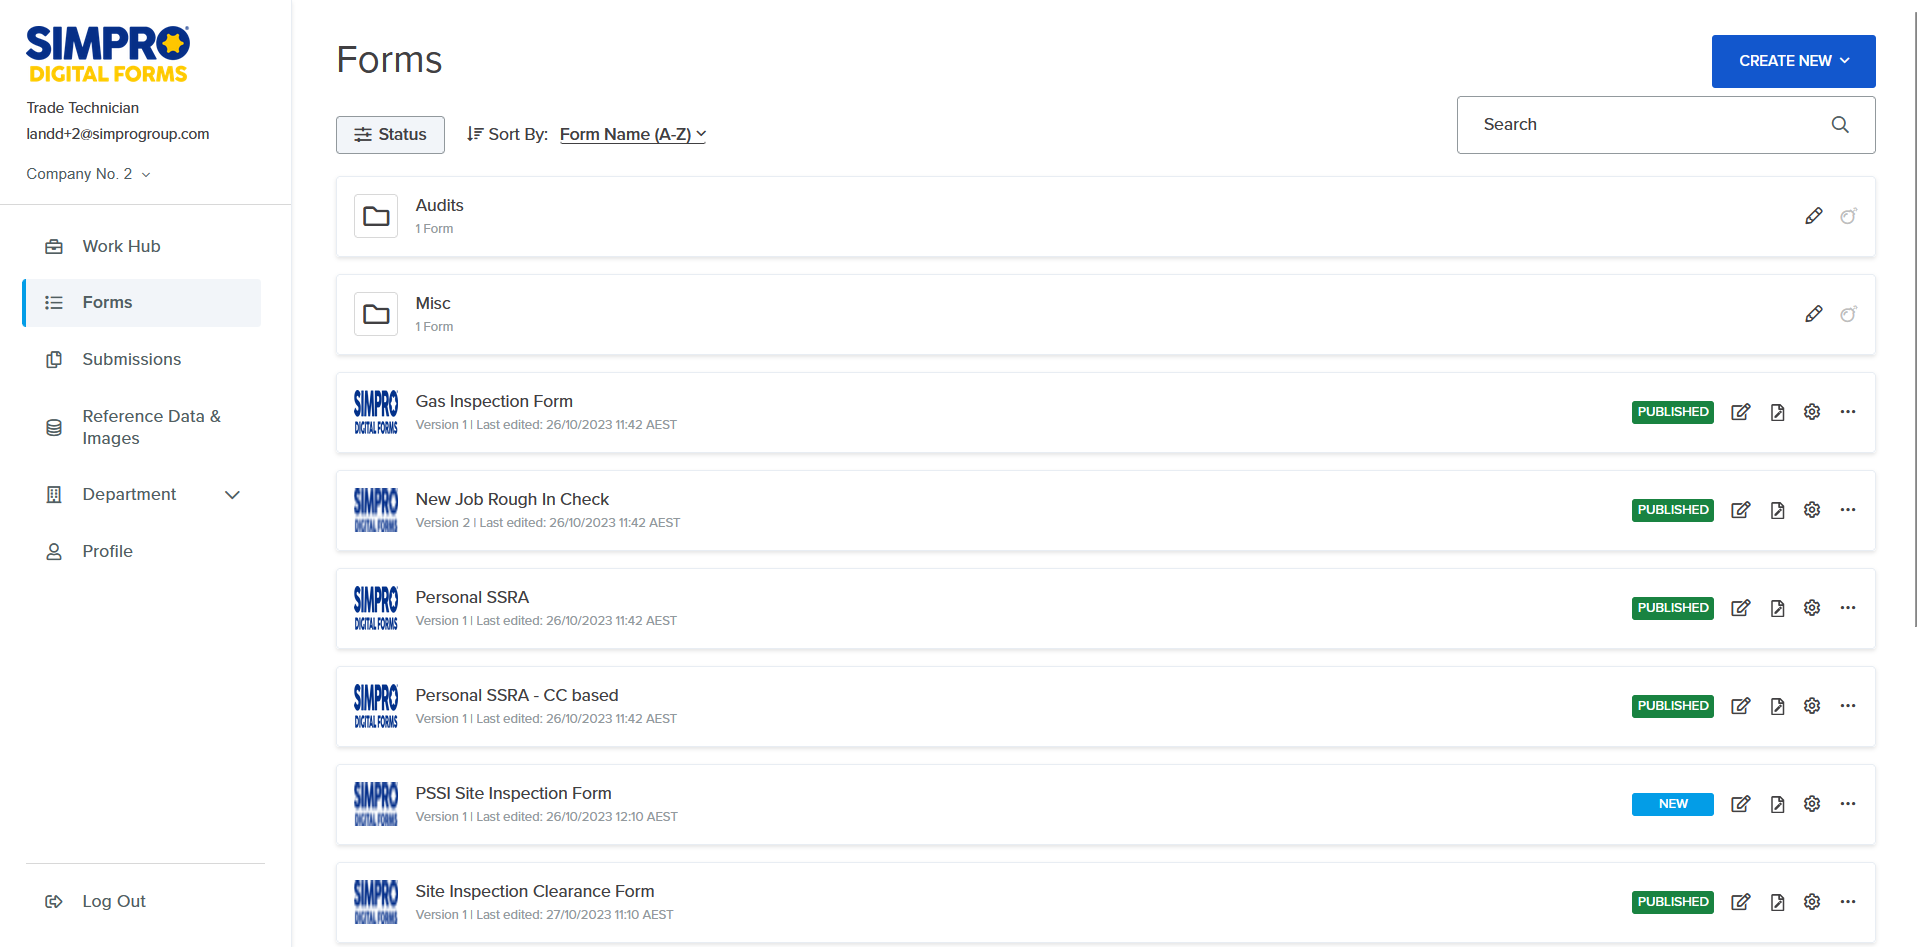
To view forms log in to the Simpro Digital Forms web portal and click Forms in the main menu. All forms created by users associated with a specific account are accessible to all other users associated with that account.
In addition to forms created by users, the following forms are available by default:
- Accident Report
- Leave Request
- Stock Requisition
- Variation & Extra Works Approval Form
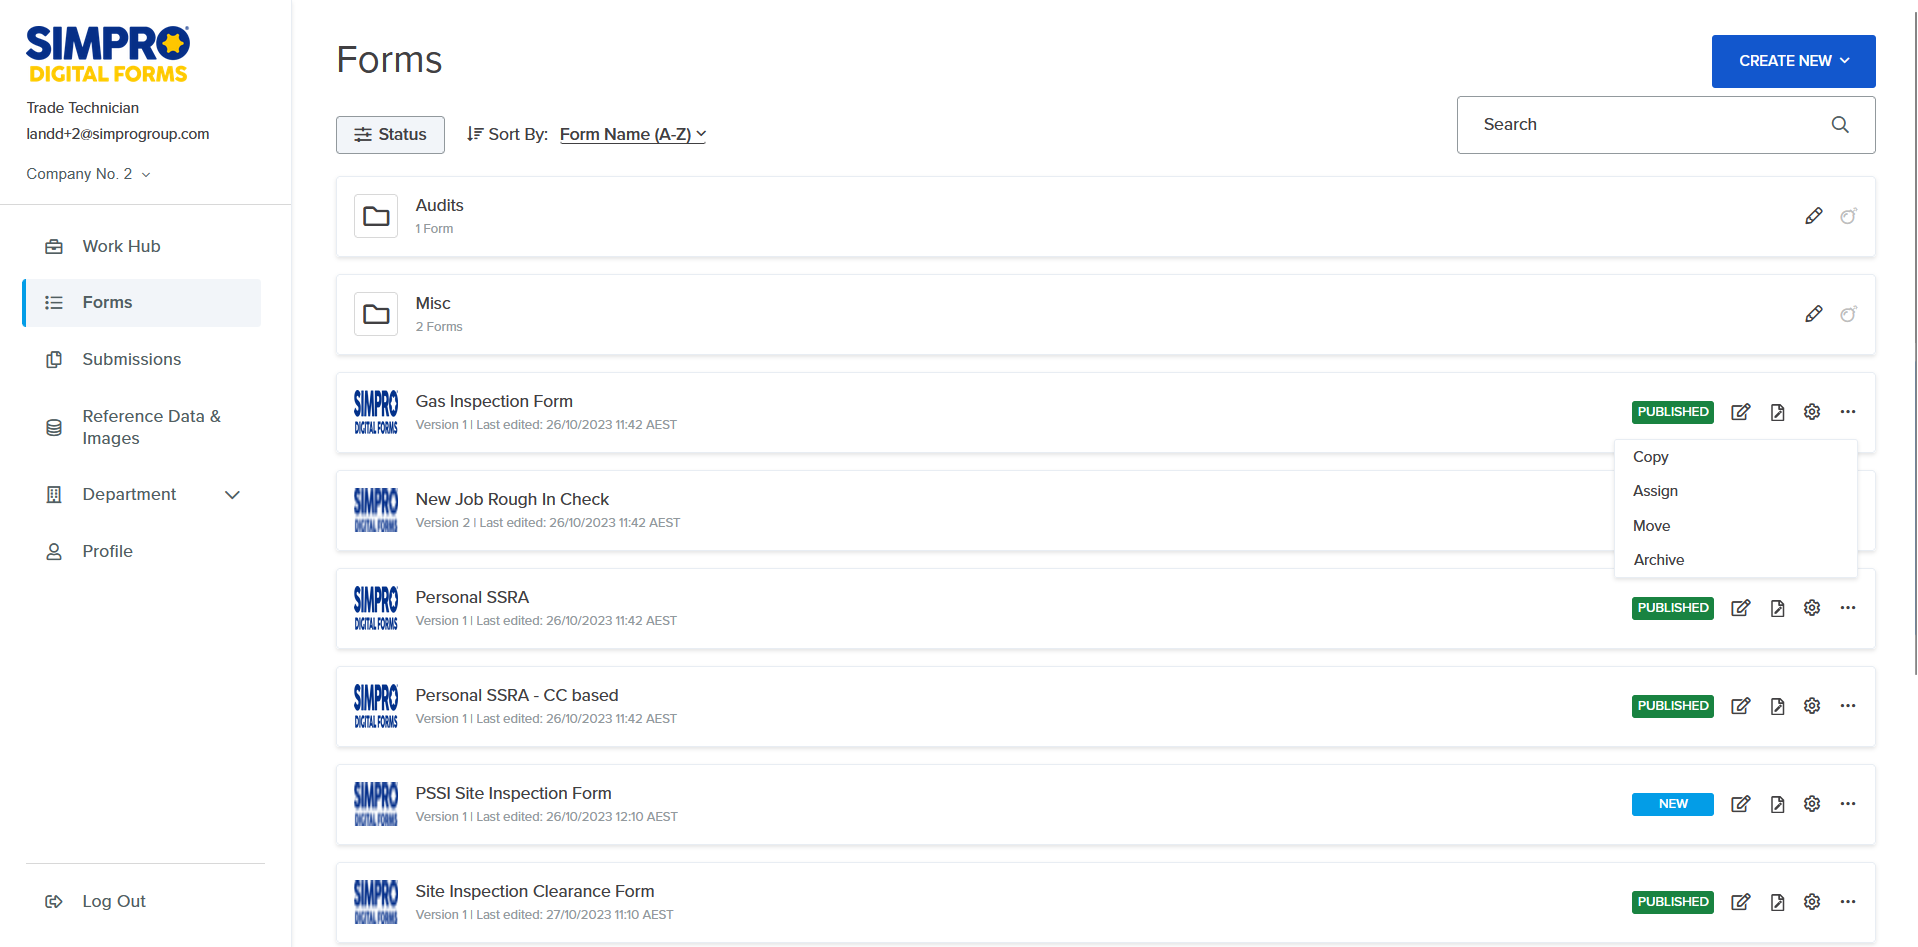
Click ![]() and click Copy to duplicate these forms and use them as a basis for creating other forms as required.
and click Copy to duplicate these forms and use them as a basis for creating other forms as required.
- Click Status to filter forms by New, Pending, Published and Archived. By default Archived forms are not displayed.
- Click to Sort by Form Name (A-Z), Last Edited (Newest-Oldest) or Last Edited (Oldest-Newest).
- Enter the name of the form in the search bar and search to locate a form if you have a large number of forms.
- Each form includes a Name, Version number and the date it was Last edited.
 Create and manage folders
Create folders to keep your forms organised.
- Click CREATE NEW > FOLDER.
- Enter the Folder Name.
- Click CREATE FOLDER.
Click the ![]() icon to rename a folder or click the delete icon to delete a folder.
icon to rename a folder or click the delete icon to delete a folder.
Note that a folder can only be deleted once all the forms in the folder are moved from it or permanently deleted. To access a folder, click the folder and create a form inside it or move forms into the folder to keep them organised.
 Form options
Use form options to manage your forms:
- Click
 to edit an existing form, modify, add or remove elements in the form. Learn more in Create, save and test a new form. Learn more in How to Create Basic Forms
 - Click
 to edit the layout and appearance of an Advanced form when it is submitted as a PDF. Basic forms are created using a PDF background.
 - Click
 to access the form’s settings. Learn more in Form settings.
 - Click
 and click Copy to duplicate a form.
 - Click
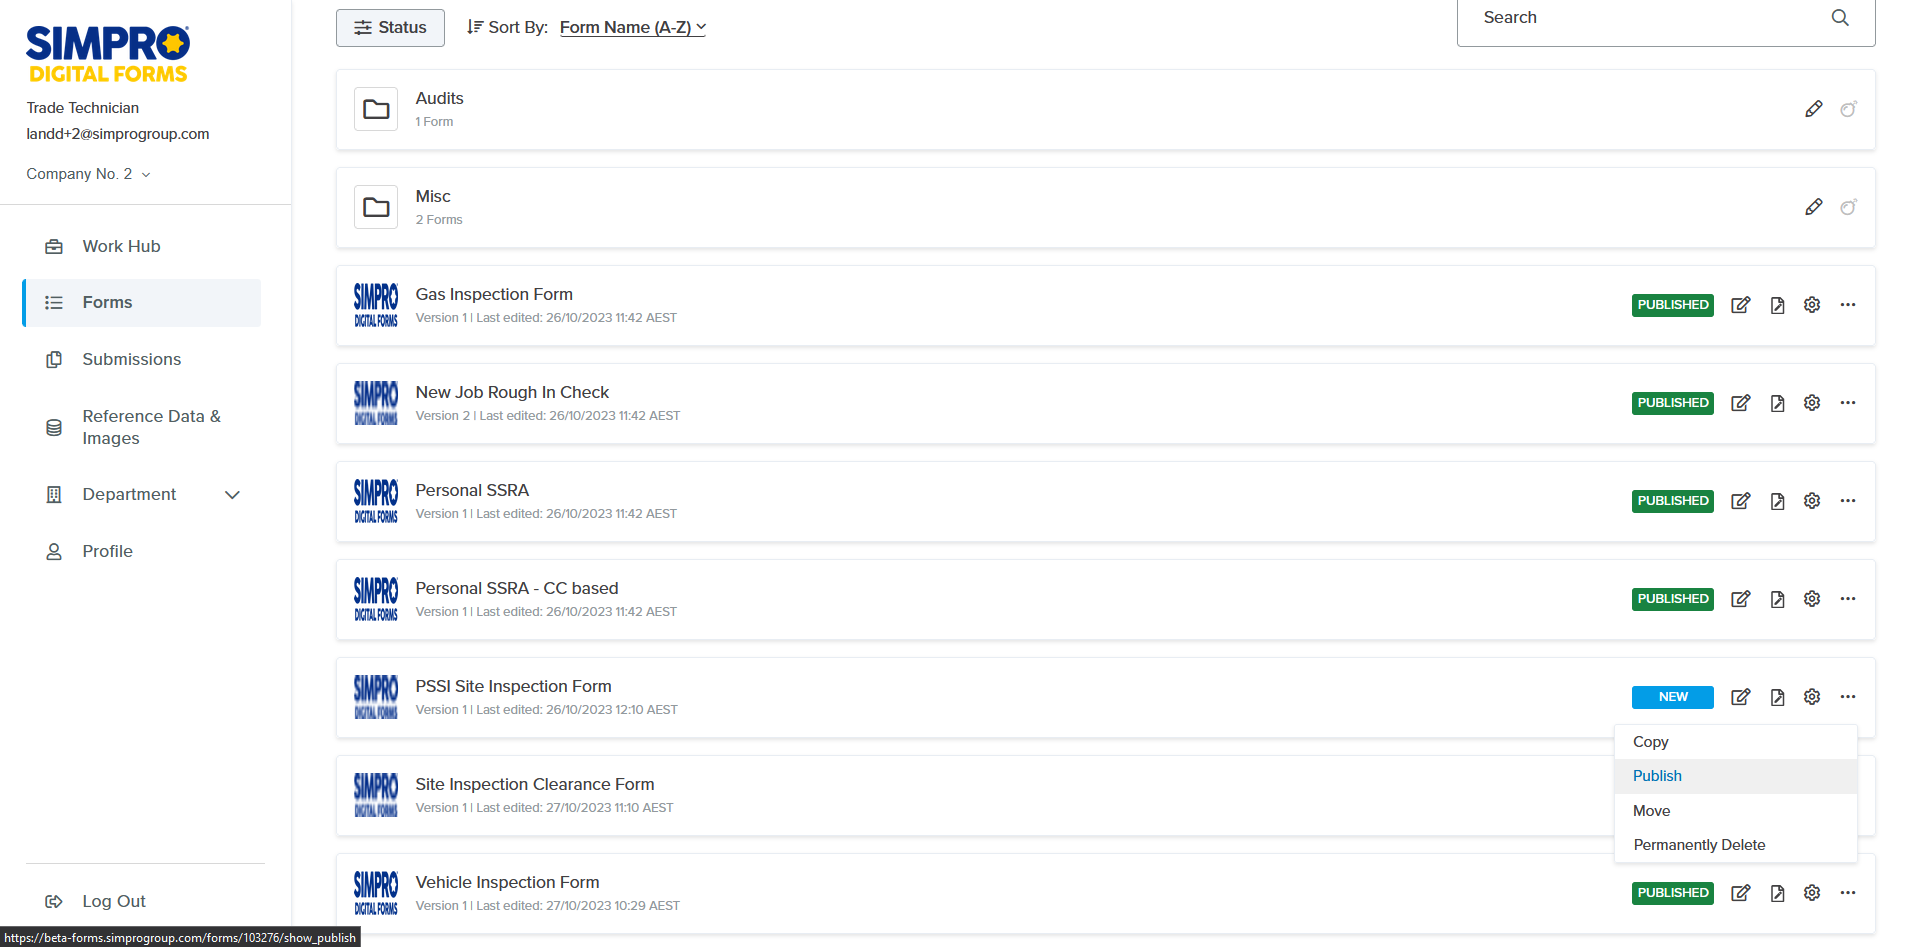
 and click Publish to make a form available on the Mobile app. Learn more in Publish a form.
 - Click
 and click Move to move a form into a folder, or click and drag a form to move it.
 - Click
 and click Permanently Delete to remove a form from your company's account.
Once a form is permanently deleted it cannot be recovered.
Click VIEW under Templates to access your list of template forms and edit the template, create a form from the template or delete the template. If you do not have templates this option will not appear. To create a template from a form, click ![]() > under Actions click Create Template.
> under Actions click Create Template.
 Publish a form
Once a form is built and the PDF is designed, it is then ready to be filled in and you can publish it to make it available to be dispatched and accessed in the Simpro Digital Forms mobile app.
To publish a form:
- Click ... and click Publish. Alternatively click on the form name to access the form setting and click Publish. Many of the settings applied when publishing can be accessed from the form settings.
- Toggle on Icon and click Update Logo to add an image file as the logo for this form. This appears on the form page and can help you identify the form.
- Toggle on Email Options to set up how the form is emailed when it is submitted.
- Under PDF to send as attachment select Designer. Standard is not available in the Simpro Digital Forms portal.
- Under Choose an option for mobile users, select to restrict mobile users from emailing the PDF, allow them to email the PDF to themselves, or email the PDF to anyone.
- Email addresses to always receive a copy (comma separated) allows you to list one or more emails that will receive a copy of the submitted PDF form.
- Toggle on Table of Contents and select to allow mobile users to fill out whatever screen they want instead of going in order.
- Toggle on Dispatch to allow this to be dispatched. Learn more in Create a Dispatch.
- Toggle on Web Editing to make the form editable by different roles.
- Toggle on Mobile Editing & Viewing to make the form editable by different roles.
- Click Next.
- Select which User Groups and Individual Users to assign to the form.
- Click Publish.
 Form settings
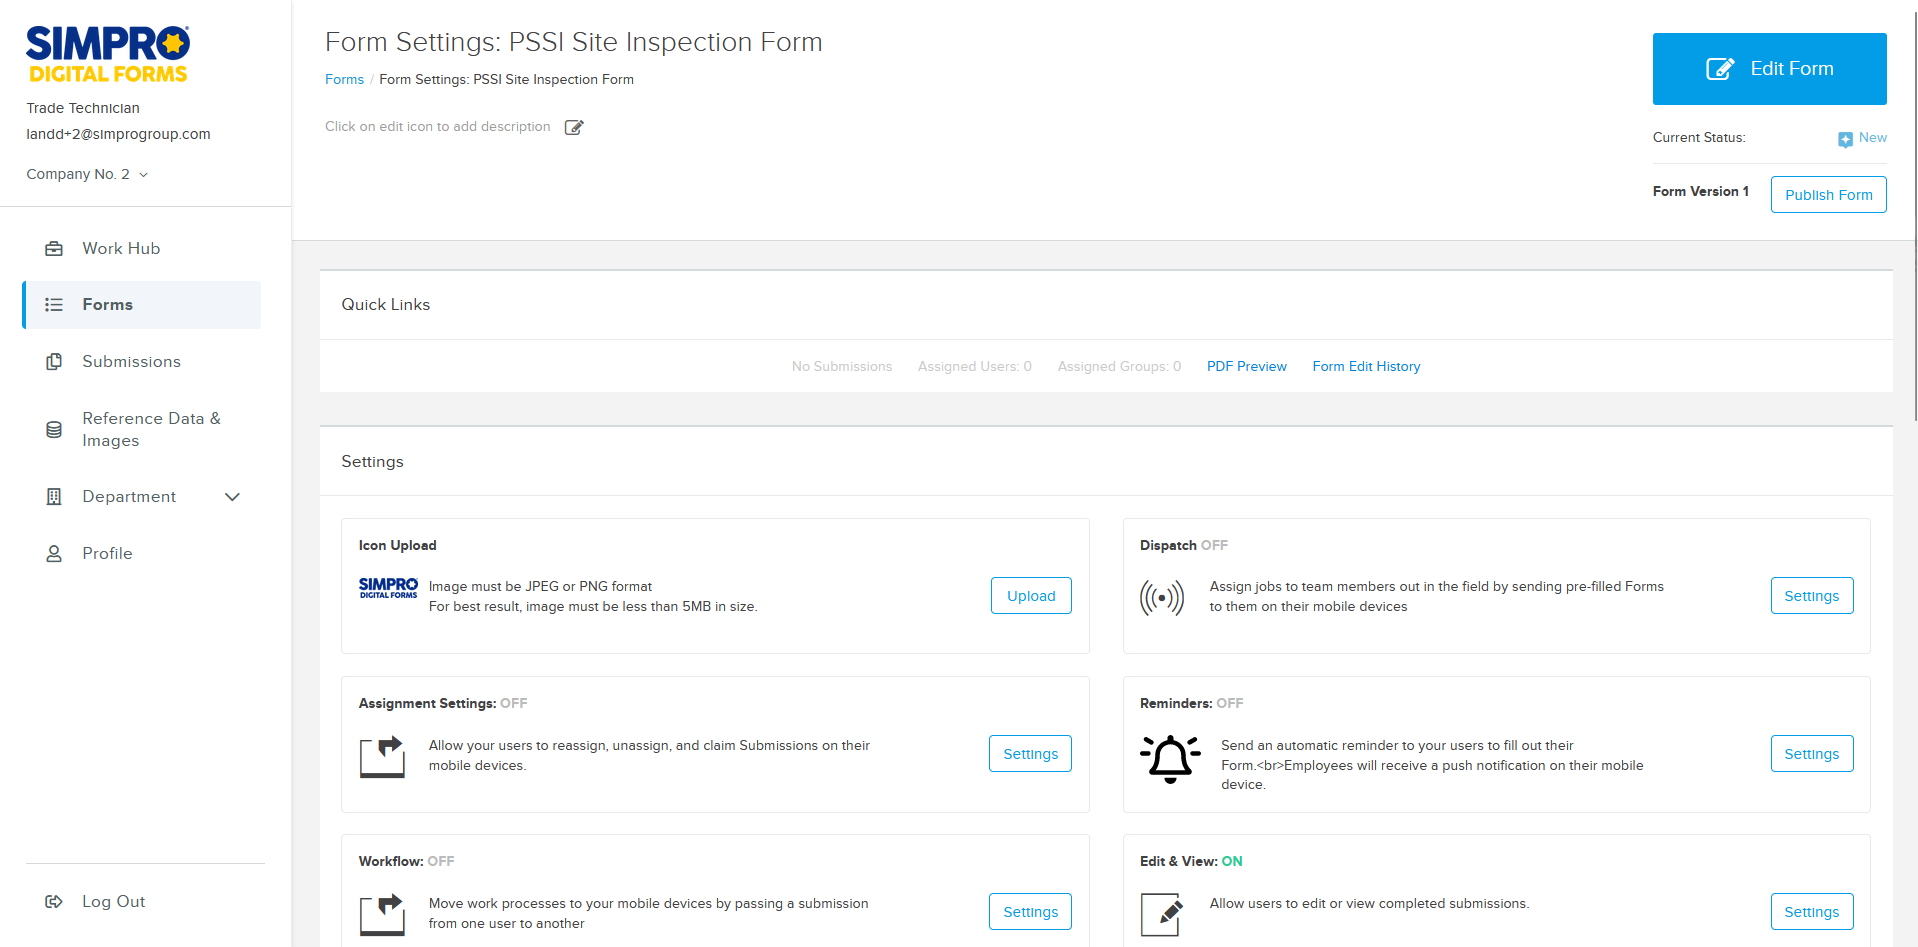
Each form has its own unique settings so you can customise how each form is used in your business. Access individual form settings to manage who has access to the form, customise PDF options, enable dispatch, set reminders, manage submission statuses and settings, control form email settings, set whether the form must be filled in a set order, manage image compression and access reference data used in the form.
Some settings are not applicable for Basic Forms.
Account settings allow you to apply settings across all users and forms. Learn more in How to Manage Your Account.
Certain settings are not applicable to Basic Forms.
To access form settings go to Forms and click the name of an individual form. You can also click ![]() on the relevant form.
on the relevant form.
The following settings are available for each form:
| Setting | Description |
| Add description | Click to add a description to help identify the purpose of this form. |
| Archive | Removes the form from your default forms list and removes it from the Simpro Digital Forms app. |
| Assigned Users | Lists the number of users assigned to complete this form. Click to view which individual users and user groups are assigned. Select users and groups to assign them to the form as required and click Save. Select Send notification to notify newly assigned users by email. |
| Assigned Groups | Lists the number of user groups assigned to complete this form. Click to view which individual users and user groups are assigned. Select users and groups to assign them to the form as required and click Save. Select Send notification to notify newly assigned users by email. |
| PDF Preview | Click to view an example of the PDF form as it will appear when the form is submitted. Not available for Basic Forms. |
| Form Edit History | Click to view a record of each time the form has been edited. The Date, Version, Name and User Email of the person who edited the form are recorded for each Event. The Event indicates what kind of change was made. Select Dates to narrow the history and click Filter. Click Export to download a CSV of the history. |
| Icon Upload | Click upload to change the icon that appears for this form on the Forms page. |
| Dispatch | Click to enable or stop this form from being dispatched. Select Use Reference Data in the Dispatch Manager with this form to require the person dispatching the form to pre-fill fields on the form with reference data, rather than the person the form is dispatched to filling in these fields. Learn more in Create a new dispatch. |
| Assignment Settings | Feature is currently not available. |
| Reminders | Click to send an automatic reminder to your users to fill out the form. Employees will receive a push notification on their mobile device. Click to Enable Reminders, Select Days and Times that the employee will receive the reminder. |
| Workflow | Workflow is for processes where multiple people have to fill out a form. Mobile users can pass a submission from one user to the next until it is completed. It includes the ability to reject back to the previous user. Learn more in How to Create a Workflow. |
| Edit & View | Allow users to edit and view submissions. Click to select which Roles can edit and delete submissions this form on the Web on the Mobile app and whether the Submission Date can be edited on the Web or Mobile. |
| Email Options |
Click to manage email options.
|
| Submission Number |
Activate and configure unique submission numbers across all users for this form. Click to Enable Submission Numbering.
|
| Submission Status |
Create your own statuses for your submissions of this form. These statuses allow you to help track the progress of your forms for your internal processes. Click to Enable Submission Status for this form.
|
| PDF Options |
Some of these settings apply to Standard Forms which are not available in the Simpro Digital Forms portal. Use the Form Designer to customise the appearance of your PDFs. Not available for Basic Forms. Learn more in How to Design PDF Forms. Settings that do apply include:
Not available for Basic Forms. |
| Table of Contents | Toggle on to allow mobile users to fill out whatever screen they want instead of going in order. |
| Simpro Settings |
Toggle on Public and Email to allow the form to be seen by Simpro Premium users in the Attachments tab and to be sent as email attachments from Simpro Premium. These options are toggled off by default. |
| Remember & Recall |
Toggle on to allow mobile users to auto-populate fields in their form based on what they had entered previously. Not available for Basic Forms. |
| Compression |
Adjust the size of the images you are capturing to speed up your uploads. Click to select the Image Quality this changes the Compressions Quality % and the Compression Max Height/Width Dimensions. Not available for Basic Forms. |
| Actions | You can Copy Form, Create Template from the form, Archive Form, Permanently Delete Form and Department Share, to set which departments the form is accessible to. |
| Reference Data | The Reference Data used in the form is listed. Click to edit or download a copy of the reference data file. |


