Last Updated: December 08 2025
Overview
Create a PO number to generate an empty purchase order. This is useful for enabling technicians to purchase from local suppliers.
 Required setup
In order to view content or perform actions referred to in this article you need to have the appropriate permissions enabled in your security group. Go to System![]() > Setup > Security Groups and access your security group to update your permissions. The relevant security group tab and specific permissions for this article can be found here:
> Setup > Security Groups and access your security group to update your permissions. The relevant security group tab and specific permissions for this article can be found here:
Before performing the steps detailed below, ensure that this part of your build is set up correctly. The relevant steps to set up the features and workflows detailed in this article can be found here:
A purchase order needs to have items before it can be receipted. Either add items to the purchase order and then create a receipt, or import a supplier invoice, which automatically adds items and create a receipt. Alternatively, change the purchase order type to a description order.
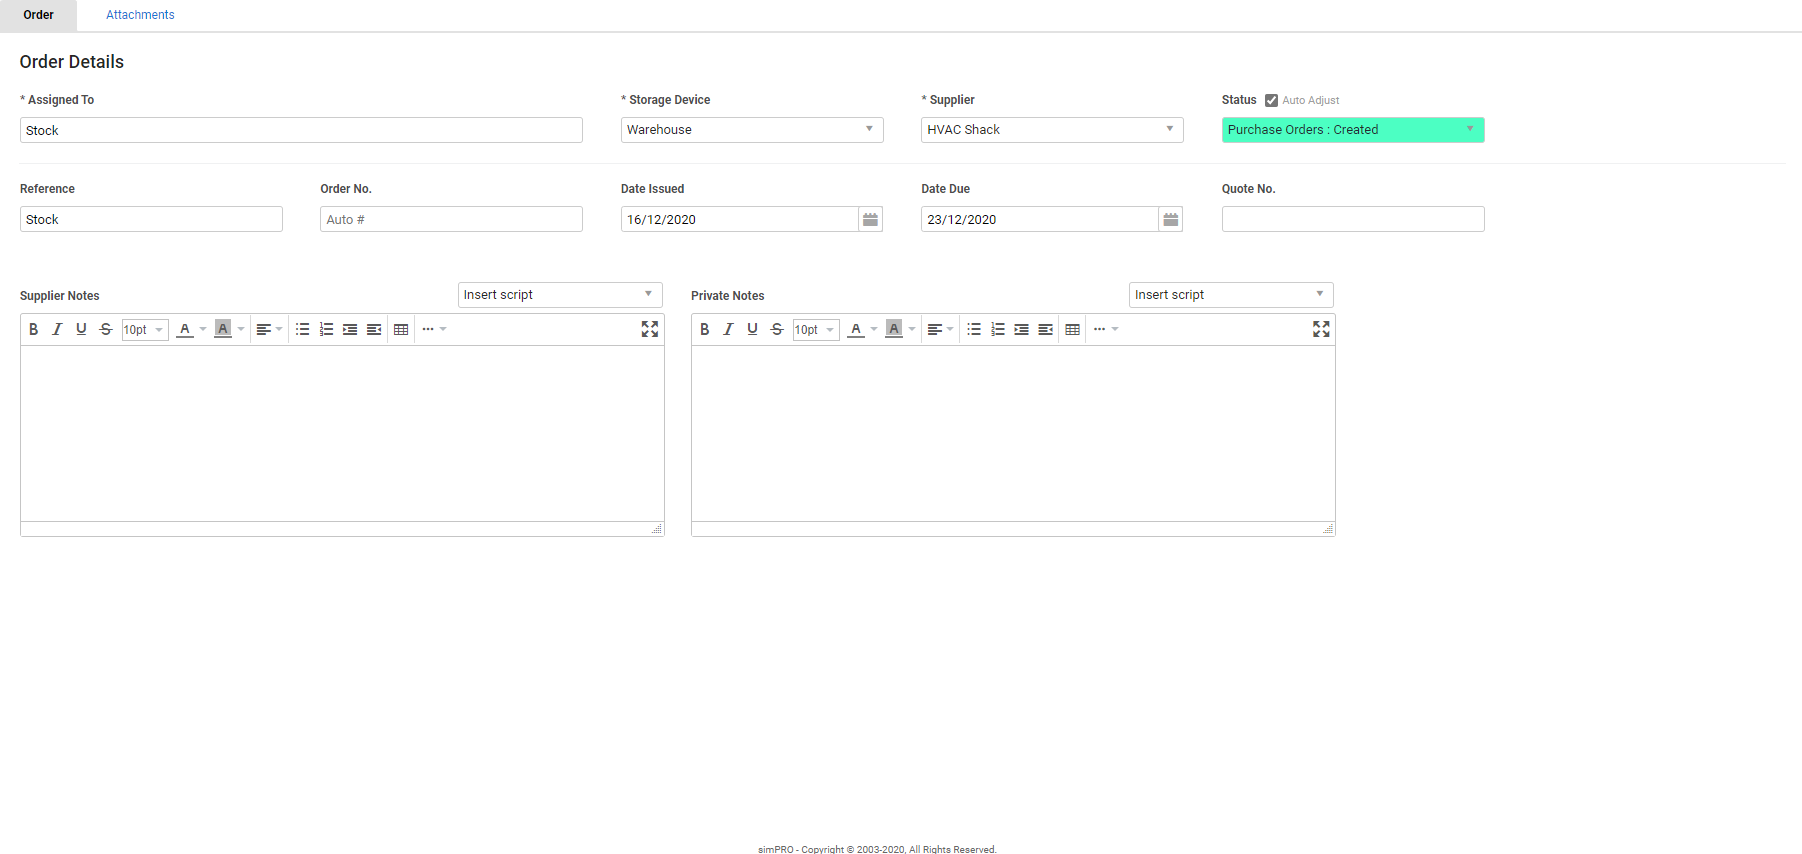
To create a PO number:
- Go to Materials
 > Create New PO Number.
 - The default storage device is automatically used. Select a different Storage Device if necessary.
- Under Assign To, select whether you are ordering to a Job or to Stock.
- If Job is selected, search and select the job.
- Select a Supplier.
- Enter Optional information as required.
- Enter Supplier Notes and Private Notes as applicable.
- Go to Attachments to add attachments if required.
- Click Finish.
When you create a purchase order number, the 'A purchase order has been raised for the job' status does not trigger unless the purchase order has items on it. Learn more about status triggers in Status Codes and Automatic Triggers.
To add items to the PO number:
- Go to Materials
 > Purchase Orders > Pending and open the PO number.
 - Go to the Catalogue tab and add catalogue items.
- Alternatively, in the Details tab click Add New Item to create new items and add them.
The Forms, Receipts, and Log tabs appear. You can then Email the purchase order.
 Walk Me Through
Need additional help?
Try Walk Me Through, our step-by-step guidance tool, to create purchase order numbers.
In Simpro Premium, go to Help ![]() > Walk Me Through and search PO Number.
> Walk Me Through and search PO Number.
Learn more in How to Use Walk Me Through in Simpro Premium.
