Last Updated: December 15 2025
How to Create Simpro Takeoffs
Overview
Create takeoff estimates quickly and easily with Simpro’s takeoff add-on. Associate your drawings directly with your Simpro Premium projects, create your list of material estimates with associated fit times, and update these directly into the Simpro Premium project’s cost centres.
 Access Takeoffs
In order to access the takeoff add-on, you must have a licence assigned in your employee card.
To access the takeoff add-on in Simpro Premium:
- Hover over Utilities
 .
. - Click Takeoffs.
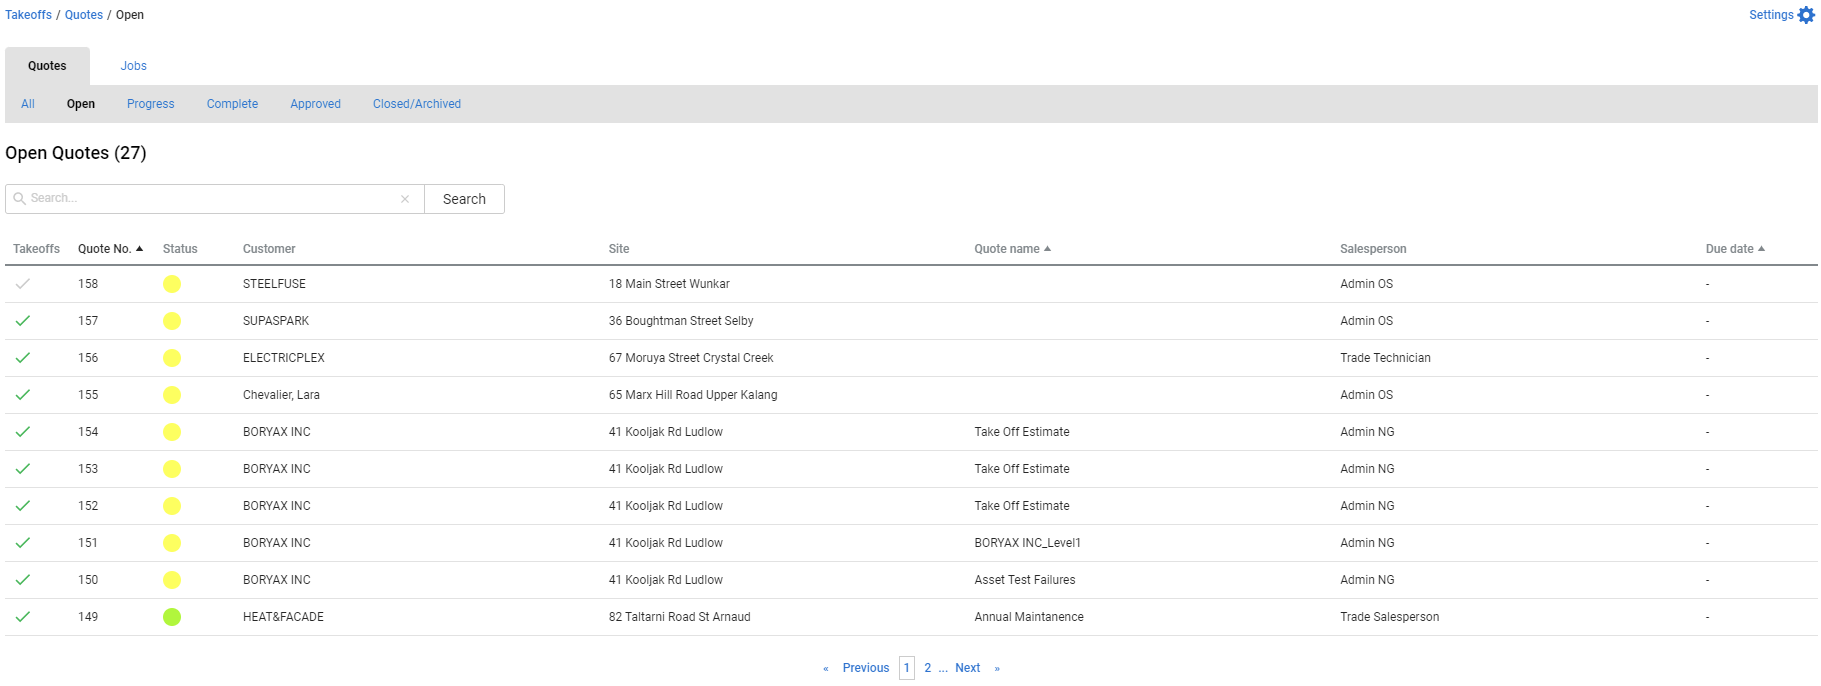
- Search for the required quotes / jobs using details such as a customer, site and name.
- Click Search and open an existing quote or job from the results.
The Open Takeoffs button
When creating a new project or when working on a quote or job in the pending stage, you can use the Open Takeoffs button available on the top right corner.
This launches the takeoff add-on with the relevant quote or job open.
Save and Finish options
If you are working on a quote or job in the pending or progress stage you can access Takeoffs when you click Save and Finish.
Click Open Takeoffs in the Save and Finish pop-up window.
This launches the takeoff add-on with the relevant quote or job open.
Access a Simpro Premium quote or job from Takeoffs
You can easily return to the corresponding quote or job from Takeoffs. Click Back to Quote / Job to return to the quote / job.
 Update Settings
To set your unit of measurement and view symbols:
- Click Settings.
- In the Main settings tab, select Metric or Imperial as your unit of measurement.
- Select the Key Settings view as Detailed or Summary.
- Click the Symbols tab to view and add all available symbols. Learn more in Add Symbols.
- Click Save.
 Add Symbols
To upload customised symbols, the symbols should follow specific formatting styles to appear correctly in Takeoffs. Incorrectly formatted symbol may appear as black square or it may react incorrectly if you change its colour.
The formatting requirements for symbols are:
- The file type must be .SVG
- The size must be 16x16 pixels.
- The background of the symbol should be transparent, not white.
- The symbols must be in either white or black colour. You can fill the white lines and shapes using the colour selector, however, the black lines and shapes retain black colour only.
- A single .ZIP file can contain multiple .SVG files. When you upload a .ZIP file, all .SVG files included in it are added.
To view and add the available symbols to takeoffs:
- Go to Settings > Symbols to view all available symbols.
- To add a new symbol pack, click Create Group in the User tab.
- Enter a group Name.
- Click + Symbol Pack.
- Enter a Symbol pack name.
- Drag a zipped folder containing relevant symbols into the upload area.
- Click Save > Create Pack.
- To Rename or Delete a group or symbol pack, click the three dots icon.
- Click Done.
Takeoffs has a list of system-provided symbols that are specific to a number of trade industries. You can enable or disable the symbol packs that are relevant to your business. To enable or disable the system symbol packs:
- Click Settings > Symbols.
- Go to the System tab.
- Under System Packs, use the toggle to Enable or disable symbol packs, as required.
 Upload plans
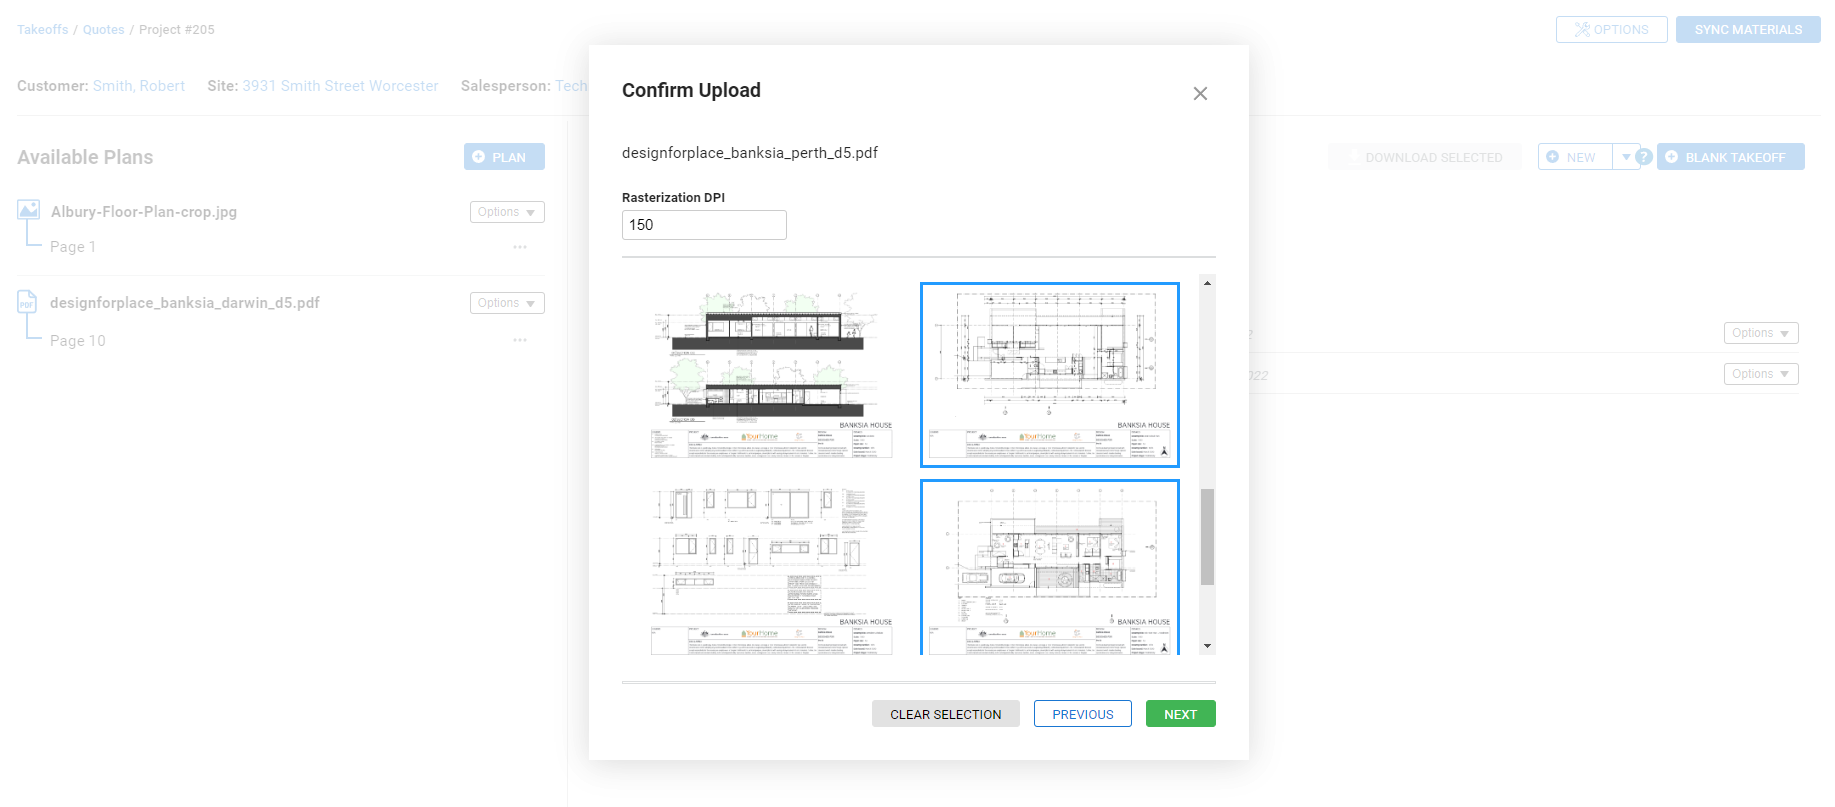
You can upload a multi-page plan and select multiple pages to use for creating takeoffs at the same time. Alternatively, upload a single page plan to create individual takeoffs.
To upload plans for using the takeoff add-on in Simpro Premium:
- In Takeoffs, access the required quote or job.
- Click + Plan.
- Select to add a plan From Quote/Job or From Device.
- Click From Quote/Job to select the plan from the list of attachments added to the quote / job in Simpro Premium. Learn more in How to Use Attachments.
- Click Import to add the plan, and then close the pop-up window.
- Click From Device to browse and locate the file from your local drive and click Save and Close.
- You can select both single and multi-page plans to upload. For multi-page plans select the individual pages to upload.
- Multi-page plans are only compatible in PDF format.
- Preview the uploaded plan in the plan wizard and update the drawing using the Editor tools.
- Set the scale of the plan before creating your takeoffs drawing by setting a scale ratio or set by drawing.
- Use the left panel to control additional options on the plan including renaming, reselecting pages, delete, and reset.
- Click Save Page to save the current plan.
- You can use the editor tools to edit the uploaded plan prior to drawing in takeoffs.
- Click the three dots next to the uploaded page and select Create Takeoff.
- You can create multiple takeoffs from the same plan to provide different options to a customer. To ensure that the items are not duplicated, add different options to optional cost centres. Learn more in How to Manage Optional Quotes.
- Use the Download option to download a copy of the uploaded plan.
- Use the Delete option to remove a plan or page.
- If the plan is added to a job, you can create an As Built drawing. Learn more in How to Create an As Built Drawing.
- Select the project Section and Cost Centre.
- For single cost centre service quotes and jobs, select only a Cost Centre.
- Click Save or click Save and Open to start building the takeoff. Learn more in How to Build Simpro Takeoffs.
Editor tools
| Select | Select Pencil marks, Text and Images. |
| Rotate Left and Right | Rotate the plan page left or right. |
| Zoom | Zoom in and out. |
| Pencil | Manually draw elements over the plan page. |
| Text | Place text on the plan page. |
| Image | Upload additional images to place on the plan. |
| Erase Area | Click and erase an area on the plan. |
| Clip | Mark out an area on the plan page to clip. |
| Delete Mark | Select and delete marks added on the drawing. |
| Undo and Redo | Undo or redo your last action performed. |
 Create a blank takeoff
To create a takeoff without uploading a plan:
- In Takeoffs, access the required quote or job.
- Click + BLANK TAKEOFF.
- If there is an existing empty cost centre, click the drop-down next to the cost centre and select Create in the empty cost centre.
- Enter a Takeoff Name.
- Choose a Section and Cost Centre from the drop-down.
- If the quote / job has a single section and cost centre, those are pre-selected in the drop-down.
- Click Create new Section and Create new Cost Centre to create a new section or cost centre.
- Creating a new section is only available for project quotes / jobs.
- Click Save or click Save and Open to start building the takeoff. Learn more in How to Build Simpro Takeoffs.
- Continue creating the takeoff as normal.
 Manage Takeoffs
After you upload plans and create takeoffs, you can use different available options to rename, move, or lock the takeoffs. Learn more in How to Build Simpro Takeoffs.
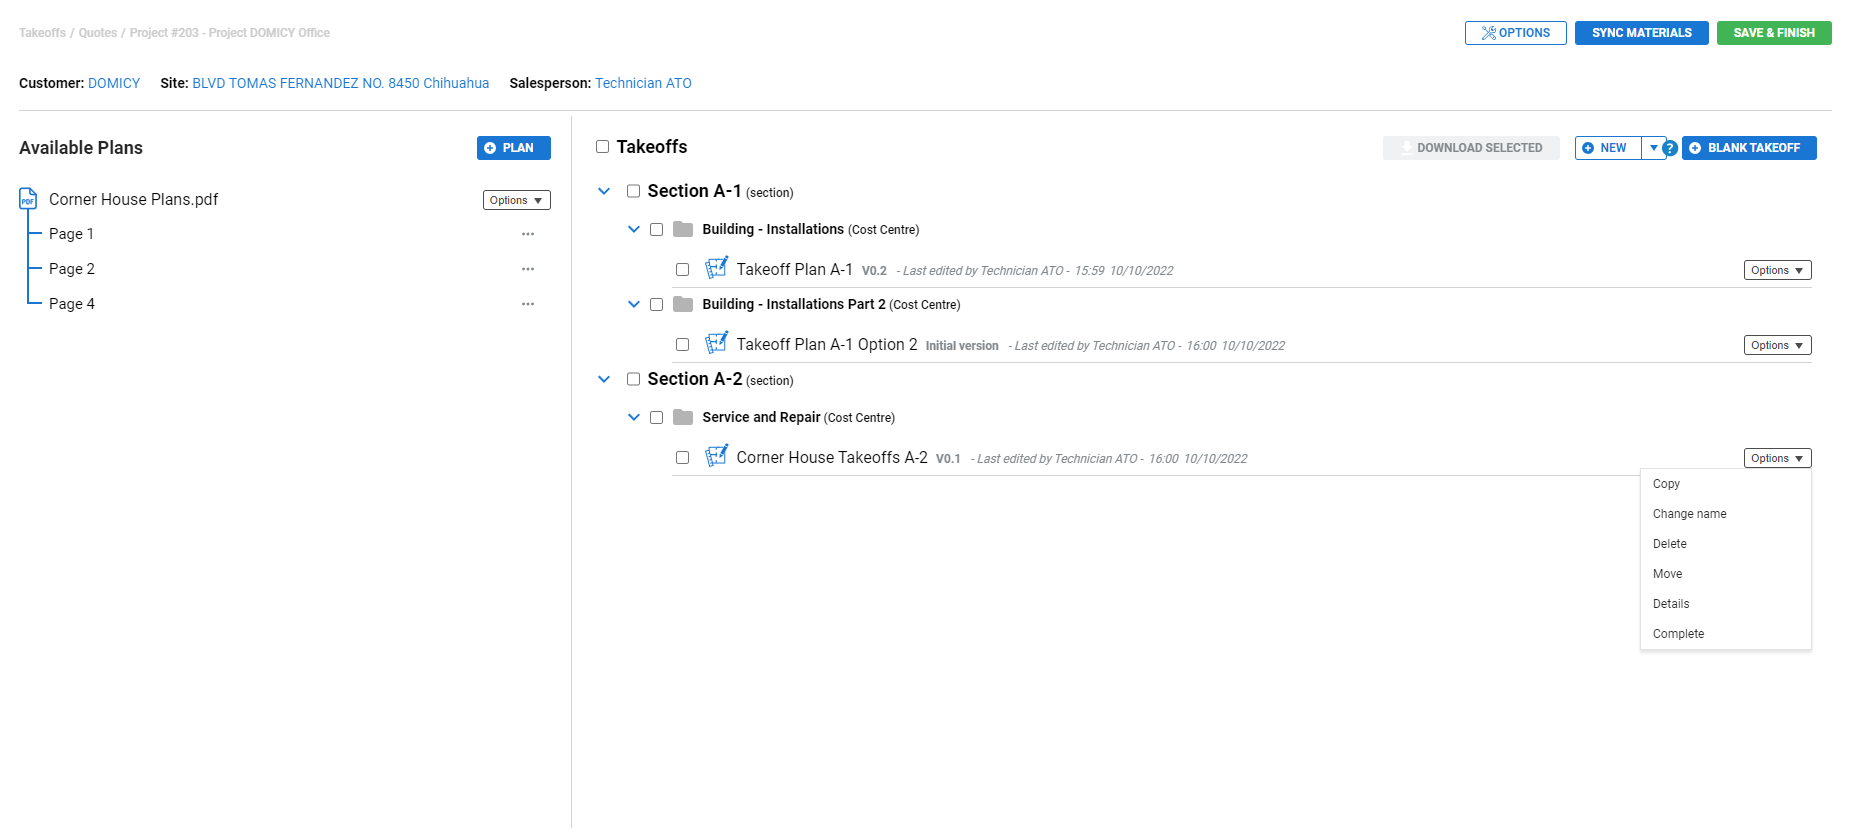
When you access the Takeoffs tab in a quote or job, the following options are available:
- Click + Blank Takeoff to create a completely new takeoff from a blank canvas. Enter a Takeoff name and select a Cost Centre and Section to proceed and access the drawing.
- Click Sync Materials to sync any materials from your completed takeoffs drawings to Simpro Premium.
- Select takeoff drawings from the list and click Download Selected to download the selected drawings as a .PNG, .JPG or .PDF.
- Click + Plan to upload plans for using the takeoff add-on. Learn more in Upload plans.
To preview the uploaded plans, navigate to the uploaded file under Plans. In this preview window, you can zoom or navigate to different pages of the plan, as required.
Click the Options next to the required takeoff drawing to:
- Make a Copy of the takeoff in a different cost centre or section.
- If the quote / job has a single cost centre, it is pre-selected in the drop-down.
- To make a Copy of a specific takeoff version, select the takeoff drawing and select Versions. Select the associated options next to the relevant version and select Copy.
- Change name of the takeoff, if required.
- Delete the takeoff to permanently remove it from the quote or job.
- Move the takeoff to another cost centre or section.
- View the takeoff Details including the name of the Original plan, Size of the file, date it was last updated, who it was Modified by.
- Mark a draft takeoff as Complete and update the quote or job with any items that are added to the selected takeoff. Learn more in Complete a Takeoff.
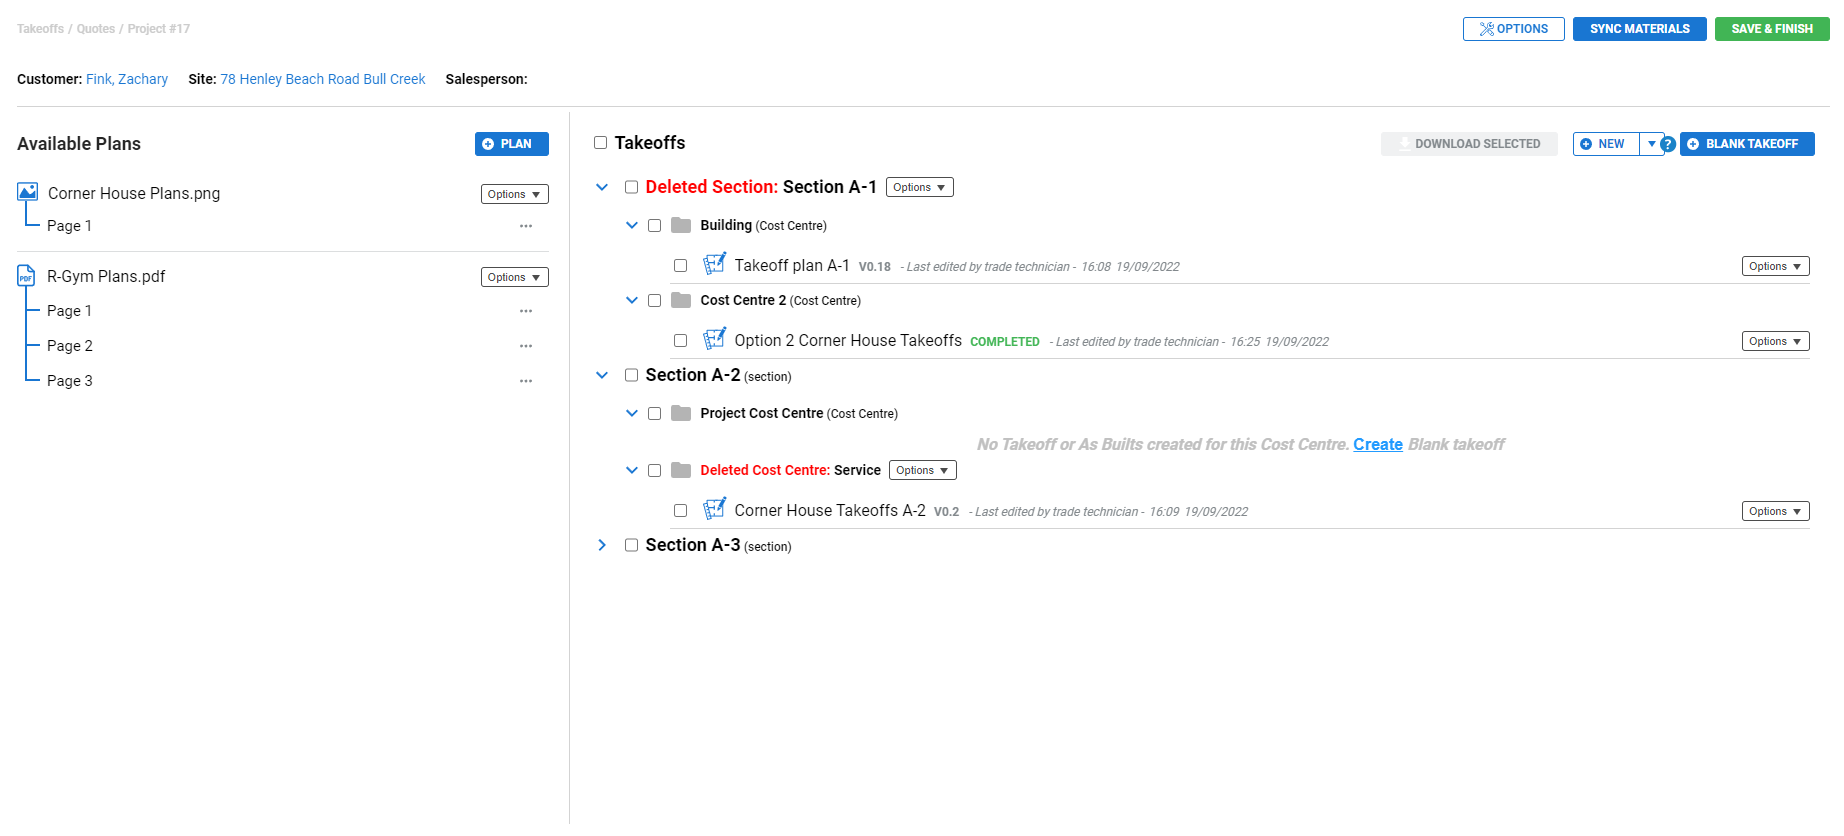
A Deleted Cost Centre or Deleted Section appears in red. Click Options for additional options:
- Select Assign to existing Cost Centre to assign drawings from a deleted cost centre to an existing cost centre.
- Select Create & assign a new Cost Centre to create a new cost centre for the takeoff drawings of the deleted cost centre to be assigned to.
- Select Delete Cost Centre and Drawings to delete both the deleted cost centre and any existing takeoff drawings in the cost centre.
- Select Create and assign a new Section to create a new section to assign existing cost centres and takeoff drawings.
- Select Assign to existing Section to assign cost centres and takeoff drawings from a deleted section, to an existing section.
- Or Delete Section, Cost Centre and Drawings to delete the section, cost centres and any existing takeoff drawings in the cost centres.
 Complete a Takeoff
To mark your takeoff estimate complete:
- Go to the Takeoffs tab in the selected project.
- Click Options next to the required drawing version and select Complete. Alternatively, when you finish editing a takeoff drawing, select Save and Complete from the Save drop-down.
- View previous versions of a takeoffs drawing by selecting Versions when in a takeoffs drawing.
- Revert a completed takeoff back to a draft in the drawing when selecting Versions. Use this option to ensure the quote or job is not updated with the materials on the takeoff.
- The Revert option is available only for completed takeoffs.
- Click the completed drawing in the Takeoff List.
- In the Summary, you can review the list of estimated materials.
- Click the edit icon to add or update any associated labour costs and fit times, fit time multipliers and deductions.
 Updating Simpro Premium
After you complete a takeoff, you can update the corresponding quote or job in Simpro Premium to add details about the parts and labour.
When you update a job or quote with a takeoff, a pop up shows the status of the update. You can navigate and proceed with other work as the processing happens in the background.
To update and sync the Simpro Premium quotes or jobs with the estimated materials:
- In Takeoffs, access the required quote or job.
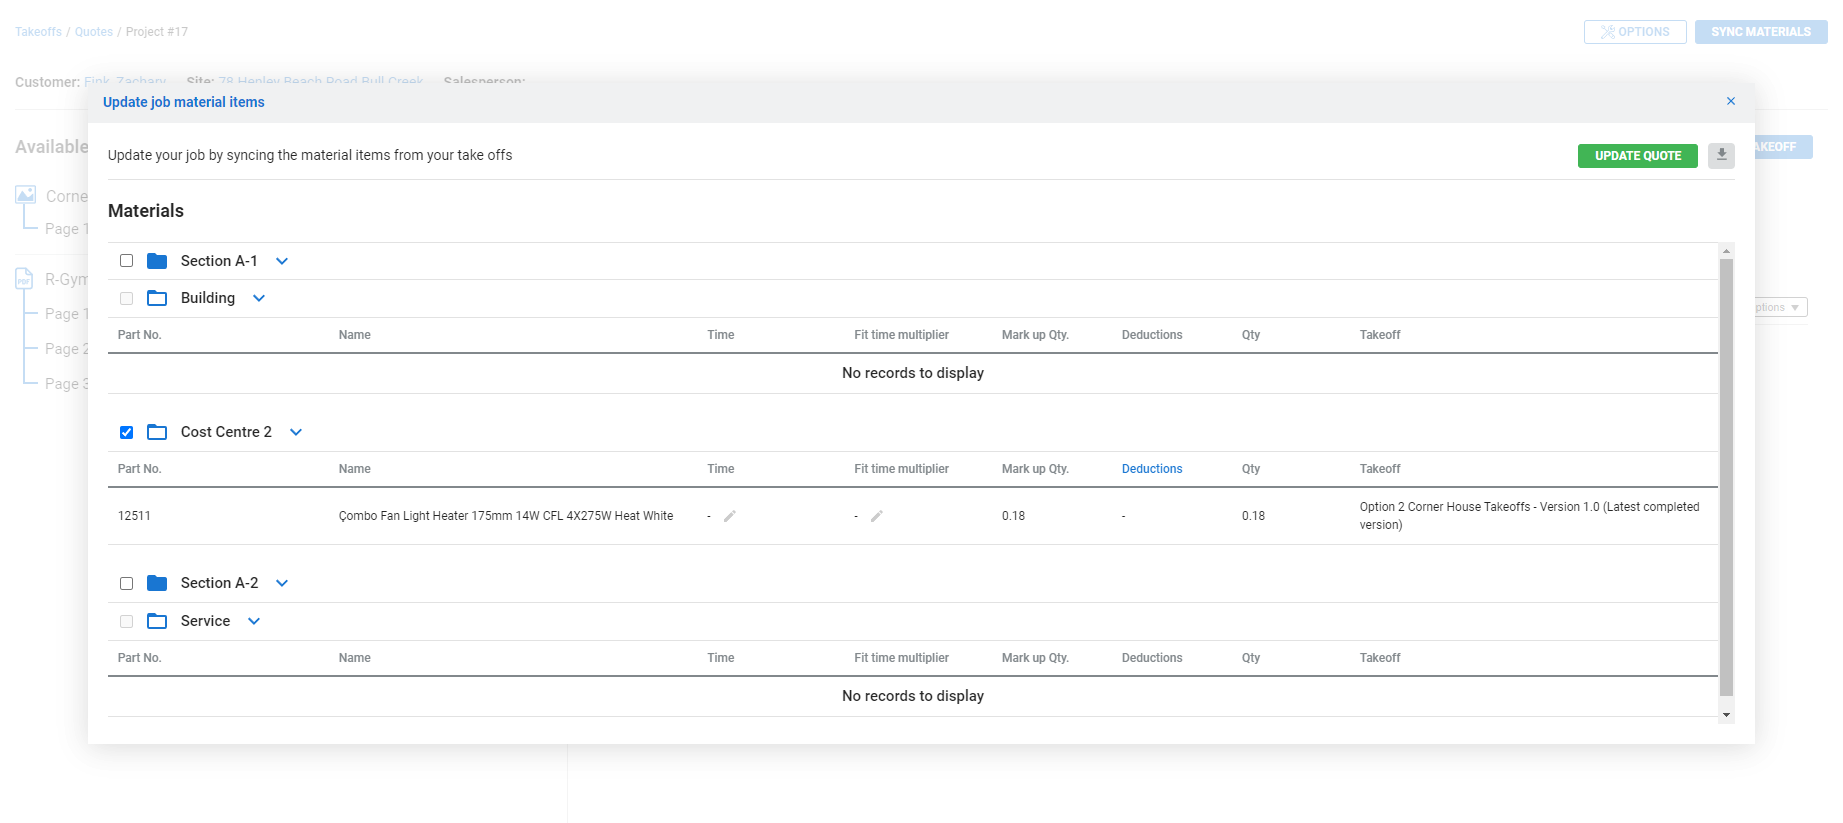
- From the Takeoffs List page, click Sync Materials. Select the required sections and cost centres that are associated with the drawings.
- Cost centres are processed in subsequent order, with the items and attachments.
- A Status indicates if any part of the process is successful or if it fails, so you can review which section had troubles syncing.
- Click Update Quote or Update Job.
- Updating a quote or job with a takeoff replaces the materials in the selected cost centre with those in the takeoff. If the quote or job has existing materials a warning message is displayed for confirmation.
- Materials are added to the project cost centre in the Parts and Labour tab.
- A copy of the drawing is attached to the associated quote or job as a .PDF.
Any updates or changes made directly to the cost centre in Simpro Premium do not update the drawing created while using the takeoffs add-on. To make updates using the takeoffs add-on, it is recommended to create a new drawing version, make the required changes and update it in Simpro Premium.
If you have added one off items to your takeoff, navigate to the corresponding quote or job in Simpro Premium. Then, go to the Parts & Labour > Billable tab in the required cost centre and update the time and cost details for the one off items, as required.
Learn more about one off items in Simpro Premium in Add a one off item.
 Learn more in the Learning Toolbox
For additional training, complete an interactive material in the Simpro's Learning Toolbox. Learn more in About Simpro's Learning Toolbox.
