Last Updated: December 12 2025
Overview
When customers make payments on invoices you have issued them for jobs, you can apply these payments to the invoices in Simpro Premium depending on your security group settings.
Technicians can also process and apply payment to invoiced jobs in the field using Simpro Mobile.
If you have activated Simpro Premium Payments, you can also apply payments made by credit card in the office over the phone, and customers can apply payment themselves online and through the customer portal. See more in How to Use Worldpay Payments.
To create payments in bulk, see How to Import Payments.
If you handle payments externally from Simpro Premium in your accounting package, it is still important to enter payment details in Simpro Premium so that you can use statements, aged receivables, the accounts dashboard, credit limits on customers, keep track of outstanding invoices, and more.
Once a payment has been applied to an invoice, it is not recommended to edit it or delete the payment, as it may have already posted to your accounting package.
 Apply payment to invoices
You can begin the process of applying a payment to an invoice in Simpro Premium in a number of ways:
| By invoice |
To apply payment directly to the relevant invoice:
|
| By customer |
To apply payment to multiple invoices for the same customer:
Alternatively, to apply payment in the customer statement:
Learn more in How to Create Customers. |
| By invoiced job |
To apply payment to an invoiced job:
|
| Xero / QuickBooks Online only: By payment import |
Import payments into Simpro Premium through the accounting link if you use Xero or QuickBooks Online as your accounting package. Learn more in Adjust Xero export options /Adjust QuickBooks Online export options. |
You can then follow the instructions detailed below to complete the process or, if you have activated Square Payments, Stripe Payments or Simpro Premium Payments, learn more in About Square Payments, About Simpro Payments, or How to Use Worldpay Payments.
After you apply a payment to an invoice:
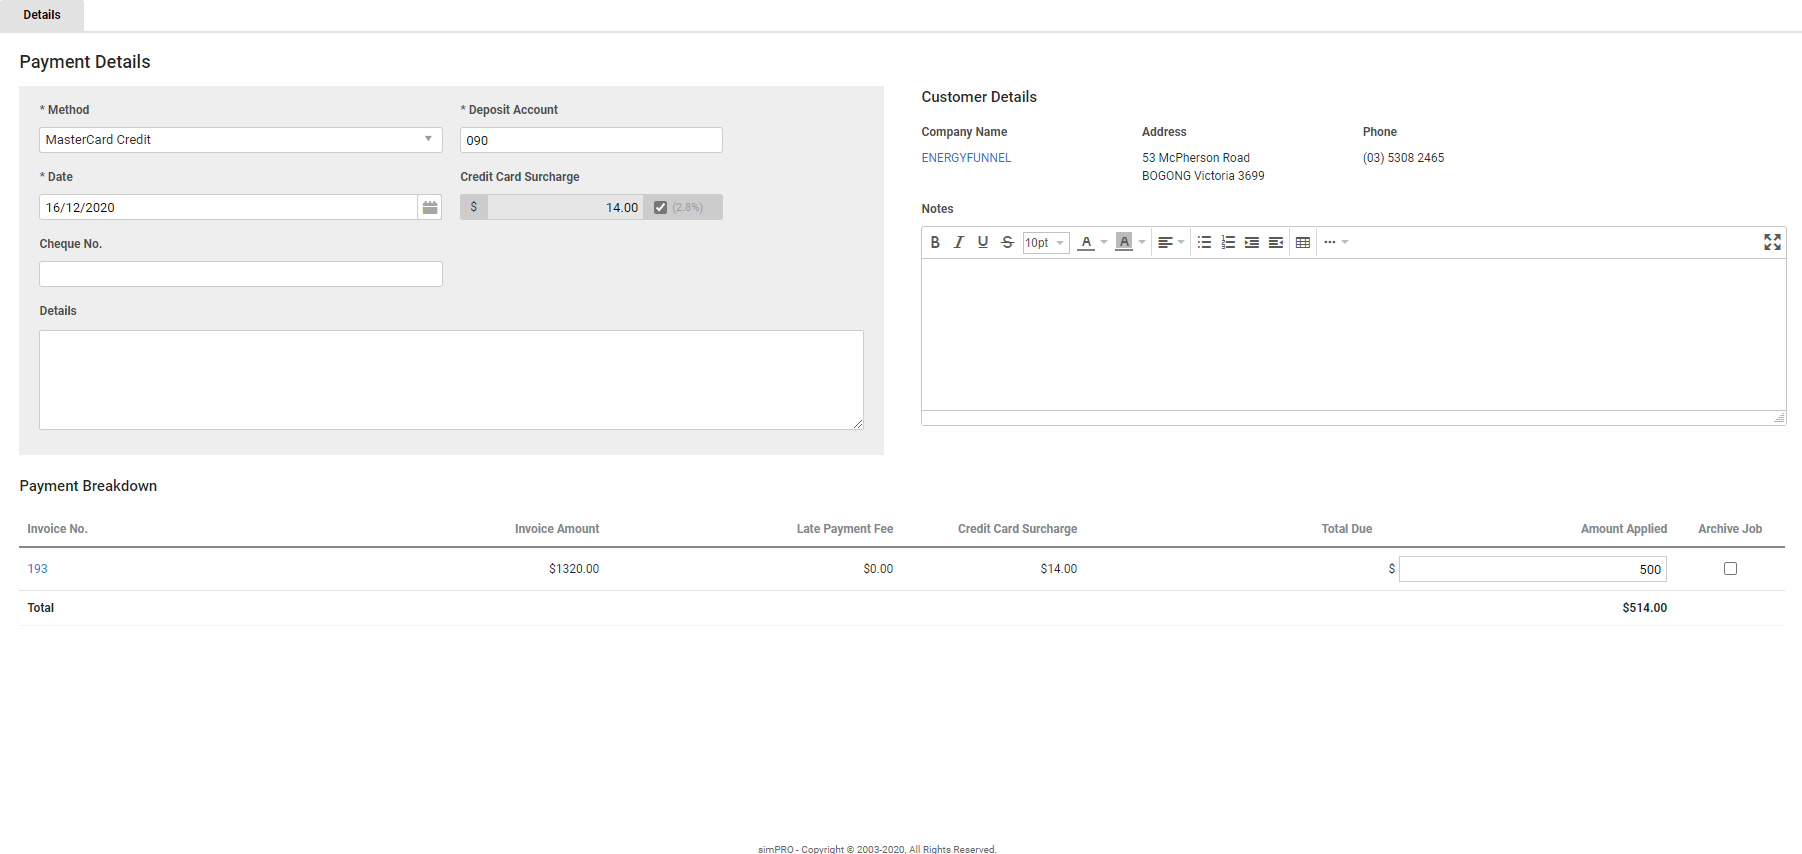
- Select a payment Method, and enter a Deposit Account if it does not automatically populate.
- See How to Use Payment Methods for information on assigning deposit accounts to your payment methods.
- If your customers frequently pay by cheque, enter payment details in Profile > Settings > Banking so that when you next process a cheque from that customer, you only need to manually enter the cheque number.
- Adjust the Date, finance charge, Cheque No., and Notes as required.
- Adjust the Amount Applied as required.
- Select Archive Job to archive the relevant job after this payment is applied.
- Click Submit.
You can then Email a payment receipt or click Finish to exit the payment.
 Email a payment receipt
To email a payment receipt:
- Apply a payment to an invoice and click Submit.
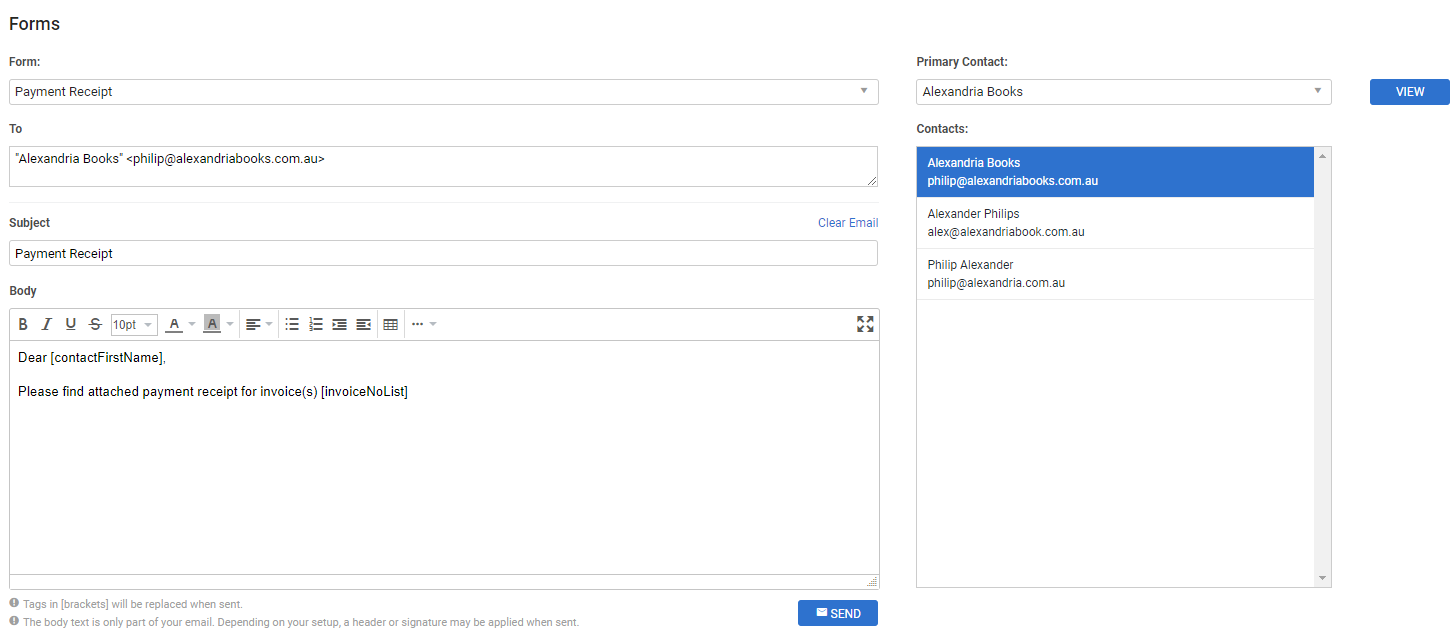
- Click the Forms tab.
- Click View to preview the receipt, then return to the Forms tab.
- To learn how to adjust how the payment receipt PDF form displays, including how to adjust the form title, include a Paid stamp, or display a paid invoice as an invoice or receipt, see How to Set Up Invoice Forms.
- Select a Primary Contact to address the form to and click to add additional Contacts if required.
- This is automatically populated by the primary contact for invoicing defined in the customer card file.
- Alternatively, you can manually enter email addresses and separate them with a comma.
- Adjust the default Subject and Body template if required, or click Clear Email to remove it and enter new text.
- Click Send > OK > OK.
- Click Finish.
Learn more in How to Create Contacts.
 Walk Me Through
Need additional help?
Try Walk Me Through, our step-by-step guidance tool, to pay invoices and email payment receipts.
In Simpro Premium, go to Help ![]() > Walk Me Through and search Apply a Payment or Email a Payment Receipt.
> Walk Me Through and search Apply a Payment or Email a Payment Receipt.
Learn more in How to Use Walk Me Through in Simpro Premium.

