Last Updated: January 08 2026
Overview
Before you start using the accounting link, you need to set up MYOB Desktop to recognise your Simpro Premium build, and make sure your Simpro Premium data matches your MYOB data so that your transactions post correctly.
If you intend to create invoices in MYOB Desktop, we recommend that you discuss this with your implementation consultant or Simpro Premium Support to minimise issues with linking.
After setup is complete, learn more in How to Use the MYOB Desktop Accounting Link.
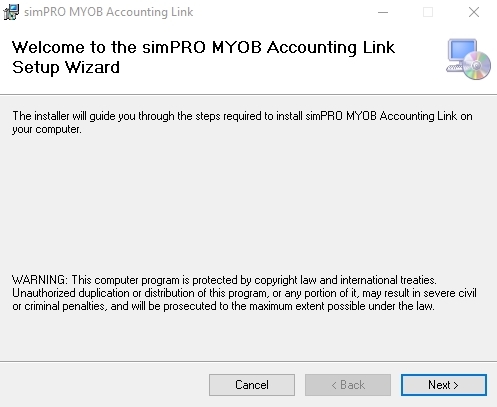
 Download and install the accounting link
Download the accounting link: MYOB Desktop. If you are interfacing with MYOB Desktop for the first time, you need to register your company file for ODBC with MYOB.
 Register your company file for ODBC
If you are using the same serial number for multiple MYOB company databases, you can register the first for ODBC online here. Subsequent MYOB companies need to be requested by phone or through the online chat system.
Contact MYOB and Simpro Premium Support for assistance.
 Prepare your Simpro Premium data
Before using the accounting link, set up your Simpro Premium data to match your MYOB Desktop data to ensure data from Simpro Premium posts correctly in MYOB Desktop.
Confirm with your accountant which accounts need to be used.
 Match your Simpro Premium accounts
Go to System ![]() > Defaults > Financial to ensure that your accounts in Simpro Premium match your accounts in MYOB Desktop. These accounts include:
> Defaults > Financial to ensure that your accounts in Simpro Premium match your accounts in MYOB Desktop. These accounts include:
- Income Account
- Deposit Account
- Expense Account
- Finance Charge Account
- Restocking Fee Account
- Retention Asset Account (if using retention)
- Retention Liability Account (if using retention)
- Inventory Account (if using Inventory Tracking)
- Inventory Adjustment Account (if using Inventory Tracking)
- STCs Account (must be enabled in the Extensions tab)
- VEECS Account (must be enabled in the Extensions tab)
The Freight Account is ignored in favour of your MYOB Purchase Freight account. Learn more about freight in Set up freight in MYOB.
Learn more in How to Set Up Financial Defaults.
 Set up cost centres
Go to System ![]() > Setup > Accounts > Cost Centres to ensure the Income Account No. and Expense Account No. for each cost centre match your accounts in MYOB Desktop.
> Setup > Accounts > Cost Centres to ensure the Income Account No. and Expense Account No. for each cost centre match your accounts in MYOB Desktop.
Additionally, ensure the selected account is the correct type of account.
Learn more in How to Use Cost Centres.
In MYOB Desktop, header accounts are displayed in bold. Make sure that you have not entered any header accounts in Simpro Premium, as these are not actual accounts but group totals.
 Set up tax codes
Ensure your Simpro Premium tax codes match your MYOB tax codes. This is important for entering transactions in MYOB Desktop, because if a tax code has not been specified, MYOB treats the transaction as tax-free.
Learn more about Financial Defaults in How to Use Tax Codes.
 Set up payment methods
Go to System ![]() > Setup > Accounts > Payment Methods and ensure that the Account No. for each payment method matches the applicable MYOB account.
> Setup > Accounts > Payment Methods and ensure that the Account No. for each payment method matches the applicable MYOB account.
Learn more in How to Use Payment Methods.
 Set up employees
In Simpro Premium, open an employee card file and go to Details > Profile to view the employee ID number. Make sure that your Card ID numbers in MYOB Desktop match your employee ID numbers in Simpro Premium. If you use the initial import, your MYOB Card ID numbers overwrite your Simpro Premium ID numbers. Learn more in How to Perform an Initial Import.
Learn more in How to Create Employees.
 Set up schedule rates
If you are importing timesheets from Simpro Premium to MYOB Desktop, ensure that your schedule rates in Simpro Premium match your payroll categories in MYOB Desktop. This must be exact, including letter case.
Learn more in How to Create Schedule Rates.
 Use the desktop accounting link
When you use the accounting link for the first time:
- In the first screen, select the Simpro Premium Edition that you use.
- Enter the host name or IP address of your Simpro Premium installation. If you have Simpro Premium open, copy and paste the URL into the field.
- Enter your Simpro Premium username and password.
- Locate your MYOB company file.
- Locate your MYOB executable. If you are unsure where this file is or what file this is please contact Simpro Premium Support for assistance.
- Enter your username and password for your MYOB company.
If your MYOB company file is located on a network, the accounting link may process records slower than if the file is located locally.
Date formats that are sent into MYOB are dependent on your system regional settings. For example, North America uses Month/Day/Year.
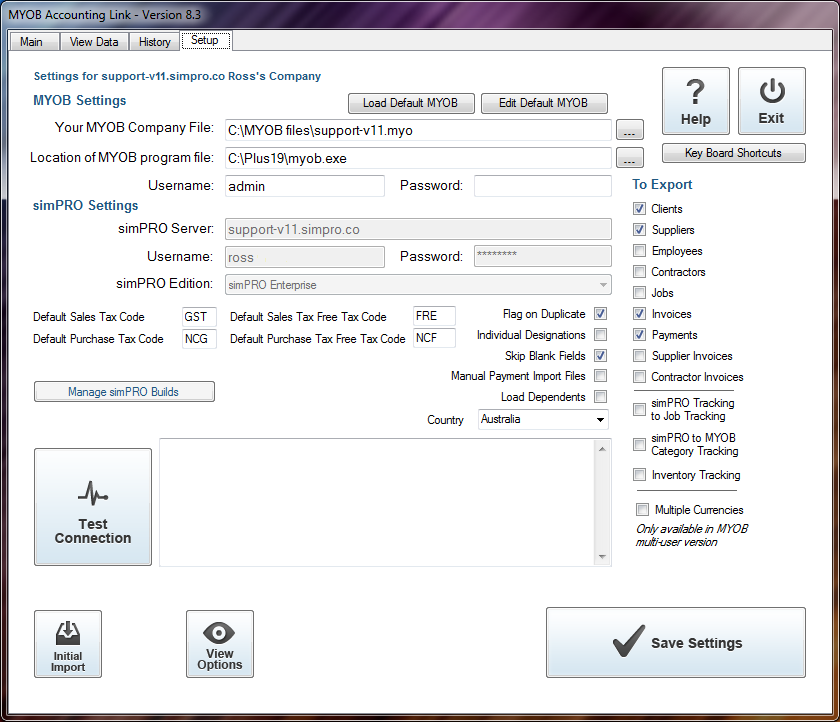
 Adjust accounting link settings
To adjust your accounting link settings:
- Click the Setup tab.
- Under To Export on the right, select the types of transactions that you send through the accounting link
- Select the applicable check box/es if you are using Simpro Premium Tracking to Job Tracking, Simpro Premium to MYOB Category Tracking, or Inventory Tracking.
- Select if you are using Multiple Currencies.
- By default, the accounting link does not update a field in MYOB if the corresponding field in Simpro Premium is blank. This means you can have information in MYOB that is not overridden by Simpro Premium every time you use the accounting link. To have blank fields in Simpro Premium update fields in MYOB, clear the Skip Blank Fields check box.
- To import card files as individuals, select Individual Designations. If import card files as companies, clear the check box.
- For suppliers, contractors and employees, Simpro Premium has only one field for names. To ensure that this is correctly sent to MYOB, format names in the order of 'last name, first name'.
- Click Save Settings.
 Set up freight in MYOB
To set up MYOB to accept freight on purchase orders from Simpro Premium:
- Go to Setup > Linked Accounts > Purchase Accounts.
- Select I Pay Freight on Purchases and choose the account.
 Advanced
 Multi-company
If you have a multi-company build, you can switch between companies using the drop-down list in the Main tab. Each company has its own accounting link settings.
Learn more in Multi-Company.
 Multiple Simpro Premium builds
If you have multiple Simpro Premium builds, you can use the same accounting link for all of them. This is different from multi-company, as each build has a different URL.
To set up multiple Simpro Premium builds in the accounting link:
- Go to Setup > Manage Simpro Premium Builds.
- To add another build, click Add Simpro Premium Host.
- Enter the build details.
- Click Test Connection to check the accounting link can connect to the build. If successful, a tick appears in the Test Passed column.
You can remove all additional builds, but not the original build.
 Multiple currencies
If you use multiple currencies, you need to enable this in both Simpro Premium and MYOB. Learn more about multiple currencies in How to Use Currencies.
To enable multi-currency in MYOB:
- Go to Setup > Preferences > I Deal in Multiple Currencies [System-wide] > Lists > Currencies.
- Each currency needs to have a currency linking account, and then for each currency there is a separate account that links to the account with the base currency. You should seek the advice of your accountant to help set this up.
- Make sure that your list of currencies matches your list of currencies in Simpro Premium. The codes must be exact.
- For each currency in MYOB, allocate the correct accounts to the Receivable and Payable accounts tabs.
- Specifically, allocate the asset account for Tracking Receivables in the Currency.
- You do not need to make any changes to the accounts that were entered into Simpro Premium - MYOB handles the conversion and allocation to the correct linked accounts.
Make sure that your version of MYOB supports multiple currencies.
 Tax rates applied in accounting link
Simpro Premium and MYOB apply different rounding conventions to transactions. So, it is possible that the Sub Total and / or Tax Amount of certain transactions in MYOB may differ by a few cents when compared to the same transactions in Simpro Premium. The only figure that must match between MYOB and Simpro Premium is the Total.

