Last Updated: December 15 2025
Overview
The key difference between a project and a service quote or job is that a project is split into sections. You can create sections to define different stages of the job, such as 'Fit Off', 'Rough In', and 'Commissioning', and add cost centres![]() AU, NZ, UK: Cost centre. A method for separating operational costs of the business for reporting and financial management. to each section to manage parts and labour.
AU, NZ, UK: Cost centre. A method for separating operational costs of the business for reporting and financial management. to each section to manage parts and labour.
You can also add the membership cost centre to sell the customer a membership discount for a specific duration to boost customer loyalty and revenue. See How to Sell Memberships to learn more.
In project quotes and jobs, you can create optional cost centres or variations. Learn more in How to Manage Optional Quotes and Types of Variations.
 Required setup
In order to view content or perform actions referred to in this article you need to have the appropriate permissions enabled in your security group. Go to System![]() > Setup > Security Groups and access your security group to update your permissions. The relevant security group tab and specific permissions for this article can be found here:
> Setup > Security Groups and access your security group to update your permissions. The relevant security group tab and specific permissions for this article can be found here:
Before performing the steps detailed below, ensure that this part of your build is set up correctly. The relevant steps to set up the features and workflows detailed in this article can be found here:
 Add sections and cost centres
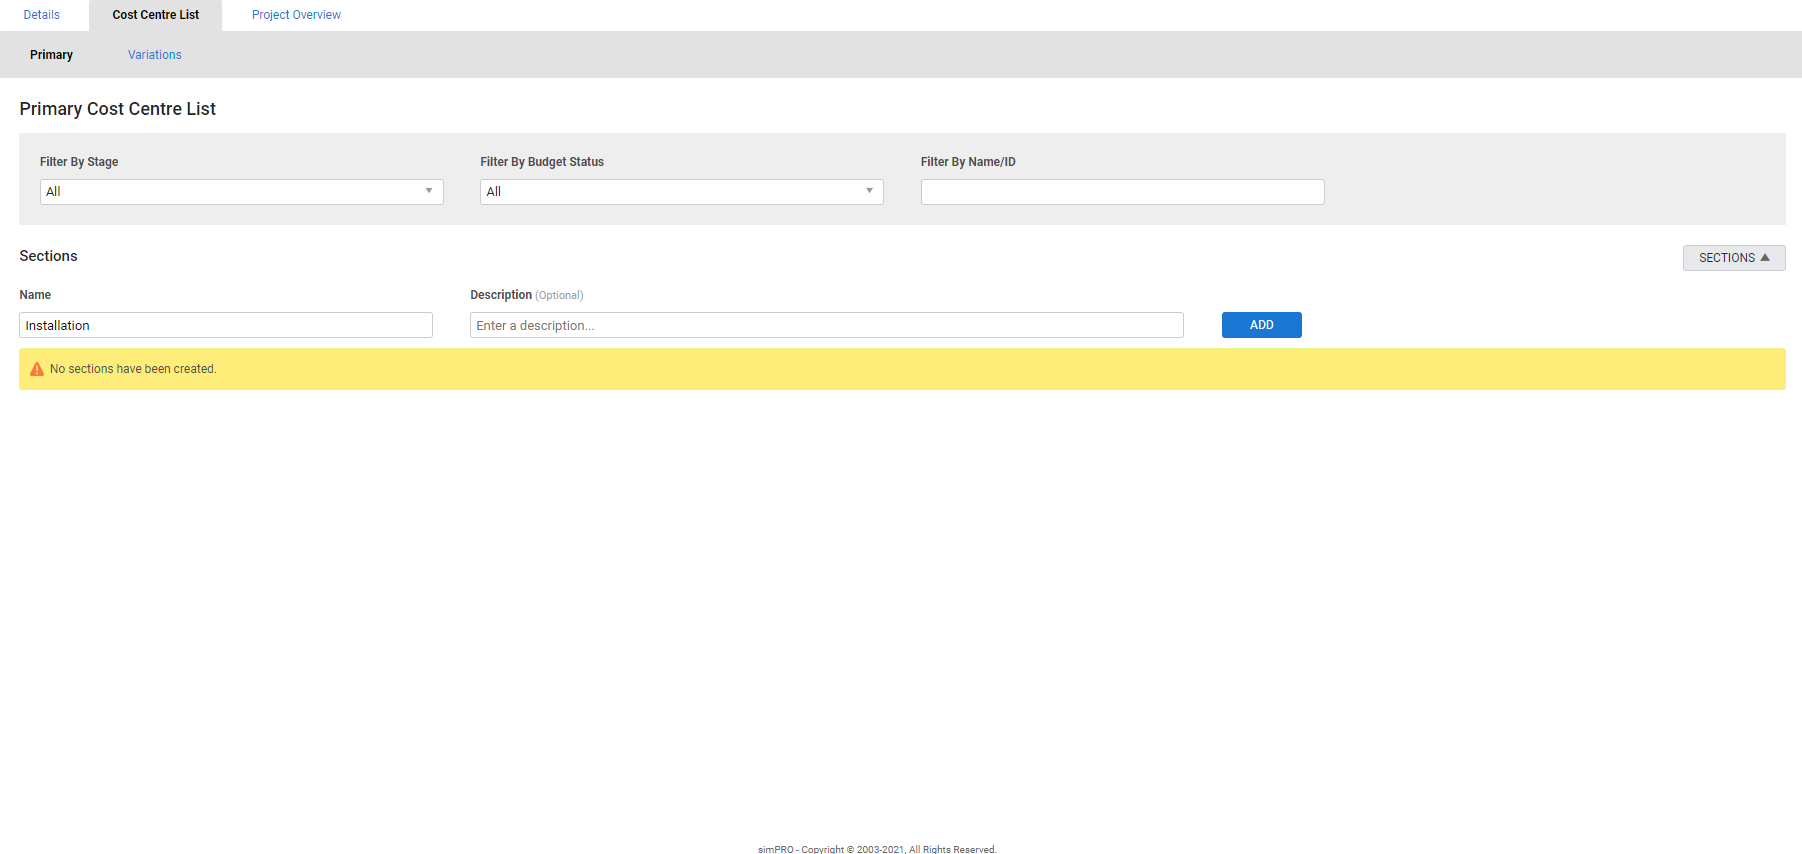
To add sections to a project:
- Open the project and go to the Cost Centre List.
- Enter the Name of the section.
- Enter a Description if required.
- Click Add.
Repeat as required to continue adding sections, and change their order using the grey drag handles.
To add cost centres to a section:
- Go to the Cost Centre List.
- Under a section, select from the Cost Centre drop-down list.
- If required, rename the cost centre to be more descriptive for this specific job.
- Click Add.
Repeat as required to continue adding cost centres. If you are adding sections and cost centres that are very similar, save time and Copy sections and cost centres, and make adjustments as required.
If a quote / job consists of more than one cost centre, you can control which cost centres appear on the generated form.
Go to the Forms tab in the quote / job and in the Cost Centres list select the cost centres that should be displayed. Learn more in Send quote forms.
To sell the customer a membership to apply discounts to future workflows raised against them for a specific duration, as well as apply a discount to the current project, select Membership from the Cost Centre drop-down list, click Add, then click the new cost centre to select the membership type. Learn more in How to Sell Memberships.
Once you have added all of your sections and cost centres, you can start building your job by adding parts and labour. Learn more in How to Build Your Project.
If you have a lot of sections, click Sections in the top left to collapse each section for a clearer view.
 Copy sections and cost centres
If you are adding sections and cost centres that are very similar, you can duplicate a section or cost centre within the same job, or copy a section or cost centre to a different job. This copies the following items from the original section / cost centre:
- Catalogue items
- Pre-builds
- One off items
- Customer assets
- Labour rates.
Schedules, contractor work orders, purchase orders and invoices are not copied.
To duplicate a section / cost centre within the same job:
- Go to the Cost Centre List.
- Next to the section / cost centre, click Options.
- Click Duplicate Section / Duplicate.
If you are duplicating a section, the duplicate appears below all the other sections. If you are duplicating a cost centre, the duplicate appears within the same section, below all the other cost centres.
You can move sections and cost centres using the grey drag handles.
To copy a section or cost centre to another job:
- Go to the Cost Centre List.
- Next to the section / cost centre, click Options.
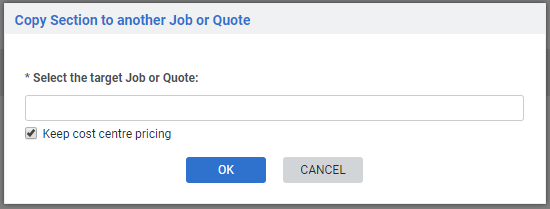
- Click Copy To...
- Search and select the target job or quote.
- By default, the copied cost centre keeps the same pricing. To use different pricing, clear the check box.
- Click OK to close the message.
 Merge cost centres
To merge two cost centres into one:
- Go to the Cost Centre List.
- Select the check box for one of the cost centres you wish to merge.
- Click Merge in the footer options.
- From the drop-down list, select the cost centre you want to merge into.
- Click Merge.
- If the cost centre value has an adjusted price, the merge may change the cost centre value and a warning appears. Click OK to continue and click Merge again. The value variation is displayed.
You need to save cost centres to merge them.
 Update job cost centre stage
In a project job, each cost centre progresses through stages: from pending, to in progress, to complete, to invoiced.
While the stage for the entire job updates according to automatic triggers, stages for individual cost centres must be updated manually or triggered using mobile statuses.
To update multiple cost centres at once:
- Go to the Cost Centre List.
- Select the check boxes for each cost centre you wish to update.
- Next to Update Stage in the footer options, click the applicable stage.
The new stage is displayed next to each cost centre.
 Adjust cost centre settings
You can access an individual cost centre to adjust its settings.
To adjust cost centre settings:
- Go to the Cost Centre List and click the cost centre.
- Go to Details > Settings.
- Select a different Cost Centre if required.
- To give the cost centre a more specific name, enter a Cost Centre Name.
- If the works are performed at a different site from the overall project, select the Site.
- Enter an Order No. if required.
- Select a Start Date.
- Select an End Date.
- Select a Cost Centre Stage.
- Click Save and Finish > Save.
For service jobs that have a single cost centre, the Completed Date field appears in the cost centre > Details > Settings.
The Completed Date field automatically defaults to the date the job was set to Complete and is available to edit, if required.
Once a job is partially or completely invoiced, you are not allowed to change the corresponding cost centre so the Cost Centre drop-down list turns inactive. However, you can rename the cost centre at any stage for internal reference and also to modify how it appears to your customer.
 Lock and unlock cost centres
If you want to finalise a cost centre budget, lock the cost centre so further changes cannot be made. You can lock cost centres individually by editing them, or lock multiple cost centres at once from the Cost Centre List.
Learn more in Lock a cost centre.
If you manage a large number of cost centres, you can lock or unlock multiple cost centres in bulk. You can lock or unlock multiple cost centres for all quotes, jobs, and recurring jobs / invoices. Additionally, you can bulk lock or unlock standard cost centres as well as optional cost centres on quotes and variation cost centres on jobs. For instance, to unlock cost centres in jobs:
- Hover over Jobs and click Pending Jobs.
- Open the relevant job.
- Go to the Cost Centres List tab.
- Select the required cost centres or click Select All.
- Click Lock or Unlock in the footer options.
- Note that you cannot unlock a cost centre that is invoiced.

