Last Updated: December 15 2025
How to Send Quote Forms
Overview
All correspondence about the quote is sent from the Forms tab. To learn how to send a quote using a form builder template, see How to Send Form Builder Templates. You can also send quote acceptance forms for customers to accept online. Learn more in How to Use Quote Acceptance Forms.
To learn how to create service quotes for 'do and charge' jobs, see How to Create a Service Quote.
To learn how to create and manage project quotes, see How to Create a New Project Quote and How to Manage Project Quotes.
 Required setup
In order to view content or perform actions referred to in this article you need to have the appropriate permissions enabled in your security group. Go to System![]() > Setup > Security Groups and access your security group to update your permissions. The relevant security group tab and specific permissions for this article can be found here:
> Setup > Security Groups and access your security group to update your permissions. The relevant security group tab and specific permissions for this article can be found here:
Before performing the steps detailed below, ensure that this part of your build is set up correctly. The relevant steps to set up the features and workflows detailed in this article can be found here:
 Send quote forms
To send a quote form:
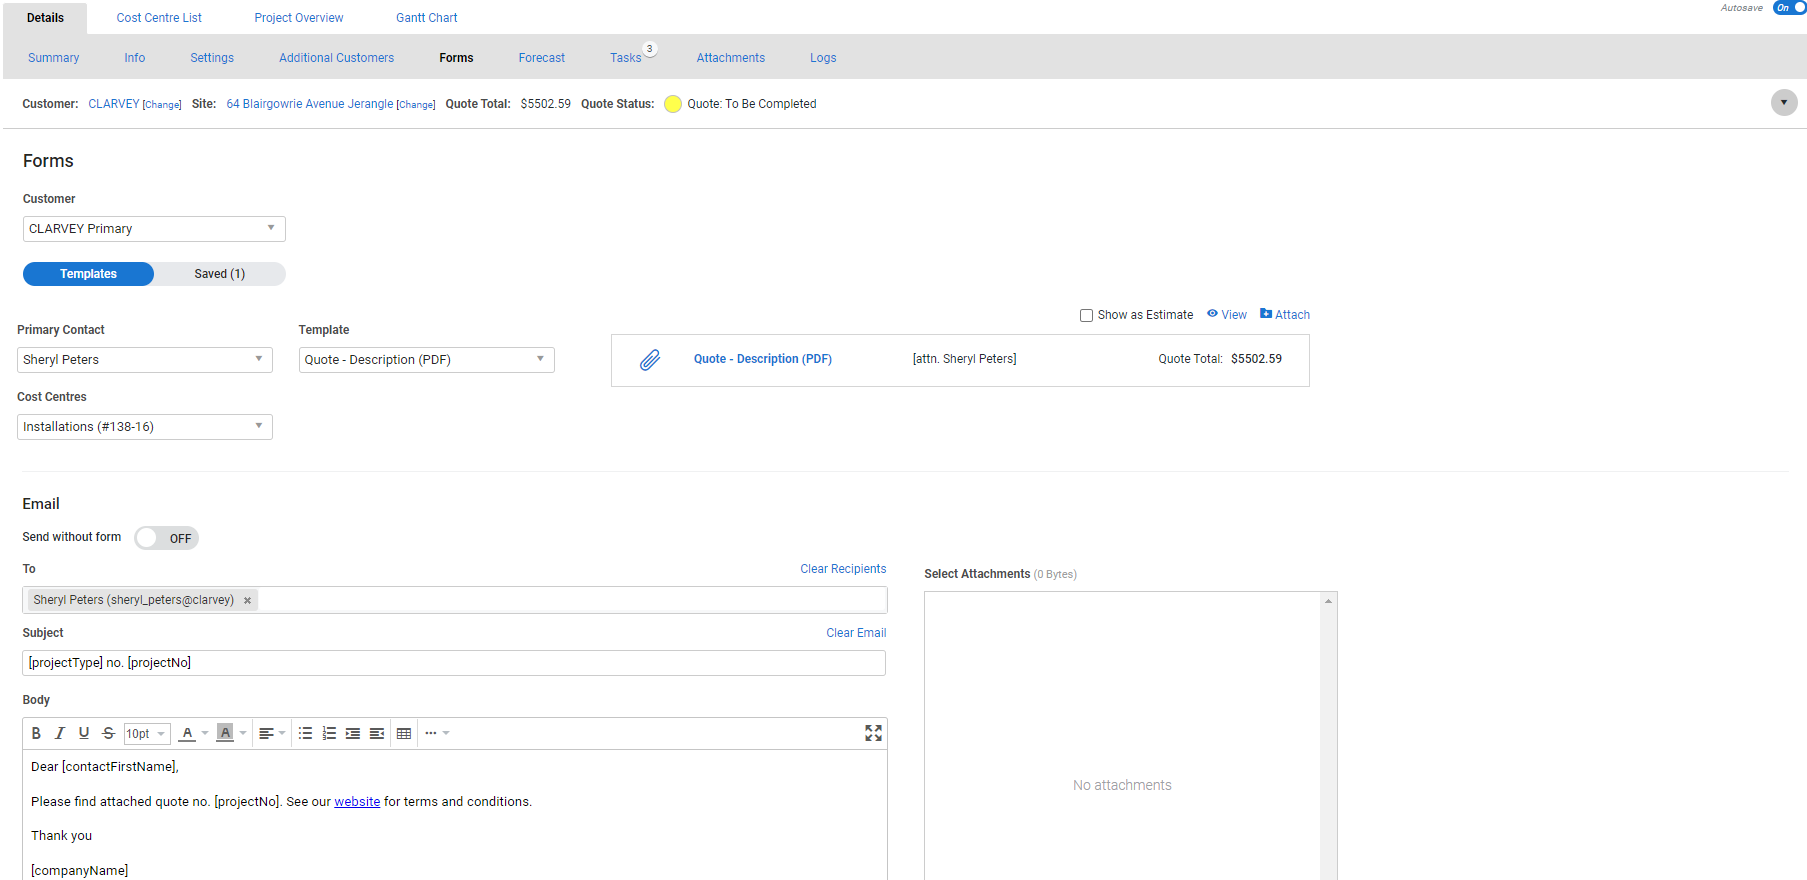
- Go to Details > Forms.
- Select the Form type depending on the amount of detail you need to provide to the customer.
- Under Email, use the toggle switch to send an email excluding the default quote as an attachment, if required.
- Select the Show as Estimate option, if required.
- If this option is selected and the [projectType] field is used in Subject or body of the email, the quote is referred to as an Estimate. Also, any reference to Quote in the form template is replaced with Estimate.
- From the Templates list, select a quote template, as applicable.
- The templates marked as DOCX are editable version of forms. You can re-upload the forms to Simpro Premium after updates.
- The templates marked as PDF are the non-editable versions of the quotes ready for emailing to the customers.
- If your quote / job consists of more than one cost centre and you want to only display specific cost centres on the generated form, in the Cost Centres drop-down list select the required cost centres to be displayed.
- Select All to display all the available cost centres on the form.
- Click View to preview and / or print the form.
- If the form is DOCX format this downloads the form that you can open and edit it in a word processor.
- If you finish out of the quote, any changed made to the template are saved as a separate revision.
- In the To field, select a Primary Contact to address the form to and click in the field to add additional Contacts, if required.
- Alternatively, you can manually enter email addresses and separate them with a comma. To remove recipients, click Clear Recipients.
- To send copies of the email to multiple recipients, use the Cc or Bcc fields.
- Click Attach to save a copy of the selected quote as a PDF and make it available under Select Attachments.
- Any attached template is also available in the Attachments tab of the quote.
- On the Attachments tab, select the manually uploaded files to make them available under Select Attachments. Choose all the required files and templates / forms from Select Attachments and send to your customers at once.
- All attached files have a time and date stamp for future reference.
- Adjust the default Subject and Body, if required.
- Alternatively, click Clear Email to enter a new Subject and Body, or select a script from the Insert Script drop-down. Learn more in How to Use Scripts.
- Click Send > OK.
- If email logging is enabled for a Form Builder template or any form, a note is created in the activity timeline and in the customer card file. Learn more in How to Use the Activity Timeline and Create customer notes.
A pop-up may then appear confirming the email address you have just sent the form to. Click OK to return to the quote, then click Attach to attach a copy of the sent form to the quote for your records. DOCX forms can only be attached in the Attachments tab.
Learn more in How to Use Attachments.
After you save the project, a log entry is created in Details > Log, where you can view the email text and any form attachments.
 Learn more in the Learning Toolbox
For additional training, complete an interactive material in the Simpro's Learning Toolbox. Learn more in About Simpro's Learning Toolbox.
